A dripping bathroom faucet usually stems from worn-out seals, washers, or O-rings in the valve assembly, or corrosion in the valve seat. Fixing it yourself requires only basic tools (an adjustable wrench, screwdrivers, replacement parts, plumber’s grease) and typically takes under two hours. By isolating the leak to the hot or cold side, disassembling the faucet, replacing the damaged component (washer, O-ring, cartridge, or ceramic disc), and reassembling, you’ll eliminate the drip and prevent further damage.
Tools and Materials Needed
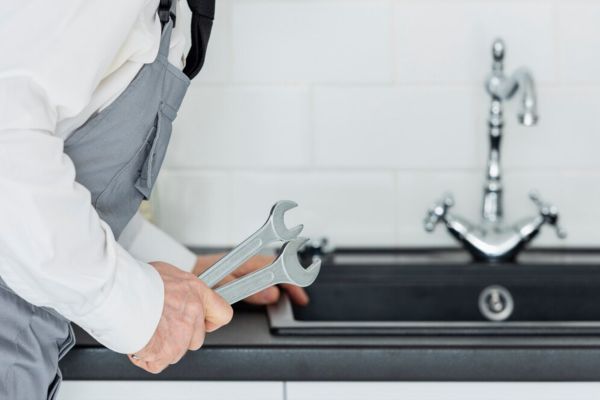
- Adjustable wrench and pliers for loosening nuts and pulling out cartridges
- Flat-head and Phillips screwdrivers to remove decorative caps and handle screws
- Hex/Allen wrenches for set screws on some handles
- Replacement parts: washers, O-rings, seals, cartridges, or ceramic discs (matched to your faucet model)
- Plumber’s grease to lubricate O-rings and seals for smooth operation
- Towel or sink stopper to catch small parts and prevent tool loss
Diagnosing the Leak
READ MORE: How to Repair a Toilet that Keeps Running
- Shut Off Water Supply. Locate and turn off the hot and cold shut-off valves beneath the sink.
- Isolate Hot vs. Cold. Turn on one valve at a time; if the drip stops when the cold valve is off, the cold side is leaking (vice versa for hot).
- Relieve Line Pressure. Open the faucet to drain residual water; close the drain or insert a stopper.
Identifying Your Faucet Type
- Compression Faucet (two-handled): Uses a rubber washer pressed onto a valve seat; common in older installations.
- Cartridge Faucet (single- or double-handled): Uses a removable cartridge; leaks usually require cartridge replacement.
- Ball Faucet (single-handled): Contains a rotating ball; O-rings and seats wear out over time (not covered in detail here).
- Ceramic Disc Faucet (single-handled): Uses ceramic discs; replacement of the entire cylinder often solves leaks.
Step-by-Step Repair
1. Remove the Handle
- Pry off any decorative cap with a flat-head screwdriver.
- Loosen and remove the set screw using an Allen wrench or screwdriver.
- Pull the handle straight off the faucet body.
2. Disassemble the Valve Assembly
- Use an adjustable wrench to loosen the retaining nut or bonnet nut.
- Pull out the cartridge, stem, or ball assembly.
3. Replace the Faulty Component
- Compression Faucet: Remove the old washer from the stem and replace it along with the rubber O-ring; tighten the packing nut.
- Cartridge Faucet: Remove the retaining clip or nut, pull out the old cartridge, and insert the new one aligned correctly.
- Ceramic Disc Faucet: Unscrew the retainer nut, pull out the old cylinder, and install the replacement cylinder.
4. Lubricate and Reassemble
READ MORE: Fix Clogged Kitchen Sink
- Apply a thin coat of plumber’s grease to O-rings and seals before reassembly.
- Slide the valve assembly back into place and tighten the retaining nut securely, but avoid overtightening which can crack ceramic or plastic parts.
5. Reattach the Handle and Test
- Replace the handle, tighten the set screw, and snap on any decorative caps.
- Slowly turn the water supply back on and open the faucet to flush out debris; check for leaks and ensure smooth operation.
Preventative Maintenance Tips
- Regularly Inspect O-rings and Washers: Check annually for wear and replace proactively.
- Clean Aerators and Screens: Mineral buildup can cause drips and low flow; soak in vinegar to remove deposits.
- Use Quality Replacement Parts: OEM or high-grade aftermarket parts last longer and seal better.
Frequently Asked Questions
1. How can I tell if the leak is coming from the hot or cold side?
To isolate the source, first shut off both the hot and cold shut-off valves under the sink. Then:
- Turn on the faucet briefly to relieve pressure.
- Close one valve (e.g., cold) and open the faucet—if the drip stops, the cold side was leaking; if not, switch and test the hot side.
- This simple test narrows your repair focus, saving time and parts.
2. What tools and materials do I need to fix a leaky bathroom faucet?
Common DIY toolkits include:
- Adjustable wrench and pliers for nuts and cartridges.
- Flat-head and Phillips screwdrivers for handle and cap screws.
- Allen (hex) wrenches for set screws on certain handles.
- Replacement parts: washers, O-rings, cartridges, or ceramic discs matched to your faucet model.
- Plumber’s grease to lubricate seals and ensure a watertight fit.
3. Can I repair a leaky faucet myself, or should I call a professional?
Many homeowners successfully tackle leaky faucets as a DIY project, especially if it’s a simple compression or cartridge repair. However, consider a professional if:
- You’re unfamiliar with plumbing tools or parts.
- The faucet uses complex ceramic disc or ball assembly mechanisms.
- You’ve attempted repairs that didn’t stop the leak.
For experienced DIYers, replacing a cartridge or washer can cost under $20 in parts; for novices, professional rates average $270 per repair, factoring in labor.
4. How long does it typically take to fix a leaky faucet?
Most straightforward repairs—replacing a washer, O-ring, or cartridge—take 30 minutes to an hour for DIYers with the right tools. More complex ceramic-disc or ball faucet repairs can extend to 1–2 hours. Professional plumbers often complete the job within one service visit, billing at least one hour of labor.
5. What is the cost to repair a leaky faucet?
- DIY cost: Typically $5–$30 for parts (washers, O-rings, cartridges).
- Professional cost: Average $100–$400, with a national mean of $270 depending on faucet type and labor rates.
- Labor rates: Generally $45–$200 per hour; emergency or after-hours calls can be higher.
Budget accordingly, and remember that early DIY fixes can avoid higher professional fees.
6. How much water and money does a dripping faucet waste?
Even a modest drip of 10 drops per minute wastes about 1 gallon of water per day, adding up to 365 gallons annually. At typical municipal rates, that’s roughly $1 per month in wasted water—and that doesn’t account for potential damage or increased energy costs if it’s a hot-side leak.
7. How often should I perform maintenance to prevent faucet leaks?
Preventative steps include:
- Inspecting O-rings and washers annually, replacing any that show wear.
- Cleaning aerators every 3–6 months to remove mineral deposits that stress seals.
- Lubricating moving parts with plumber’s grease during filter or cartridge changes.
8. Do different faucet types require different repair methods?
Yes. Common types and their fixes:
- Compression faucets (two handles): Replace washers and O-rings on the stem.
- Cartridge faucets (single or double handle): Swap out the cartridge unit.
- Ball faucets (single handle): Replace seals and springs in the ball assembly (requires specialized kits).
- Ceramic disc faucets (single handle): Replace the ceramic disc cartridge for a long-lasting seal.
9. What’s a quick temporary fix if I can’t repair immediately?
For a short-term solution:
- Tighten the adjusting ring under the handle with pliers to compress the packing nut and reduce dripping.
- Apply a small amount of plumber’s epoxy around a minor leak at the base—this is strictly temporary until proper parts arrive.
10. When should I replace the entire faucet instead of repairing it?
Consider a full replacement if:
- The faucet is over 10–15 years old and shows multiple leaks.
- Corrosion or pitting inside the spout or valve body prevents new parts from sealing.
- You want an upgrade for style or to add features (e.g., touchless operation).
- Repairs exceed 50% of the faucet’s replacement cost.
New faucets range from $50 to $500+ depending on finish and features, and installation often costs $75–$200.
Conclusion
Fixing a leaky bathroom faucet is a straightforward DIY project that can save hundreds of gallons of water per year and reduce your utility bills. By diagnosing the leak, disassembling the faucet, replacing the worn component, and reassembling with proper lubrication, you’ll restore smooth, leak-free performance in under two hours. Regular maintenance will keep your faucet working flawlessly for years to come.

