Hot water heaters are an unseeded hero of modern comfort. Whether it is a soothing shower or hot water to wash dishes, we trust them as we feel. But when the heater closes or you just go to a new place, it is not always comfortable. Before diving into it, it is important to understand what kind of heater you have. There are a few main types—each with its own operation process.
Types of Water Heaters: Gas vs. Electric vs. Tankless
Water heaters generally fall into three categories: gas, electric, and tankless.
- Gas water heaters rely on a pilot light and a burner system powered by natural gas or propane. They’re fast and efficient, but working with gas demands caution.
- Electric water heaters use electrical resistance coils to heat water. These are common in modern homes and are easier to manage but take longer to heat up.
- Tankless water heaters, also known as on-demand heaters, heat water as it flows through the unit. They’re energy-efficient and compact but require a different setup.
Knowing your type is step one. Check the label or instruction manual. If it mentions BTUs or thermocouples, it’s likely gas. If you see wattages and breakers, it’s electric.
Basic Components You Need to Know
Every water heater, regardless of type, comes with key components:
- Thermostat: Sets the desired water temperature.
- Temperature and pressure relief valve (T&P valve): A safety device to release excess pressure.
- Drain valve: Used for flushing the tank.
- Anode rod: Helps prevent corrosion inside the tank.
- Pilot light and gas valve (for gas models): Ignites the flame and controls gas flow.
- Heating elements and circuit breaker (for electric models): The source of heat and power control.
Familiarizing yourself with these parts makes the process smoother and safer.
READ MORE: How to Shut Off a Hot Water Heater
Safety First: Precautions Before Turning On
Before flipping a switch or killing the match, security needs to come first. Water heaters deal with high temperatures, pressure, gas or electricity – none of which are forgiving mistakes.
Importance of Safety Measures
Don’t just rush in. Even a minor mistake can lead to gas leaks, electrical shorts, or worse. Here are some must-follow precautions:
- Turn off the power supply for electric water heaters at the breaker.
- Shut off the gas valve if working with a gas heater.
- Ensure the tank is full of water before turning on the power. A dry tank can destroy heating elements or lead to fire hazards.
- Ventilation matters. For gas heaters especially, ensure the area is well-ventilated to avoid carbon monoxide buildup.
- Use a carbon monoxide detector. If you’re using gas, this is non-negotiable.
Take five minutes to walk around the unit, check for leaks, loose wires, or odd smells. That short inspection can prevent major issues.
Tools You Might Need
Here’s a quick checklist of tools and items that might come in handy:
- Flashlight
- Screwdriver (Phillips and flathead)
- Adjustable wrench
- Teflon tape
- Multimeter (for checking power flow)
- Lighter or matchstick (for gas pilot ignition)
- Instruction manual
Having these tools nearby means you’re ready for anything. And always, always keep a fire extinguisher close when dealing with gas appliances.
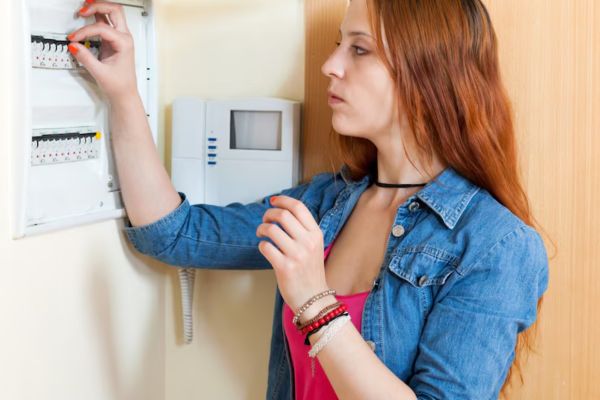
Step-by-Step: How to Turn On an Electric Water Heater
If you’ve confirmed you’re dealing with an electric unit, the process is pretty straightforward—but timing and sequence are critical. Skipping even one step could damage the unit or cause a short circuit.
Locate the Circuit Breaker
First, find the dedicated breaker for your water heater in the main panel. It’s often labeled, but if it’s not, it’s typically a double-pole breaker (two switches connected).
- Flip the breaker to the OFF position.
- This is crucial because you want to avoid live electricity while checking the unit.
- You can also use a multimeter to double-check there’s no voltage at the heater.
Don’t proceed unless you’re 100% sure the power is off.
Check the Tank for Water
Here’s where many people mess up. If you turn on the heater before the tank fills with water, you risk burning out the heating element—called a “dry fire.”
- Open a hot water faucet somewhere in the house.
- Then, turn on the cold water supply to the heater.
- Wait until you see a steady stream (not sputtering) from the faucet.
- This confirms the tank is full.
Be patient. It might take a few minutes for the tank to fill completely.
Switch On the Heater Safely
Once the tank is full:
- Locate the access panel on the heater.
- If necessary, remove insulation and adjust the thermostat (120°F is a safe and energy-efficient setting).
- Replace the panel and insulation.
- Now go back to your breaker box and flip the breaker ON.
Give the heater about 30–60 minutes to heat the water fully, depending on your tank size.
READ MORE: Do Dishwashers Heat the Water?
Step-by-Step: How to Turn On a Gas Water Heater
Gas water heaters are a bit more involved because of the manual pilot lighting process. But with the right steps, you can handle it safely—even if you’re not a DIY expert.
Locate the Pilot Light and Gas Valve
First, find the access panel near the bottom of the tank. Remove it to reveal the pilot light and thermocouple.
- Identify the gas control knob—usually marked with OFF, PILOT, and ON.
- Make sure it’s currently set to OFF.
- Wait 5 minutes to let any lingering gas clear.
If you smell gas even after waiting, STOP immediately and ventilate the area. Then call your gas provider.
Turn On the Gas Supply
Once it’s safe:
- Open the main gas shut-off valve slowly.
- Set the control knob to PILOT.
- Press down on the knob—this releases gas to the pilot light area.
Keep holding the knob as you light the pilot.
Lighting the Pilot Light Manually
While pressing the knob:
- Use a long lighter or matchstick to ignite the pilot flame.
- Keep pressing the knob for 30–60 seconds after the flame catches.
- Release the knob slowly. The pilot should stay lit.
If it goes out, repeat the process. If it keeps failing, your thermocouple may need replacement.
After the pilot stays lit:
- Turn the knob to ON.
- Replace the access panel.
- Set your thermostat to the desired temperature (again, 120°F is recommended).
Now, wait 30–45 minutes for the water to heat up.
READ MORE: How to Relight Pilot Light on Water Heater
Step-by-Step: How to Turn On a Tankless Water Heater
Tankless water heaters are rapidly becoming the preferred choice for homeowners. These sleek, modern units offer hot water on demand, which means no waiting for a tank to fill and heat up. But the startup process for a tankless system is a bit different—and just as important to do correctly.
Check Manufacturer Settings
Before turning on the tankless water heater, it is important to consult a user manual. Tankless models vary widely depending on the brand and type (gas or electric). Some have digital interfaces, while others have manual dials and switches.
Regardless, the manufacturer instructions will guide you to the correct startup process, including flow rate settings, minimal water pressure and initial temperature preset.
Some tankless models also contain built-in sensors and diagnostics that help identify issues. You can see the error code on the display. If you do, consult a manual to understand what is wrong before proceeding.
Power Supply and Initial Settings
Once you’ve familiarized yourself with the controls:
- For electric tankless heaters, locate the power switch or circuit breaker and make sure it’s OFF.
- For gas tankless heaters, locate the gas valve and ensure it’s in the OFF position before beginning.
- Open a hot water tap to trigger the system.
- Slowly turn on the cold water inlet valve to allow water to flow through the system. Tankless units only activate when water flows through them.
Now turn ON the power (electric) or the gas valve (gas).
- For electric models, switch on the circuit breaker or press the ON button.
- For gas models, you may hear a faint clicking sound as the igniter starts.
The unit should begin heating as soon as it detects water flow. If it doesn’t, check for errors on the display or listen for any unusual noises.
Adjusting Temperature Controls
Most tankless heaters come with a digital control panel:
- Set the temperature between 115°F and 125°F for everyday household use.
- Avoid setting it too high to prevent scalding, especially if you have kids or elderly at home.
Some advanced models allow you to set different temperature zones for various parts of the house. You can usually access these settings through a digital interface or mobile app, depending on the model.
Once you’ve confirmed the temperature and that water flows hot from a faucet, your system is good to go.
READ MORE: How to Plumb a Dishwasher Drain
Troubleshooting Tips
So, what if you followed all the steps and still don’t have hot water? Don’t panic—there are common issues that pop up with all types of water heaters. The key is understanding the symptoms and knowing where to look first.
If You Don’t Hear the Heater Turn On
No sound? Here’s what you can do:
- Electric Units: Go back to your breaker panel. Did the breaker trip? If so, reset it. If it trips again immediately, there could be a short circuit in the heater.
- Gas Units: Check the pilot light. If it’s out, try relighting it. If it still won’t stay lit, the thermocouple might be faulty.
- Tankless Units: No ignition click? That could mean no water flow is detected. Make sure your faucet is open and that water pressure is adequate.
Always give it a minute. Some heaters have a slight delay before firing up, especially if they haven’t been used in a while.
Common Problems and Fixes
- Strange noises: Popping or knocking sounds could indicate sediment buildup. The fix? Flush the tank.
- Leaking water: Inspect all valve connections and gaskets. A little tightening might solve the problem.
- Water not hot enough: Your thermostat might be set too low. Try bumping it up a few degrees.
- Error codes on digital display: Refer to the user manual. Most codes are straightforward—like low pressure, ignition failure, or flow rate issues.
Sometimes the fix is simple. Other times, it’s safer to call in a licensed plumber. If you’re ever unsure, don’t risk it.
How to Maintain Your Hot Water Heater
Regular maintenance is the secret sauce to keeping your heater running efficiently for years. Even the best models need some TLC to stay in shape. Think of it like oil changes for your car—skip it, and you’re asking for trouble.
Regular Flushing for Efficiency
Every few months, especially if you live in a hard water area, you should flush the tank. Sediment and mineral buildup reduce efficiency and can damage the heating elements.
- Turn off the power/gas and cold water supply.
- Attach a garden hose to the drain valve at the bottom of the tank.
- Open the valve and drain into a bucket or nearby floor drain.
- Flush with fresh water until it runs clear.
Tankless units should also be flushed annually with a descaling solution to clean out internal components.
Monitoring for Sediment Build-Up
Watch out for signs like:
- Water taking longer to heat
- Popping or rumbling noises
- Discolored or rusty water
These are all red flags that your heater needs cleaning or that the anode rod may need replacing.
READ MORE: How to Test a Water Heater Thermostat
Energy-Saving Tips for Water Heater Usage
We all love hot water, but nobody enjoys the energy bill that comes with it. Luckily, a few simple changes in how you use and maintain your water heater can lead to significant savings without sacrificing comfort.
Lowering the Temperature
Most heaters are set to 140°F by default, which is hotter than necessary for household use. Dropping that setting to 120°F:
- Reduces energy consumption by up to 10%
- Lowers the risk of scalding
- Slows down mineral buildup and corrosion
You’ll still have plenty of hot water for showers, dishes, and laundry, but you’ll pay less each month to heat it.
Using Insulating Jackets
Heat loss from the water heater tank is real—especially if the unit is in a cold basement or garage. An insulating blanket (or jacket) wrapped around the tank can reduce standby heat loss by up to 45%.
Don’t stop at the tank:
- Insulate the first few feet of hot and cold water pipes too.
- Use pre-slit foam pipe sleeves for easy installation.
- Make sure you don’t cover the thermostat or burner area.
Insulation keeps the heat where it belongs—inside the tank—and reduces how often the unit has to reheat water.
Other tips for savings:
- Use cold water for laundry when possible.
- Run full loads in the dishwasher and washer.
- Install low-flow showerheads to reduce hot water use without noticing a drop in pressure.
Water Heater Myths Debunked
There’s no shortage of bad advice and outdated info when it comes to water heaters. Let’s clear up a few myths that might be costing you money or wasting your time.
Does It Really Use More Energy to Reheat?
This myth has been around for ages: that it’s better to leave your water heater on all the time because reheating from cold uses more energy. Not true.
Modern heaters are designed to be efficient. Turning it off when you’re gone for a few days can actually save you money. Reheating a tank of water doesn’t cost more than keeping it hot for no reason.
Some tankless systems even have vacation modes to further reduce standby loss while you’re away.
Tank vs. Tankless: Which Saves More?
People often assume that tankless is always better. The truth is, it depends on your usage.
- Tankless systems save energy because they only heat water when you need it.
- However, they can be more expensive to install and may struggle to keep up in large households with simultaneous hot water demands.
- Tank models may waste some energy on standby heat, but they’re generally cheaper upfront and provide consistent performance.
In the long run, tankless systems are great for energy-conscious users or smaller homes. But if you have multiple bathrooms and a big family, a high-efficiency tank model may serve you better.
Cost Breakdown: Running and Maintaining a Heater
Let’s talk numbers. Understanding the true cost of running a water heater can help you budget and make smarter upgrade decisions.
Monthly Operating Costs
Here’s a general idea of what different systems may cost per month:
| Type of Water Heater | Estimated Monthly Cost |
| Standard Electric Tank | $35–$60 |
| Standard Gas Tank | $20–$40 |
| Electric Tankless | $25–$50 |
| Gas Tankless | $15–$35 |
| Solar or Heat Pump | $5–$15 |
These estimates vary based on your local utility rates and household size, but it gives you a good benchmark.
Repair vs. Replacement Costs
- Basic repair (thermostat, valve): $100–$250
- Major repair (element, pilot, circuit): $300–$600
- New unit: $500–$3,000, depending on type and size
- Installation cost: $300–$1,200
So if your repair bill is approaching $600 and your heater is over a decade old, it may be time to invest in a new one instead of patching the old one.
READ MORE: What Type of Plumbing Is Not Good in a House?
When to Call a Professional
Even the most experienced DIYers hit a wall sometimes. Don’t hesitate to call a licensed plumber if:
- The pilot light won’t stay lit
- You smell gas or see water pooling
- The circuit breaker keeps tripping
- You hear loud, unusual noises from the tank
Trying to fix major issues without the right training can be dangerous—and may void your warranty.
DIY vs. Professional Help
Routine maintenance like flushing the tank, adjusting the thermostat, or replacing anode rods can usually be done on your own.
But for gas line issues, electrical repairs, or installing a new unit? Call the pros. It’s not just about getting it done—it’s about getting it done safely.
Conclusion
Turning on a hot water heater might seem intimidating at first, but once you understand your system—whether it’s electric, gas, or tankless—it becomes much more manageable. From preparation and safety checks to step-by-step activation and ongoing maintenance, each stage plays a role in ensuring you get reliable, safe hot water when you need it most.
So the next time you move into a new place, shut off your unit for a vacation, or just need to restart after a repair, you’ll know exactly what to do—and how to do it safely and efficiently.
FAQs
1. How long does it take for hot water to come back after turning on the heater?
It depends on the type of heater. Electric tanks take 30–60 minutes, gas tanks about 20–40 minutes, and tankless heaters provide hot water almost instantly.
2. Is it safe to turn on my water heater myself?
Yes, as long as you follow safety precautions—like turning off the power or gas supply, ensuring the tank is full of water, and checking for leaks.
3. Why is my hot water heater making noise?
Popping or rumbling sounds usually mean there’s sediment build-up. Flushing the tank can resolve the issue.
4. How often should I flush my water heater?
At least once a year. If you have hard water, consider doing it every 6 months to prevent mineral buildup.
5. What’s the best temperature setting for my water heater?
120°F is ideal. It’s hot enough for household use but safe and energy-efficient.

