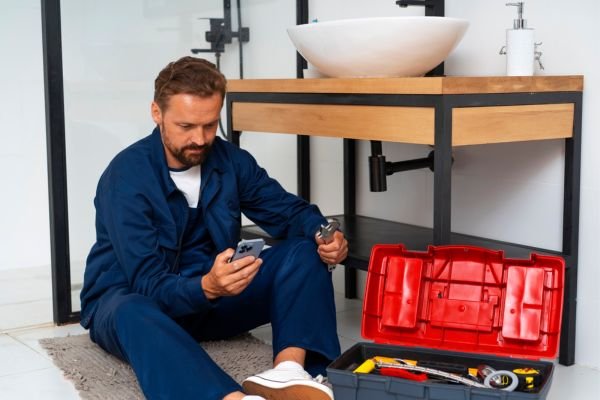
Plumbing the bathtub drain may seem complex, but it is very managed with a little patience and correct information. Whether you are installing a new tub, replacing an old drain, or roughing during a renovation, understanding how the system works, can save you time and prevent expensive mistakes.
In this guide, you’ll learn how to plumb a tub drain correctly—from fitting the overflow and drain assembly to connecting the P-trap and checking for leaks. Lets deep dive into “How to Plumb a Tub Drain: Step by Step”
Understanding the Tub Drain System
Let’s start with the basics. A bathtub drain consists of more than just the opening you see at the bottom of the tub.
READ MORE: How to Plumb a Washing Machine Drain — Step-by-Step DIY Guide
Key Parts of a Bathtub Drain Assembly
- Drain flange – The visible piece inside the tub floor where water exits.
- Tub shoe – The angled fitting directly beneath the drain flange.
- Overflow pipe – Connects the tub’s overflow hole to the main drain.
- Drain tee – Joins the overflow and tub shoe together.
- P-trap – Holds water to prevent sewer gas from entering your home.
- Trap arm – Connects the P-trap to the main drain or waste line.
All these components must be correctly aligned and sealed to ensure water drains efficiently and no leaks occur behind your walls or under your tub.
- 【Compatible With】 : Our Freestanding Tub Drain Kit is suitable for all freestanding bathtubs, floor bathtubs and island …
- 【PVC Adapter Provided】: PVC Plastic Adapter attaches Rough-in to PVC bath wastes for quick, easy and clean installation….
- 【Easy to Install】The freestanding tub drain rough-in kit is quick and easy to install, and it is easy to drain. Even one…
READ MORE: How to Plumb a Refrigerator Water Line
How the Drain and Overflow Work Together
When water reaches the overflow opening near the top of the tub:
- It travels down a pipe that connects to the same tee the main drain uses.
- This prevents overfilling and directs excess water safely down the drain.
Properly installing and sealing both lines is essential to keeping your bathroom safe and dry.

- What’s Included: Welsan tub drain kit includes 1-1/2” plastic tubular, bath drain waste and overflow horn elbow and tee,…
- Good Material: The tubes are made of High strength plastic, more solid and longevity. The bathtub drain with overflow fa…
- Universal kit: Plastic bathtub drain kits are designed to fit standard-sized bathtubs. Adjust the length or depths to fi…
READ MORE: How to Plumb a Shower Valve (Step-by-Step DIY Guide)
Tools and Materials You’ll Need
Before starting, make sure that you have everything in ARM access. The project often involves working in tight, strange places, so preparation helps.
Essential Tools for Tub Drain Plumbing
- Pipe wrench or adjustable wrench
- Slip-joint pliers
- Utility knife
- Screwdriver
- Pipe cutter (for PVC or ABS)
- Measuring tape
- Bucket or container (to catch drips)
- Universal Threaded Fit: Fits 1‑1/2″male, female and threaded drains, with 2″ to 1½” adapter, widely compatible with most…
- Dual Sealing Design: Silicone and mechanical lock dual-seal design effectively prevents leakage and odor backflow; suppo…
- Asymmetric Design: Low-profile asymmetric deck plate avoids interference with faucet rough-in, fits closer to wall for b…
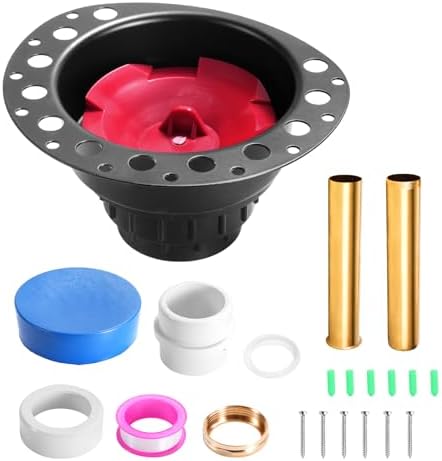
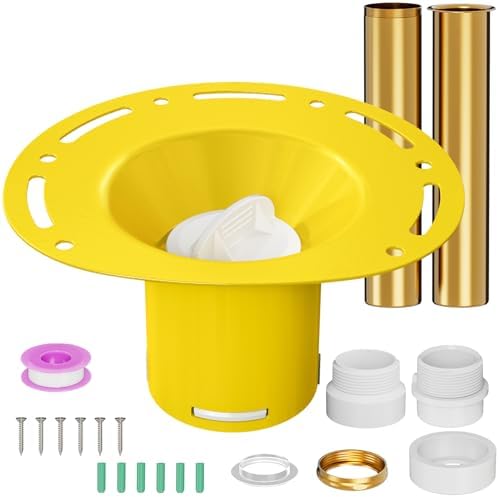
Tub Drain Kit Components
A typical tub drain assembly kit includes:
- Drain flange and rubber gasket
- Tub shoe with slip nut
- Overflow cover and faceplate
- Overflow pipe and tee
- P-trap and trap arm
- Gaskets, washers, and retaining nuts
- Plumber’s putty or silicone sealant
Make sure you match your kit with the type of piping used in your home—usually PVC, ABS, or metal.

- TUB DRAIN ASSEMBLY LINKAGE: Designed to repair and replace a worn-out Trip-lever drain assembly linkage that operates th…
- FULL REPAIR ASSEMBLIES PROVIDED: Full repair assemblies for trip lever waste and overflow drain assembly, This kits are …
- FIT STANDARD TRIP LEVER BATH TUB DRAIN: The height can be adjusted from 13-1/4” to 15-1/4” inches, Can fit 14” to 16” St…
READ MORE: How to Plumb a Double Sink: Step by Step
How to Plumb a Tub Drain: Step by Step
Preparing the Work Area
Whether you’re installing from above or below, clear access is key to a smooth job.
Accessing the Tub’s Underside or Rough-In Space
- If possible, access the tub plumbing from an adjacent room or access panel.
- If not, you may need to work through a hole in the subfloor or from below (in a crawlspace or unfinished basement).
- Turn off water to the area if you’re working near any supply lines.
Clean out the work area and lay down towels or buckets to catch any old water in the drain lines.
Measuring and Checking Drain Alignment
- Measure the distance from the tub’s drain hole to the waste line in the floor.
- Make sure your new assembly lines up properly.
- Dry-fit the drain and overflow pipes to ensure everything will connect snugly.
Proper alignment ensures smooth water flow and avoids putting strain on pipe connections.
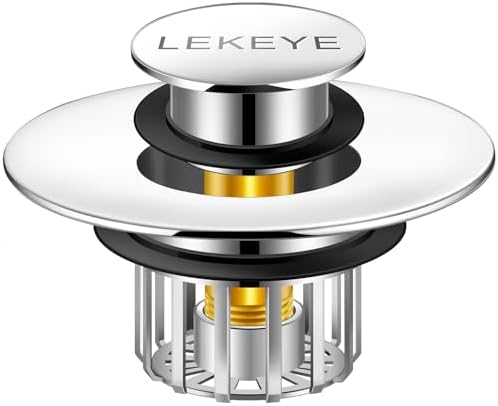
- ·Bathroom Tub Stopper with Strainer: LEKEYE newly upgraded bathtub Stopper with Strainer can help to stop drainage, and …
- ·Innovation 2-in-1 Design: The stopper consists of a pop-up plug and a basket filter. When you need to fill the sink or …
- ·Universal Fit: Designed to fit most bathtub drain holes, the LEKEYE bathtub stopper is suitable for drain holes with a …
READ MORE: How to Plumb a Pedestal Sink: Step by Step Guide
Installing the Tub Waste and Overflow Assembly
Now it’s time to install the key pieces that make up the tub drain system.
Connecting the Overflow Tube and Drain Tee
- Fit the overflow pipe to the back of the overflow faceplate and insert it behind the tub wall.
- Slide the tee fitting onto the overflow and align it with the tub shoe beneath the drain.
- Secure both with slip nuts and washers, but don’t overtighten—you’ll make final adjustments before tightening fully.
Use rubber gaskets to prevent leaks at all threaded joints.
Securing the Drain Flange with Plumber’s Putty
- Roll a small bead of plumber’s putty and apply it under the drain flange.
- Insert the flange into the tub’s drain hole.
- From underneath, thread the tub shoe onto the flange.
- Hold the shoe in place while tightening the flange with a drain wrench or pliers from above.
Wipe away any excess putty that squeezes out.

- EASY TO USE: Artiwell Tip-Toe Bathtub Drain Stopper is the best ideal replacement for your bathtub drain as it will give…
- HIGH QUALITY MATERIAL: Artiwell Tip-Toe Tub Trim Set Coming with High Quality Brass , Zinc and ABS Construction ,designe…
- STANDARD DESIGN: Brass Threaded Adapter Bushing Fits 1-1/2″ and 1-3/8″ Drain Shoe Sizes. This Drain can fit both 1-1/2″ …
READ MORE: How to Plumb a Shower
Connecting the P-Trap
After installing waste and overflow assembly, the next important step is connecting the P-trap, which prevents sewer gases from entering your house.
Aligning the Drain Tee with the P-Trap
- Position the P-trap so that it lines up directly below the drain tee.
- Ensure that the trap’s horizontal outlet (the trap arm) points toward your home’s main drainage pipe.
- The vertical piece of the P-trap should be fitted under the tub shoe connection-check for a tight fit before giving the first look.
To align everything properly, dry-fit the first pieces. Missing can cause leaks or slow drainage.
Properly Gluing or Sealing the P-Trap Joints
Depending on your piping type, connect the pieces as follows:
- For PVC or ABS, apply primer and solvent cement to each pipe and fitting, then press them together with a slight twist.
- For slip-joint fittings (common in tub kits), use rubber washers and slip nuts. Hand-tighten and check for leaks.
Ensure the trap arm slopes slightly downward (¼ inch per foot) toward the main drain to encourage gravity-based drainage.
READ MORE: How to Plumb a Shower: Step-by-Step DIY Guide for Homeowners
Attaching to the Main Drain Line
Once the P-trap is in place, it needs to connect securely to your home’s waste plumbing.
Transition Fittings and Pipe Sizes
- Most tub drains use 1½-inch piping, while main drains often use 2-inch.
- Use a reducer coupling if needed to transition between different pipe sizes.
- Make sure fittings are the same material—don’t mix ABS and PVC without a transition fitting approved by local codes.
Always use approved adapters and ensure the connection is tight and leak-free.
Ensuring Proper Drainage Slope
To prevent clogs and backups:
- Maintain at least ¼-inch-per-foot slope for horizontal runs.
- Avoid sagging or high spots in the drain pipe.
- Use pipe straps or supports to keep everything secure and angled correctly.
Improper slope can result in standing water inside the trap, increasing the chance of mold, odor, or slow draining.
Sealing and Testing the Drain
Before you enclose anything or run water into your tub, always test the system.
Using a Test Plug or Balloon
- Insert a test plug or inflatable drain balloon into the drain opening or overflow pipe.
- Fill the tub with water to check for leaks under normal usage pressure.
- Observe all joints—especially around the tee, P-trap, and drain flange.
Let the water sit for at least 15–30 minutes and inspect carefully. A dry paper towel wrapped around joints helps spot even tiny leaks.
Checking for Leaks Around All Joints
- If leaks are found, carefully loosen fittings and reapply thread tape, plumber’s putty, or adjust washers as needed.
- Retighten gently—never overtighten slip nuts or threaded pieces.
- Once everything is dry and sealed, drain the tub and monitor how quickly the water flows out.
Fast drainage and no leaks? You’ve nailed it!
READ MORE: How to Plumb a Prehung Door
Common Mistakes to Avoid
Even small errors can create major issues with bathtub drains. Keep an eye on these continuous DIY:
Misaligned Drain Assemblies
- Misconceptions between tub shoes and drain tea can cause frequent dripping or loose fittings.
- Always double-check vertical and horizontal alignment before final tightening.
Improper Slope or Venting Issues
- A flat or back-sloped pipe can cause standing water and slow drainage.
- If your tub is far from a main stack or vent pipe, improper venting may cause gurgling or poor drainage. Consider a vented tee or adding an air admittance valve (AAV) if allowed by code.
Don’t forget to account for flooring thickness or tile buildup when setting drain height.
Tips for Working in Tight Spaces
Bathroom plumbing often means crouching under tubs or reaching into narrow walls. Here’s how to work smarter.
Using Flexible Connectors
- Some kits offer flexible plastic tailpieces that simplify alignment.
- Push-to-connect fittings can be lifesavers when working in tight or awkward angles.
Make sure any flexible parts are code-approved in your area.
Making Access Panels or Cutouts
- Cut a clean access panel in the wall behind the tub for easier future repairs.
- Cover it with a vented grill or removable trim panel.
- In basement installs, consider framing out a hatch below the tub to access plumbing without removing drywall.
READ MORE: How to Plumb a Basement Bathroom: Step By Step DIY Guide
When to Call a Plumber
While a DIY tub drain installation is manageable for many homeowners, there are times when it’s safer and more efficient to call in a professional plumber.
Code Compliance or Multiple Fixture Tie-Ins
- If your tub drain connects to a shared drain line with a sink, shower, or toilet, the plumbing becomes more complex.
- Proper venting, drain sizing, and plumbing code compliance are crucial in multi-fixture setups.
- Professionals ensure everything is installed to code and won’t cause drainage or venting issues in the future.
Slab Foundation or Hidden Drain Lines
Homes built on a slab foundation or with concealed plumbing can pose big challenges:
- You might need to break into concrete or access hard-to-reach drain lines.
- Re-routing or tapping into buried pipes is risky without professional equipment or experience.
In these cases, a plumber will handle cutting, sealing, and testing with far less disruption and far fewer risks.
Conclusion
Plumbing a tub drain may seem difficult, but with a solid plan, right tools and some DIY courage, you can deal with it completely yourself. By understanding how each piece fits together to create a watertite connection, each step plays an important role in the long -term performance of your bathroom. Check for your time measuring, dry-fitting and leaks.
Whether you are installing a new tub in a remodel or simply replacing old drain components, following these detailed instructions, it ensures that you will get the work right – the first time. And remember, if you kill a wall (literally or rhetorically), calling the licensed plumber for assistance can save you time, money and a potential water disaster under the road.
FAQs
Can I use PVC for a tub drain?
Yes, PVC (white plastic) is usually used for bathtub drains. It is inexpensive, easy to work, and mostly approved by plumbing code. Just make sure to use primer and solvent cement to ensure leak-free joints.
How much slope should a tub drain pipe have?
The horizontal drain pipe should have a slope of ¼ inch per foot to promote gravity-assisted drainage. This prevents water from standing or backing up in the pipe.
Do I need a vent for a tub drain?
Absolutely. All fixtures, including the bathtub, should be denied properly to prevent avoiding guggling and sewer gas. The vent may be a wet vent, air admittance valve (AAV), or a main vent connected to the stack.
How long does it take to plumb a tub drain?
For most diyers, expected to spend about 2–4 hours on a complete installed, based on access and your skill level. Add time for tests and potential troubleshooting.
What is a tub shoe in plumbing?
A tub shoe is the bent pipe fitting that connects directly to the tub drain flange and channels water into the main drain assembly. It’s an essential part of your bathtub’s plumbing system.

