Whether you are building a new kitchen, replacing a damaged sink, or rebuilding your location, correctly installing kitchen sink plumbing is an important part of any project. Although it may seem intimidating at first, with the right tool and some careful plan, you can do it yourself – and in this process you can save a good amount of money.
The kitchen sink is one of the most-used fixtures in any home. It handles everything from dishwashing and hand cleaning to food prep and drain disposal. A poorly installed drain can result in slow drainage, persistent leaks, or even water damage that rots cabinets and floors over time. Not to mention, a bad seal or a misaligned P-trap can leave your kitchen smelling like a swamp.
The good news? Installing kitchen sink plumbing is a straightforward DIY task if you break it down into steps. This guide will walk you through the full process—from preparation to testing the final seal—so you can install a leak-free, code-compliant plumbing system under your kitchen sink. Lets deep dive into “How to Install Kitchen Sink Plumbing: Step by Step”

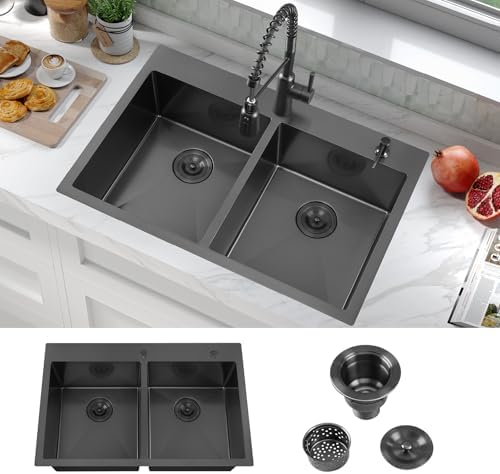
- STAINLESS STEEL KITCHEN SINK with universal design, heavy-duty 16 Gauge construction, and easy-to-clean tightly rounded …
- EXTERNAL DIMENSIONS: 32″ L x 19″ W x 10 1/2″ D – BOWL DIMENSIONS: 30″ L x 17″ W x 10″ D – Minimum Cabinet Size: 36″ – KI…
- UNDERMOUNT SINK INSTALLATION creates a seamless transition from sink to countertop with no exposed mounting deck to trap…
READ MORE: Best Under Sink Hot Water Heater 2026 — Mini-Tank & Tankless Buyer’s Guide & Prices
Tools and Materials You’ll Need
Before diving in, make sure you have everything on hand. Having the right tools and parts will make the job go faster and help avoid those frustrating mid-project hardware store runs.
Plumbing Tools Checklist
- Adjustable wrench. See Product & Price
- Basin wrench (helpful in tight spaces). See Product & price
- Channel-lock pliers. See Product & Price
- Pipe wrench. See Product & Price
- Bucket or small tub (to catch water)
- Teflon tape. See Product
- Utility knife. See Product
- Putty knife
- Hacksaw (if cutting PVC or copper). See Product & Price

READ MORE: How to Plumb a Double Sink: Step by Step
Common Materials and Fittings
- Kitchen sink strainer. See Product & Price
- Plumber’s putty or silicone caulk. See Product & Price
- Tailpiece (drain extension). See Product & price
- P-trap kit (includes curved trap, trap arm, and nuts/washers). See Product & Price
- Extension pipe (if needed)
- Slip joint nuts and washers
- PVC or ABS glue (if permanent piping needed)
- Pipe adapter (for connecting to wall drain pipe, if needed)
Optional:
- Dishwasher drain connection tee
- Garbage disposal unit and mounting ring (if installing)
Pro Tip: Always double-check your sink drain sizes—most are 1½ inches for the tailpiece and trap.

- OUTER SINK DIMENSIONS: 32 3/8″ L x 18 1/2″ W x 9″ D – BOWL DIMENSIONS: 30 3/8″ L x 16 5/8″ W x 8 5/8″ D – MINIMUM CABINE…
- KIT INCLUDES: Stainless steel kitchen sink, protective stainless steel bottom grid, stainless steel drain assembly with …
- LASTING DURABILITY: Made with heavy-duty high-performance T304 18-gauge stainless steel that stands up to everyday use a…
READ MORE: How Long Does Copper Plumbing Last?
How to Install Kitchen Sink Plumbing: Step by Step
Step 1: Turn Off Water Supply and Prepare the Area
Before doing anything else, it’s time to prep your workspace. If this is a new installation, the lines may already be capped. But for a replacement, follow these steps carefully.
Locate Shut-Off Valves
Underneath your kitchen sink, you’ll see two shut-off valves: one for hot water and one for cold. Turn each clockwise until snug to shut off the flow. To be sure water is off:
- Turn on the kitchen faucet
- Wait for any pressure to drain
- No water should come out
If you don’t have under-sink valves, you may need to shut off the main water line for your house.
Remove Old Sink Plumbing
If you’re replacing an existing sink:
- Place a bucket under the drain to catch residual water.
- Disconnect the drain trap (P-trap) using channel locks or your hand, depending on how tight it is.
- Unscrew the slip nuts holding the tailpiece and other fittings.
- Remove old strainers or caulking around the drain hole.
This is a good time to clean out the drain opening on the underside of the sink and remove any old sealant with a putty knife.
- 33 Inch double bowls drop in kitchen sink: 33″ L x 22″ W (front-to-back) x 9″, 3.0mm edge plate and 18 Gauge bowl stainl…
- Nano black mini bead embossed finish prevent scratches during daily use ,prevent oil stains and floating rust from remai…
- Nano black mini bead embossed stainless steel finish ensures that it is highly resistant to dirt and grime,easy to clean…
Step 2: Install Sink Strainer and Drain Assembly
Now it’s time to install the new sink strainer and attach the tailpiece that will connect to your new trap.
Applying Plumber’s Putty
- Roll a small amount of plumber’s putty between your palms into a thin rope, about ¼ inch thick.
- Apply the rope around the underside of the sink strainer flange (the part that sits in the sink drain hole).
- Insert the strainer into the sink’s drain hole and press down firmly.
Plumber’s putty creates a watertight seal between the sink and strainer. You can use silicone caulk instead, but it’s less forgiving if you need to reposition.
READ MORE: How to Plumb a Pedestal Sink: Step by Step Guide
Tightening the Locknut and Attaching Drain Tailpiece
- Under the sink, slide on the rubber washer, friction ring, and metal locknut (included with your strainer kit).
- Tighten the locknut using channel locks or a spud wrench. Be firm, but avoid overtightening which can crack the sink or warp the seal.
- Wipe away any excess putty that squeezes out.
- Thread the tailpiece (drainpipe extension) into the bottom of the strainer basket using a slip nut and washer. This piece connects the strainer to the trap.
If you’re installing a garbage disposal, you’ll do a slightly different process here (attaching a disposal flange and mounting bracket), but the tailpiece connects in a similar fashion.
- KITCHEN SINK SETS with SINGLE TRACK: Designed with an integrated single-tier rail for sliding built-in custom accessorie…
- FASTER DRAINING DESIGN: The undermount kitchen sink has X-shaped drain grooves on the bottom that slope gently towards t…
- 11 Gauge THICKER MATERIAL FOR EXTRA DURABILITY: The single bowl kitchen sink is made of SUS304 premium stainless steel t…
READ MORE: Does Home Warranty Cover Plumbing?
Step 3: Install the P-Trap and Drainpipe Assembly
Now the part comes where everything adds – literally. The P-trap is that the curved section of the pipe designed to keep a small amount of water, which comes through the sink makes a sewer gases to block the gases.
Assembling the Trap Arm and P-Trap
- Start by dry-fitting the trap parts to ensure everything lines up properly. Don’t glue anything yet.
- Connect the trap arm (horizontal piece) to the drain stub-out in the wall.
- Attach the curved trap to the tailpiece extending from the sink strainer.
- Use slip joint nuts and washers to join all sections. Ensure the beveled side of the washer faces the threaded joint.
Aligning to the Wall Drain Connection
- The trap arm should insert about 1½ inches into the wall drain pipe (via a trap adapter or compression fitting).
- Make sure the trap is level, and all connections are straight.
- Check that the vertical tailpiece from the sink enters the trap with a smooth downward angle (1/4 inch drop per foot).
Once you’ve confirmed everything is aligned and tight, you’re almost done.

- T-304 Stainless Steel Material: Constructed from heavy-duty 18-gauge (1.5mm) thick steel, Funmier 33 inch drop in kitche…
- Silent Sink: The thickened anti-condensation coating provides insulation, protecting the cabinets and keeping them dry. …
- Extra Spacious Sink: 33″ wide, 22″ front-to-back (33″Wx22″Dx9″H), Interior Size: 31″Wx17.8″Dx8.75″H,equipped with a stan…
Step 4: Connect Additional Fixtures (Optional)
Installing a Garbage Disposal
If your kitchen sink has garbage disposal, the plumbing is slightly different on the side where it is installed. Here’s how to handle it:
- Install the growing assembly after the manufacturer’s instructions. It usually consists of a sync outfit edge, mounting ring and gaskets.
- Mount the garbage disposal unit to the underside of the sink.
- Connect the disposal’s discharge pipe to the P-trap using a standard slip joint connection.
- If you’re connecting a dishwasher, there will be a dishwasher inlet on the disposal unit—remove the knockout plug with a screwdriver and hammer before attaching the dishwasher hose.
Do not forget to safely tighten the disposal and plug in or hardware the unit according to the local code.
READ MORE: Fix Clogged Kitchen Sink
Connecting the Dishwasher Drain Line
If there is a dishwasher in your kitchen, it will usually dry through the plumbing of the sink. You will need:
- Attach the dishwasher drain hose to a dishwasher inlet on the garbage disposal or a branch tailpiece on the sink drain.
- Secure the hose with a hose clamp.
- Make sure the hose has a high loop (looped under the sink counter) or connects to an air gap, as required by your local plumbing code. This prevents dirty sink water from backflowing into the dishwasher.

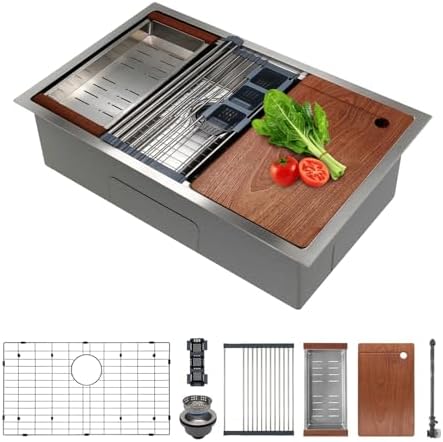
- WORKSTATION SINK with integrated ledge for sliding accessories allows you to work right over the sink while minimizing c…
- OUTER SINK DIMENSIONS: 32″ L x 19 in. W x 10 1/2″ D – BOWL DIMENSIONS: 30″ L x 16″ W x 10″ D – Min cabinet: 36 in. – KIT…
- UNDERMOUNT SINK INSTALLATION creates a seamless transition from sink to countertop with no exposed mounting deck to trap…
READ MORE: What Is Polybutylene Plumbing?
Step 5: Tighten, Seal, and Check for Leaks
Now that everything is connected, it’s time to finalize your work and check that your plumbing holds water—and not in the wrong places.
Tighten All Fittings Securely
- Go back and hand-tighten all slip nuts, then use channel locks to give each a quarter turn more.
- Don’t overtighten—this can crush washers and create leaks.
Turn on the Water and Run a Leak Test
- Slowly open the hot and cold shut-off valves under the sink.
- Let the faucet run for a few minutes while you inspect every joint for drips or pooling water.
- If a leak occurs:
- Tighten the slip nut slightly.
- Make sure the washer is properly aligned.
- Add Teflon tape to threaded connections if necessary.
- Tighten the slip nut slightly.
READ MORE: Kitchen Sink Draining Very Slowly
Test the Drain
Fill the sink halfway with water, then release the drain plug and watch the entire system while it drains:
- Look for slow drainage, which may mean improper slope.
- Watch for leaks at the P-trap or tailpiece.
Once it passes the test, you’re good to go!

- 【Package Contents】This kitchen sink accessory has a black pull-out faucet, black purifying faucet, soap dispenser, retra…
- 【QUALITY MATERIALS】Black stainless steel sink with commercial grade NANO brushed finish, like water on a lotus leaf, wit…
- 【Drain Quickly and Thoroughly】The bottom of the deep black kitchen sink is slightly sloped, the specific X-shaped guide …
READ MORE: What is Sewer Gas in Kitchen Plumbing?
Common Mistakes to Avoid
- Forgetting to apply plumber’s putty – Without a good seal under the strainer, water will seep into your cabinet.
- Installing the P-trap backward – The trap arm must always point horizontally to the wall. The U-bend faces the sink.
- Improper drain slope – If the drain pipe from the sink to the wall is flat or angled up, it will trap water and debris, leading to clogs.
- Overtightening plastic fittings – This can crack the PVC or damage washers.
- Skipping the dishwasher high loop – In many areas, this is a code violation and can allow dirty water to backwash into your dishwasher.
When to Call a Professional
While many homeowners can handle kitchen sink plumbing as a DIY job, some situations are better left to licensed plumbers:
- If your wall drain needs to be relocated or lowered.
- You’re unsure how to connect a double-basin sink.
- You suspect your home has old galvanized pipes or corroded fittings.
- The job involves modifying gas or electrical for a garbage disposal.
Hiring a pro ensures everything meets local plumbing codes and passes inspection—especially if you’re doing a full kitchen remodel or plan to sell your home.
Conclusion
Installing kitchen sink plumbing can be difficult at first, but with a step-by-step plan, right tools and little patience, it is a very notable DIY project. Whether you are replacing a worn P-trap or installing a new sink system, the key is careful alignment, waltite seal and proper drain slopes.
By understanding how the pieces fit together—and double-checking for leaks—you can save on labor costs and gain the satisfaction of doing it yourself. And if you ever need help, calling a pro is just another tool in your toolbox.
FAQs
How long does it take to install kitchen sink plumbing?
A typical DIY install takes 2–4 hours, depending on your experience and the complexity of the setup.
Do I need plumber’s putty for every sink drain?
Yes, until the manufacturer recommends Silicon Sealant. Putin of the plumber is the most common to make a watertight seal around the street.
Can I install a P-trap without glue?
Yes. Most under-sink traps use compression slip joints that don’t require glue, making them easy to disassemble for cleaning.
Why is my kitchen sink draining slowly after installation?
This could be due to a flat drain pipe, a clog, or a misaligned P-trap. Check for proper slope and ensure no debris is blocking the trap.
Do I need a vent for my kitchen sink drain?
Yes. Every sink drain must be vented—usually through a wall vent pipe or an air admittance valve (AAV). Without venting, your sink may gurgle or drain slowly.

