Copper plumbing pipes are renowned for their durability and reliability. But even the most robust pipes need care, especially if you want your water to remain clean and your plumbing system to last for decades. Over time, copper pipes can collect grime, develop mineral buildup, and even corrode on the surface. These issues may not seem urgent, but if left unchecked, they can escalate into serious plumbing problems.
Keeping your copper pipes clean doesn’t just ensure better water quality it can also extend the lifespan of your plumbing and save you from expensive repairs down the line. Plus, clean copper has a distinct aesthetic appeal, making it a favorite for exposed pipe designs. Whether you’re a homeowner or a renter dealing with visible copper pipes, learning how to clean them properly is a valuable skill.
In this guide, we’ll go step by step to show you how to safely and effectively clean both the inside and outside of your copper plumbing pipes, using tools and products that are both accessible and affordable. Lets deep dive into “How to Clean Copper Plumbing Pipes”
“Shop the Copper Power Brush.” — Strong, action-oriented verb. Check this Cleaner- 👇

Understanding Copper Plumbing
Why Copper is Used in Plumbing
Copper is one of the oldest materials used in plumbing, and for good reason. It’s naturally resistant to corrosion, highly durable, and doesn’t leach harmful chemicals into the water supply. Unlike PVC or galvanized steel, copper can withstand high pressure and temperature variations, making it ideal for both hot and cold water systems.
Another advantage is copper’s antimicrobial properties. Pathogenic bacteria are less likely to survive in copper pipes, providing cleaner water for domestic use. Furthermore, the copper is completely reused, connecting its appeal on grounds of stability.

Benefits and Lifespan of Copper Pipes
When properly maintained, copper pipes can last 50 years or more. Their longevity is one of their main selling points, but that doesn’t mean they’re maintenance-free. Here are a few benefits that make copper an ideal plumbing choice:
- Durability: Less prone to breaking or warping under pressure.
- Resistant to Corrosion: Particularly when compared to iron or steel.
- Heat Tolerant: Perfect for hot water systems.
- Low Maintenance: Minimal upkeep with regular flushing and occasional cleaning.
- Safe Water Supply: No chemical leaching into the water.
Understanding these characteristics helps you realize why cleaning copper pipes is a necessary task—despite their strong reputation, they still need a little TLC from time to time.
READ MORE: How to Fix a Copper Pipe Leak at the Joint
Signs That Your Copper Pipes Need Cleaning
1. Discoloration and Verdigris
One of the most obvious signs that your copper pipes need attention is a change in color. Fresh copper has a bright reddish-brown hue, but exposure to air, moisture, and pollutants causes it to oxidize, forming a greenish layer called verdigris. While a little patina is natural and even attractive in some designs, excessive buildup can signal that it’s time to clean.
2. Decreased Water Pressure
Have you noticed that your shower seems weak or your sink takes longer to fill up? That might be due to internal mineral deposits clogging the copper pipes. Hard water leaves calcium and magnesium behind, creating a scaly interior that restricts water flow.
3. Unpleasant Odors or Tastes in Water
Another subtle but important indicator is a change in water quality. If your tap water starts to smell metallic or taste a bit off, it could be because the interior of your pipes needs a good flushing. Build-up inside pipes can harbor bacteria or even small particles that degrade your water quality.
These signs often appear slowly, so it’s easy to overlook them. But catching and addressing them early can save you major headaches—and costs—down the line.
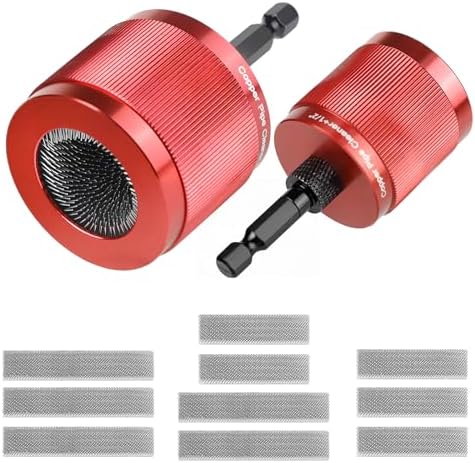
“The Last Pipe Cleaner You’ll Ever Buy.” – Focuses on the replaceable blade feature. Check this Cleaner Set- 👇
Tools and Materials Needed
Safety Equipment
Before you even touch a pipe, you’ll need to gear up. Safety should always come first, especially when dealing with chemical cleaners or scraping tools. Here’s what you should have:
- Protective gloves. Check gloves & Price
- Safety goggles
- Long-sleeved shirt and pants
- Respirator or face mask (especially when using strong chemicals)
Cleaning Solutions (Store-bought and Homemade)
You have a choice between natural and chemical cleaners, and both have their place depending on the severity of the build-up. Here are some options:
Homemade Solutions:
- Vinegar and salt (for light oxidation)
- Lemon juice and baking soda
- Cream of tartar with water (acts like a polishing paste)
Commercial Cleaners:
- CLR (Calcium, Lime, Rust remover). Check Product & Price
- Bar Keepers Friend. Check Product & Price
- Specialized copper pipe descalers
Tools: Brushes, Sandpaper, Pipe Cleaners
You’ll need a few tools to get the job done efficiently:
- Soft-bristle brush (for scrubbing exterior)
- Wire brush (for tougher grime)
- Fine-grit sandpaper (for polishing and removing stubborn oxidation)
- Pipe brush or bottle brush (for cleaning inside)
- Bucket or tub (to soak pipe sections, if possible)
With the right materials on hand, you’re ready to start the cleaning process.
READ MORE: How to Repair a Burst Water Pipe
Safety Precautions Before Cleaning
Turning Off Water Supply
First things first—shut off your main water valve. You don’t want water flowing through the pipes while you’re working. This step is especially crucial when cleaning the inside of the pipes to avoid flushing debris into your system.
Ventilation and Protective Gear
Chemical fumes and even strong vinegar can be overwhelming in a closed space. Open windows or use fans to ventilate the area well. Always wear gloves, goggles, and a mask if you’re using store-bought cleaners.
Checking for Leaks or Damage
Prior to cleaning, perform a proper inspection of the pipe for cracks, rust holes or leaks. Cleaning damaged pipes will exacerbate the problem, especially when using abrasive devices. In case you use heavy corrosion or soft spots, replacing the pipe section is better than cleaning the pipe.
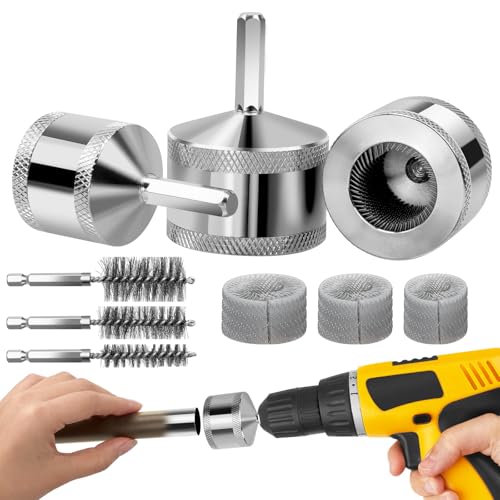
“Turn Your Drill Into a Pro-Pipe Prep Station.” — Shows the transformation of their existing tools. Check this- 👇
Methods to Clean Copper Pipes
Below are six effective methods to clean copper plumbing pipes, ranging from natural remedies to commercial solutions. Each method is designed to address specific issues, such as tarnish, mineral buildup, or corrosion.
Method 1: Vinegar and Salt (Natural and Easy)
This simple, natural method is ideal for removing light tarnish and restoring shine.
- Materials Needed:
- 1 tablespoon salt
- 1 cup white vinegar
- Soft cloth or sponge
- Steps:
- Dissolve 1 tablespoon of salt in 1 cup of white vinegar to create a cleaning solution.
- Dip a soft cloth or sponge into the solution and wring out excess liquid.
- Rub the cloth along the pipe in the direction of the grain to avoid scratching.
- Rinse thoroughly with clean water to remove any residue, which could cause green discoloration if left on the pipe.
- Dry the pipe completely with a dry cloth to prevent water spots.
- Why It Works: Vinegar’s acetic acid dissolves copper oxide (tarnish), while salt provides gentle abrasion for effective cleaning, as explained by wikiHow. See Vinegar & Price
Method 2: Flour, Salt, and Vinegar Paste (For Stubborn Tarnish)
For more persistent tarnish, this paste offers a deeper clean.
- Materials Needed:
- ¼ cup flour
- ¼ cup salt
- ½ to ¾ cup white vinegar
- Soft cloth or sponge
- Steps:
- Mix ¼ cup flour and ¼ cup salt in a bowl.
- Gradually add ½ to ¾ cup white vinegar until a thick paste forms.
- Apply the paste to the pipe using a soft cloth or sponge, rubbing in the direction of the grain.
- Let the paste sit for 10-15 minutes to break down tarnish.
- Rinse with warm water and dry thoroughly with a clean cloth.
- Tip: Substitute lemon juice for vinegar for a fresh scent, as suggested by Cleanipedia.
Method 3: Lemon and Baking Soda (Gentle Polishing)
This method is excellent for polishing copper pipes and removing light tarnish.
- Materials Needed:
- Fresh lemon juice (or bottled)
- Baking soda
- Soft cloth
- Steps:
- Mix lemon juice and baking soda to form a spreadable paste.
- Apply the paste to the pipe and gently rub with a soft cloth in circular motions.
- Rinse with clean water and dry with a soft towel to prevent water spots.
- Why It Works: Lemon juice’s citric acid reacts with copper oxide, while baking soda acts as a mild abrasive, as noted by This Old House.
Method 4: Commercial Metal Polish (Quick and Effective)
For a fast, professional-grade shine, commercial copper polish is a great option.
- Materials Needed:
- Commercial copper polish (ensure it’s safe for copper)
- Soft cloth
- Steps:
- Apply the polish to the pipe according to the product’s instructions.
- Rub gently with a soft cloth in circular motions.
- Buff with a clean, dry cloth to restore a brilliant shine.
- Caution: Follow the product’s safety guidelines, as some polishes contain chemicals that require ventilation, per Cleanipedia.

Method 5: Chemical Cleaner for Calcium, Lime, and Rust (For Mineral Buildup)
This method targets stubborn mineral deposits and rust on external pipe surfaces.
- Materials Needed:
- Calcium, lime, and rust remover (e.g., CLR)
- Water
- Rubber gloves
- Face mask
- Cotton rag
- Steps:
- Mix equal parts cleaner and warm water in a glass bowl.
- Wear gloves and a mask, and work in a well-ventilated area.
- Dip a cotton rag into the solution and wring it out.
- Scrub the pipe, rewetting the rag as needed.
- Wipe off any remaining solution with a dry cloth.
- Important: Avoid using this method on pipes carrying drinking water, as it may contaminate the water supply, as warned by wikiHow.
Method 6: Soaking in Vinegar (For Deep Cleaning)
For removable pipe sections or internal cleaning, soaking in vinegar is highly effective.
- Materials Needed:
- Large bin or bucket
- White vinegar
- Sponge or cotton rag
- Steps:
- Submerge the copper pipes completely in white vinegar.
- Let them soak for at least 15 minutes (longer for heavy tarnish).
- Remove the pipes and shake off excess vinegar.
- Scrub with a sponge or cloth, following the grain.
- Rinse thoroughly with clean water and dry completely.
- Tip: For internal cleaning, pump vinegar through the pipes and flush with clean water, as suggested by MonsterPlumb.
READ MORE: How to Safely Unfreeze PVC Pipes: A Step-by-Step Guide
Comparison of Cleaning Methods
The table below compares the cleaning methods based on ease of use, effectiveness, and safety:
| Method | Ease of Use | Effectiveness | Safety |
| Vinegar and Salt | Easy | Good for light tarnish | Safe, natural |
| Flour, Salt, Vinegar Paste | Moderate | Good for stubborn tarnish | Safe, natural |
| Lemon and Baking Soda | Easy | Good for polishing | Safe, natural |
| Commercial Metal Polish | Very Easy | Excellent for shine | Generally safe, follow instructions |
| Chemical Cleaner (CLR) | Moderate | Excellent for mineral deposits | Use with caution, not for drinking water pipes |
| Soaking in Vinegar | Moderate | Excellent for deep cleaning | Safe, natural |
Preventive Maintenance for Copper Pipes
Regular Flushing
The best way to keep copper pipes clean is to flush them regularly. Simply running hot water for several minutes once a week can reduce buildup. You can also do a vinegar flush every 3–6 months for extra protection.
Installing Water Softeners
If your water is high in calcium and magnesium (a.k.a. hard water), consider installing a water softener. These devices filter out minerals before they reach your pipes, significantly reducing scale and buildup over time.
Water softeners not only protect your copper pipes—they also extend the life of your appliances, from dishwashers to washing machines.
Routine Inspections
Make it a habit to inspect your plumbing system every 6–12 months. Look for signs of corrosion, leaks, or discoloration. Catching small issues early can save you from massive repairs later.
Simple tools like moisture meters, pipe cameras, and water pressure gauges can give you a clearer picture of what’s going on inside your system.
Common Mistakes to Avoid
Using Abrasive Tools That Damage Pipes
One of the most frequent and costly mistakes people make when cleaning copper pipes is using abrasive tools like steel wool, metal scrapers, or harsh wire brushes. While they might seem effective for removing grime or oxidation, they can scratch the pipe surface, thinning the copper and weakening its integrity over time.
Instead, always opt for soft-bristled brushes, non-abrasive pads, or fine-grit sandpaper when you need a little extra scrubbing power. These tools get the job done without leaving behind damage that could lead to leaks or early deterioration.
Ignoring Underlying Plumbing Issues
Sometimes, dirt and buildup are just symptoms of a deeper issue, like corrosion from acidic water, poorly fitted joints, or slow leaks. Simply scrubbing the pipes without addressing the root problem is like painting over rust—it looks better for a while, but it doesn’t last.
Look for recurring stains, water marks, or wetness in the water. These may be an indication of leaks or pH imbalance in the water source. If the problems continue after cleaning up, it is now time for digging deep or calling the plumber.
Not Following Safety Guidelines
Chemical cleaners are powerful and, in the wrong hands, dangerous. Many homeowners rush into using these products without reading the instructions or wearing protective gear. This can result in skin burns, eye irritation, or even respiratory issues.
Always read product labels carefully. Use gloves, safety goggles, and a mask—especially in closed areas like under the sink or in a crawlspace. And never mix cleaning agents like bleach and vinegar; they create toxic fumes that can be deadly in confined spaces.
Also, remember to ventilate your space well when using any cleaning agents, and store chemicals safely out of reach of children and pets.
When to Call a Professional
Persistent Blockages
If you’ve tried flushing your pipes multiple times and still deal with slow water flow or backups, it may be time to call in a plumber. Persistent blockages could mean a major clog deep in the system, possibly caused by mineral scale, grease buildup, or even roots invading your plumbing.
A licensed plumber has the tools and expertise to diagnose the problem accurately and fix it without damaging your pipes.
Corrosion and Leakage
Visible green or blue corrosion along pipe joints or unexplained water spots on walls or floors are red flags that shouldn’t be ignored. These signs may indicate internal corrosion or pinholes in the pipe—both of which can worsen quickly.
Rather than attempting a DIY fix, it’s safer to consult a plumbing professional who can assess whether the pipe should be repaired or replaced.
Old or Deteriorating Pipes
If your home was built more than 40 years ago and the pipes haven’t been replaced, chances are they’re nearing the end of their lifespan. Even the most well-maintained copper pipes will eventually need replacement due to natural wear.
A professional can help you decide whether cleaning is still worth it or if it’s time for a full plumbing overhaul. This investment can prevent catastrophic failures like pipe bursts or water damage.
READ MORE: How Much Does a Plumber Charge to Unclog a Toilet?
Cost of Cleaning Copper Plumbing Pipes
DIY Costs
Cleaning your copper pipes yourself is affordable and accessible, especially if you already have basic supplies on hand. Here’s a rough breakdown:
- Vinegar, salt, lemon: $5–$10 total
- Commercial copper cleaner: $10–$20
- Pipe brush, microfiber cloths, gloves: $15–$30
Total DIY cost: $20–$50
This low-cost approach is ideal for routine maintenance and light cleaning.
Professional Service Costs
Professional pipe cleaning, especially for internal blockages, comes with a higher price tag but also more thorough results. Here’s what you might expect to pay:
- Inspection fee: $75–$150
- Hydro jetting or internal pipe cleaning: $300–$600
- Full system cleaning or descaling: $500–$1,000
Total professional cost: $300–$1,200, depending on pipe length, buildup severity, and location.
FAQs
How often should I clean my copper pipes?
It’s a good idea to flush the inside of your pipes with vinegar or lemon juice every 3–6 months. External cleaning can be done annually or as needed, especially if the pipes are visible.
Can I use bleach to clean copper plumbing?
No, bleach is too harsh for copper and can cause corrosion. Stick to gentler acids like vinegar or specialized copper cleaners.
Is green corrosion on copper pipes dangerous?
Green patina (verdigris) is usually harmless if it’s only on the surface. However, excessive corrosion could indicate deeper issues like leaks or pH imbalances in your water.
What’s the best homemade cleaner for copper pipes?
A mix of white vinegar and salt works wonders. You can also use lemon juice and baking soda for a milder, equally effective alternative.
Should I replace or clean very old copper pipes?
If your copper pipes are over 40–50 years old and are worn, rusty, or chronically clogged, then them could be more cost-effective than in running cleaning.
Conclusion
Maintenance of the copper plumbing pipes is something that might look like a simple upkeep, but it is crucial to maintaining your home plumbing system in the best condition. Whether the surface is stripping oxidation or stripping mineral deposits, regular surface cleaning works out to better water quality, strong water pressure and long-lasting pipes.
By choosing the right tools, following safety guidelines, and knowing when to go DIY and when to call a pro, you can take excellent care of your copper plumbing without spending a fortune. And as a bonus, you’re also doing your part to reduce waste and preserve one of nature’s most recyclable materials.
So grab your vinegar, your gloves, and a little elbow grease—it’s time to give those copper pipes the spa day they deserve.

