An electric hot water heater is one of those household appliances you rarely think about until it stops working. Imagine waking up on a cold morning only to find that your shower runs ice cold. Or worse, you notice a small flood near your heater because the tank has finally given up. These conditions can be stressful, but the good news is that changing the electric hot water heater is not as complicated as it seems. With correct equipment, safety precautions, and step-by-step instructions, you can change someone yourself and save a significant amount than hiring a professional.
A new electric water heater not only restores comfort in your home but also improves energy efficiency. Old heaters tend to consume more power while delivering less hot water, which means higher utility bills and frustration. Replacing your unit can give you peace of mind, better performance, and a reliable hot water supply for years to come. Lets deep dive into “How to Replace an Electric Hot Water Heater: Step by Step”
READ MORE: Best Tankless Electric Water Heaters 2026: Top 5 Models for U.S. Homes
Understanding Your Electric Water Heater
Before grabbing your toolbox, it’s important to understand the basics of your electric hot water heater. Knowing how it works, what parts it consists of, and how long it should last will give you confidence in handling the replacement process.
Parts of an Electric Water Heater
An electric water heater usually consists of a storage tank, heating element, thermostat, pressure relief valve, anode rod and inlet/outlet water lines. The tank catches the water, while the inner heating elements heat it to your desired temperature. The thermostat controls heat, and the pressure relief valve ensures safety by releasing additional pressure when needed. The anode rod prevents corrosion by gradually corroding itself, shielding the steel tank from rust.
Lifespan and Common Issues
Most electric water heaters live between 8 and 12 years, depending on use, maintenance and water quality. Hard water, which has high mineral content, can reduce lifespan by causing sediment buildup inside the tank. Common issues include insufficient warm water, strange noise (such as popping or rubbing due to sediment), leaks around the tank, or water that smells metal or sulfuric.

- One Model, Anywhere: This Rinnai tankless water heater is installable indoors or outdoors thanks to our new Versa Vent a…
- Never Run Out of Hot Water with this Compact Tankless Gas Water Heater: This condensing propane and natural gas tankless…
- Smart, Efficient Design: This water heater’s modern design includes an easy-to-use interface, Quick Flush feature for si…
Signs It’s Time for Replacement
- Water not heating as efficiently as before
- Rust-colored or foul-smelling water
- Frequent need for repairs
- Visible leaks around the tank
- Unit is older than 10 years
READ MORE: Best Tankless Water Heater 2026 — Top Picks, Costs & Buyer’s Guide
Tools and Materials You’ll Need
Like any project, preparation is key. Having the right tools and materials on hand before you start will make the replacement steps smoother and safer.
Essential Tools
- Adjustable wrench
- Pipe wrench
- Screwdrivers (flathead and Phillips)
- Pliers
- Bucket and garden hose (for draining the old tank)
- Voltage tester (to confirm power is off)
- Utility knife
- Teflon tape (plumber’s tape)

- HVAC TORQUE WRENCH: By ensuring optimal tightening precision, it significantly diminishes the likelihood of refrigerant …
- DIGITAL LCD SCREEN: Allows for meticulous torque adjustments, ensuring unparalleled accuracy in tightening operations, o…
- NINE MEMORY SETTINGS: Designed with the convenience of nine customizable memory slots, this feature allows technicians t…
Safety Gear
Working with electricity and water at the same time requires extra caution. Be sure to have:
- Safety goggles
- Heavy-duty work gloves
- Non-slip shoes
- Protective clothing
READ MORE: Why Does My Water Heater Keep Turning Off?
Replacement Parts and Materials
- The new electric water heater (make sure the size matches your household needs)
- Flexible water supply lines
- Dielectric unions (to prevent corrosion between copper and steel connections)
- Electrical wire connectors
- Pipe insulation (optional for energy savings)

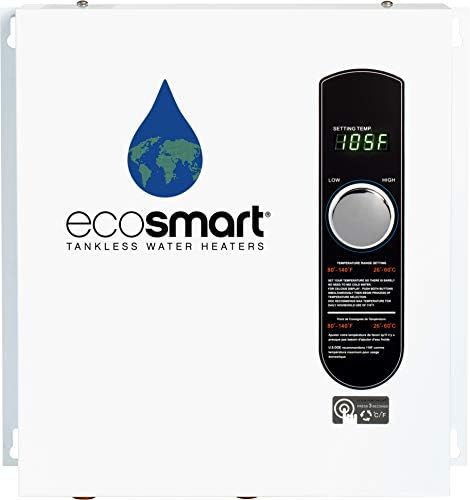
- ELECTRICAL REQUIREMENTS: 3 x 40 AMP Double Pole Breakers Required. 200 AMP Household service recommended. Ensure your ho…
- PROVEN PERFORMANCE: Continuous hot water when you need it for the whole home (review performance guide image to confirm …
- EASILY ADJUSTABLE: ON/OFF Dial Control with adjustable digital temperature display allows for adjustments in 1-degree in…
Safety Precautions Before Starting
Changing the electric water heater involves handling both electricity and water, if not cautious if not managed then the potentially dangerous combination. By taking proper safety precautions you can work without the risk of shock, burns or floods.
Turning Off the Power
Locate the breaker panel in your home and turn off the circuit that powers the water heater. Use a voltage tester to double-check that there’s no power running to the unit before touching any electrical connections.
Shutting Off the Water Supply
Turn off the cold-water supply valve connected to the water heater. This stops fresh water from flowing into the tank while you carry out maintenance. Also, open a hot water faucet somewhere in your home to relieve pressure inside the pipes.
Checking for Leaks and Hazards
Inspect the area around your water heater for leaks, rust, or standing water. Make sure the floor is dry before you begin working to avoid slipping or electrical hazards. If the tank has been leaking badly, be cautious when moving it, as it could be structurally weak.
READ MORE: AO Smith vs. Rheem Water Heaters: 2026 Comparison & Expert Reviews
Removing the Old Water Heater
Now that you’re prepared, it’s time to say goodbye to the old unit. Removing an electric water heater involves several steps, and patience is key, especially when draining the tank.
Draining the Tank Properly
Attach a garden hose to the drain valve at the bottom of the heater. Place the other end in a floor drain or outside where water can safely flow. Open the drain valve and let the tank empty completely. To speed things up, open a hot water faucet in your home to allow air into the system.
Disconnecting Electrical Wiring
Once drained, carefully remove the access panel on the water heater to expose the wiring. Use a voltage tester again to ensure no power is running. Disconnect the wires, keeping track of which ones are hot, neutral, and ground.
Detaching Water Supply Lines
Using a wrench, disconnect the cold water inlet and hot water outlet pipes from the tank. Be prepared for some remaining water to spill out.
Safely Moving the Old Unit Out
Water heaters are heavy, even when drained, so you may need a helper or a dolly to move the old unit out. Dispose of it properly according to local waste regulations many areas have recycling centers that accept old water heaters.
- On demand a continuous and unlimited supply of hot water
- Sleek design saves space and no venting required, It also features two different temperature memory presets, making it e…
- Requires hard-wired 240 or 208-volt electric service, with a maximum draw of 28,800 watts at 240 volts or 21,600 watts a…
READ MORE: Does Replacing a Water Heater Increase Home Value?
Preparing for the New Water Heater
Once the old unit is out, the real excitement begins you’re ready to prepare for the installation of your new electric water heater. Preparation is more than only to unboxes new tools; This involves ensuring that everything is installed for a smooth and code-transportation installation.
Checking Local Building Codes
Before installing a new water heater, it’s important to check your local building codes. Some municipalities require permits for water heater replacement, while others may have specific rules about venting, electrical connections, or placement. Skipping this step can lead to costly fines or complications if you ever sell your home. If you’re unsure, call your local building department to confirm requirements.
Measuring the Space and New Unit
Water heaters come in different sizes, so make sure the new one will fit comfortably in the designated space. Measure the height, width and depth of the region where the heater will sit, and compare it with the dimensions of your new unit. In addition, make sure that there is sufficient withdrawal around the heater for future maintenance, as Cramming it in tight space can cause headaches under the line.
Preparing Electrical and Plumbing Connections
Check the wiring size and breaker capacity for compatibility with the new heater. Most standard residential electric water heaters require a 30-amp breaker and 10-gauge wire. Inspect the water supply lines for wear and tear; if they’re corroded or brittle, now’s the perfect time to replace them with flexible connectors. Adding dielectric unions between copper and steel connections prevents galvanic corrosion, extending the lifespan of your system.
Installing the New Water Heater
Now comes the hands-on part getting the new water heater in place and hooked up. This step requires careful attention to detail, but with patience, it’s straightforward.
Positioning the New Heater
Place the new water heater in its designated spot, making sure it sits level and stable. Some units come with adjustable feet, which can be helpful if your floor isn’t perfectly even. If you live in an earthquake-prone area, you may be required to install seismic straps to secure the heater to the wall.
Connecting the Water Lines
Attach the cold-water inlet and hot-water outlet lines using flexible connectors for easier installation and future maintenance. Be sure to wrap the threaded connections with Teflon tape to prevent leaks. Tighten the connections with a wrench, but don’t over-tighten, as this can damage the fittings.
Rewiring the Electrical Connections
Remove the access panel on the new unit to reveal the wiring compartment. Connect the household wires to the corresponding terminals on the heater typically, black (hot) to black, red (hot) to red, and green or bare wire to ground. Use wire connectors and secure everything tightly. Once finished, replace the access panel to keep the wiring safely enclosed.
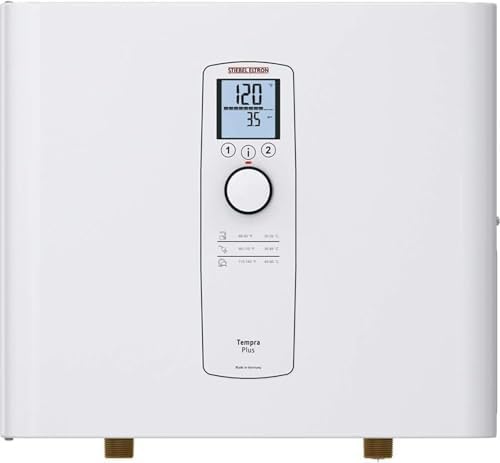
- Configured for climates where incoming water temperature can reach as low as 37 degrees.
- Capable of heating nearly 3 gpm.
- Digital temperature control allows temperature settings in 1 degree increments.
READ MORE: Stiebel Eltron Water Heater Review 2026: Is It Worth the Cost?
Filling and Testing the Tank
Before flipping the breaker back on, you’ll need to fill the tank with water and ensure the system is working properly.
Refilling with Cold Water
Close the drain valve on the tank and turn the cold-water supply valve back on. As the tank fills, you’ll hear water flowing in. To avoid air pockets, open a nearby hot water faucet and let it run until water flows smoothly without sputtering. This ensures that the tank is completely filled before powering it on.
Bleeding Air from the System
Air trapped inside the plumbing can cause loud banging noises (known as water hammer) and reduce efficiency. Bleeding the system by running hot water faucets around the house for a few minutes ensures all trapped air is released.
Restoring Power and Testing Heating
Once the tank is full of water, go to your breaker panel and turn the power back on. The heating elements should begin warming the water. Depending on the size of your tank, it may take between 30 minutes to 2 hours for the water to reach your set temperature. Test several faucets to ensure hot water is flowing properly.
Troubleshooting After Installation
Even if you follow every step carefully, small issues can sometimes pop up after installing a new water heater. Don’t worry most of them are easy to fix.
Common Issues and Quick Fixes
- No hot water: Check the breaker and ensure power is on. If wiring is correct, it may take more time for the tank to heat up.
- Leaking connections: Re-tighten fittings or apply additional Teflon tape to threads.
- Strange noises: Popping sounds often come from trapped air or minor sediment; run water through faucets to clear it.
Checking for Leaks and Electrical Problems
Inspect the base of the heater and all connections regularly during the first 24 hours. If you notice water pooling, shut off the supply and recheck connections. For electrical concerns like tripped breakers or sparks, shut off power immediately and call a professional.

- Instant Hot Water: This upgraded smart propane tankless water heater delivers consistent performance with its 140,000 BT…
- Zero Cold Water Tech – Instant Hot Water:Our tankless water heater propane system features APUS exclusive single-circula…
- Built-in Booster Pump: Increases water flow by up to 130%, delivering a maximum of 6.8 GPM. it easily supports 2 showers…
READ MORE: Best Heat Pump Hot Water System (2026) — Buyer’s Guide
Maintenance Tips for Longer Life
Now that your new electric water heater is installed and running smoothly, it’s time to think about longevity. Just similar to your car needs regular oil changes, your water heater requires basic maintenance to stay in top shape. A few normal habits can add years to its lifetime and save you from expensive repairs.
Regular Flushing
Over time, minerals and sediment build up inside the tank, especially if you stay in an area with hard water. This buildup can insulate the heating elements, making them work harder and reducing efficiency. Flushing the tank 1/2 a year helps prevent these problems.
- Turn off the power and water supply.
- Connect a garden hose to the drain valve and direct the water to a safe drain location.
- Open the valve and let the tank empty.
- Once drained, briefly turn on the cold-water supply to rinse out remaining sediment.
- Close the valve, refill the tank, and restore power.
Checking the Anode Rod
The anode rod is often referred to as the “sacrificial rod” because it attracts corrosive elements in the water, protecting the steel tank from rust. Inspect it every two to three years. If the rod is heavily corroded or less than ½ inch thick, replace it. This inexpensive part can extend your water heater’s life by several years.
Monitoring Performance
Keep an eye on the daily performance of your water heater. If you reduce low water supply, strange noise, or high energy bills, it may be a sign that maintenance is required. Catching small issues quickly prevents major problems below the road. Constant maintenance ensures that your investment pays with reliable warm water for a long time.
READ MORE: Can a Water Heater Explosion Kill You?
Cost Considerations
Changing an electric hot water heater involves both advance expenses and long -term financial views. Understanding the costs will help you wisely in the budget and decide whether DIY or professional installation makes the most understandable.
Average Replacement Cost
On average, the cost of a new electric water heater ranges from $400 to $1,200, depending on size, brand, and efficiency rating. Add to that the cost of installation if you hire a professional, which can be another $500 to $1,500.
DIY vs Professional Installation Costs
If you choose the DIY route, you will save a lot on labor. However, you will still need a factor in materials such as flexible connectors, dielectric unions and security gear. For many homeowners, the cost of DIY installation is approximately $ 500- $ 800, while professional installation can reach $ 2,000 or more.
Energy Efficiency and Long-Term Savings
Although high-efficiency models cost more upfront, they can reduce your electricity bills over time. Look for ENERGY STAR rated heaters, which use advanced insulation and smarter heating elements. Savings may increase, especially with demand for high hot water in large homes.
The weight of advance cost against long -term savings will help you choose the best option for your home and budget.
Conclusion
Replacing an electric hot water heater may seem like a daunting task, but with preparation, safety precautions, and the right steps, it’s a manageable project for many homeowners. From shutting off the power and draining the old tank to wiring the new unit and testing the system, each stage builds your confidence and brings you closer to a reliable hot water supply.
By investing in regular maintenance and considering energy-efficient options, you’ll extend the life of your new heater and enjoy lower bills. Whether you tackle the project yourself or call in a professional, the goal is the same steady, efficient, and safe hot water for your household.
READ MORE: Best Under Sink Hot Water Heater 2026 — Mini-Tank & Tankless Buyer’s Guide & Prices
FAQs
How long does it take to replace an electric water heater?
On average, a DIY replacement takes 4–6 hours, while professionals can often complete the job in 2–3 hours.
Do I need a permit to replace a water heater myself?
In many areas, yes. Always check with your local building department before beginning the replacement.
Can I reuse the old water supply lines?
It’s best to replace them. New flexible connectors ensure a tighter seal and reduce the risk of leaks.
How often should I replace my electric water heater?
Most units last 8–12 years. If your heater is over 10 years old and showing signs of failure, replacement is recommended.
What size water heater do I need for my home?
It depends on household size and hot water usage. A family of four typically needs a 50-gallon tank, while smaller households can manage with 30–40 gallons.

