Plumbing vents are your home’s lungs when they’re clogged your drains gurgle, odors appear, and sewer gas can back up. This quick How to Clean Plumbing Vent Pipe Safely (Step-by-Step Guide) explains how to spot vent clogs, safely clear blockages, and prevent future problems so your drainage works smoothly. Regular vent maintenance saves money and keeps your home odor-free. Lets deep dive into “How to Clean Plumbing Vent Pipe Safely (Step-by-Step Guide)”

Understanding Plumbing Vents
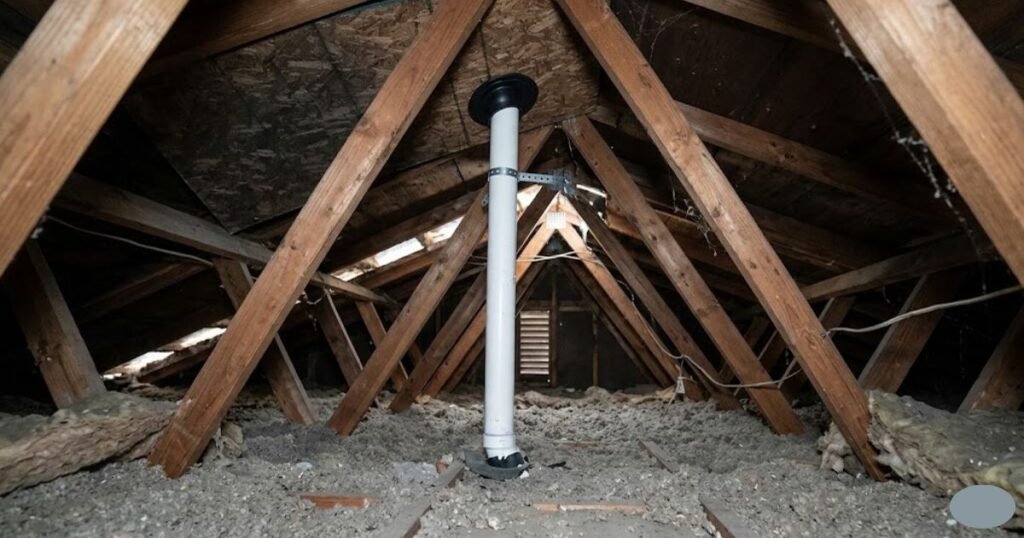
Before diving into cleaning, it’s crucial to understand what plumbing vents do. Plumbing vents, also known as vent stacks or air vents, are vertical pipes that typically extend from your main drain line up through the roof. Their purpose is to regulate air pressure in the drainage system and allow sewer gases to escape outside rather than entering your living spaces.
When water flows down your drains, it creates a vacuum. Without a vent, this vacuum would stop water flow and trap air inside pipes, causing gurgling noises or even preventing drainage entirely. Plumbing vents solve this by letting air in to balance pressure and help water flow smoothly.
There are different types of vent systems:
- True Vent: A vertical pipe connected directly to the drain and extends through the roof.
- Wet Vent: A shared vent used by more than one fixture.
- Loop Vent: Commonly used for island sinks where a roof vent connection isn’t possible.
Signs Your Plumbing Vent Is Clogged
A clogged vent doesn’t always make itself obvious right away. However, several telltale signs indicate your plumbing vent might be blocked:
- Slow Drains: When air can’t circulate properly, water drains sluggishly, creating suction in the pipes.
- Gurgling Noises: Hearing gurgles when flushing a toilet or running a sink often means air is trapped.
- Foul Odors: Sewer gases that should exit through the vent can seep back into your home if the vent is clogged.
- Toilet Bubbling: If bubbles appear after flushing, it’s a strong sign of vent obstruction.
- Water Backups: In severe cases, water might back up into sinks, tubs, or toilets due to pressure imbalance.
If you notice any combination of these issues, your plumbing vent needs attention. Ignoring them could lead to pipe damage or dangerous sewer gas exposure.
READ MORE: Do You Need a Plumber to Replace an Outdoor Spigot?
Safety first: essential warning
First and foremost, work involving roofs and ladders is dangerous by nature. If you are under the age of eighteen, uncomfortable with heights, or lack the necessary equipment and training, do not attempt to climb onto a roof or use a ladder. Falls from roofs and ladders are a leading cause of serious injury, and even a minor slip can result in major harm. In addition to the physical risks, rooftop plumbing work may void warranties, damage shingles or flashing, and perhaps violate local construction standards or HOA regulations, leaving you liable for repairs or fines.
Tools and Materials Needed to Clean a Plumbing Vent
Before heading to your roof, gather all the necessary tools and safety gear. Having the right equipment not only makes the process smoother but also ensures your safety.
Essential Tools:
1. Garden hose with adjustable nozzle
Check this-

- The Flexi Hose expandable garden hose automatically expands to the stated product length – roughly 3 times extension – w…
- Strong fittings for reliability! Solid 3/4 inch brass connectors ensure the expanding garden water pipe fits the typical…
- Expandable, lightweight construction without sacrificing quality! The 3750D elastic outer fabric with 4 layers of latex …
2. Plumbing snake or auger (manual or power type)
Check this-
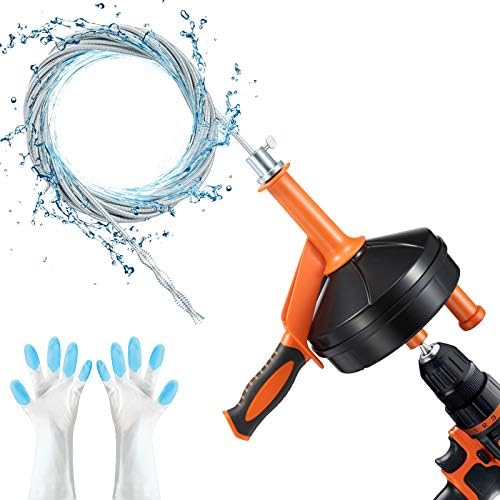
- Professional: This professional plumbers snake comes complete with 25 ft Steel, more than enough for most household clog…
- Easy to Use: The sewer snake spring is both flexible and tough to enable you to easily take tight bends, and the large c…
- Multiple Uses for Tackling Clogs: This snake drain clog remover is professional using for various drains such as kitchen…
3. Flashlight or inspection camera
Check this-

- Long Press Function and Motion Sensor: Unlike the old version, LHKNL headlamp has added a long press function. Just hold…
- Super Bright and Rechargeable: The headlamp flashlight camping essentials uses class-leading LED chips that will provide…
- Ultra-light and Adjustable: The hand-free headlamp is only weight 1.87 OZ, comfortable and lightweight. The lamp head ca…
4. Bucket and rag
5. Ladder (tall enough to reach your roof vent)
Check this-

- 2023 UPGRADE STEP LADDER—Open: 58.7″ x 20.1″ x 36.6″, Folded: 63.4″ X 20.1″ X 1.6″, Net Weight: 18.5 pounds. HBTower Saf…
- TOOL TRAY AND SPACE-SAVING:Built in a large size tool platform to accommodate tool equipment and reduce the number of ti…
- SECURITY AND STABILITY: High-grade steel frame is constructed with strength and reliability. Metal safe buckle automatic…
Safety Equipment:
- Non-slip shoes or boots
- Work gloves and safety goggles
- Ladder stabilizer and harness (for roof safety)
Optional Equipment:
- Wet/dry vacuum for suction method
- Pressure washer (for stubborn blockages)
- Duct tape (for sealing hose connections)
READ MORE: How to Increase Heat Setting on Tankless Rheem Water Heater
How to Clean Plumbing Vent Pipe Safely (Step-by-Step Guide)
Cleaning a plumbing vent may sound technical, but with patience and the right steps, it’s a manageable DIY project. Here’s a detailed guide:
Step 1: Locate the Plumbing Vent
The vent pipe usually extends above your roof and looks like a small vertical pipe often around 2 to 4 inches in diameter. If your home has multiple vents, focus on the one connected to the problem drain.
Step 2: Inspect the Vent Opening
Once located, use a flashlight to look inside the vent opening. Remove any visible debris like leaves, twigs, or bird nests using gloved hands or a grabber tool.
Step 3: Remove Deeper Obstructions
If the blockage is deeper, use a plumber’s snake or auger. Insert it carefully into the vent pipe and rotate to break up debris. Continue until resistance eases and the snake moves freely.
Step 4: Flush the Vent Pipe
After dislodging debris, insert a garden hose into the vent and run water at moderate pressure. If water backs up, stop and repeat the snaking process. Continue flushing until water flows freely down the pipe.
Step 5: Test the System
After cleaning, test your plumbing by running water in sinks and flushing toilets. If drains clear quickly and no gurgling occurs, your vent is clean.
How to Locate Your Roof Vent Safely
Finding your roof vent is relatively easy once you know what to look for but safety should always come first. The vent stack is typically a small, vertical pipe extending from your roof. It may be black, gray, or white PVC, or sometimes cast iron in older homes. Most are positioned near bathrooms or kitchens, directly above the main drain line.
Before climbing onto your roof, inspect from the ground to identify possible vent locations. Look for pipes that protrude a few inches above the roofline, often near the highest point.
When you’re ready to climb up:
- Use a sturdy ladder with non-slip feet.
- Secure the ladder on firm, level ground and, if possible, have someone hold it steady.
- Wear a safety harness and non-slip footwear.
- Avoid working on the roof in wet or windy conditions, as these increase the risk of falls.
- Carry tools in a tool belt or bucket attached to a rope rather than climbing while holding them.
If your roof is steep or slippery, it’s best to hire a professional plumber or roofer to handle the job. No amount of savings is worth risking a fall. Once on the roof, locate the vent opening and inspect it visually before proceeding with cleaning.
READ MORE: What to Do if Water Heater is Leaking from Bottom
Common Causes of Plumbing Vent Blockages
Understanding what clogs your plumbing vent in the first place can help you prevent future blockages. Here are the most common culprits:
- Debris Buildup:
Leaves, twigs, dirt, and other outdoor debris often fall into open vent pipes, especially during storms or windy conditions. Birds may also drop materials into vents while building nests. - Animal Nests:
Birds, squirrels, and even insects love the warmth and shelter of vent pipes. A small nest can completely block airflow. Installing a wire screen or cap can prevent this. - Ice and Snow:
In colder climates, vents can freeze shut. Ice caps form when warm moist air meets cold outdoor air, causing condensation and blockage. - Structural Damage:
Over time, pipes can shift or crack, especially if they weren’t properly secured. Misaligned pipes trap debris or reduce airflow. - Corrosion or Aging:
In older homes with metal vent pipes, corrosion can narrow the pipe’s interior, trapping more debris and restricting air movement. - Roof Work or Construction Debris:
Sometimes, after roof repairs or renovations, nails, shingles, or insulation may accidentally fall into the vent.
Identifying the cause of your clog helps you choose the right cleaning technique and avoid repeating the issue later.
Not everyone is comfortable climbing onto a roof and that’s perfectly fine. You can still clean your plumbing vent from inside your home using a few smart techniques.
Cleaning Plumbing Vents Without Going on the Roof
1. Using a Drain Snake from Indoors
If you can access the vent connection near a drain, insert a plumbing snake through the clean-out plug or directly into the drain line. Gently feed it upward until you feel resistance, then rotate to break through the blockage. This works well for small obstructions close to the fixture.
2. Using Water Pressure from Below
Attach a high-pressure nozzle to your garden hose and feed it into the drain or clean-out. The upward water pressure can help push out debris that’s stuck in the vent. Be cautious not to use excessive pressure, as it can cause pipe leaks or disconnections.
3. Using a Wet/Dry Vacuum
A powerful shop vacuum can help suck out blockages. Seal the vent opening (either on the roof or via an accessible pipe) using a rag or duct tape, and connect the vacuum hose. Run the vacuum for a few minutes — it can pull out leaves, nests, or small debris effectively.
These methods are safer alternatives for those who can’t climb roofs or prefer to avoid the risk. However, if the blockage is deep or solid, you might still need to access the vent from above or hire a professional.
Preventative Maintenance Tips
Cleaning your plumbing vent once isn’t enough consistent maintenance keeps your plumbing system efficient and odor-free. Here are some proven ways to prevent future blockages:
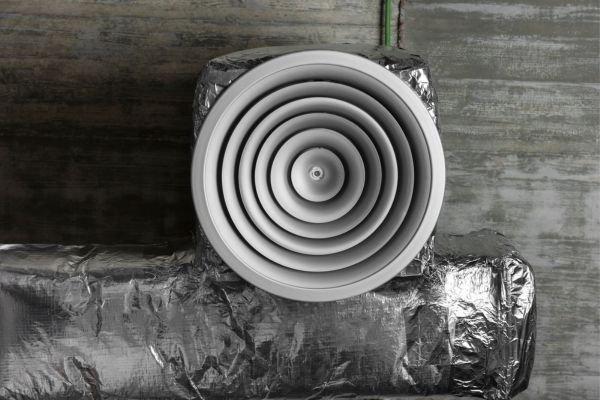
- Install Vent Covers or Screens:
Mesh or wire vent caps allow air to flow while keeping out debris, birds, and pests. Ensure they’re corrosion-resistant and fit snugly. - Inspect Vents Seasonally:
Make it a habit to check your vents at least twice a year — once before winter and once after fall. Remove any visible obstructions or buildup. - Trim Nearby Trees:
Overhanging branches often drop leaves and twigs into vents. Keeping trees trimmed back helps prevent this. - Clear Roof Debris:
After heavy storms, clear off leaves, sticks, and other debris that could fall into your vent openings. - Check for Ice Build-Up in Winter:
In freezing regions, pour warm (not boiling) water down the vent or wrap the exposed pipe with heat tape to prevent freezing. - Run Water in All Fixtures Weekly:
Using all sinks and drains periodically helps maintain water flow and prevents dry traps, which can lead to odor and vent issues. - Schedule Annual Plumbing Inspections:
A professional plumber can inspect vent pipes and drain lines for damage, corrosion, or buildup catching issues early saves on future repair costs.
READ MORE: How Much to Tip a Plumber?
Professional Cleaning Services vs. DIY Cleaning
When it comes to cleaning plumbing vents, homeowners often face a common dilemma: should you do it yourself or hire a professional? Both approaches have their advantages and drawbacks, depending on your comfort level, tools, and the complexity of the blockage.
1. DIY Cleaning:
If you’re handy, confident with basic tools, and the blockage seems minor (like leaves or a small nest), DIY cleaning can save you money. You can use a garden hose, plumbing snake, or wet/dry vacuum to clear the vent. It’s an excellent option for routine maintenance or light clogs.
Pros:
- Cost-effective
- Immediate action without waiting for a plumber
- A great learning experience for homeowners
Cons:
- Risk of injury if done unsafely (especially on roofs)
- Limited access to deep or complex blockages
- Possible damage to pipes if incorrect tools are used
2. Professional Cleaning:
Professional plumbers come equipped with high-powered augers, inspection cameras, and hydro-jetting machines to clear vents and drains efficiently. They can also detect structural damage or vent misalignment that might not be visible to you.
Pros:
- Safe and thorough cleaning
- Identifies hidden plumbing issues
- Saves time and effort
Cons:
- More expensive than DIY
- Requires scheduling and waiting
Cost Comparison:
On average, DIY cleaning costs less than $50 (mostly for tools and supplies you may already own), while professional vent cleaning ranges from $150 to $400, depending on accessibility and severity of the blockage.
Ultimately, if the blockage is severe, recurring, or located deep within the plumbing system, hiring a professional is the smarter and safer choice. For minor maintenance, DIY cleaning works perfectly well.
Common Mistakes to Avoid When Cleaning Plumbing Vents
Cleaning plumbing vents might seem easy, but several mistakes can make things worse leading to damage, recurring clogs, or even safety hazards. Avoid these common pitfalls:
1. Using the Wrong Tools:
Not every plumbing tool is suitable for vent cleaning. Using sharp or rigid objects can puncture the vent pipe, while oversized augers may get stuck. Always choose flexible plumbing snakes or hoses designed for vent cleaning.
2. Applying Too Much Pressure:
Forcing a hose or auger down the vent can cause damage or push debris deeper instead of removing it. Work slowly, using gentle pressure until the blockage loosens naturally.
3. Ignoring Safety Precautions:
Climbing a roof without safety gear or in bad weather can lead to accidents. Always prioritize safety over speed.
4. Forgetting to Test the System After Cleaning:
Once you’ve cleared the vent, it’s essential to test it. Run water through several drains and flush toilets to ensure airflow is restored and no gurgling sounds remain.
5. Overlooking Hidden Damage:
If your vent repeatedly clogs, it could indicate a larger issue — like a collapsed pipe or incorrect vent design. Failing to address this may cause future drainage problems.
6. Not Cleaning Regularly:
Many homeowners wait until a major issue arises before cleaning vents. Preventative maintenance saves time, effort, and money in the long run.
Avoiding these mistakes ensures a safer, more effective cleaning process and keeps your plumbing system running smoothly year-round.
READ MORE: Does a Plumber Replace a Water Heater?
Troubleshooting Persistent Vent Problems
Sometimes, even after cleaning, plumbing issues persist. In these cases, the problem may not be a simple blockage. Here’s how to troubleshoot deeper issues:
- Check for Pipe Damage:
Use an inspection camera or hire a plumber to examine the vent line. Cracks, collapsed sections, or corrosion can block airflow and cause recurring problems. - Look for Improper Vent Connections:
In some older homes or DIY plumbing setups, vents may be installed incorrectly or tied into other systems. Improper slope or alignment can prevent proper airflow. - Examine the Main Stack:
If multiple fixtures are affected, the main vent stack may be blocked or damaged. This vertical pipe connects all secondary vents and plays a crucial role in the system. - Inspect Roof Flashing:
Leaky or corroded roof flashing around the vent can allow debris or water intrusion, leading to clogs or even roof damage. - Monitor Airflow:
After cleaning, place your hand near the vent opening while running water in a sink. You should feel air movement. Weak airflow could signal an internal blockage or collapsed pipe.
If you’ve gone through all these steps and the issue persists, it’s time to call a professional plumber. Persistent vent problems often point to deeper structural or design issues that require expert tools and experience to resolve.
Conclusion
Keeping your plumbing vent clean isn’t just about avoiding clogs it’s about maintaining a healthy, efficient plumbing system. When your vents are clear, your drains flow smoothly, odors stay out of your home, and your entire plumbing network works as it should.
By learning how to locate, inspect, and clean your vent safely, you can handle minor issues yourself and save on costly repairs. Regular maintenance including installing vent screens, trimming trees, and inspecting your system twice a year will keep problems at bay.
How often should I clean my plumbing vent?
It’s best to clean or inspect your plumbing vent at least once a year. However, if you live in an area with lots of trees or wildlife, consider checking it twice a year once in spring and again in fall.
Can a clogged plumbing vent cause slow drains?
Yes. A clogged vent prevents air from entering the plumbing system, creating a vacuum that slows down water flow. Cleaning the vent usually restores normal drainage.
Is it safe to pour water down the plumbing vent?
Yes, but do so carefully. Use moderate pressure to flush out debris. If water backs up quickly, stop and remove the blockage before continuing to avoid overflow.
What if my vent pipe is frozen?
Pour warm (not boiling) water down the vent to thaw the ice. You can also wrap the vent with heat tape to prevent it from freezing again.
Can I use chemicals to clean a plumbing vent?
No. Chemical drain cleaners can damage pipes and don’t effectively clear vent blockages. It’s better to use mechanical tools like snakes or water pressure instead.

