Whether you’re hanging wallpaper, framing walls, or setting fence posts, one thing remains constant: accuracy matters. A plumb bob is one of the simplest yet most precise tools ever invented for ensuring vertical alignment. Despite modern technology offering laser levels and digital measuring devices, the humble plumb bob still holds its place in the toolbox of builders, carpenters, and surveyors.
Essentially, a plumb bob is a pointed weight attached to a string. When suspended, gravity pulls it straight down, showing the true vertical line or “plumb.” Understanding how to use a plumb bob properly ensures your work is straight, aligned, and professional-looking every time. In this guide, we’ll explore everything you need to know from how it works to step-by-step instructions for indoor and outdoor projects. Lets deep dive into “How to Use a Plumb Bob: Step by Step”
READ MORE: Best Tankless Water Heater 2026 — Top Picks, Costs & Buyer’s Guide
Understanding the Plumb Bob
The plumb bob, also called a plummet, has been used for thousands of years dating back to ancient Egypt and Rome. Builders used it to align massive stone structures like pyramids and temples with remarkable precision.
Design and Components:
A plumb bob typically consists of:
- A weight made of brass, steel, or lead
- A pointed tip for precise alignment
- A string or cord attached to its top
The weight can vary depending on the job lighter bobs for indoor tasks, heavier ones for outdoor or windy conditions.
Types of Plumb Bobs:
- Traditional Brass Plumb Bobs: Classic design, highly durable, and corrosion-resistant.
- Retractable Plumb Bobs: Come with a retractable line for convenience and storage.
- Laser-Assisted Plumb Bobs: Combine gravity accuracy with laser projection for modern efficiency.

- QUICK STABILIZATION – Quick-stabilizing 14-Ounce bob steadies within 6 seconds
- MULTI-SURFACE CONNECTION – Includes setting pin for wood/drywall, strong magnet for steel surfaces, and hook for nails o…
- SELF-RETRACTING LINE – Universal plumb bob setter with 14.5 ft self-retracting line for quick easy storage
READ MORE: Best Under Sink Hot Water Heater 2026 — Mini-Tank & Tankless Buyer’s Guide & Prices
How a Plumb Bob Works
At its core, the plumb bob relies on gravity to find true vertical alignment. When you suspend the bob from a fixed point, it hangs perfectly straight because gravity pulls it downward. The line it forms represents a plumb line, which is a reference for vertical precision.
Here’s the simple science:
- The string acts as a guide.
- The weight keeps the string taut.
- Gravity ensures the line points directly toward the Earth’s center.
When the bob stops swinging and stabilizes, the line it forms is your perfect vertical.
Plumb Bob vs. Laser Level:
While laser levels offer speed and convenience, they require batteries and calibration. A plumb bob, on the other hand, never fails it’s simple, mechanical, and perfectly accurate as long as gravity exists. For many professionals, that reliability is irreplaceable.

- AWESOME PLUMB BOB KIT! Are you looking for a high quality kit for establishing a perfect vertical line or plumb bob? We …
- QUALITY PLUMB BOBS! Our Plumb Bob Kit comes with two precision made, all brass plumb bobs. Each plumb bob comes with 2 r…
- EASY TO USE! To attach the cord to the plumb bob, just remove the screw in cap; thread the cord through the center openi…
READ MORE: How to Plumb a Washing Machine Drain
When and Why to Use a Plumb Bob
You might wonder why, in an age of lasers and digital gadgets, anyone still uses a plumb bob. The answer lies in simplicity and precision.
Here are common uses:
- Construction:
Builders use plumb bobs to ensure walls, columns, and door frames are vertically straight. Even a small deviation can cause structural misalignment. - Carpentry and Framing:
When building wall frames, decks, or stairs, a plumb bob helps ensure all vertical members align perfectly from top to bottom. - Wallpapering and Tiling:
A plumb bob gives a perfectly straight reference line, ensuring patterns and tiles align evenly. - Surveying and Land Work:
Surveyors use plumb bobs to transfer points from one level to another, ensuring precision across elevations. - Plumbing and Electrical Work:
Aligning pipes, conduits, or fixtures vertically requires a reliable vertical reference the plumb bob delivers that effortlessly.

- 3 DOT LASER LEVEL: Firecore F301G laser level project 3 bright self-leveling green dots simultaneously for versatile use…
- SELF-LEVELING MODE: Slide the side switch to the unlocked position to start the self-leveling mode, the laser level will…
- EFFICIENT LATOUT: This 3-point laser transfers point from floor to ceiling for fast, accurate layouts; accuracy is +/- 1…
READ MORE: Best Whole House Water Softener System for Home (2026) — Top Picks & Buyer’s Guide
Tools and Materials You’ll Need
Before you begin using a plumb bob, gather a few essentials to make your work easier and more efficient.
Required Tools:
- A plumb bob (choose based on weight: 4 oz to 16 oz for most tasks)
- A durable, non-stretch string or cord
- Measuring tape or ruler
- Pencil or chalk for marking
- Ladder or stable surface (for overhead work)
Optional Tools:
- Plumb bob reel or holder
- Magnetic attachment for metal surfaces
- Wind shield (for outdoor use)
Choosing the Right Plumb Bob:
- Lightweight (4–6 oz): Best for indoor projects like wallpapering.
- Medium (8–12 oz): Ideal for framing or general construction.
- Heavy (14–16 oz): Perfect for outdoor or windy conditions where stability matters.

- POWERFUL USE:High quality quick stabilization 10.7-oz bob for establishing a perfect vertical line or plumb bob,steadies…
- VALUE AND PRACTICALITY:Plumb bobs retractable – Through resistance adjustment, it can adapt to different specifications …
- FLEXIBILITY:Plumb bob with string includes positioning pins for wood/drywall, strong magnets for steel surfaces, and hoo…
READ MORE: How to Clean Plumbing Vent
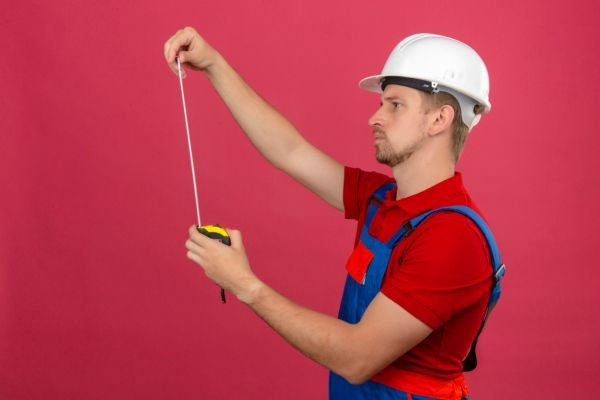
Step-by-Step Guide: How to Use a Plumb Bob
Now, let’s dive into the practical part using your plumb bob correctly for precise results.
Step 1: Prepare the Area
Start by identifying the point from which you’ll hang the plumb bob. This could be a beam, ceiling, or any stable overhead structure. Ensure the surface is firm and won’t shift during use.
Step 2: Attach the String
Tie one end of the string securely to the plumb bob. Make sure the knot is tight and centered at the bob’s top so it hangs straight.
Step 3: Mark the Reference Point
If you’re aligning a wall or column, mark the upper reference point where the string will be attached. This point determines where your vertical line starts.
Step 4: Drop and Stabilize the Bob
Let the plumb bob hang freely, allowing gravity to pull it straight down. Wait until it stops swinging this may take a few seconds. The string now represents a perfect vertical line.
Step 5: Make Your Alignment Mark
Once the bob stabilizes, mark the spot directly beneath its tip. This mark aligns perfectly with your top reference point. Use this line to guide construction, layout, or installation work.
Pro Tip:
If the bob keeps swinging, lightly touch it once to dampen the motion, or place it inside a paper tube to block air movement.

- Sufficient Quantity: our gages plumb bob set comes with two 8-ounce hexagonal hammers, giving you additional choices whe…
- Materials: the hexagonal body of the vertical head is made of cold drawn steel with a plating, offering durability and m…
- Convenient to Use: our products come with a removable cord cap, which makes it easy to replace the cord; We also provide…
How to Use a Plumb Bob Indoors
Using a plumb bob indoors is one of the most common and practical applications for homeowners, DIY enthusiasts, and professionals alike. Whether you’re aligning walls, installing cabinets, or hanging artwork, a plumb bob provides the vertical reference you need to keep everything straight and precise.
1. Aligning Walls and Door Frames:
If you’re building or checking a wall for straightness, the plumb bob can verify that it’s perfectly vertical. Attach the string to the top of the wall frame or beam, and let the bob hang close to the surface. When the plumb line stops moving, measure the distance between the string and the wall at both the top and bottom. If both distances are the same, your wall is plumb. If not, adjust accordingly before securing it permanently.
2. Checking Corners and Studs:
When framing corners or installing studs, you can use a plumb bob to make sure they line up vertically from the floor to the ceiling. This is particularly important in older homes where floors and ceilings may have shifted slightly over time.
3. Hanging Wallpaper or Wall Tiles:
A plumb bob is invaluable when applying wallpaper or tiles. To start, hang the bob from the ceiling where you want your first strip of wallpaper or tile row to begin. Once it stops moving, mark the vertical line along the string using a pencil. This ensures each strip or tile follows a perfectly straight line, preventing crooked patterns that could ruin the look of the room.
4. Centering Fixtures:
If you’re installing chandeliers, ceiling fans, or pendant lights, the plumb bob helps ensure they hang exactly over the desired point on the floor or table. Simply suspend the plumb bob from the ceiling junction box, wait for it to stabilize, and mark the floor spot directly beneath it.
Indoors, precision matters because even a few millimeters off can be noticeable, especially in finishes like tile or wallpaper. The plumb bob ensures professional-level accuracy without relying on digital gadgets or batteries.
READ MORE: How Much Does a Plumber Make in California
How to Use a Plumb Bob Outdoors
Outdoors, conditions can be a bit trickier wind, uneven ground, and longer distances can all affect accuracy. However, with the right technique, a plumb bob can still deliver reliable vertical alignment for construction, landscaping, or fencing projects.
1. Setting Fence Posts:
When installing fence posts, a plumb bob helps ensure each post stands straight. Attach the bob to the top of the post and let it hang near the ground. Adjust the post until the bob’s point aligns with the center mark at the bottom. Once it’s perfectly plumb, secure it in place with concrete or braces.
2. Aligning Structural Columns or Beams:
For larger construction projects, such as decks, pergolas, or sheds, use a heavier plumb bob (12–16 oz) for better stability. Suspend it from a beam or string line to ensure each column or support post is vertically aligned.
3. Establishing Layout Points:
Surveyors and builders often use a plumb bob to transfer layout points from one level to another for instance, from a blueprint on the ground up to a beam above. Hang the bob from the reference mark and mark the ground point directly below the tip. This method maintains perfect alignment between structural elements.
4. Dealing with Wind:
Outdoor conditions can make your plumb bob sway. To counteract this, use a heavier bob or shield it with a cardboard tube or PVC pipe. You can also lightly coat the string with wax or water to dampen movement.
5. Verifying Vertical Lines in Masonry:
When laying bricks or blocks, suspend the plumb bob next to the structure to ensure each layer remains straight. Adjust the bricks as needed before the mortar sets.
Calibrating and Adjusting Your Plumb Bob
Like any precision tool, your plumb bob needs to be checked and calibrated regularly to ensure accuracy.
1. Check the String Alignment:
Make sure the string is attached at the exact center of the bob’s top. If it’s off-center, the bob won’t hang straight, which can throw off your vertical line.
2. Test for True Vertical:
To test your plumb bob, hang it next to a known vertical surface (like a wall or beam). Once it stabilizes, measure the distance from the wall at both the top and bottom of the string. If the distances match, your plumb bob is true.
3. Adjust for Wind and Movement:
When working outdoors, secure the top of the string firmly and use a weight that suits the conditions. Heavier plumb bobs are better for windy areas since they stabilize faster.
4. Inspect for Damage:
Check the tip of the plumb bob for dents or corrosion. A damaged tip can cause inaccuracies when marking points. Replace or polish the tip as needed.
5. Replace Old or Frayed Strings:
Strings can stretch, fray, or absorb moisture over time. Replace them periodically to maintain consistent performance.
Tips for Getting the Most Accurate Results
Even though the plumb bob is a simple tool, a few small techniques can make a big difference in precision.
- Work in Calm Conditions:
If possible, avoid using a plumb bob when it’s windy. Even light breezes can cause the string to swing and distort your readings. - Use a Stabilizer:
You can create a makeshift stabilizer by placing the bob inside a narrow tube or plastic bottle with both ends cut off. This reduces air movement and speeds up stabilization. - Allow Time to Settle:
Always wait until the bob stops swinging completely before marking your line. Patience ensures accuracy. - Verify with Multiple Measurements:
For critical work, take readings from two or more positions to confirm accuracy. Consistent results mean you’re truly vertical. - Use a Longer String for Better Precision:
A longer plumb line magnifies small deviations, making it easier to detect errors in alignment. - Keep the String Tight and Clean:
A loose or dirty string can affect how the bob hangs. Replace the string if it becomes stretched or uneven.
READ MORE: How Much Does a Journeyman Plumber Make?
Common Mistakes to Avoid
Even experienced builders can make mistakes when using a plumb bob. Here are the most frequent errors and how to avoid them:
- Not Waiting for Stabilization:
Rushing to mark before the bob stops swinging leads to inaccurate results. Always wait until it’s perfectly still. - Using the Wrong Weight:
A lightweight bob outdoors can sway too much, while a heavy one indoors can damage surfaces. Match the weight to your working conditions. - Attaching the String Off-Center:
If the string isn’t centered, the bob won’t hang true causing a false plumb line. - Ignoring Calibration:
Failing to check your bob’s accuracy before use can cause cumulative errors in large projects. - Working on Unstable Surfaces:
If the point you’re hanging from shifts or moves (like a ladder or ceiling tile), your measurements will be off. Always hang from a stable structure. - Not Marking Properly:
Using a dull pencil or marker can lead to misaligned marks. Use a fine-tipped pencil or chalk for clear, precise markings.
Maintaining and Storing Your Plumb Bob
Proper care extends the life and accuracy of your plumb bob.
- Clean After Each Use: Wipe the bob with a dry cloth to remove dust, dirt, or moisture.
- Polish the Tip: Keep the metal tip sharp and free from corrosion for precise marking.
- Store in a Protective Case: Avoid tangling the string or damaging the point by storing it in a box or pouch.
- Check the String Regularly: Replace it if it becomes frayed, knotted, or stretched.
- Keep Away from Moisture: If your bob is made of steel or iron, moisture can cause rust. Store it in a dry place.
Comparing Plumb Bobs with Modern Leveling Tools
It’s natural to wonder whether the traditional plumb bob still has a place alongside modern tools like laser levels and digital inclinometers. The short answer is yes and here’s why.
Advantages of Plumb Bobs:
- No batteries or electronics required
- Inexpensive and virtually indestructible
- Extremely accurate for vertical measurements
- Reliable even in harsh conditions
Advantages of Laser Levels:
- Faster setup and measurement
- Can project both vertical and horizontal lines
- Great for large-scale or repetitive tasks
However, the plumb bob remains unbeatable for pure vertical precision. In environments where technology may fail dusty sites, outdoor areas, or remote locations the plumb bob always performs.
Many professionals use both tools: the plumb bob for establishing a true reference point, and the laser level for expanding that line across the project.
READ MORE: Do You Need a Plumber to Replace an Outdoor Spigot?
Safety Precautions When Using a Plumb Bob
Even simple tools can pose risks if mishandled. Keep these safety tips in mind:
- Always handle the sharp tip carefully it can puncture skin or surfaces.
- Don’t stand directly under a suspended plumb bob. If it falls, it can cause injury.
- When working at heights, secure the plumb bob tightly to prevent accidental drops.
- Use gloves when working with metal cords or heavy weights.
- Keep the tool out of reach of children.
Troubleshooting Plumb Bob Problems
If your plumb bob isn’t hanging correctly or seems inaccurate, try these fixes:
- Swinging Too Much: Use a heavier bob or shield it from airflow.
- Not Hanging Straight: Check that the string is centered and untwisted.
- Tip Misalignment: Replace or sharpen the tip if it’s worn or bent.
- Inconsistent Readings: Ensure your hanging point is stable and your surface is level.
FAQS
What is a plumb bob used for?
A plumb bob is used to check true vertical alignment, or “plumb,” by using gravity to create a straight line downward. It is commonly used in carpentry, framing, and layout work.
How do you use a plumb bob to check if a wall is straight?
Attach the string at the top point, let the weight hang freely, and wait until it stops moving. Then compare the bottom point to your mark to see whether the wall is vertical.
How do you transfer a mark from the ceiling to the floor with a plumb bob?
Place the bob at the starting point above, let it hang straight down, and use the point below as your floor mark. This is a common method for layout work when you need the ceiling and floor marks lined up.
How far should a plumb bob hang from the surface?
The line should hang freely without touching the surface, so the weight can settle straight under gravity. Some DIY guidance places it about 1/2 inch above the floor when checking alignment.
What can you use a plumb bob for in home projects?
Common uses include framing walls, installing doors, hanging fixtures, and checking cabinet or wall alignment. It is especially helpful anywhere you need a reliable vertical reference line.
Conclusion
The plumb bob might be one of the oldest tools in human history, but it remains one of the most reliable. Its simplicity, precision, and durability make it indispensable for builders, carpenters, and DIY enthusiasts alike.
Whether you’re hanging a picture frame or constructing an entire wall, understanding how to use a plumb bob correctly guarantees professional-level alignment every time. With a bit of patience and care, this ancient tool will keep your projects straight, balanced, and built to last.

