If you’ve ever watched a home being built or remodeled, you’ve probably heard contractors talk about the rough-in phase. But what exactly does that mean? When it comes to plumbing, the rough-in is one of the most important and often overlooked stages of construction. It’s the stage where your plumbing system’s “skeleton” is installed, laying the groundwork for everything that comes later.
In simple terms, rough-in plumbing is the process of installing all the pipes and connections that will eventually deliver clean water to your faucets and remove wastewater safely. It’s the hidden network behind your walls and under your floors the foundation upon which all the visible fixtures (like sinks, toilets, and showers) depend.
Getting this phase right is critical. A small mistake during rough-in can lead to costly leaks, pressure problems, or even complete system failure down the line. Whether you’re a homeowner planning a remodel or a DIY enthusiast trying to understand the basics, knowing what rough-in plumbing involves will help you appreciate the complexity and precision that goes into a well-built home. Lets deep dive into “What Is Rough-In Plumbing?”
“Slash Your Install Time. Get the All-in-One Hydraulic Crimping Kit.” See Product Below-

- High-Performance
- Hydraulic Copper Crimping Tool
- User-Friendly Design
Understanding the Foundation of Plumbing Work
Think of your plumbing system like the human body. The visible fixtures your faucets, sinks, and toilets are like the skin and features you see. But underneath lies an intricate network of “veins” and “arteries” that carry water in and out. That’s your rough-in plumbing system.
The rough-in stage happens after the framework of your house is built but before the walls and floors are sealed. It’s when plumbers install the necessary pipes for water supply, drainage, and venting. These pipes will later connect to fixtures once the finishing phase begins.
Why is it so important? Because every plumbing fixture depends on precise alignment and flow. If your rough-in isn’t done correctly, no amount of expensive fixtures can fix the underlying issues. Proper rough-in ensures:
- Water pressure is consistent throughout the home.
- Drains flow smoothly without clogs or backflow.
- Vents are positioned to prevent sewer gases from entering the house.
- Future maintenance and repairs are simpler and safer.
So, while rough-in plumbing might not be glamorous, it’s arguably the most crucial part of any plumbing system. It’s the invisible work that makes modern comfort possible.
“Slash Diagnostic Time by 50%. Shop Professional Teslong Gear.” See Product Below-

The Meaning of Rough-In Plumbing
Let’s define it clearly: Rough-in plumbing refers to the initial installation of water supply lines, drain pipes, and vent systems before walls, floors, and ceilings are finished.
During this stage, plumbers map out where every fixture sink, toilet, bathtub, dishwasher, etc. will go and then install the pipes that will eventually connect to them. No faucets, drains, or fixtures are attached yet; it’s all about laying the internal groundwork.
In new construction, rough-in plumbing typically follows the framing and electrical rough-ins. Once complete, inspectors review the work to ensure it meets building codes before any drywall or flooring is installed.
Key stages of rough-in plumbing include:
- Layout and Planning: Measuring and marking pipe locations based on the architectural design.
- Water Supply Installation: Running hot and cold water lines from the main source to designated fixtures.
- Drain-Waste-Vent (DWV) System: Installing pipes that carry wastewater away and vent sewer gases.
- Pressure Testing: Ensuring there are no leaks or weak spots.
- Inspection: Having the system approved before moving on to the finishing phase.
READ MORE: What Are Plumbing Fixtures?
The Difference Between Rough-In and Finish Plumbing
If you’re new to construction, it’s easy to confuse rough-in plumbing with the finishing stage. But the two are very different and equally essential.
Here’s a simple way to think about it:
- Rough-in plumbing is what you don’t see — the pipes behind walls, under floors, and inside ceilings.
- Finish plumbing is what you do see — the fixtures and connections that make your plumbing usable and attractive.
Let’s compare them side by side:
| Aspect | Rough-In Plumbing | Finish Plumbing |
| Timing | Installed before walls and floors are finished | Done after walls, floors, and tiles are complete |
| Main Focus | Laying water lines, drains, and vents | Installing fixtures (sinks, faucets, toilets, etc.) |
| Tools Used | Pipe cutters, soldering torches, drills | Wrenches, sealants, plumber’s tape |
| Visibility | Hidden inside walls or floors | Visible and accessible |
| Inspection | Mandatory before finishing work begins | Usually a final check before occupancy |
While rough-in work ensures everything functions correctly, finish plumbing adds the aesthetic touch the polished faucets, clean fixtures, and decorative elements that make a home feel complete.
If the rough-in isn’t done properly, the finish stage becomes a nightmare. For instance, misaligned pipes can cause a toilet not to fit, or improper slope in drain lines can lead to clogs. That’s why professional plumbers treat rough-in as the most critical stage of the job.
“End the Clog in Seconds. Get the High-Pressure Electric Plunger.” See Product below-

Components of Rough-In Plumbing
Now that you know what rough-in plumbing is, let’s dive into its key components. Every rough-in system consists of three major parts:
1. Water Supply Lines
These pipes bring fresh water into your home from the main supply. Typically, cold water lines run directly from the main inlet, while hot water lines come from your water heater. Modern homes often use PEX tubing or copper pipes, both known for durability and flexibility.
2. Drain-Waste-Vent (DWV) System
The DWV system handles the removal of wastewater and prevents sewer gases from backing up into your home. It’s made up of:
- Drain pipes — carry wastewater away from sinks, tubs, and toilets.
- Vent pipes — allow air to enter the system, preventing suction that could slow drainage.
- Waste pipes — connect to the main sewer or septic line.
3. Fixture Stub-Outs
Stub-outs are short sections of pipe that protrude from walls or floors at fixture locations. Later, they’ll connect to sinks, toilets, or showers. Their placement must be exact even being off by an inch can cause major installation issues.
Common materials used for rough-in plumbing include:
- PVC (Polyvinyl Chloride): Lightweight and ideal for drain lines.
- PEX (Cross-linked Polyethylene): Flexible and easy to install for water lines.
- Copper: Durable and resistant to corrosion, though more expensive.
READ MORE: Is Plumbing Hard?
Step-by-Step Rough-In Plumbing Process
Step 1: Planning and Layout
Before a single pipe is cut, plumbers review blueprints and determine where every fixture and pipe will go. Precise measurements are taken to ensure everything aligns perfectly with the finished structure.
Step 2: Drilling and Cutting
Once the layout is finalized, holes are drilled through studs, joists, and walls for pipe routing. This requires careful attention to avoid damaging the home’s framing or compromising structural integrity.
Step 3: Installing Water Supply Lines
Next, plumbers run hot and cold water lines from the main supply to each fixture location. PEX or copper pipes are commonly used, depending on the building code and budget.
Step 4: Installing Drain and Vent Systems
The drain-waste-vent system is then installed. This is where precision is vital every pipe must have the correct slope (usually ¼ inch per foot) to ensure proper drainage and prevent blockages.
Step 5: Pressure Testing
Once the pipes are installed, they’re filled with water or air to check for leaks. Any issues must be fixed before inspection.
Step 6: Inspection and Approval
A building inspector reviews the entire setup, ensuring it complies with local plumbing codes. Only after approval can drywall, flooring, and finishing work begin.
Proper rough-in plumbing might not be visible when the home is complete, but it’s what ensures your system runs quietly, efficiently, and without leaks for decades.

aRough-In Plumbing for Bathrooms
The rough-in process might look intimidating, but it follows a logical sequence. Here’s how professionals tackle it step by step:
Bathrooms are where the majority of plumbing in any home exists, so the rough-in process here requires extreme precision. A single mistake during bathroom rough-in can cause future leaks, drainage issues, or misaligned fixtures.
Bathroom rough-ins generally involve three primary fixtures the toilet, sink, and shower or bathtub. Each of these requires careful planning to ensure proper water flow and drainage.
Toilet Rough-In
For toilets, the standard rough-in distance between the finished wall and the center of the drain pipe is usually 12 inches. However, some models use 10 or 14 inches. The waste line is typically 3 to 4 inches in diameter, while the water supply line should be positioned about 8 inches above the floor and 6 inches to the left of the toilet centerline.
Sink (Lavatory) Rough-In
For a standard bathroom sink, the drainpipe is placed approximately 18–20 inches above the floor, with the water supply lines on either side, about 4 inches apart. These lines must be accurately placed to fit within the vanity cabinet and align with the faucet.
Shower and Bathtub Rough-In
The drain for showers or tubs typically centers at 12–15 inches from the wall, depending on the design. The water supply lines must be placed high enough for comfortable use generally 48 inches above the floor for showerheads and 30–36 inches for tub spouts.
Plumbers must also ensure proper venting for all fixtures. Without it, drains may gurgle or emit foul odors. During rough-in, all these systems are installed and pressure-tested before being hidden behind walls or tiles.
In bathrooms, precision is everything. Once the walls are finished, moving pipes is costly and difficult, so getting the rough-in right the first time saves time, money, and frustration later.

- Precision Cutting: The copper pipe cutter is equipped with sharp SKD cutter wheels and 6 high-density ball bearing rolle…
- Sturdy and Durable: Made from high-density, lightweight aluminum alloy, this metal/pvc pipe cutter is built to last. Its…
- Easy to Use: Simply rotate the knob to secure the tube, then rotate the cutter around the pipe, tightening it after each…
Rough-In Plumbing for Kitchens
Kitchen plumbing may not seem as complex as a bathroom’s, but it demands its own level of skill and coordination. The rough-in here focuses on sinks, dishwashers, and refrigerators the core of any functional kitchen.
Sink Rough-In
The kitchen sink is the heart of kitchen plumbing. The drain line is typically placed 18–20 inches above the floor, centered on the sink base cabinet. Water supply lines are installed about 2–3 inches to either side of the drainpipe.
Dishwasher Rough-In
The dishwasher’s rough-in involves connecting to both the hot water supply and the drain line. Plumbers usually install a branch from the sink’s drain system, allowing the dishwasher to discharge wastewater directly into it. The water supply connection is often made under the sink, and a shut-off valve is required for safety.
Refrigerator Rough-In
Modern refrigerators often include ice makers or water dispensers, requiring a cold water line nearby. Plumbers typically install a small ¼-inch copper or PEX line behind the fridge with a shut-off valve for easy maintenance.
Proper venting and air admittance valves are also vital in kitchens to prevent odor buildup or slow draining.
While kitchen rough-ins are less extensive than bathroom systems, they still require precision, especially since cabinetry and countertops are built to exact measurements. A poorly placed pipe could delay installation or lead to expensive modifications.

- 142-piece tool set for everyday household projects, repairs, and DIY tasks
- This tool set includes the most useful and necessary tools for home maintenance and daily use. Includes hammer, level, a…
- Corrosion-resistant, heat-treated plating for durability
Rough-In for Laundry Rooms and Utility Areas
Laundry rooms and utility spaces might not get as much attention as kitchens or bathrooms, but they play a crucial role in household plumbing. The rough-in process here ensures that appliances like washers and water heaters run safely and efficiently.
Washing Machine Rough-In
A standard washer rough-in includes both hot and cold water supply lines and a drainpipe. The water lines are usually set around 42 inches above the floor, while the standpipe drain is placed between 36 and 42 inches high, depending on the model. The drainpipe should have a 2-inch diameter to handle the high discharge volume from washing machines.
Utility Sink Rough-In
Many laundry rooms also feature a utility or mop sink. The drain for these sinks sits about 18–20 inches above the floor, similar to bathroom sinks, with supply lines placed symmetrically on either side.
Water Heater Rough-In
If your water heater is located in the laundry or utility area, the rough-in includes both inlet and outlet water lines, as well as drainage for overflow. Gas water heaters require additional rough-ins for gas lines and venting to ensure safety.
Proper backflow prevention devices must be installed to stop dirty water from re-entering the clean supply. This is a critical safety step often inspected during rough-in reviews.
Rough-in plumbing for laundry and utility spaces may seem straightforward, but poor alignment or incorrect pipe sizing can lead to flooding, vibration, or slow drainage. That’s why even in these less glamorous areas, precision is everything.

- All-in-One Angle Stop Valve Kit: Quickly replace compression angle stops and remove compression rings with step-by-step …
- 2-in-1 Plumbers Wrench: Enhanced grip and torque with a dual-action mechanism. Adjustable wrench fit 15/16″ & 5/8″ nuts,…
- Wall & Pipe-Safe Ferrule Removal: The compression sleeve puller removes leaky ferrules without damaging walls, copper pi…
Rough-In Plumbing Code Requirements
Building codes exist for one main reason: safety. Plumbing codes ensure that every installation provides clean water, proper drainage, and protection against contamination or structural damage. During the rough-in phase, compliance with these codes is non-negotiable.
Key Rough-In Code Requirements Include:
- Pipe Sizing: Water and drain lines must meet minimum diameters based on fixture type.
- Vent Placement: Every fixture needs a properly vented line to prevent negative pressure.
- Slope of Drain Lines: A standard ¼-inch slope per foot is required to allow gravity to carry waste away.
- Cleanouts: Accessible cleanout points must be installed for maintenance.
- Backflow Prevention: Devices like air gaps and check valves must be used to keep dirty water from contaminating clean lines.
Failing to follow these codes can result in inspection failure, leaks, or even health hazards.
Common Code Mistakes During Rough-In:
- Using the wrong pipe size for toilets or sinks.
- Forgetting to install vents for certain fixtures.
- Allowing improper pipe slopes that cause slow drainage.
- Not anchoring pipes properly, leading to noisy or shifting systems.
Every municipality has its own specific plumbing code, usually based on the International Plumbing Code (IPC) or Uniform Plumbing Code (UPC). Before starting a rough-in, always consult local regulations or work with a licensed plumber who understands them thoroughly.
READ MORE: Do You Need a Plumber to Replace an Outdoor Spigot?
Tools and Materials Needed for Rough-In Plumbing
Whether you’re a professional plumber or a skilled DIYer, having the right tools can make or break your rough-in project. Rough-in plumbing involves both heavy-duty installation and precise measurement, so accuracy and reliability are key.
Essential Tools Include:
- Pipe Cutters: For cutting copper, PVC, or PEX pipes cleanly.
- Soldering Torch: For sealing copper joints.
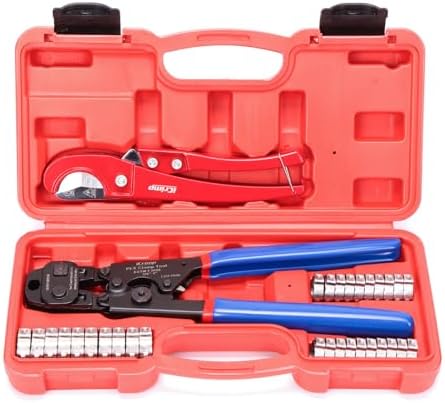
- PEX Crimping Tools: For securing flexible PEX fittings.
- Hole Saw and Drill: For cutting openings in studs and joists.
- Pipe Wrenches: For tightening large fittings.
- Level and Tape Measure: To ensure proper slope and alignment.
- Pressure Testing Gauge: For checking leaks before inspection.
Common Materials Used:
- Pipes: PVC for drains, PEX or copper for water supply.
- Fittings: Elbows, tees, couplings, and adapters.
- Valves: Shut-off valves for controlling water flow.
- Pipe Hangers and Clamps: To secure lines to walls and framing.
- Sealants and Teflon Tape: For watertight joints.
Using high-quality materials ensures longevity and reduces maintenance. While cheaper alternatives might save a few dollars upfront, they often fail early, leading to costly repairs.
Common Mistakes During Rough-In Plumbing
Even experienced plumbers can make mistakes during the rough-in stage and when they do, the consequences can be expensive. Since the rough-in plumbing is hidden behind walls and floors, errors are hard to spot later. That’s why attention to detail at this phase is absolutely crucial.
Here are the most common rough-in plumbing mistakes and how to avoid them:
1. Incorrect Pipe Slope
Drain pipes need gravity to carry waste away efficiently. If the slope is too flat, water and waste stagnate; too steep, and the water outruns the solids, leaving residue behind. The correct slope is about ¼ inch per foot for horizontal drain lines.
2. Poor Venting
Every drain system needs proper venting to let air in and prevent negative pressure. Without vents, drains can gurgle, smell bad, or drain slowly. A missing or improperly placed vent is one of the top reasons plumbing systems fail inspection.
3. Misaligned Stub-Outs
Stub-outs are the short pieces of pipe that stick out of walls or floors to connect to fixtures. If these are off by even an inch, sinks, toilets, or showers might not fit correctly. Always double-check fixture measurements before sealing walls.
4. Forgetting Cleanouts
Cleanouts are access points used to clear blockages in your drain system. Failing to install them in accessible locations can make future maintenance a nightmare.
5. Mixing Incompatible Materials
Not all materials work well together. For example, connecting copper directly to galvanized steel without a dielectric union can lead to corrosion and leaks.
6. Skipping Pressure Tests
Never assume your work is leak-free, always test it. A simple air or water pressure test can reveal issues before inspection, saving you costly rework later.
7. Ignoring Local Codes
Each area has specific plumbing regulations. Ignoring them might save time now but will likely cause inspection failure, delays, and extra expenses.
8. Not Securing Pipes Properly
Loose pipes can shift, causing noisy “water hammer” sounds or even joint separation over time. Always use proper clamps and supports according to code.

- Bates ratchet-type pipe cutter is made of manganese steel with high hardness, good toughness, strength, and durability. …
- The rubber-textured handle is comfortable to use, reliable to hold, and not easy to hurt. A stainless steel buckle is at…
- Bates ratchet-type pipe cutter is perfect for easily cutting through pipes. The triangle design at the edge of the knife…
READ MORE: Is AO Smith a Good Water Heater?
How to Pass a Plumbing Rough-In Inspection
Once the rough-in phase is complete, your work must pass inspection before the walls can be closed. Inspectors check not only for leaks but also for compliance with plumbing codes and safety standards. Passing on the first try saves time, money, and headaches.
Here’s What Inspectors Typically Look For:
- Correct pipe diameters for each fixture.
- Proper slope on horizontal drains.
- Vent placement and configuration.
- Secure pipe fastenings and supports.
- Accessibility of cleanouts.
- Leak-free systems (verified through pressure testing).
- Correct placement of fixture stub-outs and valves.
Tips to Pass Your Inspection Smoothly:
- Check Everything Twice: Go over each joint, fitting, and vent before scheduling your inspection.
- Keep Drawings Handy: Have your plans or blueprints ready for the inspector to review.
- Perform Your Own Pressure Test: Fill the system with water or air and check for leaks before the official test.
- Label Pipes Clearly: It helps the inspector identify supply, drain, and vent lines quickly.
- Stay Present During the Inspection: If something isn’t clear, you can explain your reasoning and potentially avoid a fail.
If an issue arises, inspectors usually explain what needs fixing. Address the problems promptly, retest, and schedule a reinspection. The goal isn’t just to “pass” it’s to ensure your plumbing system is built to last and safe for everyone using it.
Cost of Rough-In Plumbing
The cost of rough-in plumbing varies depending on the type of project, the size of the property, materials used, and local labor rates. But understanding the cost breakdown helps you plan your budget and avoid surprises.
Average Rough-In Plumbing Costs:
- New Home Construction: $4,000 – $12,000 (depending on house size and fixture count)
- Bathroom Rough-In: $1,500 – $4,000
- Kitchen Rough-In: $1,000 – $3,000
- Laundry or Utility Room Rough-In: $800 – $2,000
Key Cost Factors Include:
- Pipe Materials: Copper is more expensive than PEX or PVC but lasts longer.
- Labor Costs: Professional plumbers charge $50–$150 per hour, depending on location.
- Accessibility: Working in tight or complex spaces raises the cost.
- Number of Fixtures: More sinks, showers, and toilets mean more piping and fittings.
- Permits and Inspections: Required permits typically cost between $100 and $500.
Ways to Save Money:
- Use PEX instead of copper for water lines (it’s cheaper and easier to install).
- Group fixtures close together to minimize pipe length.
- Plan your layout carefully before starting to avoid costly adjustments.
- Hire a licensed plumber who does the job right the first time — rework costs more than doing it right initially.
READ MORE: What to Do if Water Heater is Leaking from Bottom
DIY vs. Professional Rough-In Plumbing
If you’re handy, you might wonder if you can tackle rough-in plumbing yourself. While it’s possible for small projects, there are major differences between DIY and professional rough-in work.
DIY Rough-In Plumbing
DIY rough-ins can save labor costs, but they come with risks. Without deep knowledge of plumbing codes, slopes, and venting systems, even small errors can cause long-term issues. Many localities also require a licensed plumber to perform or at least approve the work before inspection.
DIY rough-ins might be suitable for:
- Small renovations (like adding a laundry sink).
- Outdoor plumbing projects.
- Non-pressurized drain installations under supervision.
However, even for experienced DIYers, rough-in plumbing can be overwhelming due to the level of precision required.
Professional Rough-In Plumbing
Hiring a licensed plumber ensures your system meets all building codes, safety standards, and inspection requirements. Professionals bring not only experience but also the right tools and techniques to complete the job efficiently.
Benefits of hiring a professional include:
- Guaranteed compliance with local codes.
- Fewer mistakes and faster completion.
- Long-term reliability and warranty protection.
- Reduced risk of leaks, backflow, or drainage issues.
In most cases, the professional route pays off in peace of mind and quality assurance. You’ll know your plumbing is solid and if issues ever arise, you’ll have someone accountable to fix them.
Conclusion
Rough-in plumbing might be invisible once the walls go up, but it’s the foundation of every functioning home. It’s where clean water begins its journey and waste exits efficiently all thanks to carefully planned and perfectly installed pipes.
Yes, it’s a demanding process that requires skill, patience, and precision. But when done correctly, rough-in plumbing ensures decades of comfort, safety, and efficiency.
Whether you’re a homeowner planning a remodel or simply curious about how your plumbing works, understanding the rough-in stage helps you appreciate just how essential it is. It’s not just a step in construction it’s the blueprint of your home’s lifeline.
FAQs
How long does rough-in plumbing take?
It typically takes 3–7 days for a standard home, depending on size, complexity, and the number of fixtures. Larger or multi-story homes may take up to two weeks.
What comes after rough-in plumbing?
After the rough-in passes inspection, the finish plumbing phase begins installing sinks, toilets, showers, faucets, and other visible fixtures.
Can you move plumbing after rough-in?
Yes, but it’s expensive. Moving pipes after walls are sealed requires demolition, reinstallation, and new inspections. That’s why proper planning upfront is essential.
Who does rough-in plumbing?
Licensed plumbers handle rough-in plumbing for new construction or remodeling projects. In some areas, apprentices can assist under supervision.
How do you know if your rough-in is correct?
Your rough-in is correct if it passes inspection, maintains proper slope and venting, and all fixtures align perfectly according to plan.

