Plumbing projects, whether in residential or commercial settings, are never a one-step task. They are carefully divided into multiple phases that ensure the proper design, installation, and functionality of the entire plumbing system. Understanding these phases is not just important for plumbers but also for homeowners, contractors, and project managers. It helps in maintaining realistic expectations, proper coordination, and avoiding costly errors.
Plumbing is often described as the “artery system” of a building it carries water in and waste out. For this intricate network to work efficiently, every phase must be executed with precision. From planning to the final inspection, each step ensures the plumbing system meets safety codes, efficiency standards, and durability requirements. Lets deep dive into “How Many Phases Are Plumbing Projects Completed In?”
Now, you might wonder how many phases are there in a plumbing project? Generally, plumbing projects are completed in five main phases:
- Planning and Design
- Rough-In Installation
- Top-Out (Above-Ground Work)
- Final Fix or Trim-Out Stage
- Inspection, Testing, and Handover
Each of these phases plays a crucial role in ensuring that the final plumbing system performs seamlessly. Let’s explore them in detail.
READ MORE: Weil‑McLain Boiler Reviews (2026) — Models, Costs, Pros & Cons

- [Toolbox Included] – Includes 1-Drawer storage box with independent sliding drawer to enlarge the capacity more than com…
- [High Quality Material] – Made of high-quality steel and finished in heat treated chrome, durable and corrosion resistan…
- [Muti-purpose Tools Kit] – 325Pcs tools set for most small repairs and DIY projects around the house. It is perfect for …
Plumbing Phase in Details:
1. Planning and Design
Every successful plumbing project begins long before a single pipe is installed it starts with planning and design. This is the stage where ideas are turned into actionable blueprints. During this phase, the plumber, architect, and homeowner (or project manager) collaborate to design a system that aligns with the building’s layout, usage, and water demand.
Initial Consultation and Site Assessment
The first step involves an on-site inspection. The plumber assesses the property layout, soil conditions, and available water sources. For new constructions, this phase often includes evaluating municipal connections and drainage systems. For renovations, it may include inspecting existing pipes and fixtures.
Creating Plumbing Blueprints and Layouts
Blueprints are then drafted to map out where each fixture, pipe, and drain will go. It ensures no overlaps with electrical or structural elements. Proper blueprinting minimizes future complications like water leaks or pressure drops.
Selecting Materials and Fixtures
The type of materials (PVC, copper, PEX) and fixtures (sinks, toilets, showers) are selected based on budget and long-term maintenance. Modern designs also consider water-efficient systems to reduce utility costs.
Budget Estimation and Scheduling
Finally, cost estimates and project timelines are prepared. This helps clients understand the scope of investment and ensures that all materials are procured before installation begins.

- 【Lightweight Cordless Drill】The 8V drill set can be used for drilling in wood and plastic, and tightening/loosening scre…
- 【Rechargeable Battery】This drill is supplied with a type-C 1.5A charging cable.A universal charger or USB output(5Vd.c) …
- 【Be a Handy Women】This cordless drill combo kit are made of alloy steel, chrome plated to prevent corrosion, grip is ant…
READ MORE: Does a Plumber Replace Pipes?
2. Rough-In Stage (Underground and In-Wall Work)
Once the planning is complete, the next step is the rough-in stage, which is considered the backbone of any plumbing system. During this phase, plumbers install the pipes that will carry water to and from the building. These systems are usually hidden within walls, floors, or underground, making it critical to get them right the first time.
Installing Underground Plumbing Systems
For new constructions, underground lines are laid before the foundation is poured. This includes main supply lines, drainage systems, and sewer connections. Proper slope and alignment are vital to ensure efficient wastewater flow.
Water Supply and Drainage Line Setup
Plumbers then run water supply lines and drainpipes through the building structure. These pipes are responsible for connecting every fixture, from sinks to bathtubs, ensuring consistent water flow and drainage.
Pressure Testing and Inspection
Before closing walls or floors, pressure tests are conducted to check for leaks or weak joints. Local building inspectors usually review the installation to ensure compliance with plumbing codes.
Addressing Common Rough-In Challenges
Issues such as improper slope, missed vent lines, or incorrect pipe sizes can cause long-term problems. Therefore, experienced plumbers pay close attention to detail during this stage, as fixing hidden issues later can be extremely costly.
READ MORE: What Are SharkBite Fittings in Plumbing?

- 「UNIVERSAL」This tool meets ASTM 2098 standard will work with stainless steel clamps from any manufacturer to make PEX co…
- 「INNOVATIVE」New design makes it be a multi-function tool which can cinch clamps and remove the clamps from pipe to allow…
- 「DURABLE」The cinch&remove tool is constructed of durable high-quality steel with forging process to ensure integrated me…
3. Top-Out or Above-Ground Plumbing Installation
After the rough-in stage comes the top-out phase, also known as the above-ground plumbing installation. This phase focuses on connecting the upper-level water supply lines, vent pipes, and other above-ground plumbing elements that complete the internal water system.
Fixture Connection and Vent Installation
During this stage, plumbers connect the venting system, which helps regulate air pressure in the plumbing lines and prevents sewer gases from entering the home. They also prepare for fixtures like sinks, toilets, and showers by connecting appropriate pipe networks.
Piping for Hot and Cold Water Systems
Separate pipelines are installed for hot and cold water. The hot water system connects to water heaters or boilers, ensuring that every tap in the home delivers temperature-controlled water on demand.
Ensuring Code Compliance and Safety Standards
Every connection, joint, and fixture placement must adhere to local plumbing codes. Plumbers inspect and recheck their work to ensure that no future issues like backflow or low pressure occur.
The top-out phase is where the plumbing system begins to take its final form, bridging the hidden infrastructure with visible fixtures and outlets.
READ MORE: How to Get Air Out of Plumbing Lines: A Simple Step by Step DIY Guide

- Size: 8-inch groove joint, 8-inch and 6-inch slip joint, 7-inch linesman, 6-inch and 4-1/2 inch long nose, and 6-inch di…
- Drop Forged Polished Steel: Heat treated solid body construction
- Hardened Cutting Egdes: Long-lasting, increased cutting ease and performance
4. Final Fix or Trim-Out Stage
The final fix or trim-out stage is where everything comes together. This is the stage most visible to homeowners, as all fixtures, fittings, and appliances are installed and connected to the plumbing network.
Installing Fixtures, Faucets, and Appliances
Sinks, bathtubs, dishwashers, washing machines, and water heaters are fitted in their designated spots. Faucets and valves are installed to ensure water control across the system.
Testing System Functionality
Every outlet and drain is tested for water pressure, temperature control, and proper drainage. Plumbers make sure there are no leaks or unusual noises from the pipes.
Finishing Touches and Aesthetic Detailing
The aesthetic appeal is finalized visible pipes are polished or concealed, fixtures are aligned, and sealing work is completed for a clean, professional look.
The final fix stage transforms a skeletal system into a fully operational and functional plumbing network ready for inspection and use.

- All-in-One Angle Stop Valve Kit: Quickly replace compression angle stops and remove compression rings with step-by-step …
- 2-in-1 Plumbers Wrench: Enhanced grip and torque with a dual-action mechanism. Adjustable wrench fit 15/16″ & 5/8″ nuts,…
- Wall & Pipe-Safe Ferrule Removal: The compression sleeve puller removes leaky ferrules without damaging walls, copper pi…
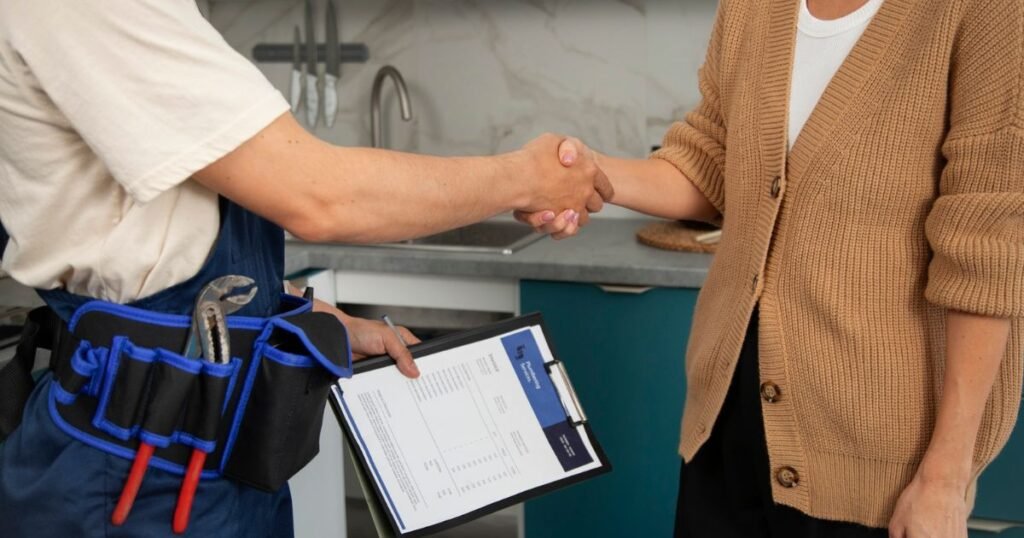
5. Inspection, Testing, and Handover
This final phase ensures that everything installed works perfectly and meets all regulatory standards.
Final Inspection by Plumbing Authorities
Local inspectors review the entire system for compliance with building and plumbing codes. Approval is mandatory before occupancy or project closure.
Performance and Pressure Testing
Plumbers conduct final performance tests for leaks, flow rates, and water pressure. Drainage systems are checked for blockages and backflow.
Client Walkthrough and Handover Documentation
Once approved, the plumber provides the client with documentation, warranties, and maintenance advice. A final walkthrough ensures the client understands system operation and maintenance.
READ MORE: What Does FNPT Mean in Plumbing?

- 142-piece tool set for everyday household projects, repairs, and DIY tasks
- This tool set includes the most useful and necessary tools for home maintenance and daily use. Includes hammer, level, a…
- Corrosion-resistant, heat-treated plating for durability
Common Mistakes During Plumbing Phases and How to Avoid Them
Even with the best planning, plumbing projects can encounter issues if key steps are overlooked. Many homeowners or contractors, in an attempt to save time or money, may skip essential processes only to face expensive repairs later. Understanding the most common mistakes made during plumbing phases can help you avoid costly setbacks and ensure long-term reliability.
1. Poor Planning and Material Choices
One of the most frequent mistakes occurs right at the start insufficient planning. When the design phase is rushed or incomplete, plumbers may end up rerouting pipes, reconfiguring drains, or replacing fixtures mid-project. This can disrupt timelines and inflate costs. Similarly, selecting the wrong materials for pipes and fittings can result in early wear and tear. For example, using low-grade plastic pipes in high-pressure systems can cause cracks or bursts.
To avoid this, every project should begin with a detailed blueprint that considers water pressure, building layout, and future maintenance. Material choices should be based on water quality, temperature variations, and long-term performance, not just cost.
2. Ignoring Local Building Codes
Each city or state has its own plumbing regulations that dictate installation methods, pipe sizes, and fixture placement. Ignoring these rules can lead to failed inspections, fines, or even the need to redo entire sections of the project.
Hiring a licensed plumber who understands local building codes is the best way to prevent this. They ensure your plumbing system complies with all requirements, keeping you safe from future legal or functional issues.

3. Inadequate Testing Before Completion
Skipping the testing phase is another big mistake. Even if everything looks fine externally, unseen leaks or pressure inconsistencies can lead to major water damage later on. Proper testing, such as pressure tests and smoke tests, should always be performed before walls or floors are closed.
READ MORE: What is CPVC in Plumbing? CPVC vs. PVC Plumbing Explained
Cost Factors Affecting Plumbing Projects in Different Phases
Every plumbing project comes with unique cost elements that vary by phase. Whether it’s a small renovation or a full-scale commercial installation, understanding these cost factors can help you manage your budget efficiently and prevent financial surprises.
Labor, Materials, and Permit Costs
- Labor Costs: Skilled plumbers typically charge per hour or per project. The more complex the system, the higher the labor costs. For example, installing a new bathroom or connecting to a municipal sewer line involves more expertise and time than a simple pipe replacement.
- Material Costs: Prices differ depending on the type and quality of pipes and fixtures used. Copper and stainless steel are more durable but also more expensive, while PVC and PEX are affordable yet efficient alternatives.
- Permit Costs: Many plumbing tasks require official permits, especially when altering major water lines or drainage systems. These costs vary by location and project size.

- HIGH QUALITY&STANDARDS:Forged from high-quality steel and finished in high-polish chrome,strength, durability, anti-corr…
- COMPLETE VARIETIES:Contains tools needed for most small repairs and basic DIY projects around the house.Perfect for Hand…
- INCLUDES:Comprehensive assortment of professional-grade wrenches, ratchets, a complete range of 1/4 inch and 3/8inch met…
Additional Costs Due to Delays or Rework
Unexpected problems like poor soil conditions, incorrect pipe sizes, or failed inspections can delay completion. Each delay means extra labor hours, additional inspections, or even reinstallation costs. To minimize such risks, it’s crucial to work with an experienced team and perform quality checks at every phase.
READ MORE: How to Change Plumbing on a Bathtub: Step by Step DIY Guide
Importance of Hiring a Licensed Plumber
A plumbing system may look simple on the surface, but beneath the walls and floors lies a complex network of pipes, valves, and vents. Hiring a licensed plumber for every phase is not just about professionalism it’s about ensuring safety, efficiency, and compliance.
Ensuring Professional Standards and Safety
Licensed plumbers are trained to adhere to safety standards, both for installation and long-term performance. They understand how to handle pressurized systems, gas lines, and drainage systems without compromising building integrity.
For instance, improper connections in hot water systems or gas-fed water heaters can lead to serious safety hazards. A professional plumber ensures everything is done by the book, keeping your home safe and sound.
Benefits of Hiring Certified Technicians
- Guaranteed Quality: Certified plumbers are accountable for their work and often provide warranties.
- Code Compliance: They stay updated with local building regulations, ensuring smooth inspection approvals.
- Access to Advanced Tools: Professionals use specialized equipment for leak detection, pipe fitting, and system testing, which enhances accuracy.
- Time and Cost Efficiency: Their expertise reduces rework, delays, and costly mistakes.
READ MORE: How to Unclog Plumbing Vent: Step by Step DIY Guide
Technology and Tools Used in Each Phase of Plumbing Projects
Modern plumbing has come a long way from the days of manual pipe wrenches and guesswork. Today, technology plays a massive role in every phase of plumbing from planning to final testing ensuring accuracy, efficiency, and safety.
Modern Equipment for Pipe Installation
During the rough-in and top-out stages, plumbers use laser-guided measuring tools, digital levels, and pipe inspection cameras to ensure precision. Trenchless technology is now popular for underground pipe installation, allowing pipes to be replaced or repaired without major excavation.
Smart Plumbing Systems and Leak Detection Tools
Smart plumbing systems have revolutionized how water is managed. Leak detection sensors, Wi-Fi-enabled water shutoff valves, and automated water monitoring devices help homeowners track usage and detect leaks instantly via smartphone apps.
These innovations not only save water but also prevent structural damage caused by hidden leaks. For example, acoustic leak detectors can identify small drips within walls before they become major problems.
Plumbing Project Timeline: How Long Each Phase Takes
While every plumbing project differs in complexity and scale, understanding an approximate timeline helps in managing expectations.
Estimating Project Duration for Residential vs. Commercial Buildings
- Residential Projects:
- Planning & Design: 3–5 days
- Rough-In Stage: 5–10 days
- Top-Out Phase: 3–7 days
- Final Fix & Testing: 2–5 days
- Total Time: Around 2–3 weeks
- Planning & Design: 3–5 days
- Commercial Projects:
These take longer due to larger layouts and stricter regulations. Expect 4–8 weeks on average, depending on project size and coordination with other trades.
READ MORE: How Much Does a Plumbing Snake Cost?
How Communication Impacts Plumbing Project Success
In construction, poor communication often leads to confusion, errors, and wasted time and plumbing is no exception. Effective communication among plumbers, contractors, and clients ensures that everyone stays aligned with the project’s goals and timeline.
Collaboration Between Plumber, Contractor, and Client
Open dialogue between all parties ensures that design plans are clear, changes are communicated promptly, and any issues are resolved quickly. For instance, if the architect changes the bathroom layout mid-project, the plumber needs to know immediately to adjust pipe placement accordingly.
Regular meetings, digital progress reports, and shared blueprints can prevent costly rework and maintain efficiency. Remember, in plumbing projects, good communication is just as essential as good workmanship.
Maintaining Plumbing Systems After Project Completion
Once the project is completed, maintenance becomes key to preserving the system’s performance. Proper care ensures that the plumbing lasts decades without major issues.
Routine Maintenance Tips
- Regularly check for leaks under sinks and around toilets.
- Flush your water heater every 6–12 months to remove sediment.
- Inspect outdoor plumbing before winter to prevent frozen pipes.
- Clean drains with natural solutions to avoid clogs.
Preventing Future Plumbing Issues
Using high-quality fixtures and maintaining proper water pressure are essential. Consider installing smart leak detectors for early warnings. Annual inspections by a licensed plumber can catch minor issues before they turn into emergencies.
READ MORE: Can I Lay Residential Plumbing Supply Lines on the Ground?
Conclusion:
Every plumbing project is a journey from initial planning to the final inspection. Understanding each phase helps ensure that nothing is overlooked and that every pipe, valve, and fixture functions as intended. By working with licensed professionals, using the right materials, and embracing modern tools, you can ensure that your plumbing system serves you efficiently for years to come.
FAQs
How long does a full plumbing project usually take?
A typical residential plumbing project takes 2–3 weeks, while larger commercial projects can take up to 8 weeks or more, depending on complexity.
Which is the most critical phase of a plumbing project?
The rough-in stage is often considered the most critical since it involves the installation of pipes within walls and underground any mistake here can lead to long-term problems.
Can homeowners handle any plumbing phase themselves?
Minor tasks like fixture replacement or unclogging drains can be done DIY. However, system design, rough-in, and inspections should always be left to licensed professionals.
What are the signs of poor plumbing installation?
Low water pressure, leaks, slow drains, and noisy pipes are common signs. Early inspection and maintenance can prevent bigger issues.
How can one ensure a plumbing project passes inspection?
By following all building codes, hiring licensed plumbers, and performing pre-inspection testing to identify and correct any potential issues beforehand.

