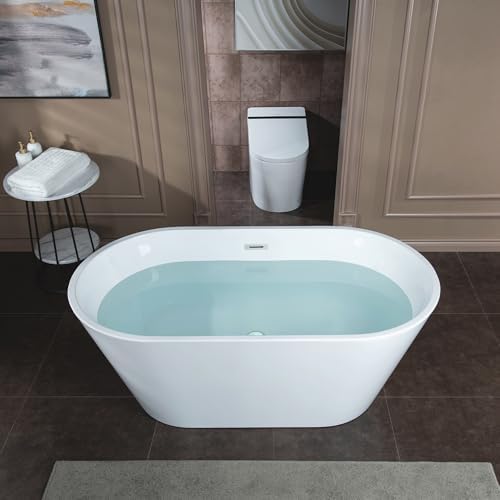
Changing the plumbing on a bathtub might sound intimidating, but with the right guidance and a little patience, it’s a project most homeowners can handle themselves. Whether you’re upgrading an outdated bathroom, fixing a leak, or replacing rusty pipes, learning how to change bathtub plumbing can save you hundreds in labor costs.
This guide will take you through every step from identifying the plumbing components to installing new lines, testing for leaks, and ensuring your bathtub is ready for years of use. Lets deep dive into “How to Change Plumbing on a Bathtub: Step by Step DIY Guide”
READ MORE: Best Tankless Water Heater 2026 — Top Picks, Costs & Buyer’s Guide
Understanding Your Bathtub Plumbing System
Before picking up a wrench, it’s crucial to understand how your bathtub’s plumbing works. A typical tub has three main components:
- Water Supply Lines: These bring hot and cold water from your main supply to the tub faucet.
- Drain System: This includes the drain assembly, overflow tube, and trap that carry wastewater away.
- Valve and Faucet Assembly: This controls the water temperature and flow into your bathtub.
Knowing where these parts are located and how they connect will make replacing them much smoother. If your home has older plumbing, you may find galvanized steel or copper pipes, while newer homes often use PEX or PVC, which are easier to work with.

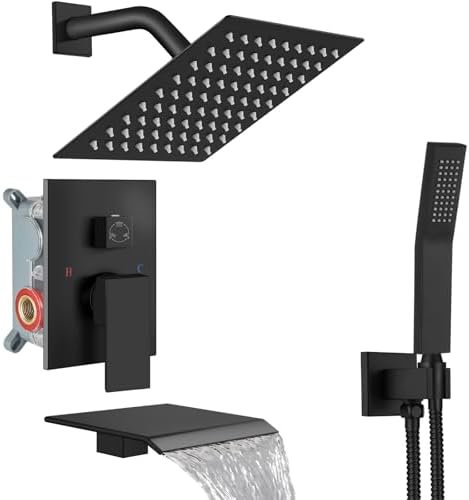
- Solid Brass Construction with Corrosion Resistance-Polish Chrome Finish: Water Use Information: 1.46 GPM (5.52 L/min).Cr…
- Dual-Function Tub Faucet with Single Handle Control: Easily switch between the waterfall tub spout and the handheld spra…
- Smooth Waterfall Tub Filler with Wide Spout Design: Delivers a smooth, natural waterfall flow to fill your bathtub quick…
READ MORE: How to Drain a Rheem Water Heater — Step-by-Step Guide
Common Reasons for Replacing Bathtub Plumbing
There are several reasons you might need to change your bathtub plumbing:
- Leaks or corrosion: Over time, metal pipes rust, causing leaks and water damage behind walls or under floors.
- Low water pressure: Mineral buildup inside old pipes can restrict flow.
- Upgrading fixtures: If you’re installing a new bathtub or modern faucet, your old plumbing may not be compatible.
- Drainage issues: Clogged or damaged drain assemblies can cause standing water or unpleasant odors.
- Remodeling: Bathroom renovations often require rerouting or replacing plumbing to match the new design.
If you’re experiencing any of these issues, updating your plumbing is a smart long-term investment.

READ MORE: How to Unclog Plumbing Vent
Tools and Materials You’ll Need
Before you begin, gather all the tools and materials you’ll need. Having everything ready makes the job faster and prevents unnecessary trips to the hardware store.
Essential Tools:
- Adjustable wrench. See Product & Price
- Pipe wrench. See Product & Price
- Screwdrivers (flathead and Phillips). See Product & Price
- Hacksaw or tubing cutter. See Product & Price
- Plumber’s putty. See Product & Price
- Plumber’s tape (Teflon tape). See Product
- Utility knife
- Bucket and towels
- Channel-lock pliers. See Product & Price
Materials:
- Replacement pipes (PEX, copper, or PVC)
- Fittings and connectors
- New bathtub drain and overflow assembly. See Product & Price
- Faucet and spout set
- Silicone caulk or waterproof sealant
Always double-check that your new parts match the size and thread type of your existing plumbing to avoid leaks later.
- 【Compatible With】 : Our Freestanding Tub Drain Kit is suitable for all freestanding bathtubs, floor bathtubs and island …
- 【PVC Adapter Provided】: PVC Plastic Adapter attaches Rough-in to PVC bath wastes for quick, easy and clean installation….
- 【Easy to Install】The freestanding tub drain rough-in kit is quick and easy to install, and it is easy to drain. Even one…
Preparing for the Job
Preparation is key to a smooth plumbing replacement. Start by:
- Turning Off the Water Supply:
Locate the bathroom’s water shut-off valves, usually near the tub or main supply line. Turn them clockwise to close. - Draining the Bathtub:
Remove any standing water from the tub and open the drain. Place a bucket underneath to catch any remaining water when you disconnect the pipes. - Clearing the Workspace:
Remove the access panel behind the bathtub (usually found in an adjacent room or closet). If there’s no panel, you may need to cut a small opening in the wall for access. - Protecting Surrounding Surfaces:
Lay down towels or a tarp to catch debris, and cover the tub to prevent scratches.

READ MORE: How Much Does a Plumber Charge for a Hose Bib?
Safety Precautions Before Starting
Working on plumbing involves potential hazards. Always follow these safety measures:
- Avoid electrical risks: Make sure no electrical outlets or devices are near your workspace.
- Wear protective gear: Use gloves and safety goggles.
- Ventilate the area: If using caulk or adhesives, ensure good airflow.
- Check for mold: Water damage behind walls can lead to mold—clean it thoroughly before continuing.
If you’re uncomfortable cutting or soldering pipes, consider hiring a professional for that step.
READ MORE: How to Get Air Out of Plumbing Lines: A Simple Step by Step DIY Guide
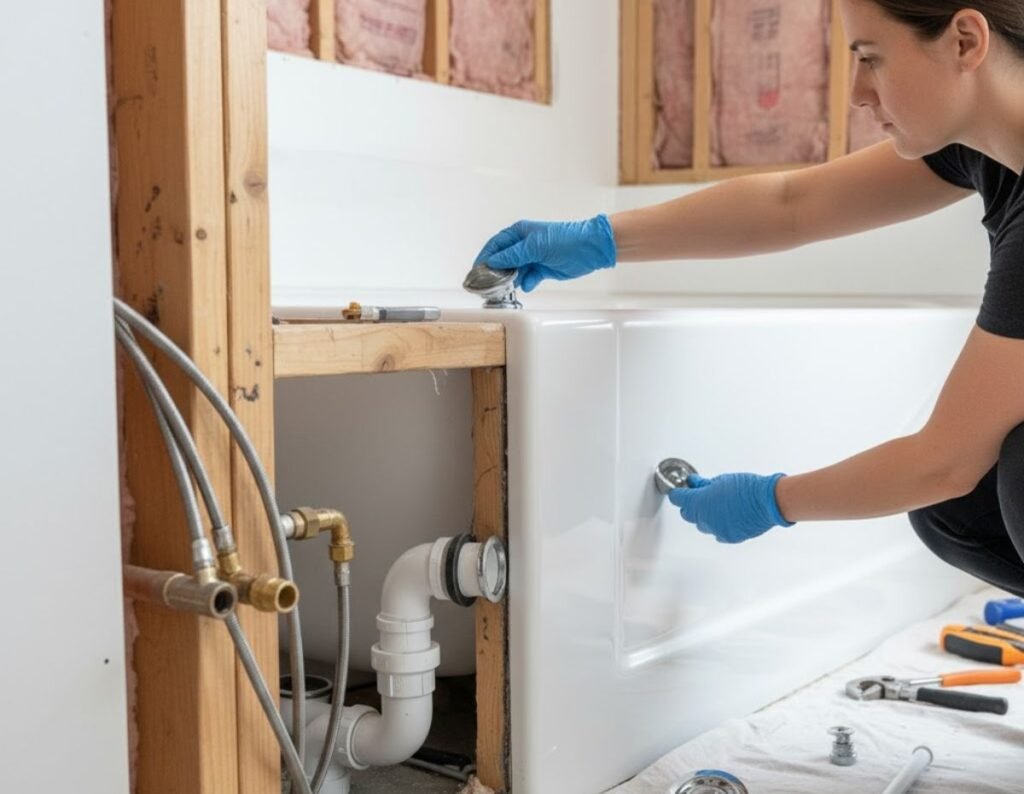
Removing the Old Bathtub Plumbing
Now comes the hands-on part removing the old plumbing system.
- Remove Faucet Handles and Spout:
Use a screwdriver or Allen wrench to loosen the set screws, then carefully pull off the handles. For the spout, twist counterclockwise or loosen the screw underneath, depending on the design. - Disconnect Water Supply Lines:
Use an adjustable wrench to unscrew the hot and cold water connections from the faucet valve. Have a towel ready for any leftover water. - Detach the Drain Assembly:
Remove the drain cover and use a drain wrench or pliers to unscrew the drain flange. Disconnect the overflow plate and pull out the linkage assembly. - Remove Old Pipes:
Using a hacksaw or pipe cutter, cut out any corroded or damaged sections of pipe. Be cautious not to damage surrounding walls or supports.
This step exposes the inner workings of your plumbing system and prepares it for inspection and replacement.

Inspecting the Existing Plumbing System
Before installing anything new, inspect the exposed pipes and fittings for:
- Rust or corrosion (common in old copper or galvanized pipes)
- Leaks around joints or fittings
- Signs of water damage on nearby wood or drywall
- Weak or cracked connections
If you notice any of these, replace affected sections. It’s also a great time to upgrade your plumbing materials for better durability.
READ MORE: How to Plumb a Washing Machine Drain
Choosing the Right Replacement Plumbing
The type of material you choose affects both the performance and longevity of your bathtub plumbing:
- PEX (Cross-linked Polyethylene): Flexible, easy to install, resistant to corrosion—ideal for DIYers.
- Copper: Durable and long-lasting but requires soldering and professional handling.
- PVC: Common for drain lines affordable and simple to work with.
When selecting parts, make sure they are rated for hot water use and compatible with your home’s existing system.
Installing the New Water Supply Lines
Once your old plumbing is removed and inspected, it’s time to install the new water supply lines for your bathtub. This is one of the most critical parts of the job, as even a small leak can lead to long-term water damage.
Follow these steps carefully:
- Measure and Cut the Pipes
Using your old pipes as a reference, measure and cut your new PEX, copper, or PVC pipes to the appropriate length. Always leave a little extra length to ensure flexibility when fitting. - Attach the Shut-Off Valves
If your old valves are worn or corroded, replace them now. Use Teflon tape on threaded connections to ensure a watertight seal. - Connect the Hot and Cold Lines to the Valve Assembly
- Identify the hot (left) and cold (right) inlets on the bathtub valve.
- Attach each supply line using fittings that match your pipe material.
- If using PEX, you’ll need crimp rings and a crimping tool; for copper, solder the connections carefully.
- Identify the hot (left) and cold (right) inlets on the bathtub valve.
- Secure the Pipes
Anchor the pipes to wall studs using pipe clamps to prevent movement or vibration. - Check Alignment
Ensure both pipes line up correctly with the faucet openings before tightening everything. Misalignment can cause leaks or stress the fittings.
Once installed, double-check that all connections are tight but not over-tightened (which can crack fittings).

- 【All Metal Construction】Water Use Information: 1.61gpm 6.12L/min Solid brass, this free standing tub faucet is construct…
- 【Functions】This stand alone tub faucet has 360 Degree Swivel Spout, Handheld Shower with 59″(150cm) shower hose will hel…
- 【Installation】Floor mounted, Include all the installation hardware.Come with 32 inch long water supply line with 1/2 con…
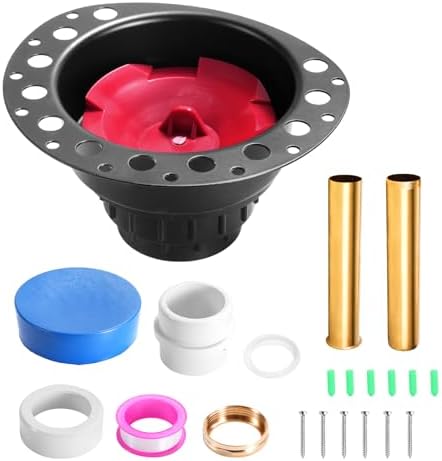
Installing the Bathtub Drain Assembly
Your drain assembly ensures that wastewater flows smoothly from the tub into the main drain. Replacing it properly prevents leaks and clogging.
Steps to Install:
- Install the Drain Flange:
Apply plumber’s putty around the underside of the drain flange. Insert it into the drain hole, and from underneath, attach the rubber gasket and locknut. Tighten until secure, then wipe off excess putty. - Connect the Overflow Assembly:
- Position the overflow plate on the tub wall and insert the linkage and stopper mechanism.
- Secure the overflow tube to the main drain pipe using a T-fitting and compression nuts.
- Position the overflow plate on the tub wall and insert the linkage and stopper mechanism.
- Attach the P-Trap and Drainpipe:
The P-trap prevents sewer gases from entering your home. Connect it to the drain line under the tub using PVC glue or slip nuts (depending on your pipe type). - Seal All Joints:
Apply pipe thread sealant or Teflon tape to threaded joints. For glued joints, ensure a snug fit before the adhesive sets.
After assembly, check for alignment your drain should slope slightly downward toward the waste line to ensure proper drainage.
- All-in-One Set: Water saving shower tub faucet set complete system includes stainless steel rainfall showerhead, handhel…
- SUS304 Showerhead & Handheld: 8 inch rainfall showerhead offers full coverage and adjustable angles for comfortable show…
- Waterfall Wide Tub Spout: 7.8-inch wide spout design for efficient filling, delivering even water output without splashi…
READ MORE: How Does an Electric Water Heater Work?
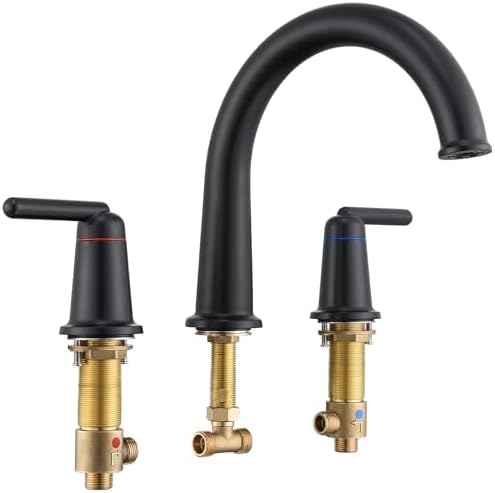
Connecting the Tub Spout and Faucet
The faucet assembly is where functionality meets style, so proper installation is key to both appearance and performance.
- Install the Mixing Valve:
The mixing valve regulates hot and cold water flow. Insert it between the two water supply lines, ensuring the valve is centered behind the tub’s faucet location. Use a level to verify accuracy. - Attach the Tub Spout:
For threaded spouts, wrap the pipe threads with Teflon tape before screwing on the spout. For slip-on models, slide the spout over the pipe and tighten the set screw underneath. - Install Faucet Handles:
Align each handle with the valve stems, then tighten the mounting screws. Make sure the handles move smoothly without resistance. - Secure and Seal Everything:
Apply a thin bead of silicone caulk around the faucet escutcheons to prevent water from seeping behind the wall.
Testing for Leaks
Before closing up walls or finishing the project, thoroughly test your plumbing for leaks.
- Turn On the Water Supply:
Slowly open the shut-off valves and allow water to flow into the pipes. Listen for any unusual noises or dripping. - Check All Connections:
Inspect each joint, fitting, and connection for leaks. Even a small drip can turn into a major issue later. - Test Hot and Cold Water Flow:
Turn on both hot and cold water to ensure even pressure and correct temperature mixing. - Check the Drain and Overflow:
Fill the tub halfway and let it drain while inspecting underneath for leaks. Also, test the overflow assembly by running water above the overflow hole.
If any leaks appear, turn off the water, tighten fittings slightly, or reapply Teflon tape where needed.
Finishing Touches
With the plumbing successfully installed and tested, you can now focus on the finishing touches that make your bathtub look polished and professional.
- Seal the Edges:
Apply a clean bead of 100% silicone caulk around the edges where the tub meets the wall or floor. Smooth it with a damp finger or caulking tool for a neat finish. - Replace Access Panels:
Reattach or replace the access panel you removed earlier. If you created an opening, install a plastic or metal access door for easy future maintenance. - Clean the Tub and Work Area:
Wipe away debris, old caulk, or putty residue. Rinse the tub and faucet to remove any dust or particles from installation. - Run a Final Test:
Let the water run for several minutes to ensure everything is functioning perfectly.
A little attention to detail here ensures your project looks and performs just as well as professional work.
Maintenance Tips for Long-Lasting Bathtub Plumbing
Once your new plumbing is installed, regular maintenance helps extend its lifespan:
- Inspect Annually: Check behind access panels for any signs of leaks or corrosion.
- Avoid Harsh Chemicals: Use enzyme-based drain cleaners instead of corrosive ones.
- Keep Faucets Dry: Wipe down fixtures after each use to prevent mineral buildup.
- Flush Pipes Occasionally: Run hot water through the pipes to clear minor blockages.
- Tighten Loose Fittings: A small leak can be fixed easily if caught early.
Simple maintenance habits prevent costly repairs and keep your bathtub running smoothly for years.
Common Mistakes to Avoid
Many DIY bathtub plumbing projects fail due to avoidable errors. Here’s what to watch out for:
- Using the Wrong Pipe Material:
Mixing incompatible materials (like copper and galvanized steel) can cause corrosion. - Skipping the Sealant:
Always use plumber’s tape or sealant on threaded joints to prevent leaks. - Over-Tightening Connections:
Too much force can crack fittings or strip threads. Tighten firmly, not excessively. - Ignoring Drain Slope:
The drainpipe must slope slightly downward to ensure proper flow. - Forgetting to Test Before Sealing Walls:
Always test for leaks before closing up any access panels or walls.
READ MORE: How Does a Gas Water Heater Work?
When to Call a Professional Plumber
While many homeowners can handle basic bathtub plumbing changes, some situations call for expert help. You should contact a licensed plumber if:
- You need to relocate pipes behind walls or floors.
- You encounter extensive corrosion or mold damage.
- Your home has complex copper or cast iron plumbing.
- You lack proper access to the plumbing lines.
A professional can complete the job quickly and safely, often saving you from costly mistakes or water damage later.
Conclusion
Changing the plumbing on a bathtub may seem like a big task, but with patience, planning, and the right tools, it’s absolutely achievable. By understanding your system, following safety precautions, and carefully installing each component, you can restore full functionality to your bathroom while improving its efficiency and appearance.
Whether you’re tackling a full remodel or a simple repair, this guide gives you the confidence to handle the project like a pro. Take your time, test for leaks, and don’t be afraid to ask for help when needed. Once complete, you’ll not only have a perfectly working bathtub but also the satisfaction of knowing you did it yourself.
FAQs
Can I change bathtub plumbing without removing the tub?
Yes, if there’s an access panel behind or below the tub, you can replace most plumbing parts without removing the bathtub itself.
What’s the best pipe material for bathtub plumbing?
PEX is the easiest and most flexible for DIY projects, while copper offers long-lasting durability if professionally installed.
How long does it take to change bathtub plumbing?
For most DIYers, it takes 6–10 hours, depending on complexity and accessibility.
How much does it cost to replace bathtub plumbing?
If you do it yourself, expect to spend $150–$400 in materials. Professional replacements range from $700–$1,500.
Do I need a permit to change bathtub plumbing?
In many areas, major plumbing changes require a local permit. Always check with your city’s building department before starting.

