When you notice your outdoor faucet leaking or freezing up, it’s often time to replace your hose bib the small but essential outdoor faucet where you connect your garden hose. One of the most common questions homeowners ask is, “How much does a plumber charge for a hose bib?” The cost varies based on factors like the type of hose bib, where it’s installed, and local labor rates.
Generally, you can expect to pay between $100 and $300 for a plumber to install or replace a standard hose bib, including labor and parts. More complex setups or premium frost-free models can push the cost to $400 or more.
But it’s not just about the price tag understanding what goes into the cost can help you make smarter decisions, prevent future plumbing problems, and even save money in the long run. Let’s dive into everything you need to know about hose bib costs, factors affecting them, and how to ensure you’re getting the best value for your money.
What Is a Hose Bib?
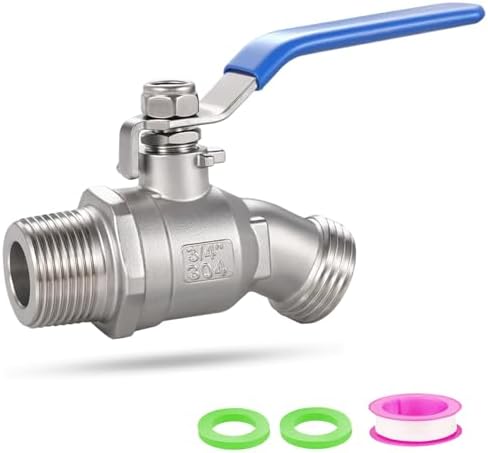
A hose bib, often called a spigot or outdoor faucet, is a plumbing fixture attached to your home’s water supply, usually found on exterior walls. Its main function is to provide easy access to water outdoors whether you’re watering your lawn, washing your car, or filling a pool.
This simple device might not seem like much, but it’s a crucial connection point between your home’s indoor plumbing and outdoor water use. Over time, hose bibs can wear out, develop leaks, or freeze in winter climates. That’s when replacement becomes necessary.
Most homes have at least one hose bib, but larger properties or those with gardens often have multiple. Knowing the type and location of your hose bibs helps you plan for maintenance and replacement costs more accurately.
Types of Hose Bibs
There’s more than one kind of hose bib and the type you choose can significantly impact your total cost. Here are the most common types you’ll come across:
1. Standard Hose Bib
This is the traditional outdoor faucet found on most homes. It’s affordable, simple to install, and works perfectly in mild climates. Prices for standard hose bibs typically range from $10 to $40 for the part alone.
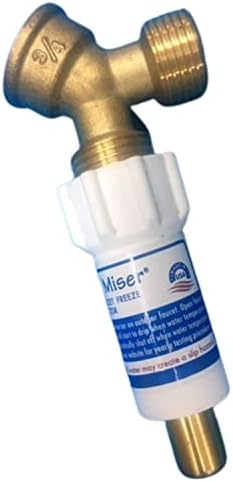
2. Frost-Free (Freeze-Proof) Hose Bib
If you live in an area where temperatures drop below freezing, a frost-free hose bib is a smart investment. It’s designed with a long stem that shuts off water inside the warm part of your home, preventing freezing and burst pipes. Expect to pay $25 to $60 for this type, with higher installation costs due to its length and complexity.
3. Anti-Siphon Hose Bib
This model includes a backflow prevention device that stops contaminated water from flowing back into your home’s supply. It’s now required by code in many areas. Prices range from $15 to $50, and it’s often combined with other hose bib features.
4. Decorative or Specialty Hose Bibs
Some homeowners opt for decorative or specialty hose bibs that match their landscaping or architectural style. These can cost $50 to $100+, especially for unique finishes or brass materials.
Each type offers different benefits and durability levels, which is why the type of hose bib you choose directly affects the overall plumbing cost.
READ MORE: How Many Phases Are Plumbing Projects Completed In?
Factors That Affect the Cost of Installing or Replacing a Hose Bib
Not all hose bib replacements are created equal. Several factors influence the total cost of hiring a plumber for the job.
1. Type of Hose Bib Material
The material you choose plays a big role in determining both the cost and longevity of your fixture.
- Brass hose bibs are durable, corrosion-resistant, and suitable for most climates but they cost more upfront.
- Plastic options are cheap but can crack under pressure or extreme temperatures.
- Stainless steel versions are premium-grade, resistant to rust, and long-lasting, ideal for coastal areas.
A high-quality brass or stainless-steel hose bib can last 10–20 years, reducing replacement frequency and maintenance costs.
2. Labor Costs and Plumber’s Hourly Rates
Plumbers typically charge $75–$150 per hour, depending on your location and the complexity of the job. A straightforward replacement might take an hour, while a more complicated installation (especially through concrete or tight spaces) could take two to three hours.
If your plumbing lines need rerouting or repair, expect higher labor costs. Urban areas generally have higher service fees than rural locations.
3. Location of the Hose Bib
Accessibility matters. If your hose bib is in a tight, hard-to-reach area, behind walls, or near finished interiors, labor time increases. Exterior hose bibs are easier and cheaper to replace, while interior or basement ones may require additional work like cutting drywall.
4. Additional Plumbing Repairs or Upgrades
Sometimes, replacing a hose bib uncovers other issues like corroded pipes, leaky joints, or the need for a new shut-off valve. These extra fixes can add $50–$200 to the total cost. While it increases upfront spending, it ensures your plumbing system stays in good condition for years.

Average Cost to Replace or Install a Hose Bib
The national average cost for hose bib replacement or installation in the U.S. ranges from $150 to $300, but prices can vary depending on your region, hose bib type, and whether it’s a new install or a simple swap.
National Averages
| Type of Hose Bib | Material Cost | Labor Cost | Total Installed |
| Standard Hose Bib | $10–$40 | $75–$150 | $100–$200 |
| Frost-Free Hose Bib | $25–$60 | $100–$200 | $150–$300 |
| Anti-Siphon Hose Bib | $15–$50 | $100–$180 | $150–$250 |
| Decorative Hose Bib | $50–$100 | $120–$200 | $200–$400 |
If a plumber needs to open walls, repair pipes, or install a shut-off valve, you could pay up to $500 in total.
READ MORE: Does a Plumber Replace Pipes?
DIY vs. Hiring a Professional Plumber
When it comes to replacing or installing a hose bib, many homeowners wonder whether it’s worth doing it themselves or calling in a professional. While DIY projects can be rewarding and save money, plumbing tasks especially those connected to your home’s water system can be tricky. Let’s break down the pros and cons of both options so you can make an informed decision.
Pros and Cons of Doing It Yourself
Pros:
- Cost Savings: The biggest advantage of a DIY hose bib replacement is saving on labor costs. You’ll only need to pay for materials, which typically cost between $10 and $60.
- Learning Experience: If you’re comfortable with basic tools, doing it yourself can teach valuable skills and boost your confidence with home maintenance.
- Immediate Action: You can get the job done on your schedule without waiting for an appointment.
Cons:
- Risk of Leaks or Damage: Without the right knowledge, you might create leaks that lead to water damage or mold growth inside your walls.
- Hidden Plumbing Problems: If the issue isn’t just the hose bib but a deeper pipe problem, you could make it worse without even realizing it.
- Warranty Issues: Many plumbing companies offer warranties on their work something you won’t get with a DIY job.
If you’re only replacing an easily accessible outdoor hose bib and you know how to shut off the water, a DIY replacement might be feasible. But if the bib is embedded in a wall or the connection is corroded, it’s best to call a professional.
Why Hiring a Plumber Is Worth It
Hiring a licensed plumber ensures that the job is done safely and correctly the first time. Professionals have the tools and experience to handle complex installations, identify hidden issues, and ensure watertight connections.
Additionally, plumbers often provide warranties on their work, giving you peace of mind. A botched DIY repair might save $100 upfront but could lead to thousands in water damage later.
Signs You Need to Replace Your Hose Bib
A hose bib might look fine from the outside, but internal wear and tear can lead to bigger issues over time. Recognizing the early warning signs of hose bib failure can help you replace it before costly damage occurs.
Common Issues
- Leaking Faucet: A persistent drip often means the washer or valve inside is worn out. While a small leak might seem harmless, it can waste gallons of water each month and drive up your bill.
- Rust or Corrosion: Visible rust or mineral buildup indicates that the metal inside the bib is breaking down. This can lead to weak spots and eventual failure.
- Low Water Pressure: If your hose isn’t getting strong pressure, the problem could be a partial blockage or internal corrosion.
- Freezing or Cracking: In cold climates, water left inside the bib can freeze and expand, cracking the fixture or connected pipes.
- Difficulty Turning the Handle: If the valve feels stiff or gets stuck, it’s often a sign that the internal mechanisms are failing.
READ MORE: Can You Use 90 Bends on Plumbing Vent Pipe?
How to Inspect Your Hose Bib
- Check for Leaks: Turn on the water and look for drips around the handle, spout, or wall connection.
- Inspect the Wall Area: Feel for moisture or discoloration inside the house near where the hose bib connects this could signal hidden leaks.
- Test in Different Seasons: In colder months, test to make sure your frost-free bib drains properly; in warmer months, ensure smooth water flow.
- Listen for Unusual Sounds: Whistling or gurgling sounds when you open the faucet may indicate internal damage.
If you notice any of these signs, replacing your hose bib promptly can prevent water waste and structural damage.
How to Save Money on Hose Bib Replacement
Everyone likes to save a little cash especially on home repairs. Luckily, there are smart ways to cut costs without compromising on quality when replacing a hose bib.
Seasonal Timing and Promotions
Just like HVAC services, plumbing work tends to be cheaper during off-peak seasons. Late fall or early winter (before freezing temperatures hit) is often a great time to schedule repairs or replacements. Many plumbing companies offer discounts or maintenance packages during slower months to attract customers.
You can also save by:
- Getting multiple quotes: Compare at least three local plumbers before choosing one.
- Asking for flat-rate pricing: Some plumbers charge by the hour, while others offer flat rates. The latter can prevent surprises if the job takes longer than expected.
- Bundling services: If you have other small plumbing tasks (like fixing leaks or replacing faucets), have them done together to save on labor costs.
Choosing the Right Hose Bib
Don’t just go for the cheapest fixture. A frost-free or anti-siphon hose bib might cost more initially but can save you hundreds in potential repairs.
Look for trusted brands known for durability, such as SharkBite, Woodford, or American Valve. Spending an extra $20–$40 upfront can easily extend your hose bib’s lifespan by 10 years or more.
DIY Prep Work
Even if you’re hiring a plumber, you can reduce costs by doing some prep yourself like clearing access to the area, shutting off the water supply, or purchasing the replacement part ahead of time.
By being proactive and strategic, you can ensure a high-quality installation without overspending.
READ MORE: Can I Lay Residential Plumbing Supply Lines on the Ground?
Tips for Maintaining Your Hose Bib
Proper maintenance can extend your hose bib’s life, prevent leaks, and save money on future repairs. Here’s how to keep it in great condition year-round.
Winterization
If you live in an area prone to freezing temperatures, winterizing your hose bib is crucial. Follow these simple steps:
- Disconnect all hoses before temperatures drop. Water trapped in hoses can back up into the faucet and freeze.
- Shut off the indoor valve that supplies water to the outdoor spigot (if your home has one).
- Drain the remaining water by opening the hose bib until no water flows.
- For extra protection, install an insulated faucet cover to keep freezing air out.
These few minutes of preparation can save you hundreds in repair costs for burst pipes or damaged fixtures.
Regular Inspections and Cleaning
Check your hose bib at least twice a year once in spring and once before winter. Look for leaks, mineral buildup, or rust. Clean the spout with vinegar and a brush to remove any calcium deposits that can restrict flow.
Also, avoid over-tightening the handle; doing so wears out the internal washer faster. When not in use, keep the faucet slightly open to relieve pressure.
With proper care and seasonal maintenance, a high-quality hose bib can last 15 years or more, keeping your outdoor plumbing hassle-free and efficient.
Conclusion
Replacing or installing a hose bib might seem like a small task, but it plays a big role in your home’s plumbing system. Understanding the costs, factors, and options involved can help you make the best decision for your home and budget.
On average, a plumber charges between $100 and $300 to replace a standard hose bib, while more complex or frost-free models can run up to $400–$500. The final price depends on factors such as the hose bib type, accessibility, material, and any necessary plumbing repairs.
While DIY replacement can be tempting, it’s not always the safest choice especially if you lack plumbing experience. A small mistake could lead to hidden leaks or costly water damage. That’s why hiring a licensed professional plumber often provides the best long-term value.
To save money, plan ahead, get multiple quotes, and schedule your replacement during off-peak seasons. Regular maintenance like winterizing, inspecting for leaks, and cleaning the spout will keep your hose bib in top shape and extend its lifespan.
FAQs
1. What is the cheapest way to replace a hose bib?
The most affordable option is to replace it yourself using a standard hose bib that costs between $10 and $40. However, if you’re not experienced with plumbing, it’s better to hire a plumber to avoid potential leaks or damage. Some professionals offer flat-rate services starting at $100–$150, which ensures a safe and lasting installation.
2. How long does a hose bib last?
A well-installed, high-quality hose bib can last 10–20 years depending on material and maintenance. Brass and frost-free models tend to have the longest lifespan. Regular inspections, cleaning, and proper winterization can significantly extend their durability.
3. Can I replace a hose bib myself without shutting off the water?
No, you should always shut off the water supply before replacing a hose bib. Working with pressurized water can cause flooding or serious damage. Most homes have an indoor shut-off valve specifically for the outdoor spigot—turn it off, drain the line, and then proceed safely.
4. How much time does a plumber take to install a hose bib?
For a straightforward replacement, most plumbers complete the job in about one hour. However, if the installation involves cutting through walls, replacing pipes, or adding new shut-off valves, it may take two to three hours or longer.
5. Are frost-free hose bibs worth the extra cost?
Absolutely. Frost-free hose bibs prevent freezing and bursting during cold weather, saving you hundreds in potential pipe repairs. While they cost about $25–$60 (plus installation), their durability and freeze protection make them a smart long-term investment for homes in colder climates.

