Ever turned on your faucet and heard that loud gurgling or sputtering noise before the water finally comes out smoothly? That’s air trapped in your plumbing lines. It’s not just annoying it can mess with your water pressure, damage pipes, and even cause long-term issues if ignored.
Air pockets in plumbing systems are common, especially after repairs, maintenance, or a temporary water supply interruption. Thankfully, getting air out of your plumbing lines isn’t rocket science. You can do it yourself with a few simple tools and a little patience.
In this guide, you’ll learn exactly how to remove air from your plumbing system step by step, what causes it in the first place, and how to prevent it from coming back. Lest deep dive into “How to Get Air Out of Plumbing Lines: A Simple Step by Step DIY Guide”
Understanding Air in Plumbing Lines
Air in your plumbing lines occurs when pockets of air get trapped inside the pipes, blocking the flow of water. Normally, your water system should be completely full of water with no gaps or bubbles. However, small leaks, repairs, or supply interruptions can introduce air, leading to uneven flow and strange noises.
Common signs of air in your plumbing lines include:
- Sputtering water when you turn on faucets
- Irregular or reduced water pressure
- Banging or “water hammer” noises
- Intermittent hot water issues
- Cloudy water that clears after a few seconds
Air pockets may seem harmless, but they can create significant problems over time. They disrupt steady water flow, put strain on pumps, and in severe cases, cause pipes to vibrate or corrode.

How Air in Pipes Affects Your Plumbing System
Air trapped in pipes can cause several frustrating issues:
- Uneven Water Flow: Faucets may sputter or cough instead of producing a steady stream.
- Low Water Pressure: Air blocks water movement, reducing overall pressure.
- Noisy Pipes: You might hear banging or knocking noises—known as “air hammer.”
- Corrosion Risks: Continuous air exposure can lead to oxidation inside metal pipes.
- Appliance Damage: Dishwashers, washing machines, and water heaters rely on consistent water pressure; trapped air can stress these appliances.
Ignoring these symptoms can result in unnecessary wear and tear or expensive repairs later on.
“Protect Your Investment—Flush Your Heater with Ease” – Tankless heaters are expensive; this highlights the kit as an insurance policy. Check this pressure relief valve-

READ MORE: How to Change Plumbing on a Bathtub
Causes of Air Bubbles in Plumbing Lines
Knowing why air gets trapped in your plumbing system helps you prevent it from happening again. Here are some common culprits:
1. Maintenance or Repairs: When pipes are drained for maintenance or replacement, air naturally enters the system.
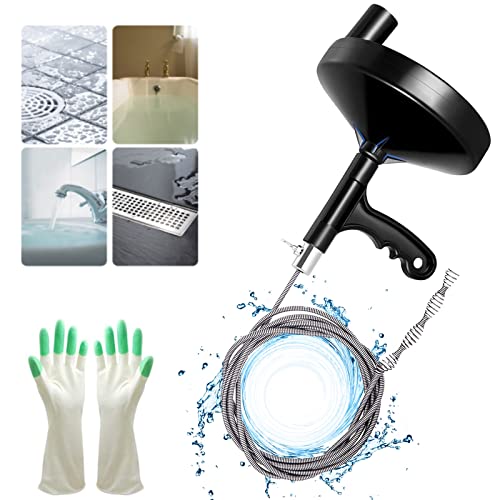
Drain Auger 25 Ft with Gloves, Plumbing Snake Drain Auger Hair Clog Remover, Heavy Duty Pipe Drain Clog Remover for Bathtub Drain, Bathroom Sink, Kitchen Cleaning. Use this Drain Auger-
2. Water Supply Interruptions: If the municipal water supply is turned off and on, air can infiltrate household lines.
3. Faulty Valves: A broken or loose valve might let air seep into the pipes. Check product & price
4. Leaks or Cracks: Even small leaks in suction lines or joints can pull in air.
5. Well Systems: In well water systems, a malfunctioning foot valve or pump seal can cause recurring air bubbles.
In short, anytime your water supply is interrupted or pressure fluctuates, air has a chance to sneak in.
Safety First: What to Know Before You Start
Before diving into any plumbing fix, it’s important to prioritize safety and preparation.
Tools you’ll need:
- Adjustable wrench. check product & price
- Screwdriver. Check product & Price
- Bucket or towel
- Flashlight
- Plumber’s tape. Check product & price
Safety steps:
- Turn off electrical appliances like water heaters, dishwashers, or washing machines to prevent damage.
- Shut off the main water supply—usually located near your water meter or where the main line enters your home.
- Open faucets carefully to relieve pressure before working on pipes.
- Have towels or a bucket ready to catch any residual water.
“Clear Your Toughest Clogs with a Single Click” – Highlights the effortless nature of the electric motor. Check this–

How to Get Air Out of Plumbing Lines: A Simple Step by Step DIY Guide
Ready to clear that trapped air? Follow these easy steps to restore smooth water flow:
Step 1: Turn Off the Main Water Supply
Locate your home’s main shutoff valve and close it completely. This prevents more water (and air) from entering the system while you work.
Step 2: Open All Faucets
Starting from the highest point in your home (like an upstairs bathroom faucet) and working down to the lowest point (like an outdoor hose bib), open every faucet. Don’t forget showers, bathtubs, and even outdoor spigots.
This helps drain any trapped air and water through the lines.
Step 3: Drain the System
Let all the water run out completely. You’ll likely hear air escaping as water drains—this is a good sign.
Step 4: Turn On the Main Water Supply Slowly
Once the system is drained, slowly reopen the main valve. Starting too quickly can trap new air in the system.
Step 5: Let Faucets Run Until Smooth Flow Returns
Go back to each faucet, starting from the lowest and moving upward. Let the water run until there’s a steady, sputter-free stream. When all faucets run smoothly, your plumbing system is air-free.
This process should take about 10–20 minutes depending on the size of your home.
“Stop AC Leaks Before They Cause Water Damage” – Directly addresses the fear of a ruined ceiling or floor. check this product-
READ MORE: How to Unclog Plumbing Vent
How to Remove Air from Hot Water Lines Specifically
Hot water lines are especially prone to air buildup due to heating and pressure fluctuations. Here’s how to handle it:
- Turn off the water heater before starting. This prevents damage while bleeding air.
- Open the hot water faucets in your home, starting with the nearest one to the heater.
- Run water until it flows steadily without spitting or hissing.
- Turn the water heater back on and check for smooth operation.
If you have a tankless water heater, consult the manufacturer’s instructions some models have built-in air purge functions.
Dealing with Persistent Air in Pipes
If air keeps returning even after flushing the system, it may indicate a deeper issue.
Check for:
- Leaks in suction lines (especially if you have a well system)
- Faulty air chambers (older systems may lose effectiveness over time)
- Broken or loose valves letting air in
You may need to replace or install new air chambers or water hammer arrestors to absorb air and prevent noise.
Persistent air problems could also be linked to your water heater or municipal water pressure issues if that’s the case, professional help is best.
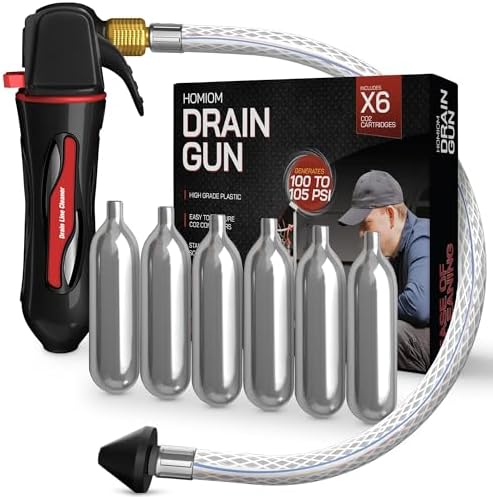
“Clear Drains Without the Splash” – Traditional plungers are messy; this is the “clean” alternative. Check this–

How to Bleed Air from a Well Water System
If you use well water instead of city supply, air in the plumbing lines is even more common and slightly trickier to fix. In most cases, the problem originates from the well pump or pressure tank. Here’s how to handle it step-by-step:
- Turn Off the Power to the Well Pump
Locate your circuit breaker and switch off the power connected to your well system. This prevents accidental operation while you’re bleeding the system. - Find and Close the Main Shutoff Valve
The shutoff valve between the well and your home plumbing should be turned off. - Drain Water from Faucets
Open all faucets inside and outside your home. Let the water flow until it completely stops. This helps release trapped air. - Check the Pressure Tank
Examine the pressure tank air can sometimes accumulate here. If you hear sloshing or bubbling noises, that’s a clear sign. Use the air valve on top to release excess air, but be careful not to drain the tank entirely. - Turn On the Pump and Slowly Refill the System
Once you’ve bled out the air, turn the well pump power back on. Open the main valve slightly to allow water to refill your pipes gradually. - Run Each Faucet Until Smooth Flow Returns
Start with the lowest faucet and move upward. Once all the taps run smoothly, the trapped air is gone.
If you still notice air pockets after this process, there could be a suction leak in the well pump or line. These leaks allow air to enter the system during operation, and you’ll likely need a plumber to locate and seal them.
READ MORE: How Much Does a Plumber Charge for a Hose Bib?
Fixing Air in Radiator and Hydronic Heating Lines
Homes with hydronic heating or radiators face a different type of air problem air trapped in the heating system. This air can cause cold spots, gurgling noises, and reduced heat output.
To fix it:
- Turn off the heating system and let it cool.
- Locate the bleed valves on your radiators. They’re usually near the top corner.
- Use a radiator key or screwdriver to open the valve slightly. You’ll hear air hissing out.
- Once water starts flowing steadily, close the valve.
- Repeat for each radiator in your home.
For hydronic systems with baseboard heaters, the process is similar, though the bleed valves may be hidden behind panels.
If you have to bleed your system frequently, that’s a sign of a circulation or expansion tank issue.
Preventing Air from Entering Plumbing Lines Again
Once you’ve spent time bleeding air from your plumbing, the last thing you want is for it to return. Prevention is key. Here’s how to minimize the chances:
- Inspect for Leaks Regularly: Small leaks let air sneak in over time. Tighten joints and replace old gaskets.
- Maintain Consistent Water Pressure: Sudden changes in pressure can draw air into the system.
- Install Air Release Valves: These automatic valves vent trapped air before it becomes a problem. Check this product & price
- Flush Your System Annually: Especially after plumbing work or long periods of disuse.
- Maintain Your Well System: For those using wells, ensure your foot valves and seals are in good shape.
Proactive maintenance can save you time, frustration, and costly repairs in the long run.

- CHECK BEFORE YOU BUY: EZVAC’s universal base is designed to fit multiple HVAC sizes. The custom black elbow ONLY fits a …
- CLEAR VISIBILITY: The clear tube allows you to see all removed dirt and sediment. We recommend using The EZVAC every 6 m…
- SAVE BIG: Stop wasting money on expensive service calls! With EZVAC’s wet vac attachment, you can clear your AC condensa…
When to Call a Professional Plumber
While removing air from plumbing lines is often a simple DIY task, some situations require a professional’s touch.
Call a plumber if you notice:
- Persistent sputtering or noisy pipes even after bleeding
- Air appearing only in certain fixtures
- Sudden drops in water pressure
- Discolored or murky water
- Leaks or visible pipe damage
A licensed plumber can use diagnostic tools like pressure gauges or air detectors to find hidden leaks or malfunctioning valves.
Professionals can also help install air chambers, pressure regulators, or new valves to ensure your system stays airtight.
Common Myths About Air in Plumbing Systems
Let’s bust a few common misconceptions homeowners have about air in their pipes:
- Myth 1: “Air in pipes always means a leak.”
Not necessarily. It can simply result from recent plumbing work or city water maintenance. - Myth 2: “It’s normal for faucets to sputter all the time.”
Occasional sputtering might happen, but regular air bursts indicate a problem. - Myth 3: “Bleeding air wastes too much water.”
The small amount of water you use during the bleeding process prevents long-term damage, saving you money in the long run. - Myth 4: “Hot water lines don’t get air.”
They actually get it more frequently due to heating cycles and expansion.
Understanding these truths helps you react properly and avoid unnecessary stress or misdiagnosis.
READ MORE: How to Plumb a Washing Machine Drain
Pro Tips for Homeowners
- Open Taps Slowly: After turning your water back on, open faucets gradually to prevent new air pockets.
- Install a Water Hammer Arrestor: This small device cushions air surges, reducing banging noises.
- Keep Plumbing Lines Full: Avoid draining your system unless absolutely necessary.
- Bleed Lines After Major Plumbing Work: Always remove trapped air after maintenance.
- Monitor Pressure Gauges: For well systems, check the pressure tank regularly for unusual readings.
Taking these simple steps can keep your plumbing system in excellent shape for years.
Conclusion
Getting air out of your plumbing lines may sound intimidating, but with the right approach, it’s actually quite simple. Whether you’re dealing with sputtering faucets, noisy pipes, or uneven water pressure, the fix often involves bleeding your lines and restoring water flow in a controlled way.
Air pockets might seem minor, but they can cause long-term issues if ignored everything from noisy pipes to damaged valves or inconsistent water flow. By learning how to remove and prevent air buildup, you’re not just fixing an annoyance; you’re extending the life of your entire plumbing system.
Remember: if you’ve followed all the steps and still notice issues, don’t hesitate to call a professional. Sometimes what seems like “air in the lines” might be a symptom of a bigger problem, like a hidden leak or a failing valve.
What causes air to get into plumbing lines?
Air can enter from water supply interruptions, leaks, faulty valves, or recent maintenance that drained your system.
How do I know if there’s air in my water lines?
You’ll notice sputtering faucets, low pressure, and sometimes banging or gurgling noises when turning on the water.
Is air in pipes dangerous?
Not usually dangerous, but it can cause damage over time by straining pipes and reducing water pressure.
How long does it take to get air out of plumbing lines?
Typically, it takes 10–20 minutes to bleed air from the system completely, depending on your home’s size.
Can I prevent air from getting trapped in the future?
Yes—maintain consistent water pressure, fix leaks promptly, and install automatic air release valves if necessary.

