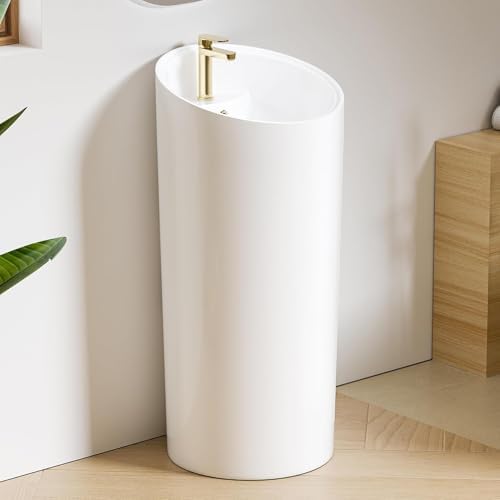
If you’re remodeling your bathroom or simply upgrading your sink, a pedestal sink is an excellent choice. Not only does it offer a sleek, minimalist design, but it also maximizes your bathroom’s space by eliminating bulky cabinetry. However, plumbing a pedestal sink isn’t as simple as just connecting a few pipes. The installation requires precision and understanding of the plumbing system behind the sleek design.
As someone who’s installed dozens of these in homes across the U.S., I can tell you it’s a rewarding DIY project for beginners with a bit of patience. It’s important because proper pedestal sink plumbing ensures efficient drainage, prevents water damage, and complies with U.S. plumbing codes that keep things safe and functional. We’re talking about avoiding mold from hidden leaks or fines from non-compliant setups.
In this guide, I’ll walk you through the process like we’re chatting over coffee step by step, with practical tips to make your installation smooth and leak-free. Whether you’re updating a powder room or tackling a full bath reno, by the end, you’ll feel confident handling pedestal sink plumbing on your own. Lets deep dive into “How to Plumb a Pedestal Sink: Step by Step Guide”
Understanding Pedestal Sink Plumbing Basics
Pedestal sinks aren’t complicated, but they are unforgiving. Every pipe, valve, and connection is exposed, which means sloppy work will stand out immediately. Before touching a wrench, it helps to understand what makes pedestal sink plumbing different from other bathroom sinks.
What Makes Pedestal Sinks Different
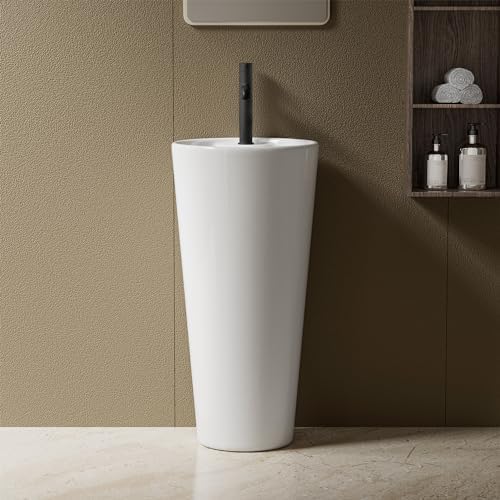
Unlike vanity sinks, pedestal sinks consist of two main parts: the basin and the pedestal leg. The pedestal isn’t structural it doesn’t hold the sink up. Its main purpose is to conceal the drain and water supply lines. That means the sink basin must be securely mounted to the wall, not supported by the pedestal.
Another key difference is visibility. The drain pipe, P-trap, and supply lines are either fully visible or partially visible. Because of that, plumbers often use chrome or polished finishes instead of basic PVC to improve aesthetics.
Tools and Materials Needed for Pedestal Sink Plumbing
Before you get started, it’s important to gather the necessary tools and materials. Having everything ready will make the process much smoother.
Essential Tools:
- Adjustable wrench or basin wrench (great for tight spaces under the sink). See Wrench & Price
- Pipe cutter or hacksaw (for trimming pipes if needed). See Hacksaw & Price
- Plumbers’ pliers or channel locks
- Tape measure and level (to ensure everything’s straight and at the right height). See Level & Price
- Screwdriver set (Phillips and flathead)
- Utility knife (for cutting seals or tape)
- Flashlight (those under-sink areas can be dark)
- Bucket and rags (for catching drips)
Key Materials:
- Pedestal sink kit (basin, pedestal, mounting hardware—check for compatibility with your faucet)
- Faucet (single-hole or widespread, depending on your sink’s holes). See Faucet & Price
- P-trap assembly (chrome or PVC; 1.25-inch is standard for bathroom sinks). See P-trap assembly & Price
- Drain tailpiece and pop-up assembly. See Product & Price
- Flexible supply lines (braided stainless steel, 12-20 inches long). See product & Price
- Shut-off valves (if not already installed; angle stops for hot and cold). See Valves & price
- Plumber’s putty or silicone sealant (for sealing the drain). See Product & Price
- Teflon tape (for threading connections)
- Wall anchors or lag bolts (if studs aren’t aligned)
- Optional: Pipe dope for extra seal on threads
Pro tip: Head to your local home improvement store like Home Depot or Lowe’s and grab a pedestal sink installation kit if you’re starting from scratch. These often include the P-trap and drain parts. Budget-wise, expect to spend $50-150 on tools if you don’t have them, and materials can run $200-500 depending on the sink quality. Always double-check sizes U.S. standards call for 1.25-inch drains for sinks, but confirm with your model’s specs.
If your existing plumbing has old galvanized pipes, consider upgrading to PEX or copper for better flow. And remember, safety first—wear gloves to avoid sharp edges. With these in hand, you’re set to tackle the job without surprises.

READ MORE: How to Plumb a Double Sink
Safety Tips and U.S. Plumbing Code Considerations
Before you start any plumbing project, it’s important to follow safety precautions and understand plumbing codes in your area.
Safety Tips:
- Shut Off the Water: Always turn off the water supply to the bathroom before beginning any plumbing work. If you’re unsure where your shut-off valves are, turn off the main water supply to the house.
- Wear Protective Gear: Use gloves and safety glasses to protect your hands and eyes while working with plumbing tools and materials.
- Proper Ventilation: Ensure the area is well-ventilated, especially when using materials like silicone sealant or plumbing putty.
U.S. Plumbing Code Considerations:
- Drain Pipe Size: Most residential plumbing systems in the U.S. require a 1 ½-inch drain pipe for pedestal sinks. Check local codes to confirm.
- Ventilation: Your pedestal sink’s drain must be vented properly to prevent siphoning and water flow issues. Most systems require venting either through a vent stack or a loop vent.
- Water Supply Connections: Make sure that the water supply lines are properly connected and compliant with local codes. Generally, you’ll need shut-off valves for both hot and cold water lines.
How to Plumb a Pedestal Sink: Step by Step Guide
Alright, let’s get to the meat of it, the hands-on part. Plumbing a pedestal sink involves prepping, mounting, and connecting everything precisely. I’ll break it down into clear, numbered steps so even beginners can follow. Assume you’re replacing an old sink; if it’s new construction, rough-in the plumbing first (drain at 18-20 inches from floor, supplies at 21-23 inches).
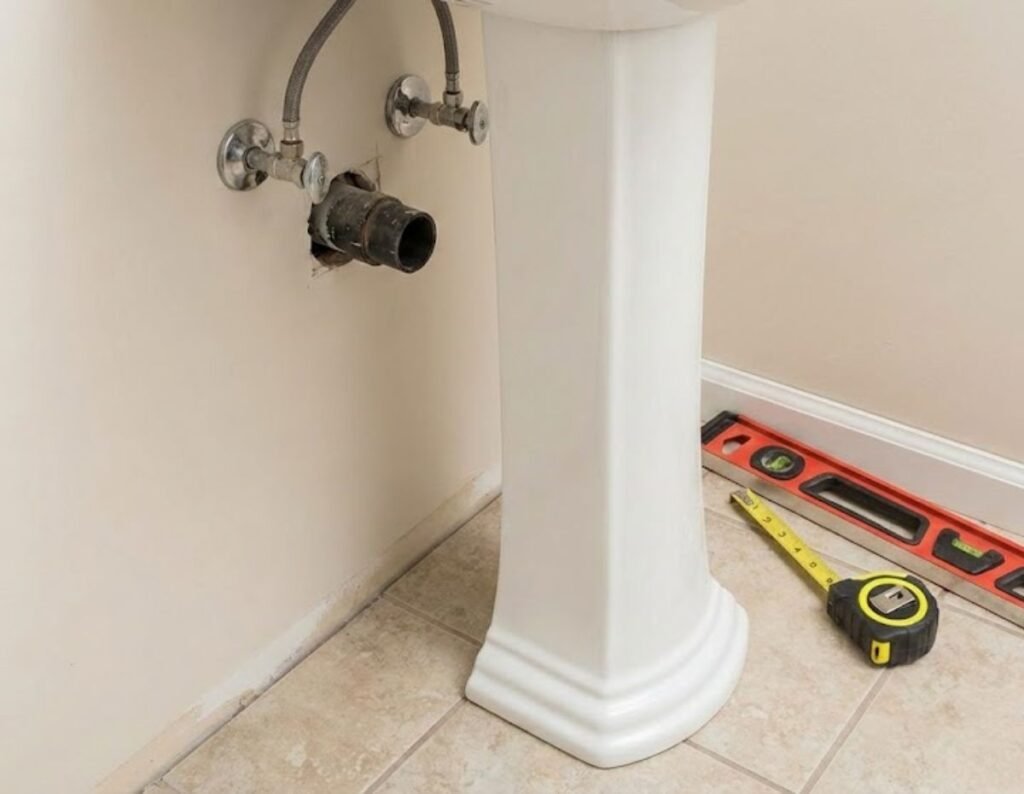
- Prepare the Area: Clear the space. Turn off water at shut-off valves and drain lines. Place a bucket under the old P-trap to catch water. Disconnect supply lines with a wrench, then loosen the drain nut and remove the old sink. Patch any wall holes if needed.
- Check and Adjust Rough-Ins: Measure your drain stub-out (should be centered under the sink, about 12-14 inches from the wall). Supplies should be 4-6 inches apart. If off, you might need to extend pipes—use couplings and solder or push-fit connectors.
- Install Wall Support: Most pedestal sinks need a mounting bracket or lag bolts into studs. Locate studs with a finder, cut drywall if necessary, and add blocking (2×6 wood) between studs for strength. Secure the bracket at the marked height (usually 30-32 inches for the basin bottom).
- Mount the Basin: Dry-fit the basin on the pedestal to mark bolt holes. Drill pilot holes, insert anchors if no studs, and bolt the basin securely. Use a level wobbly sinks are a nightmare.
- Install the Faucet: Before mounting fully, attach the faucet to the basin. Apply plumber’s putty under the base, insert through holes, and tighten nuts from below. Connect internal lines if it’s a two-handle model.
- Position the Pedestal: Slide the pedestal under the basin. It should fit snug but not bear full weight the wall does that.
This setup ensures stability. Take your time; rushing leads to misalignment.
Installing the Drain and P-trap
The drain and P-trap are crucial for proper pedestal sink plumbing they handle wastewater and block odors. Here’s how to nail this part.
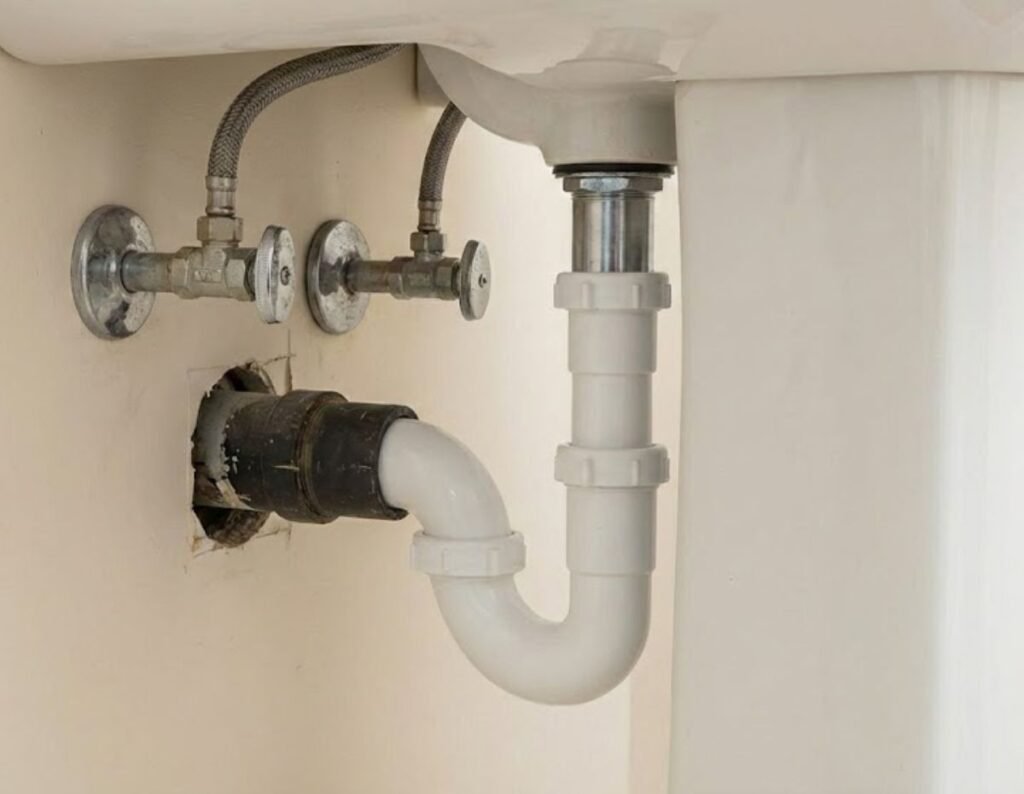
First, assemble the drain: Roll plumber’s putty into a rope and press it under the drain flange. Insert the flange into the sink hole, add a rubber washer below, then the locknut. Tighten gently with pliers overdoing it cracks porcelain.
Attach the tailpiece (vertical pipe) to the drain bottom with a slip nut and washer. Measure and cut if too long.
For the P-trap: This U-shaped piece connects the tailpiece to the wall drain. Use PVC for ease or chrome for looks. Slide the trap nut onto the tailpiece, add the washer, and connect to the trap arm. Align with the wall stub-out, trim if needed, and secure with nuts. Use Teflon tape on threads for a watertight seal.
Test fit everything before final tightening. The trap should slope slightly downward to the wall for good flow. In U.S. codes, the P-trap must be accessible and no more than 24 inches from the fixture.
Common tip: If your drain is floor-mounted, use an S-trap alternative, but check codes P-traps are preferred to avoid siphoning.
This step prevents clogs and leaks, keeping your bathroom dry.
READ MORE:How to Measure Plumbing Fittings
Connecting Water Supply Lines
Water lines bring hot and cold to your faucet simple but vital for leak-free operation.
Start with shut-off valves: If absent, install angle stops on the supply stubs. Wrap threads with Teflon tape, screw on, and tighten.
Attach flexible supply lines: Connect one end to the valve (hand-tight plus 1/4 turn with wrench), the other to the faucet inlet. Braided lines are flexible and resist bursting.
Turn water back on slowly, checking for drips. If leaking, tighten or replace washers.
For pedestal sinks, keep lines neat tuck behind the pedestal. U.S. codes require valves for isolation, so don’t skip them.
Pro advice: Use 3/8-inch compression fittings for most faucets. If lines are too long, coil gently without kinks.
Checking for Leaks and Final Adjustments
Post-install, run water full blast for 5 minutes, inspecting all connections. Dry areas with paper towels to spot slow drips.
Adjust if needed: Level the sink, caulk around the base for stability, and secure the pedestal with bolts if it has holes.
Cycle hot/cold to flush debris. If wobbly, add shims under the pedestal.
This ensures long-term performance without callbacks.
Common Mistakes to Avoid in Pedestal Sink Plumbing
I’ve seen these pitfalls trip up even seasoned DIYers dodge them for a pro finish.
- Ignoring Rough-In Heights: Supplies too high or low mean awkward bends. Measure twice.
- Overtightening Nuts: Cracks porcelain snug is enough.
- Skipping Seals: No putty? Leaks galore.
- Poor Alignment: Wobbly pedestal from uneven mounting.
- Code Oversights: No vent? Backed-up drains.
- Hiding Messy Pipes: Exposed plumbing must look clean use chrome.
Avoid by planning and double-checking.
When to Call a Professional Plumber
DIY is great, but know your limits. Call a pro if:
- Plumbing is in the floor (needs rerouting).
- Walls lack studs for support.
- You hit old lead pipes or asbestos.
- Electrical is involved.
- You’re in a high-rise with complex codes.
In the U.S., licensed plumbers cost $50-150/hour. Use sites like Angi for vetted pros. Better safe than flooded.
READ MORE: How Much Does It Cost to Reroute Plumbing?
Maintenance Tips for Long-Term Performance
Keep your pedestal sink shining with these habits.
- Clean weekly with mild soap and soft cloth skip abrasives.
- Check P-trap monthly for clogs; disassemble and rinse.
- Inspect lines for corrosion; replace every 5-10 years.
- Avoid harsh chemicals; use enzyme cleaners for drains.
- Secure loose parts to prevent wobbles.
Regular care extends life and prevents costly repairs.
FAQs:
How high should I install a pedestal sink?
Aim for 32-36 inches from floor to rim for comfort. Check local U.S. codes for ADA if needed.
How hard is it to install a pedestal sink myself?
With the right tools and a little patience, most homeowners can install a pedestal sink themselves. The process is manageable for beginners but requires attention to detail.
Can I install a pedestal sink without a wall bracket?
While not every pedestal sink requires a wall bracket, many do for added stability. If your sink doesn’t come with one, ensure the pedestal base is securely fastened to the floor.
What size drain pipe do I need for a pedestal sink?
Most pedestal sinks require a 1 ½-inch drain pipe. Make sure the drain size matches the sink’s specifications.
Do I need a plumber’s permit for installing a pedestal sink?
In many cases, installing a pedestal sink doesn’t require a permit, but local codes vary. It’s a good idea to check with your local building department.
How often should I check my pedestal sink for leaks?
Check your pedestal sink’s plumbing every 3-6 months to ensure there are no leaks or signs of wear.
READ MORE: How to Call a Plumber and Ask for Help
Conclusion
Plumbing a pedestal sink may seem intimidating at first, but with the right tools, materials, and a clear step-by-step plan, it’s a manageable DIY project. By following these instructions carefully and paying attention to detail, you can install a functional, stylish pedestal sink that lasts for years

