Plumbing doesn’t take a vacation. Small seasonal changes freezing nights in winter, heavy rains in spring, high use in summer slowly stress pipes, fixtures and appliances. Ignoring routine seasonal maintenance leads to the most common and expensive homeowner problems: burst pipes, basement flooding, failed sump pumps and costly emergency calls. A planned, seasonal approach saves money, reduces risk, and keeps your home working when you need it most.
This guide gives you a clear, practical plan: short checklists for each season, safe step-by-step DIY where appropriate, red flags that mean call a licensed plumber, realistic price ranges (sourced from common retailers and pros), and a comparison table so you can quickly decide what to try yourself and what to hand off. Advice emphasizes safety first, and points readers to trusted authorities for water-quality and Legionella/temperature concerns. A seasonal routine protects your wallet and the most valuable asset you have your home.
Quick seasonal Plumbing checklist
Spring Plumbing Checklist
- Inspect sump pump and test backup battery or secondary pump
- Reconnect outdoor hoses; inspect hose bibs and replace damaged washers.
- Flush water heater (sediment removal) if not done in past 6–12 months.
Summer Plumbing Checklist
- Check irrigation and backflow preventers before the watering season.
- Watch for leaks during higher water usage; monitor bills for unexplained increases.
- Check garbage disposal for odors; run strainers on sinks.
Fall Plumbing Checklist
- Drain and store garden hoses; install faucet covers or frost-proof sillcocks where needed.
- Add pipe insulation in unheated spaces; check washing machine hoses and replace if bulging.
Winter Plumbing Checklist
- Winterize outdoor faucets and sprinkler lines; insulate exposed pipes.
- Know and label your main water shutoff and practice turning it off.
- If away for extended periods, keep the home at moderate temperature and consider shutting water off and draining lines to prevent freeze damage.
Comparison table — Seasonal Plumbing tasks & when to DIY vs call a pro
| Task | Spring | Summer | Fall | Winter | DIY difficulty | When to call a pro |
| Outdoor faucets & hoses | Inspect, reconnect, check anti-siphon | Monitor leaks | Drain hoses, install covers | Shut off/insulate, install frost-proof sillcocks | Easy–Med | If backflow device fails or frozen pipe inside wall |
| Water heater check | Flush tank, inspect relief valve | Monitor performance/noise | Insulate tank, check temp setting | Test T&P valve; check for leaks | Med | Replace tank or gas valve issues |
| Sump pump | Test pump & alarm | Ensure discharge clear | Clean pit & float | Ensure battery backup works | Med | Replacing pump, clogged discharge or miswired alarms |
| Main sewer / drain | Snaking minor clogs | Avoid grease, schedule inspection | Camera inspection if recurring clogs | Avoid pouring fats; insulate exposed sewer lines | Hard | Repeated backups, foul sewer gas, requires sewer camera/hydrojet |
| Indoor faucets/fixtures | Check for drips, replace washers | Tighten & check aerators | Winterize little-used fixtures | Insulate pipes to fixtures in cold zones | Easy | Leaking valve bodies, corrosion, persistent drips |
| Pipes in unheated spaces | Inspect insulation, add wraps | Check for condensation | Add or replace insulation | Heat trace or professional insulation for vulnerable runs | Med | Pipes inside walls freezing repeatedly |
| Irrigation / backflow device | Test backflow device (per local code) | Monitor leaks, seasonal programming | Blow out lines (professionally if required) | Shutoff & freeze protection | Hard | Backflow device certification/repair (code/legal) |
| Garbage disposal | Check mounting, run cold water | Avoid fibrous wastes | Clean with baking soda + vinegar | Ensure no frozen feed line | Easy | Jammed motor that won’t reset |
| Washing machine hoses | Inspect, replace old rubber hoses | Monitor for leaks | Replace with braided stainless if >5 yrs | Drain if leaving home | Easy | Burst supply line or inaccessible behind unit |
| Water softener / filter | Service resin and filters | Monitor salt levels | Sanitize as needed | Keep in heated space | Med | Resin replacement, major repairs |
READ MORE: How to Find a Hidden Water Leak in Your Wall
Example cost row (typical ranges, checked Feb 2026):
- Outdoor frost-proof sillcock (part): $10–$37 — big-box retail (Home Depot / Lowe’s) (checked Feb 2026).
- Sump pump replacement (installed): $645–$2,100 — local pro average (HomeAdvisor, checked Feb 2026).
- Main sewer line unclog/hydrojet: $100–$1,600 — range from snake to hydrojet (Angi, checked Feb 2026).
Season-by-season Plumbing Tips & Tricks
Spring Plumbing Tips & Tricks
Spring is the “startup” season. Melt, rain, and thaw can reveal winter damage and clog drains. Start with these priority tasks.
Top tasks
- Sump pump test & inspection. Pour a bucket of water into the pit — pump should run and discharge water out. If you have a battery backup, cut power to ensure backup kicks in. If pump doesn’t engage or runs continuously, call a pro.
- Clear downspouts & exterior drains. Leaves and debris block rain paths and can overload the drainage system during spring storms.
- Reconnect outdoor hoses; inspect faucet & anti-siphon. Replace hose washers and test the sillcock for leaks. Consider swapping older sillcocks for frost-resistant models in colder climates.
- Flush the water heater. Sediment builds up and reduces efficiency; many pros recommend annual flushing (more often with hard water). If you’re comfortable: shut off power/gas, drain a few gallons until clear, then refill. If noise or poor performance persists, call a plumber.
- Inspect washing machine hoses. Replace rubber hoses with braided stainless every 5–7 years. A failed washing machine hose can flood a laundry room in minutes.
Step-by-step: sump pump DIY test (safe)
- Put on gloves and eye protection
- Remove the lid and visually inspect for debris.
- Pour 5–10 gallons of water into the pit — pump should start within seconds.
- Observe discharge hose for leaks and confirm water exits far enough from foundation.
If the pump fails, turn off power and call a licensed plumber or pump specialist.
Safety warnings & red flags
- Never stick hands into the sump pit while pump is powered.
- If you smell sewer gas, or see sewage backing up, stop using water and call a plumber immediately. Repeated backups usually indicate a main sewer problem requiring professional tools.
When to call a pro
- Sump pump won’t run or runs constantly.
- Evidence of sewer backup or foul odors in multiple drains.
Summer Plumbing Tips & Tricks
Summer is high-use season: irrigation, showers, washing systems see heavier loads.
Top tasks
- Irrigation check & backflow device test. Many local codes require annual testing of backflow preventers. If unsure, get a certified tech.
- Monitor for leaks and higher water bills. A sudden bill spike often shows a hidden leak. Use your meter — and avoid watering during peak sun to reduce evaporation, which can hide small leaks.
- Watch thermal expansion. When hot water demand is high, pressure spikes can stress faucets and valves. Consider an expansion tank if you have closed plumbing systems.
- Garbage disposal TLC. Run with cold water, don’t feed fibrous or starchy wastes, and occasionally flush with ice cubes + citrus to keep blades sharp and smelling fresh.
DIY instructions: detecting hidden leaks
- Turn off all water-using appliances and fixtures. Note your water meter reading. Wait 1 hour (no water use), check meter again — if it moved, you likely have a leak. For localized detection, use dye or food coloring in toilet tanks to detect leaks into bowls.
Safety warnings & red flags
- Never put hands into a garbage disposal. Always cut power at switch or breaker before servicing.
- If you detect high water pressure pulses or banging, call a pro these can indicate water hammer or failing pressure regulators.
When to call a pro
- Hidden leaks that can’t be located, sudden meter movement indicating continuous flow, or pressure issues.
READ MORE: 11 Ways to Fix Water Leaking From the Top of the Water Heater
Fall Plumbing Tips & Tricks
Fall is the season to prepare for freezing weather: drain, insulate, and protect.
Top tasks
- Drain and store garden hoses. Leaving hoses connected lets water sit and freeze back into the sillcock, causing interior damage.
- Install faucet covers or retrofit frost-proof sillcocks. Covers are cheap; retrofits may require a pro if plumbing access is limited.
- Add pipe insulation in attics, crawlspaces, garages. Foam sleeves and wrap tape are easy DIY fixes; heat tape/trace may need a professional install for long runs.
- Service water softener and filters before winter. Prevent icing and ensure systems are in good working order.
DIY step: insulating exposed pipes
- Choose foam sleeves sized to pipe (labeling often includes inner diameters). Cut to length and join using the adhesive or self-seal seam. Seal joints and elbows with appropriate tape or insulation. If pipes are in a wall cavity, consider adding more attic insulation or consult a pro.
Safety warnings & red flags
- Do not overload electrical circuits with heat tape; follow manufacturer installation instructions and local electrical code.
- If pipes freeze in walls repeatedly, a pro should evaluate insulation and heat options.
When to call a pro
- If multiple or recurring freeze events occur, or if pipes are inside walls and inaccessible.
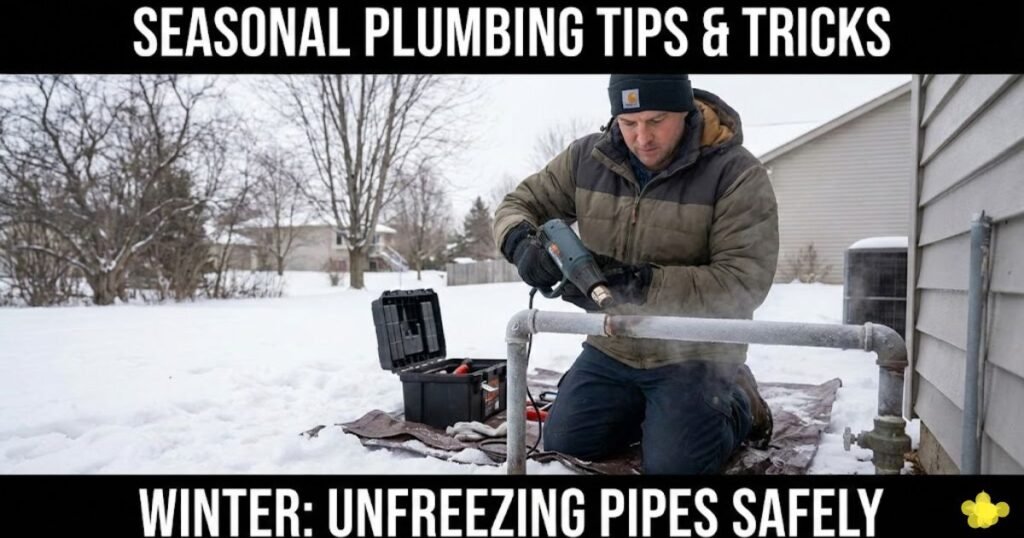
Winter Plumbing Tips & Tricks
Winter is high risk. Freezing causes most plumbing catastrophes.
Top tasks
- Winterize outdoor faucets & irrigation. Shut off interior stop valves for exterior lines and open sillcocks to drain. For in-ground irrigation, most systems require a professional blowout with compressed air. (Local code/backflow rules may apply.
- Insulate and heat vulnerable pipe runs. Add foam, consider heat tape on exposed runs.
- Know your shutoffs. Label and practice shutting off main water and valves to high-risk appliances (water heater, washing machine).
- Emergency supplies: keep a pipe repair clamp, heavy-duty tape, bucket, and a licensed plumber’s phone number handy.
Burst-pipe triage (immediate steps)
- Shut off the main water valve immediately.
- Turn off electricity to flooded areas (if safe to do so) to avoid shock.
- Drain affected fixtures and redirect water using towels and buckets.
- Call a licensed plumber; a professional will assess and replace the broken section and advise on drying/mitigation to prevent mold.
Safety warnings & red flags
- Do not attempt to thaw pipes with an open flame. Use a hair dryer, electric heater, or warm towels. If thawing is not working, call a pro — pressure may have already caused micro-cracks.
- Major flooding, electrical hazards, or structural concerns require emergency services and a licensed contractor.
When to call a pro
- When the frozen section is inaccessible, or after a pipe bursts anywhere behind walls or ceilings.
READ MORE: How Much Does Main Water Line Leak Repair Cost
Tools, materials & product recommendations
Essential items every homeowner should have:
- Pipe insulation sleeves (foam): Typical price $2–$8 per 6-ft sleeve at big-box stores (checked Feb 2026). Good to insulate exposed pipe runs in attics/garage.
- Frost-resistant sillcock / anti-siphon sillcock: Parts range $10–$37 at Home Depot / Lowe’s (checked Feb 2026). Installation may be DIY if accessible; otherwise hire a pro.
- Washing machine braided stainless hoses (2-pack): $25–$40 at big-box and online retailers; replace every 5–7 years (checked Feb 2026).
- Pressure gauge & water-hammer arrester: Pressure gauge kits cost $10–$30; expansion tanks and arresters vary more. If water-hammer noise persists, consult a plumber.
- Thermal leak detector / infrared thermometer: $20–$100 for handheld models — useful for detecting cold spots and hidden pipe freeze risk.
- Basic tool kit: adjustable wrench, pipe wrench, plumber’s tape (PTFE), bucket, flashlight, and work gloves.
Price notes & sources (examples checked Feb 2026): Home Depot and Lowe’s product pages for sillcocks and insulation; HomeAdvisor/Angi cost guides for labor ranges. See Editor Notes for exact citations.
Diagnostic Tools and Modern Plumbing Maintenance
Modern technology has significantly lowered the barrier for high-level home maintenance. In 2026, many homeowners are adopting professional-grade tools for preventative diagnostics.
The Utility of Thermal Imaging
Thermal imaging cameras, which can be purchased or rented for $130–$400, are invaluable for detecting hidden leaks.
- Cold Water Leaks: These appear as dark blue or purple “clouds” behind drywall as the water cools the surface.
- Hot Water Leaks: These appear as bright yellow or red signatures, making them very easy to spot through floors or walls.
- Thermal Contrast: For the best results, run hot water for a few minutes to create contrast before scanning with the camera.
Table 2: Essential Plumbing Toolkit (2026 Market Pricing)
| Tool | Typical Price (Feb 2026) | Source/Vendor | Primary Use |
| Water Pressure Gauge | $10.77 – $15.00 | SupplyHouse / Home Depot | Testing static home pressure |
| Foam Pipe Insulation (6ft) | $1.98 – $4.68 | Home Depot | Insulating pipes in unheated areas |
| Hard Outdoor Faucet Cover | $4.98 | Home Depot | Winterizing outdoor spigots |
| Electric Heat Cable (12ft) | $34.75 – $35.00 | Home Depot | Active freeze protection |
| Aluminum Pipe Wrench (10″) | $63.47 – $72.28 | SupplyHouse | Tightening fittings and valves |
| Thermal Imaging Camera | $129.99 – $399.99 | Home Depot / Amazon | Detecting hidden leaks behind walls |
| Braided Washer Hoses (pair) | $15.00 – $40.00 | SupplyHouse | Replacing high-risk rubber hoses |
READ MORE: What Causes Low Water Pressure in One Faucet — Easy Fixes, Costs & When to Call a Plumber
What to do if a pipe bursts or you lose hot water
Burst pipe immediate checklist
- Shut off the main water valve (practice this annually).
- Turn off electricity to the area if water is touching outlets or appliances (only if you can do so safely).
- Open faucets to drain the system and relieve pressure.
- Contain the water — buckets, towels, move valuables. Protect ceilings/floors beneath the leak.
- Call a licensed plumber right away; for large floods, also contact emergency services or your insurer as needed.
If you lose hot water
- Check the breaker or gas supply. If the water heater won’t light or is leaking, shut power/gas and call a plumber. Routine tune-ups and tank flushing can avoid sudden failures.
Quick action items to limit damage
- Have a small emergency kit (flashlight, heavy-duty tape, pipe clamp, bucket, plumber’s putty).
- Photograph damage for insurance.
- After repair, run and flush lines to clear debris.
Cost of Plumbing Repair
As of early 2026, plumbing costs have continued to trend upward due to material inflation and labor shortages. Budgeting for these repairs prevents financial stress during a plumbing crisis.
Table 3: 2026 Typical Plumbing Repair Price Ranges
| Project | Estimated Cost (Feb 2026) | Price Sourcing Notes |
| Outdoor Spigot Replacement | $150 – $350 | Google search check: Average for a “standard” hose bibb |
| Replace Burst Pipe Section | $400 – $1,500 | Angi 2026 data: Depends on access and water damage |
| Water Heater Tune-up | $150 – $300 | Local plumber estimate: Includes flush and safety check |
| Sump Pump Replacement | $400 – $700 | HomeAdvisor: Range for a submersible unit plus labor |
| Unclog Main Sewer Line | $150 – $800 | Modernize 2026 report: Price based on snaking length |
READ MORE: How to Clean Copper Plumbing Pipes
5 FAQs
Q1: How do I winterize outdoor faucets to prevent frozen pipes?
Turn off the interior shutoff for the exterior faucet, disconnect hoses and drain them, open the exterior valve to allow drainage, and install insulated faucet covers on exposed sillcocks. For in-ground irrigation, get a professional blowout if local codes or system complexity require it. For frost-proof sillcocks, check big-box part pricing and consider a pro if the wall access is limited.
Q2: How often should I flush my water heater?
Most pros recommend flushing at least once a year; in hard-water areas or older tanks, every 6 months helps reduce sediment, improve efficiency and extend life. If you hear banging or reduced hot water, flush sooner and consider a pro inspection.
Q3: What are the signs I need a new sump pump?
Frequent cycling, failure to start during testing, unusual noises, visible rust, or repeated basement dampness are signs. A failing pump in a flood-prone home should be replaced promptly; professional replacement costs vary but average in the low-thousands fully installed.
Q4: Should I replace rubber washing machine hoses with braided stainless steel?
Yes. Braided stainless hoses are more durable and less likely to burst. They’re inexpensive (roughly $25–$40 for a 2-pack at big-box/online retailers) and are a simple DIY upgrade that can prevent sudden floods. Replace rubber hoses every 5–7 years.
Q5: When do I need a sewer camera inspection vs. a simple snaking?
If clogs recur, smell sewer gas, or snaking doesn’t clear the issue, a camera inspection finds tree roots, collapsed sections, and buildup. Costs range from a modest snake job to $200–$1,600+ for camera inspection and hydrojetting depending on severity.
Final Verdict
A little seasonal attention repays itself many times over. Start with the quick checklists above, invest in a few inexpensive tools and parts, and schedule larger maintenance (sump pump, water heater service, backflow tests) during shoulder seasons to avoid emergency costs. If you ever suspect a serious leak, sewer backup, gas smell, or electrical hazard with water, stop and call a licensed plumber immediately. For routine seasonal projects that are within your comfort level, follow manufacturer instructions and local codes and when in doubt, hire a pro. Protect your home now, and you’ll sleep easier all year.

