Every home or commercial building relies on a carefully designed plumbing system to deliver clean, pressurized water. Whether you’re washing dishes, taking a shower, or running an industrial dishwasher, consistent water pressure is key. But what happens when that pressure is too high? That’s where a PRV (Pressure Reducing Valve) comes into play. A PRV ensures that your plumbing system maintains the right water pressure strong enough for daily use but not so high that it damages pipes, fittings, and appliances. Think of it as the “traffic cop” of your water system, directing and controlling flow to keep everything balanced and safe.
Without a PRV, your home could be at risk of leaks, pipe bursts, or even appliance failure. Municipal water systems often deliver water at pressures much higher than what residential systems are built to handle. By installing a PRV, you protect your investment and ensure smoother plumbing performance throughout your property. Lets deep dive into “What is a PRV in Plumbing?”
READ MORE: What Does FNPT Mean in Plumbing?
Understanding Plumbing Pressure
Water pressure, simply put, is the force that pushes water through pipes. It’s measured in pounds per square inch (psi). In most homes, ideal water pressure falls between 40 and 60 psi. Anything higher than 80 psi can stress your plumbing components. Municipal systems, on the other hand, often send water at 100 psi or more to ensure adequate flow across long distances and elevations.
Without regulation, this high pressure can wreak havoc on domestic plumbing systems. It can lead to leaky faucets, noisy pipes, and premature wear on appliances like dishwashers and water heaters. The PRV acts as a safeguard reducing that pressure to a manageable level before the water flows through your household pipes.
The PRV’s importance is often overlooked, but it plays a vital role in extending the lifespan of your entire plumbing system and reducing costly maintenance.
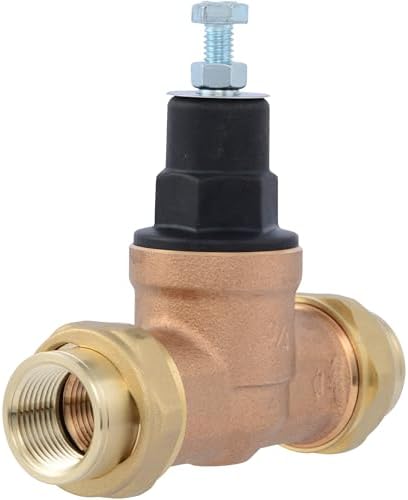
- Short lay length and compact design installs in tight spaces
- Cartridge-loaded design simplifies repairs
- Time- and labor-saving tailpiece options include threaded, PEX, copper sweat and CPVC
What is a PRV (Pressure Reducing Valve)?
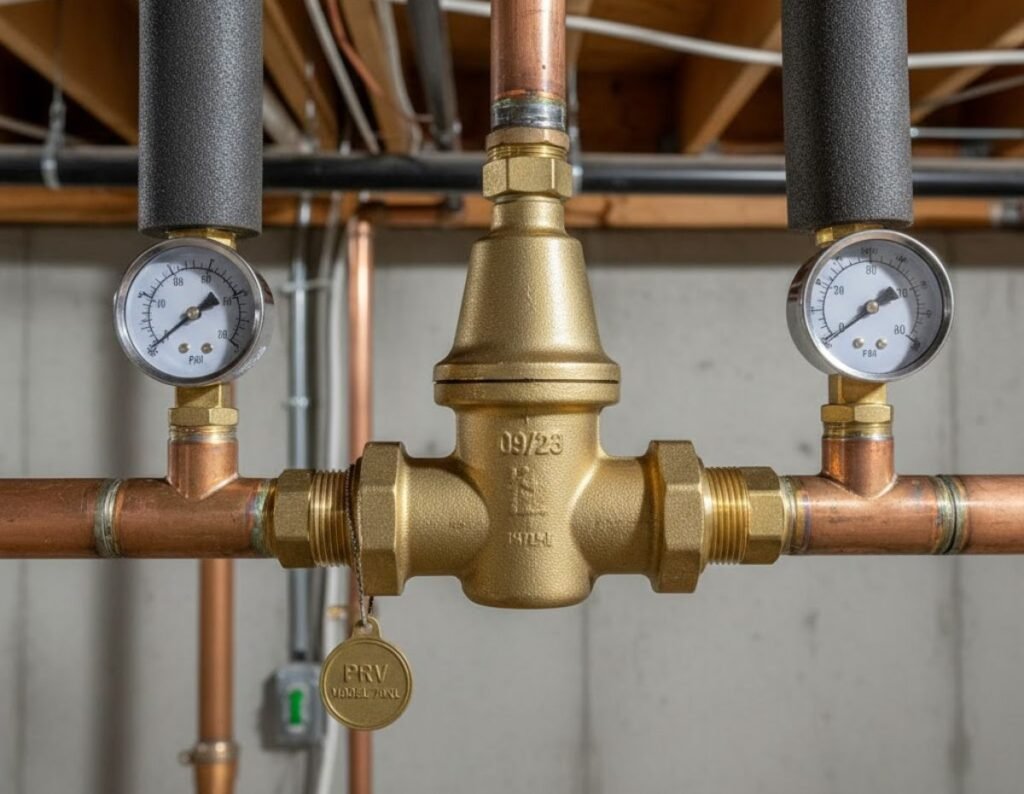
A Pressure Reducing Valve, or PRV, is a small but powerful device that automatically lowers the pressure of incoming water from the main supply line to a safer level suitable for your home or business. It’s usually installed right after the water meter or where the main water line enters your property.
The PRV works by creating resistance to the incoming water. As water enters through the valve, a spring-loaded diaphragm mechanism adjusts the flow, ensuring that only the right amount of pressure passes through. This automatic regulation happens seamlessly every time you turn on a tap, flush a toilet, or start a washing machine.
In simple terms, if your municipal supply is sending water at 120 psi, your PRV might reduce it to 60 psi safe and comfortable for household use.
READ MORE: What Does NPT Mean in Plumbing?
How Does a PRV Work?
Imagine water pressure as the speed of cars on a highway. Without control, cars might speed dangerously fast and cause accidents. A PRV works like a speed limit sign it controls that “speed” (pressure) before it reaches sensitive areas.
Inside a PRV, there’s a spring and diaphragm that respond dynamically to water flow. When water enters under high pressure, it pushes against the diaphragm. The spring resists this push, allowing only the correct amount of water pressure to exit. If demand increases (for example, multiple faucets open), the valve automatically adjusts to maintain consistent output pressure.
This self-regulating mechanism makes PRVs energy-efficient and low-maintenance. There are no electronics or external controls just pure mechanical balance between pressure forces.
- Short lay length and compact design installs in tight spaces
- Cartridge-loaded design simplifies repairs
- Time- and labor-saving tailpiece options include threaded, PEX, copper sweat and CPVC
Main Components of a PRV
To really understand how a PRV keeps your plumbing in check, it helps to know what’s inside it. Although small, the PRV is made up of several precisely engineered components that work together seamlessly.
- Valve Body: This is the main shell that houses all internal parts. It’s usually made of brass or bronze, materials known for their durability and resistance to corrosion.
- Spring: The spring provides the tension that helps control pressure. By adjusting the spring compression (usually with an external screw), you can change how much the valve restricts water flow.
- Diaphragm: This flexible rubber or metal disc separates the high-pressure side from the low-pressure side. It moves slightly up or down as water pressure changes, regulating the outlet flow.
- Adjustment Screw: Located at the top of the valve, this screw lets you manually increase or decrease outlet pressure. Turning it clockwise tightens the spring, raising the pressure, while turning it counterclockwise lowers it.
- Inlet and Outlet Ports: These are the openings that connect the PRV to the plumbing lines. The inlet receives high-pressure water, and the outlet delivers reduced-pressure water to your home’s system.
Together, these parts act like a well-coordinated team, constantly balancing the internal forces to ensure smooth, steady water pressure.
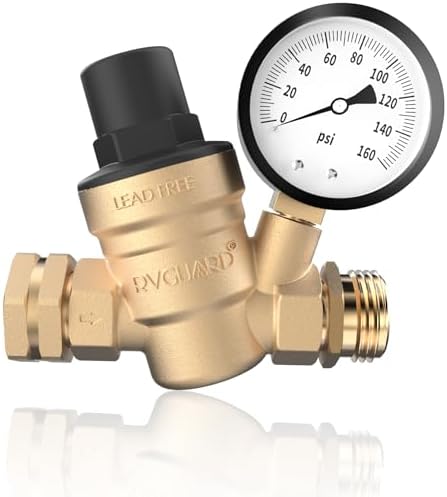
- Function: Prevent water pipes from being damaged due to high pressure, suitable for campers, trailers, and RV plumbing s…
- Safety: Class C46500 lead-free brass treated by hot casting process technology. Each regulator is tested to contain less…
- Compatible: Designed with 3/4″ garden hose thread. It is compatible with all American water sources, easy to use. RVGUAR…
READ MORE: What Is a Manifold in Plumbing?
Why PRVs Are Essential in Modern Plumbing
In the past, homes often operated without PRVs, relying solely on municipal control. But as cities grew and water systems expanded, pressure inconsistencies became a real problem. Too much pressure can wreak havoc: pipes can burst, seals can blow, and water heaters can overheat.
PRVs are not just optional upgrades anymore they’re essential safeguards. They:
- Protect plumbing fixtures from sudden surges that might damage faucets or showerheads.
- Prevent leaks and drips by reducing stress on joints and seals.
- Ensure consistent water flow across multiple outlets, even during high-demand periods.
- Increase appliance longevity by reducing the wear and tear caused by high water pressure.
Installing a PRV is like putting a surge protector on your plumbing system. It quietly prevents damage, saving you thousands of dollars in potential repairs or replacements.
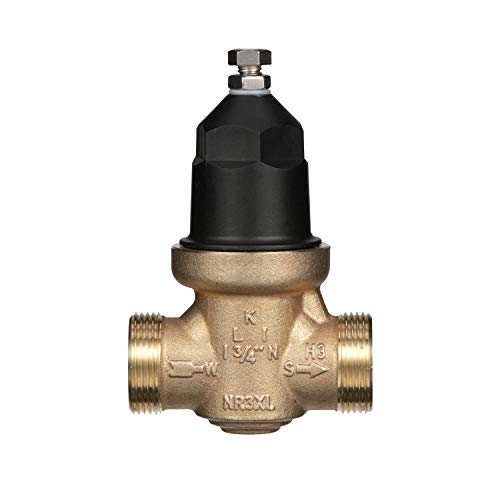
- CASH ACME WATER PRESSURE REGULATOR: The Cash Acme Direct Pressure Regulating Valve (PRV) features a half cartridge desig…
- DESIGN: This compact, inline 3/4 in. NPTF double union pressure regulating valve features EB45’s tamper-resistant design…
- MATERIAL: This regulating valve is made from brass, stainless steel and durable polymer components to withstand corrosio…
Signs You Need a PRV in Your Home
If you’ve ever noticed your shower spray feels painfully strong, or your washing machine bangs when filling, that could be excessive water pressure. Here are some telltale signs that you might need a PRV:
- Leaky Faucets or Running Toilets: Excessive pressure can cause valves to fail prematurely, resulting in constant dripping or running.
- Pipe Noise: Whistling, banging, or rattling noises (known as “water hammer”) indicate that water is moving too forcefully through your pipes.
- Frequent Appliance Damage: If your dishwasher or water heater needs repairs too often, high pressure may be the hidden culprit.
- Sudden Bursts or Leaks: Over time, unregulated pressure can weaken pipe joints, leading to spontaneous leaks or bursts.
- Inconsistent Water Flow: Water pressure that surges or drops abruptly is another clear sign that your plumbing system needs regulation.
If one or more of these issues sound familiar, it’s worth having a professional plumber test your water pressure and possibly recommend a PRV installation.
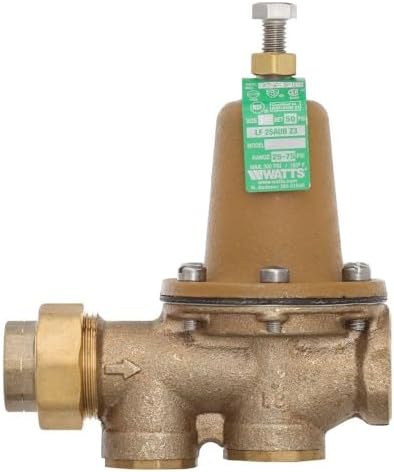
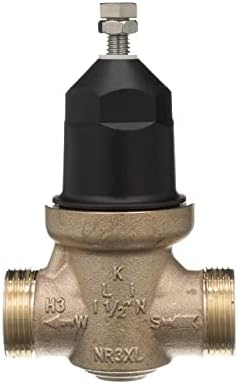
- Reduces incoming water pressure to protect plumbing systems and reduce water consumption in commercial industrial and re…
- Water supply pressures range is 25 to 75 psi (172 to 517 kPa) with the standard setting at 50 psi (345 kPa)
- Lead free copper silicon alloy with stainless steel strainer and corrosion resistant adjusting and cage screws, high-tem…
READ MORE: What Does MIP Stand for in Plumbing?
Benefits of Installing a PRV
The advantages of adding a PRV go far beyond just preventing leaks. Here’s what homeowners gain from it:
- Extended Appliance Lifespan: Your dishwasher, washing machine, and water heater all operate better and last longer under moderate pressure.
- Reduced Water and Energy Bills: Lower pressure means less water wasted and less energy used to heat it.
- Improved Comfort: Water flows smoothly and evenly throughout the house, even when multiple fixtures are used simultaneously.
- Environmental Impact: By reducing water waste, you contribute to sustainable water management in your community.
- Safety Assurance: Protects against catastrophic failures like pipe bursts that can lead to flooding and structural damage.
PRV Installation Process
Installing a PRV isn’t rocket science, but it does require precision. For most homeowners, hiring a licensed plumber is the safest choice. However, for the DIY enthusiast, here’s what the general process looks like:
- Turn Off Water Supply: Shut off the main water line before starting.
- Drain the System: Open faucets to release pressure and empty pipes.
- Select Installation Point: Typically just after the water meter or main shutoff valve.
- Cut the Pipe: Use a pipe cutter to remove a section large enough for the PRV to fit.
- Install the Valve: Attach the PRV using threaded or soldered fittings, ensuring the flow direction arrow points toward your home.
- Tighten Connections: Use a wrench to secure fittings without overtightening.
- Restore Water Flow: Slowly reopen the main valve and check for leaks.
- Adjust Pressure: Use a pressure gauge and the adjustment screw to set desired pressure (usually 50–60 psi).
READ MORE: What to Do if Water Heater is Leaking from Bottom
Adjusting a PRV: A Step-by-Step Guide
Sometimes you may need to fine-tune your PRV if your water pressure feels too low or too high. Follow these steps carefully:
- Attach a Pressure Gauge: Screw it onto a nearby hose bib or laundry faucet.
- Turn On Water: Record the current pressure reading.
- Locate the Adjustment Screw: It’s usually on top of the PRV under a cap.
- Turn to Adjust: Clockwise increases pressure, counterclockwise decreases it.
- Make Small Adjustments: Turn a quarter turn at a time, then recheck the pressure.
- Target Range: Aim for around 50 psi for most homes.
Avoid over-adjusting, as setting it too high can undo the protection the PRV provides. If you can’t achieve stable pressure, it might be time for a replacement.
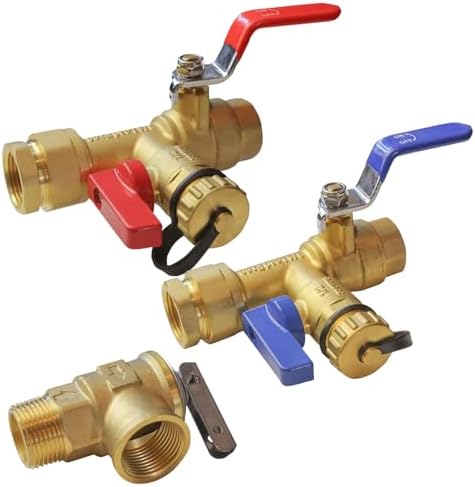
- Package Includes: 1 x hot isolation valve, 1 x cold isolation valve, 1 x pressure relief valve.
- Easy to Use: These 3/4-inch IPS isolator tankless water heater service valves, rated at 500 WOG, come with color-coded h…
- High-Quality Material: Made from certified lead-free brass, these components meet all federal and state regulations for …
Maintenance Tips for PRVs
Like any mechanical device, PRVs benefit from routine maintenance. Here’s how to keep yours in top shape:
- Inspect Annually: Check for leaks, corrosion, or strange noises.
- Flush the Valve: Sediment can build up and restrict flow; flushing helps maintain function.
- Replace Worn Components: The spring and diaphragm can wear out after years of use.
- Monitor Pressure: Use a gauge periodically to ensure pressure stays stable.
- Call a Professional: If the valve makes whining or hammering noises, a plumber should evaluate it.
Proper maintenance ensures that your PRV performs efficiently for years, safeguarding your plumbing system and saving on costly replacements.
READ MORE: What Size Circuit Breaker for Water Heater?
Common Problems and Troubleshooting
Even though PRVs are built to last, like any mechanical component, they can develop issues over time. Understanding common problems will help you identify and fix them early before they escalate into bigger plumbing disasters.
1. Water Leaking from the PRV:
If you notice water dripping from the valve, it could mean the internal seal or diaphragm is worn out. Sometimes, debris or sediment from the water supply can cause the valve to stick open, allowing water to escape. Cleaning or replacing the internal components usually resolves the issue. However, if the valve body itself is cracked, it’s best to replace the entire unit.
2. Fluctuating or Low Water Pressure:
When your faucets suddenly lose pressure or water flow becomes inconsistent, the PRV may be clogged with mineral deposits. This problem is common in areas with hard water. A simple cleaning might fix it, but in severe cases, the valve may need to be replaced.
3. Noisy PRV (Whistling or Banging Sounds):
A whistling sound indicates that the internal spring or diaphragm isn’t functioning smoothly, often because of wear or corrosion. If the valve makes banging noises (known as “water hammer”), it could mean the water pressure is still too high or the PRV isn’t adjusted correctly.
4. PRV Not Regulating Properly:
If your PRV no longer seems to reduce pressure effectively, it may have reached the end of its lifespan. Most PRVs last between 7 to 12 years, depending on water quality and maintenance.
Quick Tip: Keep a pressure gauge handy. Regularly checking your system’s water pressure is the easiest way to spot PRV problems early and prevent serious plumbing damage.
How to Test Your Water Pressure
Testing your water pressure is quick and easy, and it helps determine whether your PRV is doing its job correctly. Here’s how to do it:
- Get a Pressure Gauge: You can buy one from any hardware store. Choose a model that connects to an outdoor faucet or washing machine connection.
- Attach the Gauge: Screw it tightly to a cold-water faucet, preferably the one closest to where the main water line enters your house.
- Turn On the Faucet: Let the water flow fully and read the gauge.
- Interpret the Results:
- Below 40 psi: Pressure is too low—your PRV may be over-reducing.
- 50–60 psi: Ideal range for most homes.
- Above 80 psi: Too high—your PRV may need adjustment or replacement.
- Below 40 psi: Pressure is too low—your PRV may be over-reducing.
If your water pressure fluctuates frequently, it’s worth checking the PRV’s condition or consulting a plumber. Regular testing ensures that both your plumbing system and PRV remain in top working condition.
PRV vs. Pressure Relief Valve: What’s the Difference?
Many homeowners confuse a Pressure Reducing Valve (PRV) with a Pressure Relief Valve (PRV)—yes, they share the same acronym, but they serve completely different purposes.
| Feature | Pressure Reducing Valve | Pressure Relief Valve |
| Function | Reduces high incoming pressure to a safe level | Releases excess pressure to prevent system damage |
| Operation | Works continuously to control flow | Activates only when pressure exceeds a set limit |
| Placement | Installed at the main water line | Found on appliances like water heaters |
| Goal | Regulate water pressure | Protect from dangerous pressure buildup |
To put it simply:
- A Pressure Reducing Valve manages everyday water flow.
- A Pressure Relief Valve acts as an emergency safety release.
Both are vital for a healthy plumbing system, and many homes use both one to regulate and the other to protect.
READ MORE: Can You Use 90 Bends on Plumbing Vent Pipe?
Cost and Lifespan of a PRV
When budgeting for a PRV, cost depends on quality, size, and brand. Generally, the valve itself costs between $50 and $150, but professional installation may add $200–$400, depending on labor and local rates.
The lifespan of a PRV typically ranges from 7 to 15 years. Factors that affect longevity include:
- Water Quality: Hard or sediment-filled water shortens lifespan.
- Usage Levels: Homes with constant high demand may wear valves faster.
- Maintenance: Regular cleaning and inspection extend service life.
Replacement Signs:
- Water pressure feels inconsistent.
- Pipes or fixtures leak frequently.
- Valve body shows visible corrosion.
- Pressure gauge readings are erratic even after adjustments.
Replacing a PRV when needed is a smart investment—it prevents costly water damage and ensures smooth operation of all your water-dependent appliances.
Conclusion
So, what is a PRV in plumbing? It’s much more than just a valve—it’s the guardian of your plumbing system. A PRV ensures that the water entering your home is at a safe, consistent pressure, protecting pipes, fixtures, and appliances from the destructive effects of excessive force.
By managing water flow intelligently, PRVs help homeowners enjoy comfort, safety, and lower utility costs. They also promote sustainability by reducing water waste and extending the lifespan of essential equipment.
FAQs
What is the ideal water pressure for a home?
The best range is 50–60 psi. This provides adequate flow without putting unnecessary stress on pipes and fixtures.
How often should a PRV be replaced?
Most PRVs last 7–12 years, but heavy use or hard water can shorten that lifespan. Regular pressure checks will tell you when it’s time for replacement.
Can I install a PRV myself?
Yes, if you’re comfortable with plumbing work. However, for most homeowners, hiring a professional ensures safety and compliance with local codes.
What happens if a PRV fails?
Failure can cause dangerously high pressure, leading to leaks, burst pipes, or damaged appliances. Regular maintenance prevents this.
Are PRVs mandatory in all homes?
Many building codes require PRVs, especially where incoming pressure exceeds 80 psi. Even if not mandatory, they’re highly recommended.

