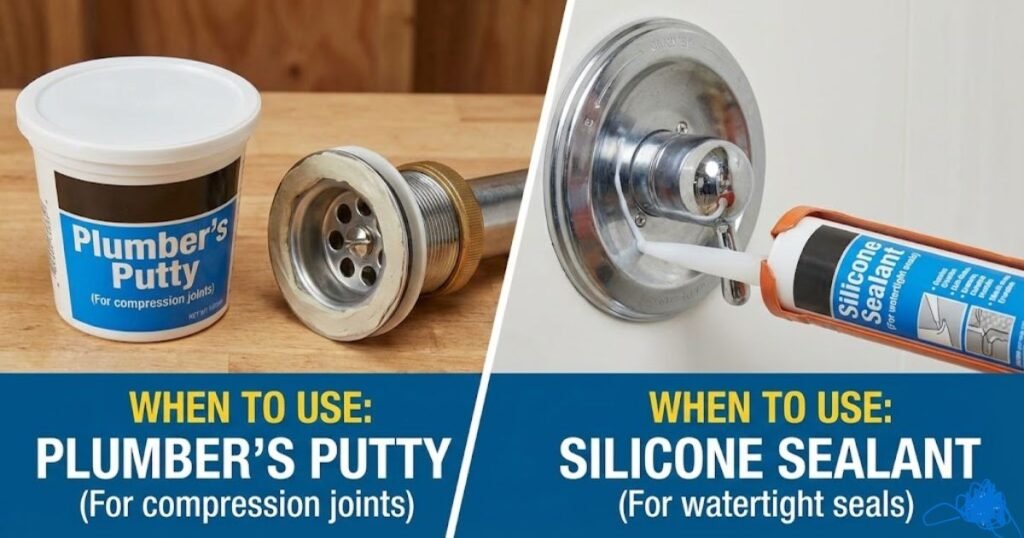
You’re tightening a sink flange and notice a tiny weep of water under the sink. Or you just had a new undermount granite sink fitted and the seam between sink and countertop needs sealing. Which sealant do you grab from the toolbox: plumber’s putty or silicone?
That choice matters. Use the wrong product and you can end up with stains on a granite countertop, a leaking sink drain, or a permanent mess that’s a pain to remove. Use the right one and you get a tidy, water-tight seal that lasts years and is easy to service when you need it. Lest deep dive into “When to Use Plumber’s Putty vs Silicone Sealant”
This guide gives straightforward, homeowner-friendly rules of thumb for common jobs (sinks, drains, tubs, tile, stone countertops and outdoor fixtures), exact DIY steps for applying each material correctly, clear warnings about surfaces and plastics, and real U.S. retail price examples checked Feb, 2026.
What is plumber’s putty?
Definition & composition
Plumber’s putty is a soft, clay-like, malleable sealing compound traditionally made from an oil base and fillers. It comes in tubs or rolls; you roll it with your hands and seat it where two surfaces meet. It never “cures” hard it remains pliable, which makes removal or adjustment easy.
Typical uses Plumber’s Putty
Plumber’s putty is the classic choice for sealing sink strainers, basket drains, and many faucet bases where a compressive, non-adhesive seal is required and you may need to remove the fixture in the future. Because it doesn’t set or glue things in place, you can tighten, re-seat or remove fixtures without chipping or scraping hardened caulk.
Check this & Get discount here-
- Adhesives & Sealants
- Country of manufacture: United States
- Manufacturer: Oatey
Advantages of Plumber’s Putty
- Instant seal — no cure time required.
- Easy to manipulate and clean up (wipe off excess).
- Ideal for installations that might require future disassembly (e.g., replacing a sink strainer).
- Very inexpensive (small tubs cost a few dollars).
Check this & Get discount here-

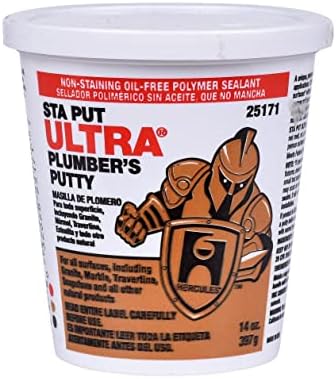
- Versatile Plumbing Putty: Black Swan Plumbers Putty is an effective waterproof putty sealant, perfect for setting bowls,…
- Stay Soft Formula: Unlike other plumbing putty, our product remains soft over time, even under high temperatures. Ideal …
- Leak Prevention and Repair: This plumber’s putty not only fixes leaks but also prevents them. It’s a perfect waterproof …
Limitations & manufacturer cautions of Plumber’s Putty
- Plumber’s putty is water-resistant, not fully waterproof in constant-immersion situations. It’s intended for static compression seals rather than joints that need flexible adhesive bonding.
- Standard oil-based putty can stain porous stone (granite, marble) and may degrade certain plastics (ABS, acrylic). Because of that, several manufacturers now offer stain-free or non-staining formulas safe for many stone surfaces — check the label. Oatey, for example, sells stain-free putty designed for use with granite, marble, quartz and Corian®.
- Not an adhesive: it doesn’t bond surfaces, so it’s not appropriate for threaded or pressured joints.
Practical note: For many traditional metal sink installations, plumber’s putty has been the go-to for decades. But modern materials (plastic drains, engineered stone countertops, acrylic tubs) have pushed silicone into more and more roles.
READ MORE: What Is Plumber’s Tape Used For?
What is silicone sealant?
Definition & types
Silicone sealant (often called silicone caulk) is a polymer-based liquid that cures into a flexible, rubber-like seal. There are several formulations relevant to homeowners:
- 100% silicone (kitchen & bath): best for wet areas; waterproof and mildew-resistant.
- Silicone-latex blends / acrylic-silicone: often paintable (some are marketed as “paintable siliconized acrylic”); easier to finish but less durable in prolonged water exposure.
- Specialty formulations: e.g., for exterior use (UV resistant), neutral-cure silicone for stone, or low-odor/fast-cure versions.
Check this & Get discount here-

- Indoor/Outdoor 100% Waterproof Seal – Provides a durable, long-lasting seal for both indoor and outdoor use, perfect for…
- 30-Minute Water-Ready – Fast-curing formula allows water exposure in just 30 minutes, perfect for quick home repairs and…
- Mold & Mildew Resistant – Protects surfaces from mold and mildew growth; easy to maintain with regular cleaning for last…
Properties Silicone Sealant
- Adhesion: bonds strongly to most surfaces (metal, glass, ceramic, tile, stone, many plastics).
- Waterproofing: once cured it provides permanent waterproofing suitable for continuous wet areas (showers, tub seams, undermount sinks).
- Flexibility: remains elastic and can handle movement and thermal expansion.
- Mildew resistance: many kitchen & bath silicones include mold inhibitors.
Check this & Get Discount here-

- 100% Silicone Caulk Protection: This silicone caulk clear provides ultimate waterproof protection, ensuring a reliable s…
- Strong and Flexible: Delivers a silicone sealant waterproof clear that remains permanently flexible, adapting to surface…
- Quick 30 Minute Water Ready Performance: Experience the convenience of a silicone caulk that becomes water resistant in …
Pros of Silicone Sealant
- Durable, long-lasting seal in wet environments.
- Works on porous and non-porous surfaces (including many natural stones) if the product is designed for it.
- Good for plastic components and places putty would attack.
Cons of Silicone Sealant
- Requires curing time (commonly 24–48 hours, sometimes up to 72 hours depending on product, thickness and humidity).
- Harder to remove than putty — it bonds and must be cut or dissolved with removers.
- Not all silicone is paintable (use an acrylic blend if painting is required).
Silicone Sealant Uses Case
Use silicone when you need permanent waterproofing, adhesion, or flexibility — for tub-to-wall seams, shower corners, undermount sink perimeters (especially with stone), and for any plastic drain / gasket connections.
Check this & Get Discount here-
Side-by-Side Comparison: Plumber’s Putty vs. Silicone Sealant
The following table provides a direct comparison of properties to guide professional and DIY selection.
| Use / Property | Plumber’s Putty | Silicone Sealant | Best Choice (Short Rule) |
| Waterproof? | Good for static, compression seals | Excellent, permanent waterproofing | Silicone for wet areas |
| Flexibility | Low–medium (stays pliable but static) | High flexibility (up to 50% movement) | Silicone for flexible joints |
| Adhesion to Stone | Not recommended — will stain | Recommended (100% neutral-cure silicone) | Silicone for stone |
| Best for | Sink flanges, basket strainers, faucet bases | Bathtub seams, showers, tile, exterior fixtures | See specific use cases below |
| Cure Time | No cure — remains pliable | Cures (usually 24–48 hours) | Putty for immediate use |
| Paintable? | No | No (unless hybrid acrylic-silicone) | Acrylic-silicone if painting |
| Ease of Removal | Very Easy | Difficult (requires scraping/solvents) | Putty for serviceable parts |
Check this & Get Discount here-

- PRECISION CAULKING WITH DRIP-FREE TECHNOLOGY: The Octogun 930-GTD Caulking Gun by Newborn offers advanced drip-free tech…
- EXTRA TOOLS INCLUDED FOR VERSATILITY: The Octogun 930-GTD comes with a range of built-in tools to streamline your caulki…
- HEX ROD FOR EFFORTLESS CAULKING: The Octogun caulking gun features a hex rod for greater durability and smoother caulk d…
READ MORE: What Does FNPT Mean in Plumbing?
Common use-cases: Plumber’s Putty Uses, Silicone Sealant Uses
Below are common fixtures and clear, actionable choices.
Sealant for Kitchen sink drain / basket strainer
- Use plumber’s putty for a metal basket strainer going into a stainless or porcelain sink if the drain and sink are metal/porcelain and you want to be able to remove the strainer later. Putty gives an instant, adjustable seal and is traditional for this job.
- Use silicone if the drain body or sink components are plastic or if the countertop/sink is porous stone and the putty you have is not labeled non-staining. (Many newer sinks use plastic parts; silicone is safer there.)
Sealant for Faucet base
- On metal deck-mount faucets where the fixture may be removed later, plumber’s putty is convenient. For faucets on stone or with plastic shanks, use an appropriate silicone. Double-check manufacturer instructions many faucet makers specify what to use.
Undermount sinks (Sealant for Granite Sink)
- Silicone is usually correct. Undermount sinks create a joint that benefits from the adhesive and waterproofing of silicone and silicone’s capacity to bond stone to metal. Also, many stones can stain from standard putty use silicone or a manufacturer-recommended nonstaining putty.
Sealant for Bathtub / Shower Seams
- Silicone (kitchen & bath, mold-resistant) — it remains flexible with movement and resists mildew in continuous wet environments. Plumber’s putty is not appropriate.
Sealant for Tile grout joints / expansion joints
- Use silicone or specialized caulks (silicone or polyurethane) for expansion joints because they remain elastic. Putty doesn’t bond as an adhesive and isn’t appropriate.
Sealant for Outdoor fixtures / exterior use
- Silicone (UV and weather-resistant formulations) is best for exterior sealing. Plumber’s putty will dry out, collect dirt, and is not designed for UV exposure.
Sealant for Plumbing fixtures with O-rings / threaded joints / slip-joint connections
- Do not use plumber’s putty inside threaded or pressurized pipe joints use thread tape (PTFE/Teflon) or pipe-joint compound where appropriate. Silicone can be used to seal around joints in some cases but check the manufacturer’s installation instructions.
When a manufacturer tells you what to use
- Always follow the fixture manufacturer’s instructions. If they require silicone or specify “do not use putty,” follow that it’s the single best way to avoid warranty/installation problems. Oatey and other manufacturers explicitly state where their putty is appropriate and provide stain-free varieties for stone.
Quick decision checklist (one-sentence rules)
- Porous stone or plastic parts → silicone.
- Metal drain/strainer that may need removal → plumber’s putty.
- Continuous wet seam (tub/shower/undermount sink perimeter) → silicone.
- Threaded / pressurized joints → Teflon tape / pipe compound, not putty.
Check this & Get Discount here-

- 【Tips】Here’s a quick tip for achieving that smooth, one-handed gliding sensation with your grout tool: consider loosenin…
- 【Professional Design】 – Saker silicone caulking tools could combine 3 functions into 1,including internal angle scraper,…
- 【Durable Material】- The Saker 3-in-1 Caulking Tool features a sharp, hard stainless steel blade for removing common old …
READ MORE: How to Plumb a Shower Valve (Step-by-Step DIY Guide)
Step-by-step: how to apply each Plumber’s Putty & Silicone Sealant (DIY)
Tools & safety
- Gloves (optional but handy), clean rags, utility knife, putty/caulking tools, plumber’s putty, silicone cartridge & caulk gun (or squeeze tube), rubbing alcohol or solvent for cleaning, masking tape (optional), and a small plastic scraper.
The success of a seal is 10% material choice and 90% surface preparation. Even the most expensive silicone will fail if applied over a dirty or damp surface.
Preparing the Surface (Both Materials)
- Mechanical Cleaning: Use a plastic putty knife or a non-abrasive scouring pad to remove every trace of the old sealant. Old silicone is notoriously difficult to remove; any remaining residue will prevent new silicone from bonding.
- Chemical Decontamination: Wipe the area with isopropyl (rubbing) alcohol or denatured alcohol. This removes residual oils, soap film, and moisture.
- Drying: The surface must be bone-dry. For silicone, even a single drop of water can cause a “void” in the seal that will eventually become a leak.
Applying Plumber’s Putty
- Warm the Material: Scoop out a golf-ball-sized amount of putty. Knead it between your palms for 30–60 seconds. The friction and heat will soften the linseed oil, making it supple.
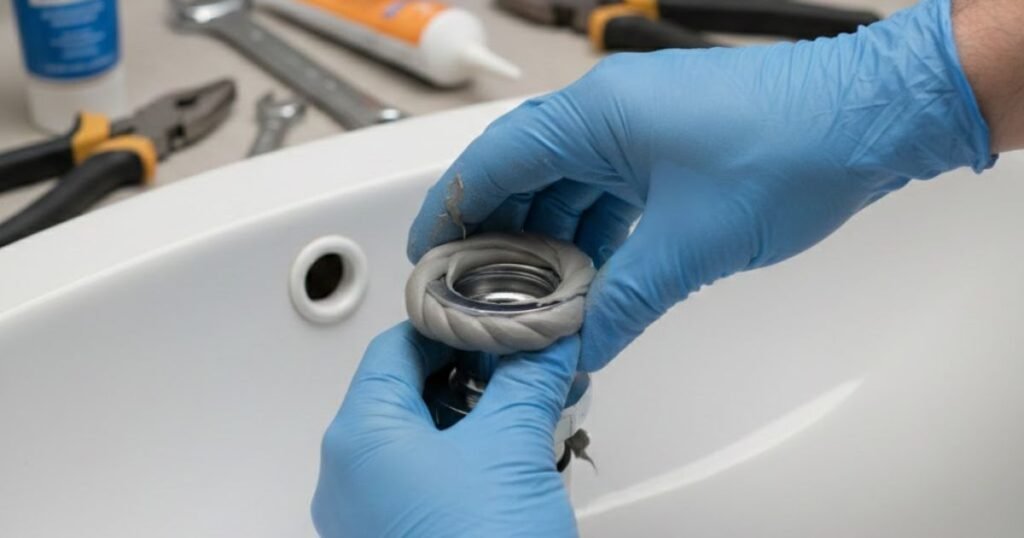
- Create the “Snake”: Roll the putty between your hands or on a clean countertop to form a consistent rope about 1/2 inch thick and long enough to circle the drain.
- The Loop: Place the putty rope around the underside of the drain flange. Overlap the ends and press them together to ensure no gaps exist.
- The Squeeze: Press the drain assembly into the sink hole and tighten the mounting nut from below. As you tighten, excess putty should “ooze” out from the top. If it doesn’t ooze out, you didn’t use enough.
- Cleanup: Wipe away the excess with a rag. You can immediately turn on the water to test for leaks.
Applying Silicone Sealant
- Masking (Optional but Recommended): For a professional look, place painter’s tape about 1/4 inch from the joint on both sides. This ensures a perfectly straight bead.
- The Cut: Cut the tip of the silicone tube at a 45-degree angle. The opening should be slightly smaller than the joint you are filling.
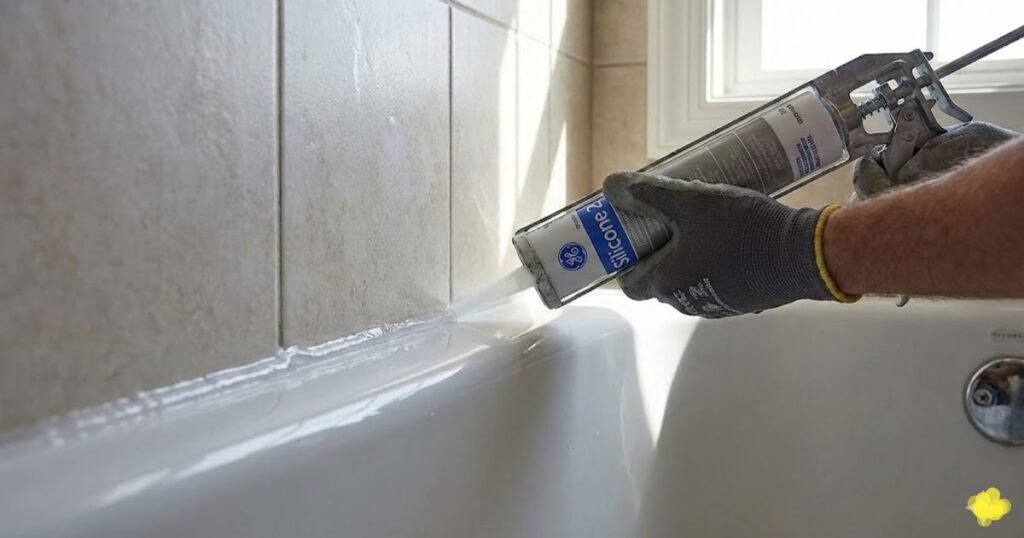
- The Bead: Apply a continuous, steady bead of silicone. Avoid “pumping” the trigger; try to maintain a single, fluid motion.
- Tooling: Within 5 minutes, use a gloved finger dipped in a little soapy water (or a specialized tool) to smooth the bead and press it into the joint.
- The Wait: Remove the tape immediately. Do not touch or get the silicone wet for at least 24 hours.
Sealant When NOT to Use Each: Avoiding Costly Mistakes
Understanding where these materials fail is as important as knowing where they work.
Never Use Plumber’s Putty On:
- Porous Stone: Granite, marble, quartz, and unsealed limestone will be permanently stained by the oils.
- Plastic Drain Assemblies: ABS and some PVC plastics will soften and warp, leading to eventual failure of the seal.
- Acrylic/Fiberglass Tubs: Putty can degrade the finish and cause yellowing or structural weakening.
- Pressurized Lines: Putty cannot hold back water under pressure; it is for gravity-fed drains only.
- Windows or Doors: Putty has no insulating value and will dry out and crack when exposed to the sun.
Never Use Silicone Sealant On:
- Oily or Dirty Surfaces: Silicone will not bond to anything that isn’t perfectly clean.
- Threaded Pipe Joints: It can make future disassembly nearly impossible and does not provide the same pressure resistance as pipe dope.
- Situations Requiring Immediate Use: If you cannot wait 24 hours, silicone is not the right choice.
- Paint Projects: 100% silicone cannot be painted; the paint will simply bead up and peel off.
READ MORE: How to Get Air Out of Plumbing Lines
Sealant Cost & Buying Guide: 2026 U.S. Retail Landscape
Pricing for these materials remains a small fraction of a total renovation budget, but choosing high-quality brands is essential for long-term reliability.
Quick Cost Check (prices checked Feb, 2026)
Based on surveys from major U.S. retailers like Home Depot and Lowe’s, homeowners can expect the following price ranges.
| Product Type | Brand Example | Size | Typical U.S. Retail Price (2026) |
| Standard Putty | Oatey / Hercules | 14 oz | $1.68 – $2.78 |
| Stain-Free Putty | Oatey Stain-Free | 9 oz | $4.54 – $6.76 |
| Kitchen & Bath Silicone | GE Advanced Silicone 2 | 10.1 oz | $10.98 – $11.58 |
| Premium Silicone | GE Supreme Silicone | 10.1 oz | $13.48 |
| Small Repair Tube | GE Interior Seal | 2.8 oz | $8.00 |
Recommended Product Picks:
- Budget Choice: A standard 14 oz tub of Oatey Plumber’s Putty ($1.86) is the most cost-effective way to seal multiple metal kitchen or bathroom drains.
- The Stone-Safe Choice: For granite or marble, Oatey Stain-Free Putty ($4.54) or GE Supreme Silicone ($13.48) is a mandatory investment to protect your countertops.
- The “One and Done” Choice: If you want a single product that works for almost everything (stone, plastic, and metal), 100% Neutral-Cure Silicone is the professional’s fallback, despite the higher price point and cure time.
Buying tips
- Read product labels: look for “kitchen & bath”, “mold & mildew resistant”, “stain-free” (for putty), or “neutral cure for stone”.
- Small tubes are cheaper to keep in a drawer; large tubs of putty are economical for pro-level use.
- If you’re sealing stone or porcelain, buy a product specifically labeled for that surface.
Sealant–Maintenance, longevity & troubleshooting
How long will the Sealant last?
- Plumber’s putty: if undisturbed and used in recommended applications, it can last many years (often decades) but can shift, compress, or smell if exposed to constant moisture or sunlight. Expect periodic replacement if the seal sees regular movement or if you remove the fixture.
- Silicone: high-quality kitchen & bath silicone often lasts 5–10 years in wet areas; premium formulations can last longer. Replace silicone when it shows cracking, delamination, mold growth that cleaning doesn’t remove, or if water bypasses the bead.
Signs of Sealant failure
- Visible water weeping from the joint or pooling.
- Soft, moldy, or discolored silicone beads.
- For putty, loose drain flanges or movement when tightening — indicates the putty seal has shifted.
Troubleshooting
- Small leak at drain flange: remove assembly, clean surfaces, and re-seat with correct material (putty for metal/porcelain drains; silicone for plastic or stone).
- Mildew on silicone: scrub with a bleach solution or a mold cleaner; if it persists or silicone is softened, remove and replace.
- Stain on stone after putty use: consult a stone-care specialist; some stains can be removed with poultices, but prevention (use stain-free putty or silicone) is best.
When to call a pro
- Hidden leaks under cabinets, continuous leaks after resealing, or when structural water damage or mold is visible call a licensed plumber.
READ MORE: How to Measure Plumbing Fittings
FAQs
Can I use silicone instead of plumber’s putty?
Yes — in many cases silicone will do the job and gives a waterproof, flexible bond. Use silicone when parts are plastic, the joint is continuously wet, or the surface is stone. Note: silicone is permanent and harder to remove, so choose putty if you need an easily removable, compressive seal.
Is plumber’s putty waterproof?
No — plumber’s putty is water-resistant and designed for static, compression seals, not for continuous immersion or pressurized joints. For permanently wet seams (showers, tub perimeters), use a kitchen & bath silicone.
Will plumber’s putty stain granite?
Standard oil-based plumber’s putty can stain porous stone (granite, marble). Use a stain-free putty labeled safe for natural stone or use silicone recommended for stone. Always check the product label.
How long does silicone take to cure?
Most kitchen & bath silicones skin over in minutes but require 24–48 hours for full cure under typical conditions; full cure can be longer in cold or low-humidity environments. Follow the product label for exact times.
Can I use plumber’s putty on plastic sinks or drains?
Generally no. Plumber’s putty can react with or degrade some plastics (ABS, acrylic). Use a silicone sealant designed for plastic or follow the manufacturer’s guidance.
Conclusion
Both plumber’s putty and silicone have important roles in home plumbing. Use plumber’s putty when you need a removable, compressive seal for metal-to-metal or metal-to-porcelain fittings (drains, some faucet installs). Use 100% silicone (kitchen & bath) for continuous wet areas, plastic components, stone countertops, and where a flexible, permanent adhesive seal is required. Always read the product label and the fixture manufacturer’s instructions and if you run into hidden leaks, pressurized joints, or uncertain materials, call a licensed plumber.

