If your tankless (on-demand) water heater cuts out halfway through a shower, it usually means one of a few things is happening: the unit isn’t seeing enough water flow to keep firing, mineral scale is triggering an over-temperature or safety cut-out, or there’s a fuel/venting or electrical/sensor fault. Below you’ll find a practical troubleshooting checklist, the most common causes (with how to test them), realistic repair vs replacement cost ranges with cited sources, a comparison table of popular models, and clear safety notes so you know when to call a licensed pro. Lets deep dive into “Why My Tankless Water Heater Shuts Off During Shower — Fixes & Costs”
Tankless Water Heater Shuts off: Quick answer
Most tankless heaters shut off mid-shower because of one of three problems: (1) insufficient flow — the unit’s flow sensor doesn’t see the minimum gallons-per-minute (GPM) required to keep the burner/element on; (2) overheat/scale — mineral buildup on the heat exchanger causes an over-temperature cut-out or reduces heat transfer; or (3) fuel / vent / electrical faults — gas pressure, blocked venting, ignition failures, or control/sensor errors. Other common contributors are sudden water-pressure drops (closed/partial valves, PRVs) or an undersized unit that can’t meet your simultaneous hot-water demand.
Minimum flow thresholds and maintenance instructions vary by brand and model — check your manual (model #) before major troubleshooting.

- 6 Piece Tank-less Water Heater Flush Kit. Helps maintain and extend the lifespan of your tank-less water heater. Kit com…
- Works with most all tankless water heaters such as Rinnai, Bosch, Noritz, Rheem, Takagi, Tempra, Navien, Ecosmart, Stieb…
- Our cleaning solution removes scale deposits from tankless water heaters, which helps improve its efficacy and lifespan….
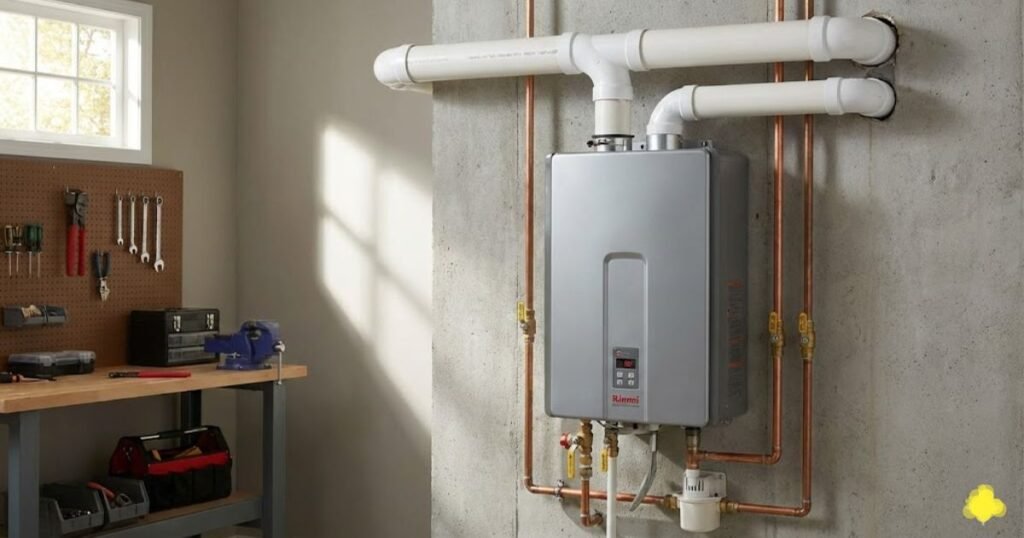
How tankless water heaters work
A tankless water heater waits until you open a hot tap, then a flow sensor detects moving water and tells the fuel system (gas burner or electric element) to heat the water as it passes through a heat exchanger. Because there’s no storage tank, the unit needs a minimum flow to sense demand and to control the burner or heating elements precisely. If flow drops below that threshold the unit will stop firing which feels like a mid-shower cutoff.
Gas units modulate flame based on flow and set temperature; condensing models have more complex venting and condensate plumbing. Electric units simply switch elements on and are more sensitive to high GPM demands (they often support lower max-GPM than gas units).
Key things to know:
- Minimum flow: typically ~0.26–0.5 GPM to start heating on many units (check your model). If your showerhead has a low-flow restrictor, that can drop you below the start threshold.
- GPM vs temperature rise: The hotter you want the water coming out, the lower the GPM a unit can sustain. Larger families / simultaneous use needs a higher GPM rating.
- Sensors & safeties: Units have flow switches, temperature sensors, and control boards — any of these can fault and shut the unit down.
| Symptom | Probable Cause | Likely Error Code | Recommended Action |
| Water turns cold after 2–3 minutes | Low Flow / Mixing Valve | None or Flow Sensor Fault | Decrease unit temperature; clean aerators |
| Sudden shutdown with error code | Overheating / Scale | Rinnai 16, Navien E016 | Descale unit with professional kit |
| Unit fails to ignite or dies mid-cycle | Gas Supply / Venting | Rinnai 11/12, Navien E003 | Check gas valves; inspect exterior vents |
| Intermittent hot and cold water | “Cold Water Sandwich” | None | Install buffer tank or adjust flow |

- MULTIPLE BENEFITS – Extend the lifetime of your water heater, improve its efficiency, reduce your energy bill, and incre…
- WORKS GREAT – Other flushing methods only remove small loose sediment particles where the Turbo Tank Cleaner physically …
- UNIVERSAL – Cleans all water heater tank types, gas and electric (not for tankless water heaters).
READ MORE: What Size Tankless Water Heater Do I Need?
Tankless Water Heater Shutting off: Causes Why They Shut off During a Shower
Below each cause: what it is, how to test it safely, common error codes to look for, and whether DIY or pro recommended.
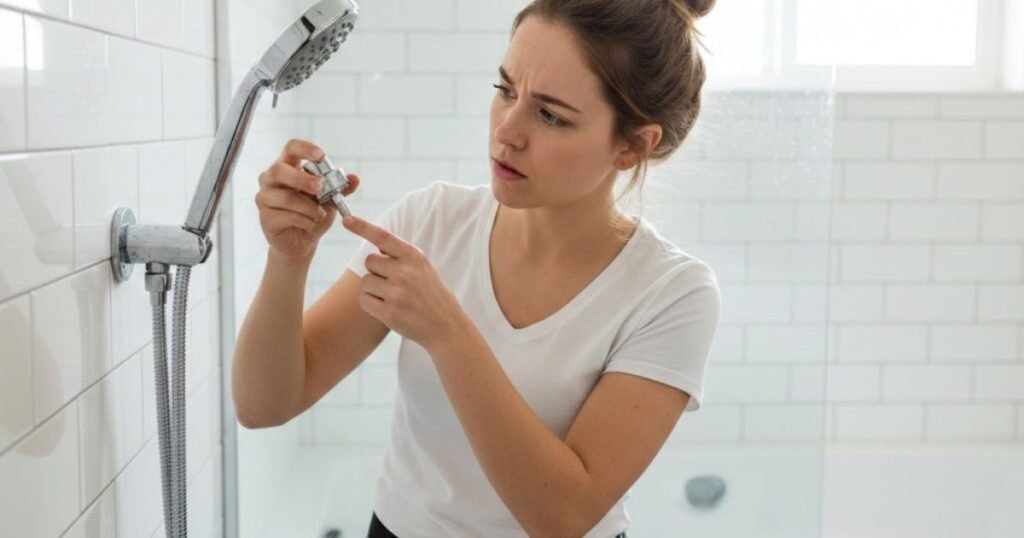
1. Insufficient flow / low-flow fixture or pressure drop
What: The flow sensor needs a minimum GPM to keep firing. Low-flow showerheads, partially closed valves, filter screens clogged with debris, or a pressure drop (e.g., someone else uses water) can drop flow below the trigger.
How to test: Remove the showerhead and briefly run the shower to see if the unit stays on; or run a second hot faucet (kitchen) while showering if that stabilizes the unit it’s a flow issue. Check the unit’s display for “low flow” or flow-related code.
Common codes: Many brands show codes for “no flow” or “low flow” check your manual. (Rinnai manuals note minimum activation flows and tell you to verify the flow turbine is spinning.)
DIY or pro: DIY for removing/cleaning showerhead and checking valves. If the household plumbing requires re-sizing or the flow sensor needs replacement, call a pro.
- UL Verified V699054 for heat & pressure
- Easy to use with instructions & videos
- Add years to the life of your water heater
2. Overheating / scale buildup on heat exchanger
What: Hard water deposits reduce heat transfer and can cause temperature sensors to trigger an over-temp safety or cause erratic behavior. Condensing units are especially sensitive to scale.
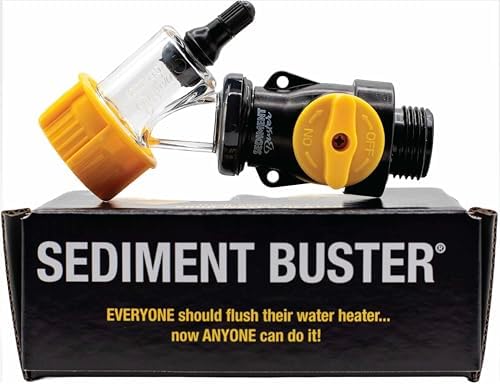
How to test: If the unit shows an over-temp or scaling related code, or you see reduced performance and a need for frequent resets, scale is likely. Flushing the unit with a vinegar or descaling solution will often restore performance (manufacturer procedure available).
Common codes: “Scale/maintenance required,” or over-temperature cut-outs (code varies).
DIY or pro: DIY safe for flushing if you’re comfortable following the manufacturer’s step-by-step flushing guide; otherwise hire a tech. Always follow the brand’s instructions.
3. Gas supply or venting issues (gas units)
What: Low incoming gas pressure, undersized gas line, or blocked/incorrect venting can cause flame failure or automatic shutdown. Non-condensing vs condensing units have different venting needs.
How to test: Look for ignition/flame error codes; if the unit tries to ignite but fails, that suggests gas/vent/combustion issues. Visual inspection of vents (outdoor intake/exhaust) for blockage (birds/nests) is safe; checking gas pressure or changing venting is not.
Common codes: “Ignition failure,” “flame failure,” “vent error.”
DIY or pro: Call a licensed plumber/HVAC pro for gas/vent work do not attempt to change gas lines or primary venting yourself. 🔴 CAUTION: gas line and venting work can be dangerous.
4. Electrical / sensor / control board faults (electric & condensing)
What: Power surges, bad wiring, faulty control boards, or failed sensors can cause the unit to shut off unexpectedly. Electric units rely on consistent electrical supply.
How to test: Check that the unit has stable power (no tripped breakers), and that display/LEDs are on. Note and photograph any error code. If the unit loses power mid-cycle, a control board or wiring fault may be present.
Common codes: “E-codes” for sensor failures, board faults.
DIY or pro: DIY for checking breakers and visually inspecting wiring for obvious issues. Call a licensed electrician or service tech for internal electrical or board replacement.

- 【Tankless Heater Clean Kit】This cleaning kit comes with everything you need to maintain your water heating system. Helps…
- 【Submersible Sump Pump】1/6HP energy-efficient motor with thermal overload protection, has the ability to deliver water t…
- 【Easy to Use】This kit includes 3 gallons bucket with a bucket lid opener, 1/6HP utility pump with 2 adapters and 2pcs 6’…
5. Water pressure fluctuations, closed valves, or mixing valve trouble
What: Pressure regulators (PRVs), thermostatic mixing valves, or partially closed stop valves can change flow/temperature and trip the unit. A faulty pressure regulator can cause the unit to see intermittent flow.
How to test: Check that all isolation valves on the unit are fully open. Open a second hot outlet if that fixes it, pressure/regulator is suspect. Inspect any whole-house pressure regulator for leaks or abnormal pressure.
DIY or pro: DIY for valve checks; pro for PRV adjustment or mixing valve replacement.
6. Unit undersized for simultaneous demand
What: The unit’s GPM capacity may be too low for multiple fixtures (shower + dishwasher + washing machine). Even a strong showerhead may overwhelm a small unit.
How to test: Turn off other hot appliances and run only the shower if it works, the unit may be undersized. Compare your model’s max GPM to your household demand.
DIY or pro: If undersized, consult a pro for options (bigger unit, parallel units, or point-of-use boosters).
- HASSLE-FREE HOT WATER – Corro-Protec’s powered anode rods are revolutionizing the water heater maintenance by preventing…
- SAY GOODBYE TO ODORS – Eliminate your water heater odor problem by removing the rotten egg smell in hot water with our a…
- PERMANENT CORROSION PROTECTION – Designed to replace your 40-89-gallon water heater’s hex head anode rod, it can defend …
READ MORE: How to Flush a Tankless Water Heater
Tankless Water Heater Step-by-step Troubleshooting Checklist
Follow this checklist top-to-bottom. Stop and call a pro if you hit any gas/electrical steps or error codes you don’t understand.
- Record model + error code. Take a photo of the unit label and the display. This speeds diagnosis.
- Reset safely. Turn the unit off per manual instructions, wait 30–60 seconds, power back on. (Check manual first.)
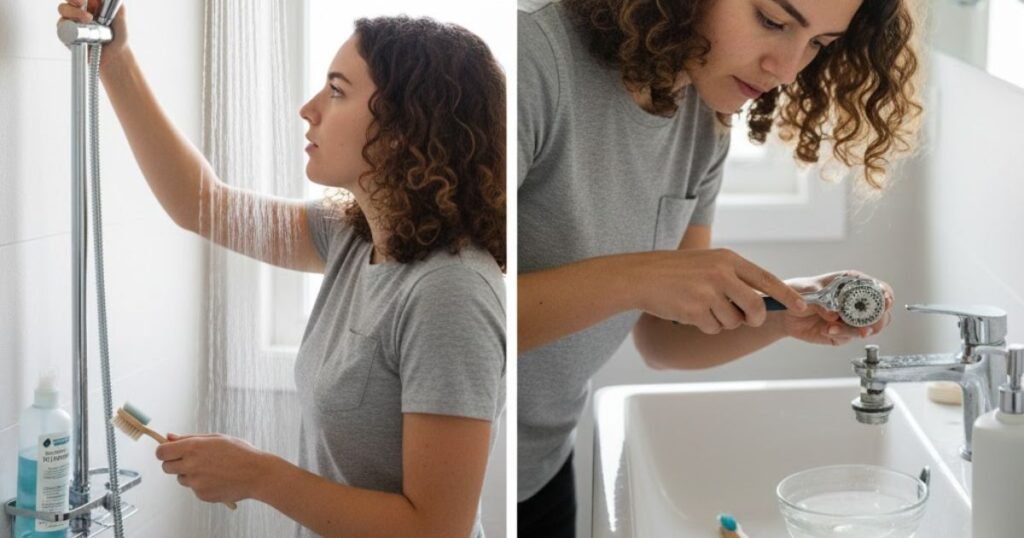
- Inspect showerhead/aerator. Remove and run the shower bare-pipe if the unit stays on, the showerhead is restricting flow. Clean or replace the head.
- Check other hot taps. Run a second hot faucet while showering. If that stabilizes output, your issue is flow/demand.
- Look for displayed error codes and consult manual. Manuals list code meanings and recommended action.
- Check for visible scale or maintenance reminders. If the unit has a “cleaning needed” message, plan a flush. Manufacturer flushing instructions are available (example: Rinnai’s 13-step flush).
- Check power & fuel: ensure breakers not tripped, gas supply on (for gas units). If there’s any smell of gas, evacuate and call your gas utility/emergency services immediately. 🔴 CAUTION: never attempt gas line repairs yourself.
- Inspect venting visually (outside): look for obvious blockages like nests or debris. If venting seems questionable, call a pro.
- If no DIY fix, call a licensed service tech with model #, error code, and your troubleshooting steps.

- 【ONE YEAR WARRANTY】Z Turn-up Kit Includes (2) 4500W 240V COPPER Water Heater Element, Insert Length: 13-9/16″. 3500W@208…
- 【ONE YEAR WARRANTY】Includes (1) Upper Water Heater Thermostat, (1) Lower Water Heater Thermostat, 120V ~ 480V
- 【Interchangeable】Therm-O-Disc Type Thermostat, Can interchange with APCOM type.
DIY fixes vs when to call a pro
Simple DIY fixes (safe for most homeowners):
- Clean or replace the showerhead/aerator and inline faucet filters.
- Check and fully open isolation valves at the unit.
- Reset the unit per manual.
- Flush the system if you’re comfortable following the manufacturer procedure (many brands publish step-by-step flushing guides).
Intermediate / call a pro:
- Replacing the flow sensor, control board, ignition system, or gas valve — professional job.
- Diagnosing low gas pressure or upsizing gas line — licensed plumber/gas pro required.
- Venting modifications, condensate drain repair, or electrical control board replacements — licensed technician.
When to call immediately: persistent ignition failure, gas smell, repeated over-temperature shutdowns, or any error code that manual lists as requiring service. Provide the technician with your model + error code and photos that saves time.
(Paraphrased advice from plumbing technicians: many flow-related shutdowns trace back to either flow restrictions or scale annual maintenance prevents most of these problems.)
READ MORE: How to Increase Heat Setting on Tankless Rheem Water Heater
Comparison table — popular whole-house tankless models & price guidance
Selecting the appropriate unit involves balancing BTU input, GPM requirements, and maintenance features. The following table provides a comparison of market-leading whole-house models for 2025–2026.
| Model / Brand | Type | Typical retail price (unit only) | Typical installed cost (unit + install est.) | GPM (approx) / Household size | Common shut-off causes | Pros / Quick note |
| Rinnai — RU199 / RE199 | Gas (condensing & non-condensing options) | $800–$2,200 (retail listings vary). | $2,500–$5,000 typical installed depending on venting & gas work. | 6–11 GPM (models vary) — good for medium→large homes. | Venting/gas supply; scale sensitivity on condensing units. | Reliable, wide model range; good service network. |
| Rheem — RTGH series | Gas (condensing) | $1,000–$2,800 (retail listings). | $2,400–$5,400 installed (varies by region & venting). | ~5–9.5 GPM — suitable for most family homes. | Low flow sensitivity; maintenance needed for sensors. | Strong dealer network; condensing efficiency. |
| Navien — NPE-240A2 | Condensing gas | ~$2,000–$2,400 (retail). | $2,500–$5,000+ installed (venting/condensate adds cost). | ~8–11 GPM (higher capacity models for large homes). | Scale buildup; flow sensor issues if not flushed regularly. | High efficiency condensing; popular with contractors. |
(Table note: price ranges are typical online retail and installed estimates actual quotes vary by region, installer, and site conditions. Verify with local suppliers and get at least two installation bids.)
Water Heater Repair Costs: Repair vs Replace
- Typical retail price (unit only): most whole-house tankless units run roughly $1,000–$3,500 depending on brand & capacity.
- Installed cost (unit + labor): expect ~$2,400 to $5,400 for many installations; complex venting, gas line upgrades, or multiple units raise costs.
- Repair cost (typical): common tankless repairs average $75–$1,300, with many homeowners seeing an average around $600 for professional visits; larger items (heat-exchanger replacement) cost more.
Typical Professional Repair Pricing (2025-2026)
| Repair / Service Item | Typical Cost Range (USD) | Components Included |
| Diagnostic Service Call | $75 – $200 | Technician troubleshooting fee |
| Descaling / System Flush | $150 – $400 | Vinegar solution and pump labor |
| Sensor / Thermistor Replacement | $150 – $500 | Parts and sensor calibration |
| Igniter / Flame Rod Assembly | $200 – $450 | Cleaning and component swap |
| Gas Control Valve | $250 – $750 | Valve unit and safety testing |
| Circuit Board (PCB) | $400 – $800 | Logic board and labor |
| Heat Exchanger Replacement | $500 – $1,500+ | Major core component (often not cost-effective) |
READ MORE: Why Is My Water Heater Temperature Fluctuating? Causes & Fixes
Tankless Water Heater Prevention & maintenance plan
A simple plan keeps your tankless working and cuts shutdowns:
- Annual flush for most gas/condensing units (six-monthly if very hard water). Rinnai and other manufacturers publish step-by-step flushing guides.
- Install a whole-house water softener or scale inhibitor if your water hardness is high — this drastically reduces heat-exchanger scaling.
- Clean inlet filters and aerators every 6–12 months.
- Annual professional tune-up: a certified technician can test gas pressure, check venting, inspect sensors, and run a descaling service.
- Recordkeeping: keep a folder with the model number, installation date, and service records; take photos of error codes when they happen.
Tankless Water Heater Pros & cons of keeping vs replacing
| Aspect | Keeping / Repairing | Replacing With New |
| Upfront Cost | Low ($150 – $600 avg) | High ($2,400 – $5,400 avg) |
| Efficiency | Decreases as unit ages | Maximum (up to 0.98 UEF) |
| Reliability | Risks recurring component failure | New manufacturer warranty |
| Comfort | May still face “Cold Water Sandwich” | Newer units have better recirc logic |
| Best Case | Unit is <8 years old; minor sensor issue | Unit is >12 years; heat exchanger leak |
FAQs
Why does my tankless water heater shut off during shower?
Most often it’s low flow (showerhead or pressure), scale causing over-temperature shutdown, or a fuel/electrical fault. Check error codes, remove the showerhead to test bare-pipe flow, and check for maintenance warnings in the manual. If you see ignition/gas or electrical errors, call a pro.
How do I fix a tankless water heater that keeps shutting off?
Try quick fixes first: clean the showerhead/aerator, run a second hot tap while showering, reset per manual, and flush the unit if it’s due. If issues persist especially ignition, gas, or board faults schedule a licensed technician.
Can low water flow make a tankless heater turn off during a shower?
Yes. If flow drops under the unit’s minimum activation GPM, the burner/element will stop. Many units need roughly 0.26–0.5 GPM to start; check your model manual for the exact minimum. Removing flow restrictors or replacing low-flow heads often fixes this.
Is my tankless water heater too small for my shower (GPM problems)?
If the unit’s max GPM at the desired temperature is lower than your shower’s demand (plus concurrent appliances), the heater can’t keep up and may cycle off. Compare your unit’s rated GPM to your household use; consider a higher-capacity unit or point-of-use booster.
What does error code [example] mean on my tankless water heater?
Error codes are brand/model specific. For example, Rinnai manuals list codes for low flow, ignition failure, and sensor faults always note the code and model then check the manual or technician guide. If the manual labels the code as “service required,” call a licensed technician.
Closing
Tried the checklist and it still shuts off? Photograph the unit label and any error codes, note what you’ve tried, and call a licensed plumber or HVAC tech. Give them the model number + error code that speeds diagnosis and gets you back to hot, uninterrupted showers.

