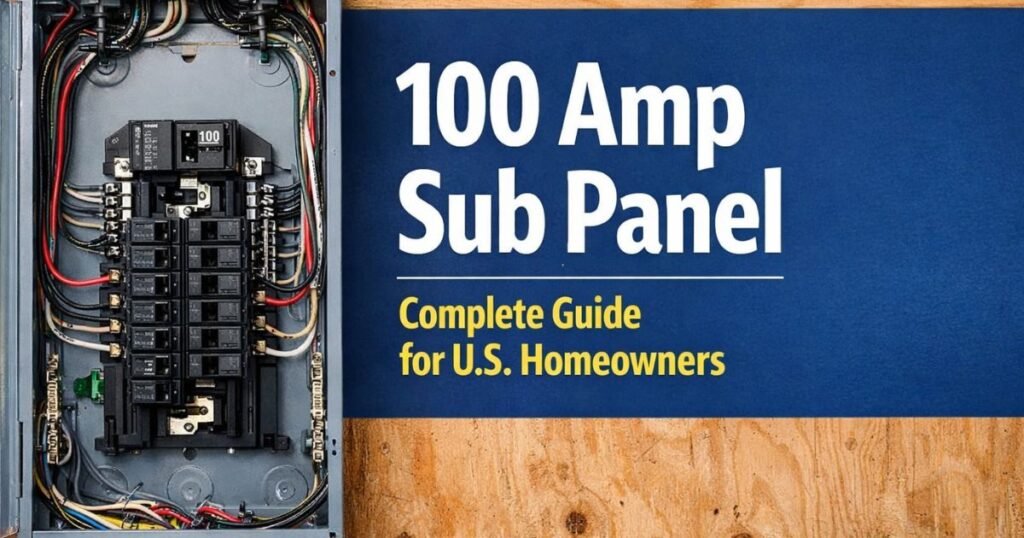
A 100 amp sub panel (or 100 amp electrical sub panel) is a smaller distribution panel that branches off your home’s main electrical service to feed a specific area or structure. Homeowners add them when they need more circuits or want to isolate a high-demand area think a finished basement with a mini-kitchen, a detached garage with power tools, or an accessory dwelling unit.
Why homeowners install one:
- To add dedicated circuits without tearing up the main panel.
- To put a set of breakers closer to where the loads are (shorter runs).
- To add capacity for new appliances, EV chargers, or a workshop.
I’ve installed a handful of sub panels over the years for a garage workshop, a finished basement, and a rental unit above a converted garage so I’ll write this as if I’m talking across the workbench with another homeowner. This is a practical, no-nonsense, homeowner-focused guide to 100 amp sub panels in the United States: what they are, when they make sense, how they compare to other sizes, what the code basics require, realistic costs for 2026, and the important safety and resale considerations every homeowner should know.
What Is a 100 Amp Sub Panel?
Simple definition
A 100 amp sub panel is a distribution panel fed from the main service by a 100 amp-rated feeder (breaker and conductors). It provides circuit spaces (breaker slots) for branch circuits in a room, building, or part of a house.
How it works with the main service
Think of the main panel as the house’s electrical “hub.” The main panel’s breakers protect the service and distribute power. A sub panel is a remote distribution point fed from a breaker in the main panel (the feeder). The feeder breaker in the main panel is sized to protect the feeder conductors and to limit the sub panel’s capacity (in this case, 100 amps).
Main panel vs sub panel the difference that matters
- Main panel: Typically the service disconnect is there (main breaker). Grounds and neutrals are bonded (connected) here.
- Sub panel: No service disconnect; neutrals must be isolated from grounds (no bonding in the sub panel). The sub panel uses a four-conductor feed: two hots, one neutral, one equipment grounding conductor.
From hands-on work, I always check that the neutral bus in the sub panel is isolated and that there’s a dedicated ground bus tied back to the main. That separation avoids stray neutral currents on ground wires a subtle but important safety detail.
(NEC and inspection checklists require neutral-ground separation in sub panels.)
When Do You Need a 100 Amp Sub Panel?
Here are common, real-world reasons homeowners choose a 100 amp sub panel:
- Home additions — adding bedrooms, a second kitchen, or a big bath cluster.
- Detached garages or workshops — especially when running tools, a small welder, or a separate HVAC system.
- Finished basements — with a kitchenette, theater room, or high-draw gear.
- Rental units / in-law suites — to separate tenant circuits and billing.
- Heavy electrical loads — EV charger plus HVAC, or multiple large appliances clustered in one area.
- Panel overcrowding — the main panel is out of spare slots or near capacity.
READ MORE: Cost to Upgrade Electrical Panel to 200 Amps
Signs your panel might be overloaded (I’ve seen these on inspections):
- Frequent tripped breakers when running normal loads.
- Lights dimming when an appliance kicks on.
- The main panel is full of tandem breakers or looks visibly old (fuse-based or 60A service in an older house).
If any of these are happening, a 100 amp sub panel is often the flexible, lower-cost solution compared with upgrading the entire service to 200A (which may or may not be necessary).
100 Amp Sub Panel vs 60 Amp and 200 Amp Sub Panels
Here’s a practical comparison so you can match capacity to likely use cases.
At-a-glance comparison
| Panel Size | Typical Use Cases | Advantages | Limitations |
| 60 amp sub panel | Small workshops, lighting circuits, a couple of dedicated appliances | Lower cost; smaller feeder conductors | Limited capacity for multiple large appliances or EV chargers |
| 100 amp sub panel | Detached garage with tools, finished basement with appliances, ADU with limited loads | Good middle ground — supports several 240V circuits, many 120V circuits | Not enough if you expect simultaneous high loads (multiple ranges, A/C, EV + HVAC) |
| 200 amp sub panel | Whole-house split feeds, large ADUs, heavy workshop + HVAC + EV | Plenty of headroom for future expansion | Higher material and labor cost; possibly requires service upgrade |
Pros and cons of 100 amps (practical)
Pros
- Usually large enough for a workshop + separate HVAC or an ADU with modest loads.
- Easier and cheaper to install than a 200 amp feed.
- Offers room for expansion (more breakers) without upgrading the main service.
Cons
- Could be limiting if you plan to add an EV charger, central HVAC, and an electric range all to the same sub panel area.
- If the main panel is already near capacity, adding a 100 amp sub might push the home toward a full service upgrade eventually.
From experience, a 100 amp sub panel is the sweet spot for many homeowners who want serious capacity without the full cost of a service upgrade.
Electrical Load Capacity Explained (U.S. Standards)
What 100 amps can realistically power
A 100 amp sub panel provides up to about 24 kW at 240V (theoretical maximum), but actual usable capacity depends on how many circuits run simultaneously. Practically, a 100 amp feed can comfortably run:
- Several 120V branch circuits (lighting, outlets, TV, small appliances).
- One or two 240V circuits for equipment like a small window-style HVAC unit, a clothes dryer, or a workshop compressor.
- A small EV Level 2 charger may work, but it will significantly affect available capacity if run at high current.
Common appliances and circuits it supports
- Lighting and outlets for a 2–3 bedroom apartment or finished basement.
- One 240V appliance (electric dryer or small range), plus multiple 120V circuits.
- Tools in a garage: saws, compressors, bench grinders but not continuous welding plus heavy HVAC at the same time without careful load management.
Load calculation basics (plain language)
Load calculations use a mix of fixed loads (ovens, AC), general lighting formulas, and demand factors to estimate likely simultaneous usage. The point of the calculation is to make sure the sum of expected loads won’t routinely exceed the feeder’s rated capacity. A licensed electrician will perform the formal NEC-style load calculation for permit and inspection purposes.
First-hand tip: plan for the “worst practical case” (what you’ll actually run at once), not just the nameplate ratings. The nameplate amps are a worst-case number devices rarely operate at continuous max, but a dryer + range + HVAC starting together can spike demand.
READ MORE: 400 Amp Service Panel: What U.S. Homeowners Need to Know
NEC Code Requirements for 100 Amp Sub Panels
The National Electrical Code (NEC) sets the standards inspectors enforce. I’ll explain the key concepts you’ll see on a plan or inspection in plain language.
Neutral and ground separation
In a sub panel, the neutral (grounded conductor) must be isolated from the equipment grounding conductor. The neutral bus is not bonded to the panel enclosure; the grounding bus is. This prevents neutral current from flowing on grounding conductors and metal enclosures. That separation is a consistent NEC requirement in inspection checklists.
Four-conductor feeder
Feeder runs to a sub panel must include four conductors for domestic installations: two hot conductors (L1/L2), one neutral, and one equipment grounding conductor. The ground provides fault return back to the main bonding point do not rely on a separate or improvised ground.
Grounding electrodes for separate structures
If the sub panel serves a separate building (a detached garage, for example), the detached structure typically requires its own grounding electrode system (for example, one or two ground rods) in addition to the equipment grounding conductor back to the main panel. The grounding electrode(s) are bonded to the sub panel’s grounding bus. This is often a point of confusion separate structures usually need their own electrode system.
Clearances and working space
Panels require clearance for safe working space in front of them (typically 30″ wide by 36″ deep minimum, but inspectors check local code adoption). Mounting height also matters: breakers must remain within reachable heights specified by code. These are straightforward to verify visually on site and will come up in permit reviews.
100 Amp Sub Panel Wiring Requirements
Below are practical wiring points you should expect to see on a plan or hear from an electrician. I’m not giving step-by-step connection instructions, just the wiring requirements you’ll need to budget for and understand.
Typical wire sizes
- Copper feeders: Contractors commonly use #3 AWG copper for a 100A feeder in many installations; some installers use #2 copper depending on length and temperature ratings. Wiring tables and local adoption determine the required size.
- Aluminum feeders: For aluminum, #1 AWG or larger is often used for 100A feeders (again, check local rules and ampacity tables).
Grounding conductor
The equipment grounding conductor must be sized per NEC tables for the overcurrent device rating. It’s a dedicated conductor in the 4-wire feeder run.
Feeder cable types
Common feeder options include individual THHN/THWN conductors in conduit, SER cable for shorter interior runs (where allowed), or individual conductors for longer conduit runs. Conduit may be required depending on where the run is and local code.
Conduit vs direct cable runs
- Conduit is typical for visible runs and allows easier future upgrades and protection for conductors.
- Direct-burial cable and buried conduit runs are options for exterior buried feeders to detached buildings they require approved burial depth and protection.
Distance & voltage drop
If the sub panel is far from the main panel (over ~50–100 feet, depending on load), voltage drop becomes a real consideration. Longer runs may require upsizing conductors to keep voltage within acceptable limits under load. Plan for voltage drop early it’s a common oversight.
(For exact conductor selection and voltage drop math, have a licensed contractor or engineer calculate the numbers for your situation.)
READ MORE: Whole House Surge Protector Cost in the USA (2026 Guide)
Indoor vs Outdoor 100 Amp Sub Panels
Enclosure ratings
- Indoor panels are standard, non-weatherproof enclosures mounted in garages or basement spaces.
- Outdoor panels must be NEMA-rated or listed for outdoor/weather exposure and include gaskets, drip edges, and extra protection.
Weatherproofing & location tips
- Keep panels away from direct sprinkler spray, high-heat areas, or places where they’d be exposed to coolant/flammable vapors.
- For detached structures, place the outdoor panel where it’s out of the way of vehicle traffic, easy for the inspector to access, and protected from weather.
From real installs: mounting a panel near a shop entrance with adequate clearance and a covered overhead often prevents future water intrusion issues.
100 Amp Sub Panel Installation Process (Step-by-Step Overview Conceptual)
I’ll give a conceptual overview of the process so you know what to expect when hiring a pro. This is not a how-to for DIY wiring for safety and legal reasons, electrical connections and final wiring should be done by a licensed electrician and inspected.
- Planning & permits (U.S. perspective)
- Decide location, number of circuits, and required capacity.
- Submit permit application with a simple one-line drawing showing feeder ampacity, conductor sizes, and panel location. Inspectors review load calculations and clearances.
- Shut-off & safety & coordination
- The electrician coordinates with the utility (if service work is needed) and plans a safe disconnect sequence. Temporary power arrangements may be part of larger renovations.
- The electrician coordinates with the utility (if service work is needed) and plans a safe disconnect sequence. Temporary power arrangements may be part of larger renovations.
- Mounting the panel
- The panel is physically mounted on a suitable wall or a weatherproof exterior surface. For detached buildings, the panel is placed to minimize the feeder path length.
- The panel is physically mounted on a suitable wall or a weatherproof exterior surface. For detached buildings, the panel is placed to minimize the feeder path length.
- Running the feeder
- The feeder is run as a four-conductor cable or individual conductors in conduit from the main panel to the sub panel location. Conduit routing, burial depth (for underground feeder), and support are prepared according to code.
- The feeder is run as a four-conductor cable or individual conductors in conduit from the main panel to the sub panel location. Conduit routing, burial depth (for underground feeder), and support are prepared according to code.
- Circuit installation
- Branch circuits are pulled to the sub panel, terminated on appropriately sized breakers, and labeled. The neutral bus remains isolated; the ground bus is bonded to the panel enclosure.
- Branch circuits are pulled to the sub panel, terminated on appropriately sized breakers, and labeled. The neutral bus remains isolated; the ground bus is bonded to the panel enclosure.
- Inspection & final approval
- A rough inspection may be required before walls are closed; after final connections the inspector performs a final inspection and issues approval.
- A rough inspection may be required before walls are closed; after final connections the inspector performs a final inspection and issues approval.
Again this is a conceptual checklist to help you understand stages and where your money and time go. Don’t attempt live wiring yourself unless you’re licensed and local law allows it’s dangerous and often illegal without proper permitting.
100 Amp Sub Panel Cost in the United States
Costs vary by region, complexity, and labor rates. Here are practical numbers based on recent contractor pricing and national averages.
National averages & ranges
- Panel-only (parts): A basic 100 amp sub panel (cabinet + main lug or main breaker) can cost $100–$400 depending on brand and features.
- Installed project (materials + labor + permit): A typical 100 amp sub panel installation runs roughly $1,200 to $3,500 as a national average, depending on complexity. Some simpler interior installs land on the lower end ($800–$1,500), while detached building installs or long conduit runs push the price up.
Material vs labor breakdown (typical)
- Panel & breakers: 20–40% of the material cost (panel, breakers, bus bars, main lug).
- Feeder conductors & conduit: 20–40% depending on distance and conductor type.
- Labor & permits: Labor is usually the largest variable electrician hourly rates and permit fees vary widely by state/county.
- Additional costs: Trenching/boring for an underground run, grounding electrode(s) for detached structures, or upgrades at the main panel can add significantly.
Factors that increase cost
- Long feeder runs or buried conduits.
- Installation to a detached structure that requires ground rods and a grounding electrode conductor.
- Main panel upgrades or cramped access that requires additional work.
- High local labor rates or union jurisdictions.
READ MORE: Temporary Power Pole: Cost, Requirements & Installation Guide
DIY vs Hiring a Licensed Electrician
What homeowners can realistically do
- Planning, location, and interior prep: You can choose the panel location, clear the wall space, and hire an electrician for the technical work.
- Running non-powered conduit or labeling: Non-electrical prep tasks are commonly homeowner-handled under electrician direction.
What should always be handled by professionals
- Making final electrical connections, sizing conductors, bonding and grounding, and pulling permits/handling inspections. These are code-critical tasks with real safety risk.
Risks of improper installation
- Shock and fire hazards from undersized conductors, improper neutral/ground bonding, or unsecured connections.
- Insurance claim denial if work was done outside permit or not to code.
- Failed inspections or a requirement to undo and redo work at additional cost.
From my installs and fixes, the extra cost of hiring a licensed electrician is a modest fraction of the total project and gives you peace of mind, insurance compliance, and a clean inspection record.
Common Mistakes to Avoid
Based on real projects, here are mistakes that cause rework or safety issues:
- Incorrect grounding — bonding neutral and ground in the sub panel (don’t do it).
- Undersized wire — trying to save by using too-small conductors, especially over longer runs where voltage drop matters.
- Overcrowding breakers — squeezing too many circuits into a panel or using tandem breakers where not allowed.
- Poor location — mounting where water splash or vehicle traffic can damage the panel.
- Ignoring permits — unpermitted work risks insurance problems and requires costly fixes at resale.
Avoiding these mistakes keeps you safe and keeps inspectors happy.
Safety, Insurance, and Resale Considerations
Why code-compliant sub panels matter
A properly installed 100 amp sub panel reduces fire risk, keeps neutral currents from flowing on grounding paths, and ensures safe operation of protective devices.
Impact on homeowners insurance
Most insurance companies require electrical work to be permitted and inspected. Unpermitted or DIY wiring that causes a loss can lead to claim denial or premium increases.
Home inspection and resale value
A neat, permitted, and labeled sub panel looks professional to buyers and can be a selling point especially if it services a permitted ADU or workshop. Conversely, unpermitted work is a red flag and can hold up closing or reduce sale value.
Long-term reliability
A properly sized and installed sub panel extends the useful life of electrical distribution in the house and provides flexibility for future upgrades.
READ MORE: Rewiring a House: Costs, Process, Permits, and What Homeowners Should Expect
Is a 100 Amp Sub Panel Worth It?
Short answer: often yes, but it depends.
Cost vs benefit
- If you need moderate additional capacity close to a cluster of loads (garage, ADU, basement), a 100 amp sub panel is usually cost-effective versus a full service upgrade.
- If you plan heavy simultaneous loads (EV charger + range + central A/C), a 100 amp sub may be a temporary fix before a 200 amp service upgrade becomes necessary.
Long-term flexibility
A 100 amp sub panel gives you headroom for several decades if you don’t foresee multiple high-draw devices running simultaneously in that area.
When it doesn’t make sense
If your main service is already overloaded or the long-term plan is a full house renovation with multiple major appliances, it may be smarter to invest in a service upgrade now.
Frequently Asked Questions (FAQ)
1. Can a 100 amp sub panel power a garage?
Yes. A 100 amp sub panel can power most detached garages or workshops, including several circuits for tools, lighting, and small HVAC, provided you size feeders and breakers appropriately and account for expected simultaneous loads.
2. How far can a sub panel be from the main panel?
There’s no single maximum distance, but longer runs increase conductor cost and voltage drop concerns. For long distances you may need to upsize conductors to reduce voltage drop and maintain performance. Consult an electrician for voltage drop calculations.
3. Can I run 240V equipment on a 100 amp sub panel?
Yes, a 100 amp sub panel can host 240V breakers and circuits (like a dryer or small HVAC). Each 240V circuit reduces available feeder capacity proportionally, so plan loads accordingly.
4. Does a sub panel need its own ground rod?
If the sub panel is in the same building as the main panel, a separate ground rod is usually not required you must run a four-conductor feeder and keep neutrals and grounds separate. If the sub panel is in a separate building, that structure typically requires its own grounding electrode system (e.g., ground rods) in addition to the equipment grounding conductor back to the main.
5. Will a 100 amp sub panel increase home value?
It can, especially when it adds permitted, useful electrical capacity for an ADU, workshop, or finished basement. Buyers value safe, code-compliant electrical systems.
6. What wire size is used for a 100 amp sub panel?
Common practice often calls for #3 AWG copper or #1 AWG aluminum feeders for a 100 amp sub, though local code, conductor type, ambient temperature, and run length can change the required size. Always verify with your electrician or local inspector.
7. How much does it cost to install a 100 amp sub panel?
Typical installed costs range from roughly $800 for a simple interior job to $3,500 or more for detached structures requiring trenching or additional grounding electrodes. Expect most mid-range projects to be in the $1,200–$3,000 band nationally in 2024–2026.
8. Do I need a permit to install a sub panel?
Yes in almost all U.S. jurisdictions you need a permit and inspection for a new panel installation. Skipping permits can create insurance and resale issues.
9. Can I add the sub panel myself?
You can handle non-electrical prep, but the actual wiring, bonding, and final connections should be done by a licensed electrician unless you are licensed and permitted to do the work yourself.
10. How many circuits fit in a 100 amp sub panel?
Panels come in various slot counts (e.g., 8, 12, 16, 20 spaces). The number of usable circuits depends on the panel’s design and whether tandem breakers are allowed. Choose a panel with extra spaces for future expansion.
Final Thoughts
A 100 amp sub panel is one of those practical upgrades that gives homeowners flexibility without the full cost and disruption of a whole-house service upgrade. From my hands-on installs, it’s an elegant solution for garages, finished basements, and ADUs provided you plan thoughtfully, size feeders correctly, follow NEC requirements, and use a licensed electrician for the critical wiring and inspection steps.