A water heater leaking from the bottom can be one of the most stressful household problems. Not only does it interrupt your daily routines like hot showers, laundry, or dishwashing but it can also lead to expensive damage if not handled quickly. A small puddle around the base might seem harmless at first, but it’s often a warning sign that something serious is happening inside your unit. Left unchecked, a leaking water heater can cause mold growth, floor damage, or even a total breakdown that leaves you without hot water altogether.
The moment you notice water collecting near your water heater, you should act fast. Whether it’s just a faulty valve or a sign that the tank has reached the end of its lifespan, quick action can save you money, prevent safety hazards, and keep your home comfortable. In this guide, we’ll break down the causes of bottom leaks, what steps to take right away, repair vs. replacement decisions, and how to prevent future issues. Lets deep dive into “What to Do if Water Heater is Leaking from Bottom”

READ MORE: How to Stop a Leak Until the Plumber Arrives: A Homeowner’s Guide
Understanding Why Water Heaters Leak from the Bottom
The leaked at the bottom of the water heater can come from various sources. Sometimes it is somewhat modest that can be fixed with a wrench, but other time means the entire tank is failing and requires replacement. The difficult part is that the water naturally occurs on the floor, which can make it difficult to indicate the actual source of leakage. That’s why you need to look at common causes carefully before jumping to conclusions.
Some leaks are related to faulty parts, while others come from natural wear and tear. Over time, even the strongest steel tank will corrode, and sediment buildup can make things worse. Other times, safety valves that are meant to release pressure can malfunction and drip water. Knowing these causes helps you diagnose the problem and figure out whether you can do a simple repair or if it’s time to call in a professional.
Sediment Buildup and Tank Corrosion
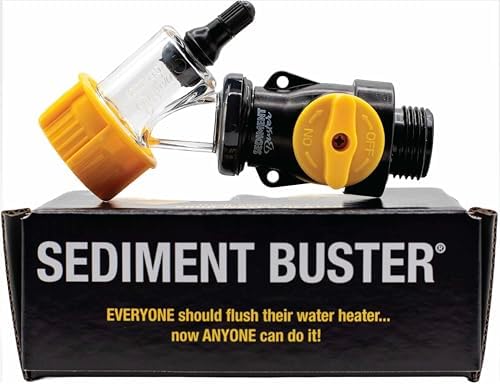
One of the most common reasons for a water heater leaking from the bottom is corrosion caused by sediment buildup. Over time, minerals from ur water supply settle at the bottom of the tank. If you’ve never flushed your water heater, this sediment layer can become thick, trapping heat and stressing the metal. This not only lowers efficiency but also accelerates rust and corrosion inside the tank.
Eventually, small holes form, and water begins seeping out. Unfortunately, when the tank itself is corroding, there’s no real repair replacement is the only solution. You can think of it like a soda can with a pinhole leak: once the metal is compromised, patching won’t hold for long.
The best prevention against this problem is regular maintenance. Flushing your water heater at least once a year removes built-up sediment, protecting the tank’s interior lining. But if you already see rusty water or constant puddling at the base, it may be a sign the tank’s lifespan is ending.
Save $400 on Pro by using this sediment cleaner DIY tool. See Below-

READ MORE: Does a Plumber Replace a Water Heater?
Faulty Drain Valve
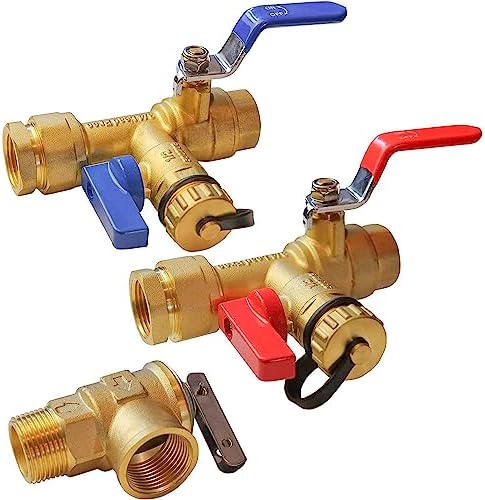
At the bottom of every water heater is a drain valve, designed to empty the tank during maintenance or replacement. Over time, this valve can loosen, wear out, or develop leaks around its threads. If you see water dripping directly from the valve, this might be the culprit.
Sometimes, the fix is as simple as tightening the valve with a wrench. Other times, the valve itself is defective and needs replacement. Thankfully, drain valve leaks are usually easier and cheaper to fix than tank corrosion.
Try this High class Drain Valve. See below-

Broken Temperature & Pressure Relief Valve
Temperature and Pressure Relief (T&P) valve is a significant safety facility on your water heater. It is designed to release water if the tank becomes too hot or if the pressure makes a dangerous level. Generally, this valve sits above the heater or near the edge, but if it is a malfunction, the water can run under the tank and gather downwards, showing that the leak is coming from the bottom.
If your T&P valve is leaking, it could mean the valve itself is faulty, or it could be a sign of excessive tank pressure. In either case, it’s not something you want to ignore. A failed T&P valve can put your home at serious risk since the tank could overheat or even explode in extreme cases.
Check this Pressure relief valve. See below-
Condensation Issues
Not every puddle near your water heater is a true leak. Sometimes, condensation forms when cold water enters the hot tank, especially in humid environments or when the heater is working extra hard. This moisture can drip down and collect at the bottom, mimicking a leak.
The good news is that condensation isn’t usually a sign of damage it’s just a natural reaction between hot and cold surfaces. However, if your heater constantly sweats and creates large puddles, it might indicate that your unit is overworked or undersized for your household needs.
READ MORE: Best Whole House Water Softener System for Home (2026) — Top Picks & Buyer’s Guide
First Steps to Take When You Notice a Leak
Discovering water around your water heater can be stressful, but your first moves are crucial for safety and minimizing damage. The very first thing you should do is turn off the power. If you have an electric water heater, switch off the breaker at your electrical panel. For gas heaters, look for the on/off dial at the bottom and turn it to the “off” position. This prevents accidents and keeps the heater from trying to reheat while leaking.
Next, shut off the water supply. Most heaters have a shut-off valve located on the cold water pipe entering the tank. Turning this valve clockwise stops additional water from filling the tank and worsening the leak. If you can’t find it, use your home’s main water shut-off valve instead.
Finally, take precautions to prevent further damage. Place towels, buckets, or a shallow pan under the leak to catch water. If the leak is large, consider using a wet/dry vacuum to remove standing water and protect flooring. At this point, you’re safe to inspect the unit more closely without worrying about worsening the situation.

- 6 Piece Tank-less Water Heater Flush Kit. Helps maintain and extend the lifespan of your tank-less water heater. Kit com…
- Works with most all tankless water heaters such as Rinnai, Bosch, Noritz, Rheem, Takagi, Tempra, Navien, Ecosmart, Stieb…
- Our cleaning solution removes scale deposits from tankless water heaters, which helps improve its efficacy and lifespan….
READ MORE: How to Replace an Electric Hot Water Heater
Diagnosing the Source of the Leak
Once you’ve shut off the power and water supply, the next step is to figure out exactly where the leak is coming from. Many homeowners assume that if there’s water around the base, the tank must be ruined. But that’s not always true sometimes the problem is a loose valve or condensation. Taking a few minutes to carefully inspect your water heater can save you from unnecessary replacement costs.
Start with the drain valve at the bottom of the tank. Dry the area completely with a towel and then check for fresh drips. If the valve is the source, you’ll see water slowly forming again. This is one of the easiest problems to fix.
Next, inspect the temperature and pressure relief (T&P) valve. While this valve is located higher up, water can run down the side of the heater and pool at the bottom, tricking you into thinking the tank itself is leaking. If the discharge pipe attached to the valve feels damp or has water stains, it’s likely the culprit.
After that, look closely at the tank body itself. Signs of rust, discoloration, or bubbling paint often indicate internal corrosion. Sadly, if water is seeping directly from the tank, there’s no reliable repair. Replacement is the only option.
Finally, consider whether it might be condensation. If your heater is working overtime or the surrounding area is humid, moisture can naturally form and drip down. This doesn’t require immediate repair, but it’s a sign your heater may not be sized properly for your household.
Temporary Fixes Before Calling a Professional
If you discover a small leak or drip, there are a few temporary fixes you can try while waiting for a plumber. These won’t solve long-term issues like tank corrosion, but they can help minimize damage and buy you some time.
For a leaky drain valve, try tightening it gently with a wrench. Sometimes the valve loosens over time and simply needs a snug fit. If the threads are worn, applying plumber’s tape can slow the leak until the valve can be replaced.
If the T&P valve is leaking due to pressure, do not attempt to block or cap it this is dangerous. Instead, collect the water in a bucket to prevent flooding and call a plumber to inspect the pressure issue.
To protect your home from water damage, place a large bucket or drip pan under the leak. If the leak is significant, using a wet/dry vacuum every few hours can help keep floors dry. Some homeowners also place old towels or rags around the base, but these should be replaced frequently to avoid mold growth.
Another smart move is to relieve pressure inside the tank. Connect a garden hose to the drain valve and carefully drain a few gallons of water. This reduces stress on the system and can sometimes lessen the leak.

- 【Tankless Heater Clean Kit】This cleaning kit comes with everything you need to maintain your water heating system. Helps…
- 【Submersible Sump Pump】1/6HP energy-efficient motor with thermal overload protection, has the ability to deliver water t…
- 【Easy to Use】This kit includes 3 gallons bucket with a bucket lid opener, 1/6HP utility pump with 2 adapters and 2pcs 6’…
READ MORE: Why My Tankless Water Heater Shuts Off During Shower — Fixes & Costs
When to Repair and When to Replace
One of the toughest questions homeowners face is whether to repair the water heater or replace it entirely. The decision often comes down to the age of your unit, the severity of the leak, and the overall cost of repair versus replacement.
If your water heater is less than 8 years old and the issue is with a valve or fitting, repair is usually the smartest choice. Replacing a drain valve or T&P valve is relatively inexpensive, and it can give your unit several more years of life.
On the other hand, if your water heater is 10–15 years old and showing signs of rust or corrosion, replacement is often the only logical option. A leaking tank cannot be repaired permanently, and investing in costly repairs for an aging unit usually isn’t worth it.
Consider the cost factor as well. Minor repairs may only cost $100–$300, but a full tank replacement ranges from $800 to $2,000 depending on size and type. If your repair estimate is more than half the price of a new unit, replacement is usually the better long-term investment.
Another thing to keep in mind is energy efficiency. Older water heaters consume more energy, driving up utility bills. Replacing an outdated model with a modern energy-efficient one can save you money over time, offsetting the upfront cost.
READ MORE: How Long for Hot Water Heater to Refill?
Professional Repair Options
When you decide it’s time to call in a professional, you’ll likely wonder what to expect. Plumbers have a variety of approaches depending on the cause of the leak. For example, a faulty drain valve can be replaced in less than an hour, often costing between $100 and $200. A T&P valve replacement may run a little higher, especially if additional pressure issues need to be addressed.
If the problem is tank corrosion, most professionals will recommend replacement rather than repair. Some may attempt temporary sealing solutions, but these rarely last and often end up costing more in the long run.
One of the advantages of hiring a professional is that they can quickly identify underlying issues that you might miss. For example, if your T&P valve keeps leaking, it could mean your water pressure regulator is failing. A plumber can catch these related problems and prevent future breakdowns.
Professional repairs also often come with a warranty on labor and parts, giving you peace of mind. Some homeowner’s insurance policies even cover water damage caused by a sudden water heater leak, so it’s worth checking your coverage before paying out-of-pocket.
Most importantly, professionals ensure safety. Water heaters combine high heat, pressure, and sometimes natural gas all of which can be hazardous if handled improperly. A certified plumber has the training to make sure the repair or replacement is done correctly and safely.
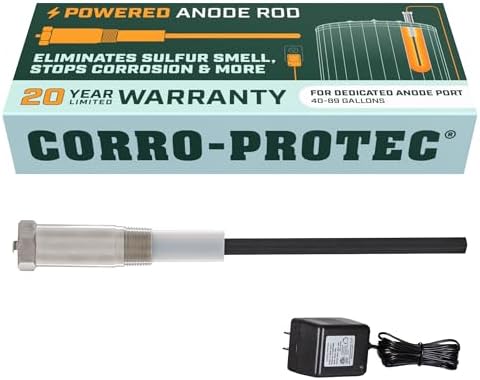
- HASSLE-FREE HOT WATER – Corro-Protec’s powered anode rods are revolutionizing the water heater maintenance by preventing…
- SAY GOODBYE TO ODORS – Eliminate your water heater odor problem by removing the rotten egg smell in hot water with our a…
- PERMANENT CORROSION PROTECTION – Designed to replace your 40-89-gallon water heater’s hex head anode rod, it can defend …
Preventive Maintenance to Avoid Future Leaks
The best way to deal with a leaking water heater is to prevent it from happening in the first place. Regular maintenance can extend the life of your unit and save you from expensive repairs.
One of the most effective habits is to flush your water heater at least once a year. This removes sediment buildup that causes corrosion and lowers efficiency. All you need is a garden hose and a few minutes to drain the tank until the water runs clear.
Another simple step is to inspect the valves every few months. Make sure the drain valve is tight and check that the T&P valve isn’t dripping unnecessarily. Catching small issues early often prevents bigger problems down the road.
Installing a water heater drain pan under the unit is another smart move. It does not stop the leaks, but it will protect your floors by consisting of water and directing it in a nearby drain.
Finally, do not forget about professional inspections. Check your system once a year from being a plumber, ensuring that everything is working properly and allows them to replace the parts worn before failing. This is a small investment that can extend the lifespan of your heater for many years.
READ MORE: How to Flush a Tankless Water Heater (Step-by-Step Guide)
How Long Can You Use a Leaking Water Heater?
When your water heater starts leaking from the bottom, one of the first questions you might ask yourself is, “Can I keep using it for a little while?” The short answer: you shouldn’t. While it might seem harmless to let it run for a few more days, doing so puts your home at risk of water damage and could even create safety hazards.
A small leak often turns into a bigger one without warning. A minor drip today can become a steady stream tomorrow, and before you know it, you’re dealing with soaked floors, mold growth, or ruined drywall. Water damage repairs can quickly cost thousands of dollars far more than replacing a water heater.
For gas-powered units, continuing to use a leaking heater can be especially dangerous. Leaks near the burner compartment may cause rust that interferes with proper combustion, increasing the risk of gas leaks or even fire. Electric heaters aren’t risk-free either; water exposure near electrical components can lead to shorts or electrocution hazards.
If the leak is coming from a drain valve or T&P valve, you may have a little time to manage it with buckets or temporary fixes until a plumber arrives. But if the tank itself is leaking, the clock is ticking. Once the inner lining has failed, the leak will only worsen. In fact, it’s not uncommon for older tanks to suddenly burst, dumping 30–50 gallons of water in minutes.

- 【ONE YEAR WARRANTY】Z Turn-up Kit Includes (2) 4500W 240V COPPER Water Heater Element, Insert Length: 13-9/16″. 3500W@208…
- 【ONE YEAR WARRANTY】Includes (1) Upper Water Heater Thermostat, (1) Lower Water Heater Thermostat, 120V ~ 480V
- 【Interchangeable】Therm-O-Disc Type Thermostat, Can interchange with APCOM type.
READ MORE: How to Identify a Plumbing Vent Pipe Blockage by Sound
Costs Involved in Fixing or Replacing a Leaking Heater
Understanding the financial side of water heater issues helps you plan ahead. The cost can vary widely depending on whether you’re repairing a small problem or replacing the entire system.
For minor repairs, expect to pay:
- Drain valve replacement: $100–$200
- T&P valve replacement: $150–$300
- Small pipe or fitting repair: $100–$250
For full replacement, costs are higher:
- Standard 40–50 gallon tank water heater: $800–$1,600 installed
- Tankless water heater: $1,500–$3,000 installed
- Hybrid electric water heater: $1,200–$2,500 installed
Keep in mind that these numbers can vary depending on your location, labor rates, and whether additional work is needed (such as upgrading venting or installing a drain pan).
It’s also smart to factor in hidden costs. For example, if your old heater has been leaking for a while, you might need repairs to drywall, flooring, or subflooring. Mold remediation can add hundreds—or even thousands—to your total bill.
Safety Hazards of Ignoring a Water Heater Leak
Some homeowners are tempted to put off fixing a water heater leak, especially if it seems small. But ignoring the problem can lead to serious hazards both for your home and your family’s safety.
First, there’s the risk of water damage. Even a slow drip can cause warped flooring, peeling paint, or mold growth. Over weeks or months, the damage spreads silently, often hidden behind walls or under flooring, until repairs become extremely costly.
Second, leaking heaters can create mold and mildew problems. Damp, dark areas are perfect breeding grounds for mold, which not only damages your home but can also trigger allergies and respiratory issues.
Third, for gas water heaters, leaks pose a fire hazard. Water dripping near the burner compartment can corrode safety controls or extinguish the pilot light, allowing gas to escape. In worst-case scenarios, this can lead to dangerous explosions.
For electric water heaters, leaks increase the risk of electrical shorts. Water and electricity are a deadly combination, and even small leaks near wiring can cause electrocution hazards.
Finally, there’s the danger of a burst tank. If the tank wall gives way completely, it can release 40–80 gallons of water at once. This flood can ruin furniture, electronics, and even the structural foundation of your home.
Conclusion
A water heater leaking from the bottom is a problem you can’t afford to ignore. Whether it’s a simple valve issue or a sign of tank corrosion, quick action is key to avoiding costly damage and safety hazards. Start by shutting off power and water, then inspect the common culprits like the drain valve, T&P valve, and tank itself. Temporary fixes can buy you time, but most leaks require professional attention.
If your heater is young and the leak is minor, repair may be enough. But if your unit is older and showing signs of rust, replacement is the smarter long-term solution. Either way, preventive maintenance like annual flushing and valve checks will help you avoid future headaches.
FAQs
How do I know if my water heater leak is serious?
If water is coming directly from the tank or if you see rust and corrosion, the leak is serious and requires replacement. Small drips from valves are less urgent but still need repair.
Can I fix a leaking water heater myself?
You can tighten valves or apply plumber’s tape for small leaks, but tank leaks or pressure-related issues should always be handled by a professional.
How long should a water heater last before replacement?
Most water heaters last 8–12 years. With regular maintenance, some may last up to 15 years, but leaks are often the first sign that replacement is due.
Is a leaking water heater covered by insurance?
Home insurance may cover sudden water damage caused by a heater, but it usually won’t cover gradual wear and tear. Check your policy for details.
What’s the safest way to dispose of an old water heater?
Most plumbing companies will haul away the old unit for a fee. You can also contact your local recycling center or waste management service for proper disposal options.