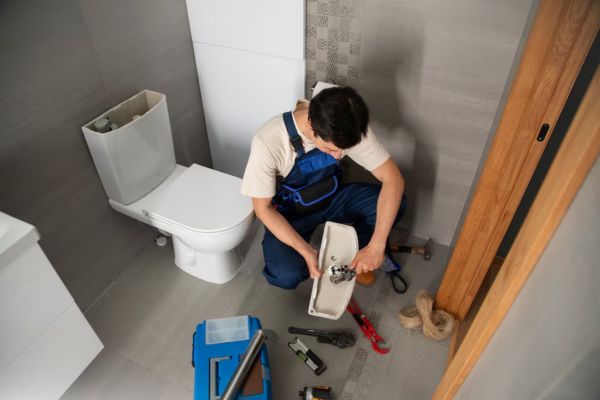
A continually running toilet is usually the result of one or more faulty internal components most often the flapper seal, fill valve, or overflow tube which Permit water to flow slowly from the tank into the bowl and trigger the refill cycle. Simple adjustments or part replacements can often resolve the problem in under an hour, preventing water waste and higher utility bills. By inspecting the tank, diagnosing the exact cause, and following a systematic repair process turning off the water supply, replacing or adjusting the flapper, tweaking the fill valve, and setting the correct water level you can restore proper toilet function without calling a plumber. Lets deep dive into “How to Repair a Toilet that Keeps Running: Step by Step”
READ MORE: Emergency Toilet Repair Near Me: Your Ultimate Guide to Fast and Reliable Solutions
Common Causes of a Running Toilet
Flapper Seal Issues
A worn, warped, or dirty flapper will not seat properly, allowing water to leak continuously from the tank into the bowl. Over time, the rubber flapper deteriorates and loses its ability to form a tight seal, which is the most frequent cause of a running toilet.
Chain and Handle Problems
When the chain linking the flush handle to the flapper is too short, too long, or tangled, it can keep the flapper slightly raised, leading to continuous leakage. A loose flush handle nut can also misalign the lever, causing intermittent runs.
Fill Valve Malfunctions
The fill valve regulates water intake into the tank following a flush. Debris, wear, or improper adjustment can prevent it from shutting off, causing water to overflow into the overflow tube and restart the refill cycle.
Overflow Tube and Water Level Problems
If the tank’s water level is set above the top of the overflow tube, excess water will drain continuously into it. An improperly sized or cracked overflow tube can also contribute to persistent running.
Diagnosing the Issue
Inspecting the Tank
Start by removing the tank lid and observing the internals during a flush cycle. Look for water seeping under the flapper, continuous flow through the overflow tube, or erratic water level behavior.
Testing the Flapper Seal
Add a few drops of food coloring to the tank water and wait 15 minutes without flushing. Colored water in the bowl indicates a leaking flapper.
Checking Water Level
Measure the water level relative to the overflow tube. It should sit ¼ – ½ inch below the top of the tube; higher levels indicate an adjustment problem with the fill valve.
Examining the Fill Valve
Flush the toilet and watch the fill valve. If water continues to flow after the tank reaches the correct level, the valve likely needs cleaning or replacement.
READ MORE: How Much Does a Plumber Charge to Unclog a Toilet?
How to Repair a Toilet that Keeps Running: Step by Step
1. Turn Off the Water Supply
Locate and close the shutoff valve (angle stop) near the toilet base by turning it clockwise until tight.
2. Replace or Adjust the Flapper
- Flush to drain most water from the tank.
- Disconnect the old flapper from the flush valve pegs.
- Clean the valve seat of any buildup.
- Install a new flapper matching your toilet model.
- Reattach the chain, leaving a slight slack (about ¼ inch) for proper sealing.
3. Adjust the Fill Valve or Float
- For float-cup valves, slide the float down the shaft to lower the water level.
- For float-ball valves, bend the adjusting rod or turn the adjustment screw.
- Ensure the final water line is below the overflow tube by at least ¼ inch.
4. Fix the Overflow Tube
- Inspect for cracks; replace if damaged.
- Ensure it is securely seated in the tank.
- Adjust the overflow tube height in some models by locking it into a different slot on the fill valve assembl.
5. Alin and Adjust the Chain
- Detach and reattach the chain so only minimal slack remains when the flapper is closed.
- Verify the handle lever isn’t catching on the chain when at rest.
6. Turn the Water Back On and Test
- Open the shutoff valve by turning it counterclockwise.
- Let the tank fill and observe for leaks.
- Flush several times to confirm the issue is resolved.
READ MORE: How to Plumb a Basement Bathroom: Step By Step DIY Guide
Tools and Materials Needed
- Replacement flapper kit.
- Adjustable wrench or channel-lock pliers
- Screwdriver (for adjustment screws)
- Food coloring (for leak testing)
- Towels or rags
When to Replace vs. Repair
Indicators for Replacement
- Cracked or brittle components (flapper, overflow tube).
- Recurring leaks after multiple repairs.
- Corroded or non-adjustable fill valves
Cost Considerations
- DIY parts kits range from $5–$20 per component.
- Professional service calls typically start around $75–$150.
Preventive Maintenance Tips
- Inspect internal parts every 6–12 months for wear.
- Clean valve seats and remove mineral deposits in hard-water areas.
- Avoid chemical cleaners that can degrade rubber components.
READ MORE: Tree roots in sewer line — removal & repair cost (2026 guide)
When to Call a Professional
- If internal parts are obsolete or unavailable
- When tools or mechanical skills are insufficient
- For persistent problems despite DIY efforts (e.g., hidden cracks, complex valve assemblies)
Conclusion
Repairing a running toilet is a straightforward process when you understand the common causes—flapper leaks, fill-valve issues, and overflow-tube misalignments—and follow a methodical repair sequence. With inexpensive devices, a replacement kit, and regular maintenance, you can save water, reduce your bill, and give your toilet-plumber a rest without ever touching a plumber.
Frequently Asked Questions
How much water does a running toilet waste?
A running toilet can waste up to 200 gallons per day, significantly impacting your water bill.
Can I use sealants instead of replacing the flapper?
Sealants are often temporary fixes; replacing the flapper with a proper OEM or universal kit is more reliable.
Why does my toilet run intermittently?
Intermittent runs usually indicate a flapper that only leaks when tank pressure changes or sediment briefly seals the gap.
Is it safe to use chemical drain cleaners in my toilet?
Chemical cleaners can damage rubber seals and valves; they are not recommended for diagnosing or fixing running toilets.
How often should I replace toilet tank components?
With regular use, flappers and fill valves typically last 3–5 years; high-mineral water can shorten this lifespan.

