This guide provides a step-by-step procedure in locating and fixing a bursting water pipe, either with a temporary clamp or by replacing the completely destroyed section. You will know how to locate the bursting point, close the system dry and safely, and get pipe and prepared ready for secure fittings. Critical equipment- pipe cutters, repair clamps, epoxy putty, and slip-fix assembly will be explained in detail with each’s best practice. Injury-free repair of security features is ensured, such as the wearing of non-conductive gloves and disability from electrical circuits.
We will also lay special emphasis on constant material-PVC primer and cement, stainless repair sleeves, and self-fusing silicone tape, so that watertite seals will be assured. After you have received the repair, you will test the pipe under pressure to check that there is no leaks and learn how to carry on exposed classes to prevent future freeze. Even though the majority of DIY fix can be completed using very little plumbing knowledge, we would recommend it is the safest to have a licensed technician to guarantee the regard for local building code and long-term dependability. Lets deep dive into “How to Repair a Burst Water Pipe”
Understanding Burst Water Pipes
Common Causes of Pipe Bursts
Pipes often burst due to freezing temperatures, causing water to expand and crack the pipe walls. Other triggers include corrosion, high water pressure, and accidental punctures during renovations.
Materials Prone to Bursting
Older galvanized steel and cast iron pipes corrode internally over decades, making them susceptible to pinhole leaks and sudden ruptures. Copper can fatigue at joints, while PEX is more flexible but can fail under UV exposure.
READ MORE: Slab Leak Detection Cost
Immediate Actions After a Pipe Burst
Locating and Shutting Off the Main Valve
First things first: find your home’s main shut-off valve and turn it clockwise until it stops. This halts water flow and minimizes flooding.
Draining Remaining Water
Open all faucets and appliances to relieve pressure and drain the system. Don’t forget to flush toilets and run showers until water stops running.

- Function: Perfect Plumbing GadGet to Repair any PinHoles, Punctures, or Splits in Piping System
- Superior Quality: Heavy Duty Stainless steel 304 Constructions; Plated Lug, Carriage Bolts and Nuts are Rust and Corrosi…
- Versatile: Great for Repairs on Rigid Copper, PVC, Galvanized and steel Pipes
Safety Precautions
Electrical Hazards
Water and electricity are a lethal combo. Shut off circuit breakers for flooded areas before entering to repair.
Personal Protective Equipment
Wear gloves, safety goggles, and rubber-soled boots to protect against sharp pipe fragments and slippery surfaces.
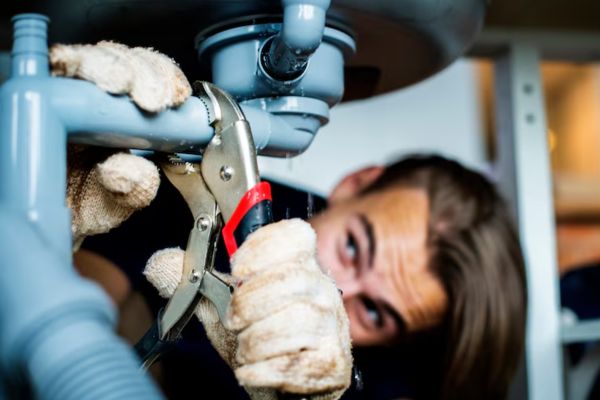
Temporary DIY Fixes
Pipe Clamps and C-Clamps
A pipe clamp kit with a rubber gasket can seal small cracks instantly. Position the clamp over the leak and tighten until dripping stops.
Rubber and Wood Patch
Place a rubber patch against the leak, sandwich it with a block of wood, and secure using a C-clamp. This stopgap holds until a permanent repair.
Epoxy Putty Applications
Epoxy putty adheres to wet surfaces and cures in minutes, forming a temporary seal over small holes. Knead the putty, apply to the leak, and let it harden.
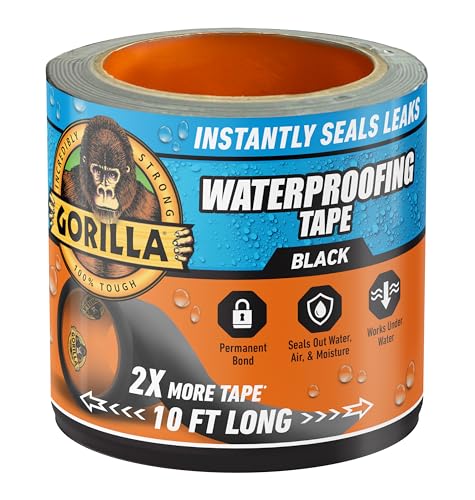
Plumbing Repair Tape
Wrap self-fusing silicone tape around the pipe multiple times. The tape melds into a watertight sleeve, lasting several days until you can do a full repair.
Tools and Materials Required
Wrenches and Pliers
An adjustable wrench or set of pipe wrenches is crucial for loosening fittings and removing damaged sections.

Hacksaw or Tubing Cutter
Clean cuts are essential. Use a hacksaw with a metal blade or a tubing cutter for copper and PVC.

Replacement Pipe and Fittings
Match the pipe material—copper, PEX, or PVC—and gather the appropriate couplings, elbows, or push-fit connectors.

- 【APPROVED TO USE】: SUNGATOR push pex fittings are certified and listed to ASSE 1061, NSF/ANSI 61; SUNGATOR plumbing fitt…
- 【EASY INSTALLATION】: Complete installs faster and safer than traditional methods with SUNGATOR pushfit couplings and eas…
- 【VERSATILE APPLICATIONS】: Whether you are repairing a water line, installing a water heater, remodeling a home or plumbi…
READ MORE: Fix Leaky Bathroom Faucet
Permanent Repair Methods
Push-Fit (SharkBite) Fittings
Push-fit connectors slip onto cut pipe ends and lock with stainless steel teeth—no soldering required. They’re rated for permanent repairs and freeze-proof applications.

Soldering Copper Pipes
Clean pipe ends, apply flux, assemble with copper fittings, and heat with a propane torch. Add lead-free solder at joints until it melts and seals.
Compression and Flare Fittings
Compression fittings use a brass olive and nut to compress onto the pipe. Flare fittings require flaring the pipe end—both provide leak-proof seals without heat.
Pros and Cons of Each Method
- Push-Fit: Quick, tool-light, but costlier per fitting.
- Soldering: Durable, low material cost, but requires skill and open flame.
- Compression: No heat, but can loosen under vibration or thermal cycling.
Repairing Different Pipe Materials
Copper Pipe Repairs
Copper responds well to soldering and push-fit. Ensure oxidation is removed with a wire brush for solid joints.
PEX and PVC Repairs
Use expansion fittings for PEX or solvent-welded joints for PVC. Solvent cement chemically fuses PVC sections—allow proper cure time .
Galvanized Steel Pipe Repairs
Steel requires threaded fittings. Cut pipe with a hacksaw and re-thread using a pipe die, then secure with a threaded coupling and Teflon tape.
Post-Repair Inspection and Testing
Pressure Testing for Leaks
Re-pressurize the system and monitor for pressure drops over 15 minutes. A stable gauge indicates a successful repair.
Checking Joints and Seals
Visually inspect each joint and feel around seals for moisture. A final wipe-down with a tissue can reveal pinhole drips.
Repair Cost Breakdown
DIY vs. Professional Costs
DIY parts (fittings, tape, epoxy) run $20–$100, depending on materials. Professional repairs typically cost $200–$1,000 including labor and materials.
Average Repair Cost Range
- Minor patch: $150–$300.
- Section replacement: $300–$900.
- Complex or hidden pipe: up to $2,000.
Factors Affecting Cost
Pipe accessibility, material, and emergency service fees drive costs higher. Weekend or after-hours calls may add $100–$200 in surcharges.
Restoration of Flooring and Walls
Drywall and Plaster Repair
Cut out damaged drywall, install a patch, tape, and mud. Sand smooth and repaint for seamless blending.
Flooring Replacement Costs
Tile or hardwood replacement ranges $3–$10 per sq ft plus labor, while concrete resurfacing runs $2–$5 per sq ft.
Hiring a Professional Plumber
When to Call a Pro
If the burst is in a hard-to-reach area, involves lead pipes, or you’re uncomfortable with tools, engage a licensed plumber.
Choosing a Licensed Contractor
Verify license, insurance, and references. Get multiple quotes and read online reviews before deciding .
Preventative Measures
Insulating Exposed Pipes
Use foam pipe insulation in unheated areas to prevent freezing and bursting in cold months.
Regular Maintenance Tips
Flush water heaters, check for corrosion, and monitor water pressure (keep below 80 psi) to extend pipe life.
FAQs
Can I fix a burst pipe without shutting off the main water supply?
No—shutting off the main valve is crucial to prevent flooding and injury.
How long does epoxy putty last on a burst pipe?
Typically a few days to weeks—it’s a temporary fix until a permanent repair is done.
Is it safe to solder pipes myself?
Only if you’re experienced—soldering involves open flame and can violate local codes without proper training.
What type of professional should I call?
A licensed plumber is best; they have the tools, skills, and insurance to handle complex repairs safely.
Will homeowner’s insurance cover burst pipe repairs?
Most policies cover sudden bursts but not gradual leaks. Always review your policy or consult your insurer.
Conclusion
Repairing a burst water pipe may feel overwhelming, but with prompt action—shutting off your main water supply and draining remaining water—you can minimize water damage and simplify repairs. Pipe clamps or epoxy putty help out temporarily leaked in quick repairs, whereas long-term resolutions through push-fitting or soldered unions provide long-term reliability. Professional repair costs between $ 200 and $ 3,000 based on average, damage limit and location. After repairing, replace any damaged drywall or floor and inspect thoroughly to provide leak-free operation. Finally, preventive measures – such as insulating insulated pipes and proper home heating – can prevent future burst and be cost- and time-saving.

