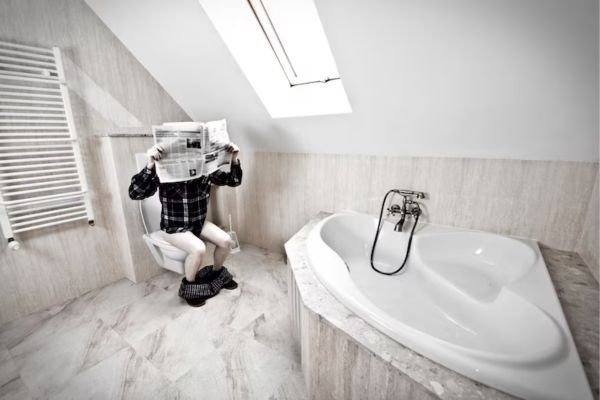
Why Add a Bathroom in the Basement?
Thinking about adding a bathroom to your basement? Smart move. Not only does a basement bathroom improve your home’s functionality, but it also adds serious resale value. Whether you’re creating a guest suite, a home office with its own washroom, or simply avoiding trips upstairs, a basement bathroom is a game-changer.
Adding a bathroom in the basement also makes entertaining easier and can increase your property’s overall square footage of livable space. It can be especially convenient in multigenerational homes or if you’re renting out your basement. The privacy it offers is just icing on the cake. Lets deep dive into “How to Plumb a Basement Bathroom: Step By Step DIY Guide”
The Throne You Deserve. Experience total hands-free luxury with a foot-activated sensor and auto-flush technology. See below-👇

Common Challenges in Basement Plumbing
However, installing a bathroom below ground level brings a few hurdles—particularly with plumbing. The biggest challenge? Gravity. Plumbing systems rely on gravity to move waste to the main sewer line, and since your basement is below the rest of the house, you’ll need to plan carefully to ensure your system works efficiently.
You might need to break through concrete, install a sewage ejector pump, or even adjust your plumbing vents to meet code. Moisture issues, tight spaces, and accessibility to main lines also pose complications. But with good planning and some DIY know-how, it’s entirely doable—even if it’s your first time tackling a project of this scale.
READ MORE: How Much Does a Plumber Charge to Unclog a Toilet?
Planning Your Basement Bathroom Layout
Locating the Main Drain Line
The first and most critical step is identifying the location of your main drain line. This is usually a 3- to 4-inch pipe that runs underneath your home and connects to the city sewer or a septic tank. You’ll be connecting all your basement bathroom waste lines—sink, toilet, and shower—to this.
To find it, look for the large drainpipe in your basement or utility room. In most cases, it runs along the floor or into the wall and exits your home to the outside. It’s best to install your bathroom as close as possible to this pipe to reduce the amount of digging required and to maintain proper drainage slopes.
The Designer’s Choice. Elevate your vanity with the clean, sophisticated lines of the Kohler Caxton. See Below- 👇

Choosing the Right Bathroom Fixtures
Next, decide what fixtures your basement bathroom will include. A typical setup has:
- A toilet
- A sink/vanity
- A shower or tub
The fixture types and their placement impact how your plumbing is laid out. For example, a one-piece shower may require less space and be easier to install than a custom tile stall. Make sure your chosen fixtures fit comfortably in your available space, keeping in mind clearances for code compliance and comfort.
Sit easy with 17″ ADA Height. Experience “Chair Height” comfort that’s easier on your knees and back. See below- 👇
Creating a Plumbing Diagram
Now, it’s time to draw a detailed plumbing layout diagram. This will show the locations of all supply lines (hot and cold water), waste lines (drains), and venting systems. While this may sound overly technical, it’s essential for obtaining permits, passing inspections, and preventing costly mistakes.
Your diagram should include:
- Drain line paths with pipe sizes
- Vent stack locations
- Fixture rough-in placements
- Cleanouts and shut-off valves
Consider using plumbing design software or consulting a plumber to ensure accuracy. A well-thought-out plan can make or break the success of your basement bathroom.
The ultimate vanity upgrade. Elevate your space with the elegance of hand-crafted artistic glass. See Below- 👇
Tools and Materials You’ll Need
Essential Plumbing Tools
Before you begin, gather the necessary tools. Here’s a list of essentials:
- Pipe cutter or reciprocating saw
- Wrenches (adjustable and pipe)
- Pipe wrenches for tight fittings
- Level and measuring tape
- Masonry saw or hammer drill (for cutting concrete)
- Bucket, gloves, and safety glasses
- Trowel and concrete tools (for floor repair)
- Drain auger or plumber’s snake (for clearing lines)
If you’re working with PEX (a popular modern plumbing material), you’ll also need:
- PEX crimping tool
- PEX cutter
- PEX expansion tool (if using expansion fittings)
Deep water, deeper relaxation. The perfect stand-alone tub for those who take their “me-time” seriously. See below- 👇

Materials Checklist
Here’s what you’ll need in terms of plumbing supplies:
- PVC or ABS drain pipes (1½”, 2″, 3″, or 4″)
- Pipe fittings (elbows, tees, reducers, couplings)
- P-traps and cleanouts
- Vent pipe (PVC or ABS)
- Pipe glue and primer
- PEX or copper piping for water lines
- Shut-off valves
- Toilet flange and wax ring
- Shower drain kit
- Concrete mix for patching floors
- Moisture barrier (optional but recommended)
Don’t forget code-compliant items like backwater valves or air admittance valves if you’re not connecting to an existing vent stack.
Designed for lounging. Contoured acrylic comfort that keeps the water warm and the relaxation lasting. Se below- 👇

READ MORE: How to Repair a Toilet that Keeps Running
Drainage and Venting Basics
Understanding Gravity Drainage
Gravity drainage is the foundation of any plumbing system. Wastewater flows downhill, so the slope of your pipes is critical. For basement plumbing, your drain pipes need to maintain a slope of 1/4 inch per foot to ensure smooth flow into the main drain line.
This can be tricky in basements where space is tight and the floor is already concrete. That’s why careful planning, and sometimes an ejector pump, is necessary. If your main line is too high to allow natural flow, an upflush system or sewage pump may be required.
What Is Venting and Why It Matters
Venting allows air into your plumbing system, which helps maintain pressure and prevents siphoning of water from P-traps. Without proper venting, you’ll experience slow drains, gurgling sounds, and even dangerous sewer gas odors.
Every fixture must be properly vented—either through a direct connection to the home’s vent stack or through an air admittance valve (AAV), which is a mechanical venting solution allowed in many jurisdictions.
Step into elegance. The matte black finish and rainfall head transform your morning routine into a high-end spa experience. See Below-

Wet Venting vs. Dry Venting
Dry venting uses separate pipes to connect each fixture to the vent stack. Wet venting, on the other hand, allows multiple fixtures to share a drain and vent line, which saves space and materials. It’s a more advanced technique and must follow strict local codes.
Before choosing your venting method, check your local plumbing code or consult a licensed plumber. Improper venting is one of the most common reasons inspections fail, so don’t skip this step.
Breaking the Concrete Floor
Marking the Layout
Once your plumbing plan is finalized, it’s time to prepare for one of the most labor-intensive parts of the job: breaking through the basement’s concrete slab. First, mark the locations of all your fixtures—toilet, sink, shower—directly on the floor using chalk or a marker. Include the paths where your drain pipes will run to the main sewer line.
Double-check your measurements. The toilet flange needs to be exactly 12 inches from the finished wall (not the studs), and the shower drain should be centered. Proper alignment now saves headaches later. Use a laser level or chalk line to ensure accuracy, and mark clearly to minimize mistakes during cutting.

Cutting and Removing the Concrete
Cutting concrete is dusty and noisy, so wear proper safety gear: a mask, goggles, and hearing protection. A concrete saw with a diamond blade is ideal for clean cuts, but a hammer drill with a chisel bit can work in smaller sections.
Score along your marked lines, then start breaking up the concrete with a sledgehammer or jackhammer. You don’t need to remove all the concrete in your basement—just where the pipes will run and around each fixture. Keep a bucket or wheelbarrow handy to remove the broken chunks.
If your slab is thick or reinforced with rebar, expect the job to take several hours or even a full day.
Excavating and Preparing the Trench
After removing the concrete, dig a trench deep enough to allow for proper pipe slope (at least 1/4 inch per foot). Make sure your trenches are wide enough to accommodate the pipes and any fittings. Use a level frequently to maintain your slope as you go.
It’s also wise to compact the soil base beneath the pipes to avoid future settling, which could crack the floor or misalign the plumbing. You may want to lay a few inches of sand or pea gravel at the bottom to cushion the pipes and make final adjustments easier.
The finish that never goes out of style. Elevate your shower with the sophisticated look of brushed nickel. See below-

- 304 Stainless Steel Structure: Made of high-quality 304 stainless steel, the main body of the product is designed to res…
- Air Pressurization Technology: The 10 inches shower head with adoption of innovative air injection technology, mixes wat…
- 2 Functions: 2-in-1 diverter + hot/cold control.Overhead Rainfall Shower and Handheld Spray.Diverter switches between to…
Installing the Drain Lines
Toilet Drain Installation
The toilet drain line is arguably the most important part of your basement bathroom plumbing. It requires a 3-inch or 4-inch PVC pipe, depending on local code. Start by positioning the toilet flange exactly 12 inches from the finished wall and centered in your bathroom layout.
Install a closet bend (a curved fitting) that connects the toilet flange to the main drain line. Make sure the pipe slopes downward at 1/4 inch per foot toward the main line. Secure the flange at floor level (not recessed) so the toilet sits flush once the concrete is re-poured.
Use PVC primer and cement to bond all pipe sections tightly. Test-fit all components before gluing—you won’t get a second chance once the cement sets.
Shower and Sink Drain Installation
For the shower, use a 2-inch drain pipe, which handles more flow and prevents clogs. Position the shower drain according to your base’s layout and connect it to the main drain or a branch line. Install a P-trap directly under the shower drain to prevent sewer gases from backing up.
For the sink, a 1½-inch or 2-inch line is standard. Install the sink drain line with a P-trap and connect it to a branch line that ties into the main system. Ensure both the shower and sink lines have adequate slope and are properly vented.

Slope and Drainage Code Requirements
Follow these guidelines for correct pipe slope:
- 1½-inch pipe: 1/4 inch per foot
- 2-inch pipe: 1/4 inch per foot
- 3-inch pipe: 1/8 to 1/4 inch per foot (varies by code)
Too much slope can cause water to outrun solids, leading to clogs. Too little slope will result in standing water. Use a torpedo level or slope laser to check alignment throughout installation.
READ MORE: Emergency Toilet Repair Near Me: Your Ultimate Guide to Fast and Reliable Solutions
Vent Pipe Installation
Connecting to Existing Vent Stack
If you have access to your home’s existing vent stack—usually a 2- or 3-inch pipe that exits through the roof—you can connect your new bathroom vent lines to it. Run a vertical vent pipe from each fixture’s drain to a point above the flood level rim (usually 6 inches) and tie them into the main vent.
Use a sanitary tee fitting to make the connection. Avoid using horizontal venting below flood level, as it can collect water and block airflow.

Alternative Venting Options (Air Admittance Valves)
If connecting to the existing vent stack isn’t feasible, many codes allow for air admittance valves (AAVs). These are mechanical devices that let air in when water flows through the pipes but prevent sewer gases from escaping.
AAVs must be installed vertically and accessible for maintenance. While they’re not legal everywhere, they’re a great option for remote bathrooms or finished basements where cutting through walls or ceilings isn’t ideal.
Make sure to check local codes before installing an AAV—some municipalities don’t allow them for toilets but will for sinks and showers.
Avoiding Common Venting Mistakes
Venting mistakes are a leading cause of plumbing problems and failed inspections. Common errors include:
- Not venting each fixture
- Using the wrong fittings (e.g., a tee instead of a wye)
- Placing vents below the flood rim
- Creating long horizontal vent runs without proper slope
Follow code, use the correct fittings, and don’t be afraid to consult a plumber if you’re unsure.

Water Supply Line Installation
Running Hot and Cold Water Lines
Running supply lines in the basement is often simpler than upstairs because you have easier access to floor joists and open ceilings. Use PEX tubing, which is flexible, easy to cut, and resistant to freezing. Alternatively, copper can be used but is more expensive and labor-intensive.
Start by tapping into your home’s existing water supply lines, usually found near your water heater. Run hot and cold lines to each fixture, making sure to use appropriate shut-off valves and elbows.
Use color-coded tubing (red for hot, blue for cold) to avoid confusion during installation and future repairs.
Using PEX vs. Copper
PEX pros:
- Flexible and easy to install
- Cheaper than copper
- Resistant to scale and corrosion
- No flame needed for connections
PEX cons:
- Can’t be used in direct sunlight
- Requires special tools for fittings
Copper pros:
- Long lifespan
- Resists UV damage
- Proven reliability
Copper cons:
- Expensive and harder to work with
- Requires soldering
Most modern basement installations use PEX due to its flexibility and cost-effectiveness. Ensure you use the proper crimp or expansion fittings for a leak-free seal.

Pressure Testing Your Supply Lines
Before enclosing or backfilling anything, pressure test your water lines. Cap all ends and connect a pressure gauge to one outlet. Fill the system with water or air (if permitted) and monitor the gauge for at least 30 minutes. A pressure drop indicates a leak that needs to be fixed before proceeding.
Installing the Bathroom Fixtures
Toilet Installation
To install your toilet, begin by placing a wax ring on the flange and lowering the toilet bowl into place. Press down firmly and bolt the base to the floor. Connect the tank (if separate), attach the water line, and test for leaks. Ensure the toilet sits level to prevent rocking or future cracks.
Use a flexible stainless steel supply line for easy hookup. Turn on the water slowly and check for drips. Test flush multiple times before finishing the job.
Shower Installation
Shower installation will vary depending on the type—prefab base, tile stall, or bathtub. Most installations begin with placing the shower pan or tub and connecting the drain to the previously installed P-trap. Secure the base to the floor and seal around the edges with waterproof caulk.
If tiling, install a waterproof membrane over the walls and floor. For prefab units, ensure the wall panels align perfectly and are sealed to prevent leaks.
Vanity and Sink Hookup
Set the vanity in place and attach the faucet and drain assembly before positioning it against the wall. Use plumber’s putty on the drain flange and Teflon tape on all threaded connections.
Connect the supply lines to the faucet using flexible hoses and tighten with an adjustable wrench. Ensure the drain tailpiece connects to the P-trap and main drain line with a watertight seal.
Once installed, test for leaks by running both hot and cold water and checking all joints.
READ MORE: Fix Leaky Bathroom Faucet
Backfilling and Re-pouring the Concrete
Proper Backfill Materials
Once your plumbing is in place and pressure-tested, it’s time to backfill the trenches before re-pouring concrete. This is not a step to rush. The right backfill materials ensure your pipes are well-supported and won’t shift or crack over time.
Start with a base layer of sand or pea gravel, about 2–4 inches deep, to cushion the pipes and promote good drainage. Carefully place it around and under all pipe sections, filling in gaps without disturbing the slope or alignment. Avoid using large rocks or debris that could puncture or shift the pipes.
Once the pipes are surrounded and securely supported, you can add additional fill material. Tamped soil or compactable gravel works well for bringing the trench close to the concrete surface. Compact it in layers to prevent settling, using a hand tamper or plate compactor.
Compaction and Moisture Control
Proper compaction is essential to avoid future slab cracks or uneven flooring. Each layer of fill should be compacted to prevent air pockets. It may take several passes with a tamper before the surface is ready for concrete.
Before pouring, ensure the area is dry and free from debris. If there’s been recent moisture or flooding, give the area time to dry out. Consider laying a vapor barrier (a heavy-duty plastic sheet) over the filled trench if your basement has high humidity or moisture issues. This helps prevent water vapor from migrating into your new concrete.
Re-Pouring and Finishing the Floor
With the trench filled and compacted, it’s time to pour the new slab. Use concrete mix with a strength rating of at least 3,000 PSI for durability. Mix and pour in small batches unless you’re hiring a professional.
Fill the trench evenly, using a trowel or screed to level the surface with the existing floor. Smooth the finish with a float and allow it to cure fully—typically 24–48 hours for light traffic and up to 7 days for full strength. Keep the surface damp during curing to avoid cracking.
Once dry, you can proceed with flooring installation or any finishing steps planned for the basement bathroom.
Testing and Inspection
Performing a Leak Test
Before closing up any walls or floors for good, do a comprehensive leak test. Run water through all fixtures: flush the toilet multiple times, run the shower and sink, and inspect every connection, joint, and seal for leaks.
It’s also wise to perform a dye test on the toilet and shower drain by adding food coloring to the water and checking for leaks below. Even a slow drip can cause major problems over time in a basement where moisture is already a concern.
If you’ve used air pressure to test your lines, re-check the pressure gauge. If it’s dropped since the initial test, inspect all joints again and reapply sealant or re-tighten fittings as needed.
Local Plumbing Inspections
Most jurisdictions require at least one inspection for basement plumbing, and possibly two—one before you pour concrete (rough-in) and one after all fixtures are installed (final). Contact your local building department to schedule inspections and clarify requirements.
Inspectors will check slope, venting, backwater valves, and pipe connections for code compliance. If your work fails, don’t panic—most inspectors will tell you exactly what needs to be fixed. After making the necessary changes, you can schedule a follow-up inspection.
Skipping this step can cause big problems later, especially when selling your home. Work without a permit and inspection, and you could be forced to tear it all out.
Troubleshooting Common Issues
Common plumbing issues during testing include:
- Slow drains (check venting or slope)
- Leaks at joints (re-glue or tighten fittings)
- Poor water pressure (inspect shut-off valves or kinks in PEX lines)
- Gurgling sounds (indicates improper venting)
Don’t move forward with finishing your bathroom until these issues are resolved. It’s much harder to fix problems once walls and floors are closed up.
READ MORE: Is a Leaking Water Heater Dangerous?
Finishing Touches and Waterproofing
Sealing Joints and Floors
After plumbing is tested and concrete is cured, it’s time to prep for final finishes. Start by sealing all pipe joints that penetrate walls or floors. Use silicone caulk or expanding foam for a watertight, airtight seal.
For floors, consider using a concrete sealer to protect against future moisture. This step is especially important if you’re using porous flooring like tile or laminate. Even with a vapor barrier below, concrete can wick moisture over time.
Moisture Barriers and Ventilation
Basements are naturally more humid, so investing in moisture control is critical for long-term comfort and health. Before installing drywall, place a plastic vapor barrier on all walls and behind shower enclosures. Use cement board instead of drywall around wet areas like tubs or showers.
Install a bathroom exhaust fan to manage humidity and prevent mold. Choose a unit rated for basement use and size it appropriately (at least 50 CFM). Vent it outside—never into the ceiling or another room.
You can also use a dehumidifier for added protection, especially if your basement is prone to dampness.
Painting and Flooring Considerations
Use mold-resistant drywall (often green or purple board) and paint with a mildew-inhibiting additive. For flooring, options like vinyl planks, ceramic tile, or sealed concrete are ideal for basement environments. Avoid carpet unless your space is exceptionally dry and well-insulated.
Install baseboards with a small gap above the floor and use water-resistant materials like PVC trim. Finish with caulking or sealant at all joints to complete a professional, waterproof look.
Costs Involved in Plumbing a Basement Bathroom
DIY vs. Hiring a Professional
Plumbing a basement bathroom yourself can save a substantial amount—often $2,000 to $6,000—but it comes with a steep learning curve and significant labor. Expect to spend $1,500 to $3,500 on materials alone, depending on fixture quality and layout complexity.
Hiring a plumber adds $50 to $150 per hour, and full installation by pros often totals $7,000 to $15,000. While expensive, professionals ensure code compliance, speed, and often warranties on their work.
DIY is ideal for experienced homeowners or those with time to spare and a solid understanding of plumbing basics. For complicated venting, tough slab work, or connection to city sewers, consider hiring a pro for at least part of the job.
Permits and Hidden Expenses
Don’t forget about permits, which typically cost $100 to $500. Skipping them can lead to penalties, failed inspections, or denied home sales.
Other hidden expenses include:
- Concrete saw rental: $50–$150 per day
- Disposal of concrete debris
- Unexpected pipe rerouting
- Extra venting or backwater valves
Budget an extra 10–20% above your estimate for these surprises. It’s better to be overprepared than caught off-guard mid-project.
Conclusion
Plumbing a basement bathroom is no small feat—but with the right planning, tools, and a bit of grit, it’s absolutely doable. From mapping out your layout and locating the main drain line, to breaking through concrete and connecting vent pipes, each step demands care and attention to detail. But the payoff? Huge.
Yes, you’ll face some challenges along the way—tight spaces, tricky venting, permits, and concrete messes. But by taking it one step at a time and staying within local building codes, you can create a fully functioning, code-compliant bathroom without hiring a full team of contractors. And for those less confident in plumbing, hiring a pro for the tough parts still allows you to save money and stay hands-on with your project.
In the end, whether you’re doing it all yourself or just managing the job, the key is preparation. Plan thoroughly, budget realistically, follow code, and don’t skip inspections. With diligence and effort, you’ll go from bare basement to finished bath—and enjoy every minute of hot showers and no more dashing upstairs when nature calls.
FAQs
Do I need a permit to plumb a basement bathroom?
Yes, in most municipalities, you’ll need a permit before starting any basement bathroom plumbing work. This ensures your installation meets building codes and safety standards. Working without a permit can result in fines or complications when selling your home.
Can I install a basement bathroom without breaking concrete?
It’s possible, but only in specific scenarios. Systems like upflush toilets or macerating pumps allow you to install a bathroom without digging into the slab. However, they are generally more expensive and best suited for installations where the existing plumbing layout can’t be modified easily.
What is the cheapest way to plumb a basement bathroom?
The most budget-friendly method is to place the bathroom close to existing drain and water lines, minimize the number of fixtures, and do most of the labor yourself. Using PEX piping over copper and avoiding complex venting configurations can also keep costs down.
How long does it take to install basement bathroom plumbing?
For experienced DIYers, the entire process might take 2 to 3 weeks, especially if you’re working nights and weekends. If hiring professionals, the job could be done in 3 to 7 days, depending on complexity and availability of inspectors.
Can I vent a basement bathroom with an air admittance valve?
Yes, air admittance valves (AAVs) are allowed in many locations and can be a viable solution when connecting to an existing vent stack isn’t practical. Always check with your local building department first, as some jurisdictions do not permit AAVs for toilets.

