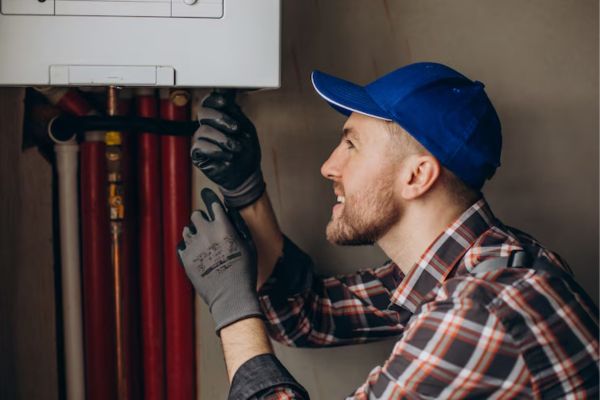
Is your shower suddenly lukewarm or ice-cold? Are your energy bills climbing while hot water runs out too fast? These could be signs that your water heater thermostat is malfunctioning. The thermostat is the brain of your electric water heater—it tells the unit when to heat water and when to stop. If it’s not working properly, your heater might be running inefficiently—or not at all.
Testing your thermostat can help you determine whether it’s time for a simple repair or a full replacement. The good news? If you’re even a little handy, you can test your thermostat yourself in under 30 minutes with just a few tools. Lest deep dive into “How to Test a Water Heater Thermostat — Easy DIY Guide”
Symptoms of a Faulty Thermostat
A bad thermostat can show up in a number of frustrating ways. Keep an eye out for these common symptoms:
- Water is too hot or not hot enough
- Inconsistent hot water temperature
- Hot water runs out faster than usual
- The water heater doesn’t turn on
- Breaker trips frequently or you hear a popping sound
If you’re experiencing any of the above, it’s worth checking your thermostat before calling a plumber or replacing the whole unit.
Check this Water Heater Thermostat-

- 【ONE YEAR WARRANTY】Z Turn-up Kit Includes (2) 4500W 240V COPPER Water Heater Element, Insert Length: 13-9/16″. 3500W@208…
- 【ONE YEAR WARRANTY】Includes (1) Upper Water Heater Thermostat, (1) Lower Water Heater Thermostat, 120V ~ 480V
- 【Interchangeable】Therm-O-Disc Type Thermostat, Can interchange with APCOM type.
Types of Water Heater Thermostats
1. Electric vs. Gas Water Heater Thermostats
Water heaters come in two main types: electric and gas, and each uses a different type of thermostat.
- Electric water heaters use one or two thermostats that control electric heating elements inside the tank.
- Gas water heaters rely on a gas valve with a built-in thermostat that regulates the pilot and burner flame.
The testing and replacement process differs depending on which type you have, with electric models generally being easier to inspect and test at home.
2. Upper and Lower Thermostats in Electric Heaters
Electric heaters usually have two thermostats—one on the top and one on the bottom:
- The upper thermostat controls the top heating element and usually turns on first when the tank is empty.
- Once the top of the tank is hot, the system switches to the lower thermostat to heat the bottom half.
If either thermostat fails, you’ll notice performance issues—like only half a tank of hot water or water that never gets hot enough. That’s why it’s important to test both thermostats when troubleshooting an electric water heater.
Check this Electric Water Heater Thermostat For Double Element Heater, Include Upper And Lower Element Thermostat–

- PACKAGE INCLUDES: 1 x Upper water heater Thermostat and 1 x Lower water heater Thermostat,Non-Simultaneous, Temperature …
- POWERFUL PERFORMANCE: Electric Water Heater Thermostat built in safety switch to prevent overheating and tune-up kit hel…
- WIDE MATCH: Electric water heater element kit perfect for most electric heaters. Water heater Thermostat fits for WHIRLP…
READ MORE: Why Is My Water Heater Making Noise?
Tools and Safety Precautions
Tools You’ll Need
Before getting started, gather the following tools:
- Multimeter (voltage/ohm meter)– Check Product & Price
- Flathead screwdriver– Check Product & Price
- Phillips-head screwdriver
- Non-contact voltage tester– Check Product & price
- Digital camera or phone (for taking photos before reassembly)
A multimeter is essential for testing continuity, which tells you whether the thermostat is completing an electrical circuit. If the circuit is broken, the thermostat isn’t working.

Safety First – Shutting Off Power and Water
Water heaters operate on 240 volts, which is enough to cause serious injury or worse. Never attempt to test an electric water heater thermostat without turning off the power.
Follow these steps:
- Turn off the circuit breaker connected to your water heater.
- Confirm power is off using a non-contact voltage tester on the wiring.
- Allow the heater to cool for at least 2–3 hours before working—hot water or tank surfaces can cause burns.
- If you’re working on the heater for an extended time, you may also choose to shut off the water supply to avoid any leaks or pressure buildup.
Never skip safety steps when dealing with electrical appliances—especially those near water.
How to Access the Thermostat
Removing the Access Panels
Once you’ve turned off the power, it’s time to open the water heater and find the thermostats. Electric water heaters typically have one or two access panels located on the front of the tank.
Here’s how to open them:
- Use a screwdriver to remove the screws holding the access panel(s) in place.
- Pull away the insulation and plastic cover behind the panel. Be careful not to damage these; you’ll need to replace them later.
- You’ll now see the thermostat and heating element. The upper thermostat is typically at the top of the tank, and the lower one is located below it behind its own access panel.
Take a photo with your phone before disconnecting any wires. This can help ensure you reconnect everything correctly when you’re done.
Check this Electric Water Heater Element Kit, Include TWO 4500W/240V Water Heater Elements, Lower Thermostat & Upper Thermostat-

- 【 High quality 】Contains 1 x Upper water heater Thermostat and 1 x Lower water heater Thermostat and 2 x Terminal protec…
- 【 Quick replacement 】The Wrench Replacing Tool has a 1-1/2-inch hex at one end, making it easy to disassemble all reside…
- 【 Convenient and convenient 】Equipped with 1x drain board,Can easily drain the water in the tank.
Locating the Thermostat and Heating Elements
Each thermostat is mounted directly to the tank and wired to a heating element. You’ll typically see:
- A dial or button on the thermostat for temperature adjustment
- Two or more terminals where wires are connected
- A reset button on the upper thermostat (small red button)
Before testing, make sure there’s no power to the unit by checking the wires with your voltage tester again. Once you’re sure it’s safe, you’re ready to start testing.
READ MORE: Is a Leaking Water Heater Dangerous?
How to Test a Water Heater Thermostat — Easy DIY Guide
Step-by-Step Testing with a Multimeter
Once you’ve accessed the thermostat and verified the power is off, you can begin testing. The goal is to check for continuity, which means the thermostat is allowing electricity to flow through it properly. No continuity means the thermostat is faulty.
Here’s how to test the thermostat:
- Set your multimeter to the ohms (Ω) setting or continuity mode.
- Identify the two terminals on the thermostat (usually marked T1 and T2).
- Touch one multimeter probe to each terminal. A good thermostat should show a reading close to 0 ohms—indicating continuity.
- If your multimeter reads “OL” (open loop) or gives no reading, the thermostat is not functioning and needs to be replaced.
- Press the reset button (on the upper thermostat) to make sure it hasn’t simply tripped. If it clicks, wait and retest the system before replacing anything.
Testing the Upper and Lower Thermostats
If you have a dual-element heater, repeat the same steps for the lower thermostat after testing the upper. You should also test both before and after pressing the reset button, as it may restore function.
Additionally, test the heating elements while you’re in there:
- Disconnect the wires from the heating element terminals.
- Set your multimeter to ohms.
- Touch the probes to each element terminal. A reading between 10 and 30 ohms is normal.
- No reading? The element is likely burned out, not the thermostat.
This full test can help you determine if the thermostat, element, or both are faulty, saving time and money on unnecessary replacements.
Check this Water Heater Thermostat, Upper Genuine Original Equipment Manufacturer (OEM) Part-

- This part is compatible with models including; 153586401,153586501,153586320,153586311
- Thermostat 100108683 Monitors The Water Temperature And Turns The Heating Element On And Off
- Genuine Original Equipment Manufacturer (Oem) Part. Compatible Brands: American Water Heater Company
How to Test a Gas Water Heater Thermostat
Thermocouple and Gas Valve Thermostat Basics
Gas water heaters work differently from electric ones. They use a gas control valve that includes a built-in thermostat and a thermocouple, which senses whether the pilot light is lit.
The thermostat itself is not easily user-serviceable. However, you can check for signs of failure:
- Water is too cold or too hot despite adjustments
- Pilot light won’t stay lit
- Burner doesn’t ignite even when demand is high
These are signs that either the thermostat inside the gas control valve or the thermocouple is malfunctioning.
When to Replace vs. Repair
Testing a gas water heater thermostat requires you to:
- Check if the pilot light stays lit.
- Adjust the thermostat dial and listen for the burner to ignite.
- If the pilot light goes out when you release the gas control knob, the thermocouple is likely bad.
- If the burner won’t ignite even with a lit pilot, the thermostat or control valve may be faulty.
Gas thermostats aren’t typically tested with a multimeter. Instead, if the heater shows these symptoms, most professionals recommend replacing the gas control valve.
Because this involves working with natural gas or propane, it’s best to call a qualified technician for diagnosis and replacement. Gas leaks or improper handling can be hazardous and should not be attempted by untrained individuals.
READ MORE: How Much Does a New Water Heater Cost?
Interpreting Your Test Results
What Different Readings Mean
After using your multimeter to test continuity, interpreting the results is fairly straightforward:
- 0 to 1 ohm: Good continuity; the thermostat is working.
- Infinite (OL) or no reading: No continuity; thermostat is faulty.
- Fluctuating readings: Could indicate loose connections or a failing thermostat that works intermittently.
Make sure to test the thermostat at room temperature. Some thermostats only allow current when the water temperature is below the set threshold.
If your readings are inconsistent, press the reset button on the upper thermostat and test again.
Comparing Upper vs. Lower Thermostat Function
If your upper thermostat is working but the lower isn’t, you’ll only get hot water until the upper tank is empty. This often feels like the hot water “runs out too quickly.”
If both thermostats test fine, but the heater still doesn’t work properly, it could be:
- Faulty heating element
- Wiring issues
- Tripped breaker
- Sediment buildup interfering with heat transfer
Testing the thermostats can help you narrow down the issue, but don’t stop there if everything checks out.
Replacing a Faulty Thermostat
How to Replace an Electric Thermostat
If you’ve determined your electric thermostat is bad, replacing it is a straightforward task:
- Turn off power at the breaker and confirm it’s off.
- Remove the wires from the thermostat terminals (take a photo first).
- Unscrew the thermostat from the tank—usually it’s held by clips or small screws.
- Install the new thermostat, making sure it fits snugly against the tank.
- Reconnect the wires, matching the same terminals as before.
- Replace insulation and cover panels.
- Turn the power back on and allow several hours for the tank to reheat.
Thermostats are inexpensive and widely available at hardware stores—usually around $20–$30.
When to Call a Professional for Gas Units
Because gas thermostats are part of the control valve assembly, replacing them isn’t as DIY-friendly. You’ll need to:
- Shut off the gas supply
- Disconnect the pilot tubing and burner assembly
- Drain the tank partially
- Remove and replace the gas valve
Unless you’re trained in working with gas appliances, it’s best to hire a professional. A botched gas valve replacement could lead to dangerous leaks or carbon monoxide exposure.
READ MORE: How Much Per Hour Does a Plumber Charge?
Preventive Maintenance Tips
Regular Flushing to Prevent Sediment Buildup
One of the most common causes of thermostat and heating element failure is sediment buildup. Over time, minerals in hard water accumulate at the bottom of the tank, insulating the heating elements and making your thermostat work harder than necessary.
To prevent this:
- Flush your water heater at least once a year
- Drain the tank halfway, stir up the sediment, then fully drain
- Refill and relight or restore power as needed
This process not only helps your thermostat and heating elements function more effectively but also extends the lifespan of your entire water heater.
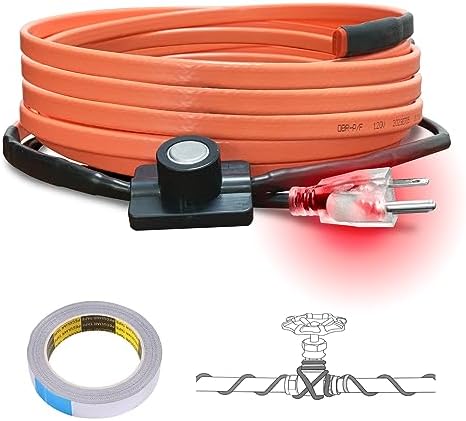
- Plumbing Protection: Our pipe heating cable uses electricity to heat the entire length of the hose in order to keep the …
- Intelligent Energy-Saving: When our pipe heating cable detects that the water temperature is below 41°F (5°C) , the heat…
- Safety Guaranteed: Operation with 120V and an external ground fault circuit interrupter (GFCI) power outlet prevents ove…
Signs It’s Time for a System Check-Up
In addition to annual flushing, keep an eye on the following indicators that your water heater needs a check-up:
- Water takes longer to heat than usual
- Inconsistent hot water temperatures
- Water that smells metallic or looks rusty
- Crackling or popping noises during heating
- Hot water runs out too quickly
If these issues persist despite a functioning thermostat, your heater might be suffering from element failure, sediment overload, or thermostat calibration issues. Having a licensed plumber inspect the unit annually is a wise choice for preventative care.
Maintaining your water heater isn’t just about avoiding cold showers—it’s about efficiency, safety, and maximizing the life of the appliance. Regular checks and basic maintenance can save you hundreds of dollars in future repairs.
Conclusion
Testing your water heater thermostat might sound intimidating, but it’s a task well within reach for most DIY-savvy homeowners—especially for electric water heaters. A few simple tools, a little caution, and some step-by-step testing with a multimeter can tell you whether your thermostat is working as it should or needs replacement.
Whether you’re dealing with lukewarm water, inconsistent temperatures, or a unit that’s stopped heating altogether, the thermostat is often the first—and most fixable—culprit. And even if you’re not experiencing major issues, testing the thermostat during regular maintenance can help prevent future failures before they start.
Gas water heaters are more complex and generally best left to professionals, especially since they involve natural gas or propane and sealed components like the gas control valve.
Remember, a little attention now can save you from a costly emergency down the road. Stay proactive, stay safe, and keep the hot water flowing.
How do I know if my water heater thermostat is bad?
Signs include lukewarm water, water that’s too hot or too cold, and hot water running out too quickly. Testing with a multimeter for continuity can confirm whether the thermostat is faulty.
Can I test a thermostat without a multimeter?
Not effectively. A multimeter is the only reliable way to test for electrical continuity. Without it, you’re mostly guessing based on symptoms alone.
Should both thermostats be set to the same temperature?
Yes. To ensure balanced heating and optimal performance, both the upper and lower thermostats in an electric water heater should typically be set to 120°F to 130°F.
Is it safe to replace a thermostat myself?
Yes—for electric water heaters, as long as you turn off the power at the breaker and follow safety precautions. For gas water heaters, it’s recommended to call a professional due to the complexity and risk of gas leaks.
What’s the cost of a new thermostat?
Replacement thermostats for electric water heaters cost between $20 and $40, while gas control valves (which include the thermostat) can range from $100 to $300, not including labor if you hire a plumber.

