Plumbing may look like a job for a shower experienced professionals, but with the right tools, clear instructions and little patience, it is completely notable for a skilled diyer. Whether you are creating a new bathroom or upgrading an old setup, proper shower plumbing ensures years of reliable water flow, solid water drainage and trouble -free use.
In this guide, you will learn how to pip the shower from beginning to end, including warm and cold supply lines, drain connections, valves and essential safety tips. Lets deep dive into “How to Plumb a Shower: Step-by-Step DIY Guide for Homeowners”
Understanding Shower Plumbing Basics
Before diving into pipe cuts and fittings, it’s important to understand how a basic shower plumbing system works.
Key Components in a Shower Plumbing System
A typical shower setup includes:
- Hot and cold water lines: Feed water to the shower valve.
- Shower valve: Controls temperature and flow. See Product & Price
- Shower riser: Pipe that brings water up to the shower head.
- Shower head: Where water exits for the user.
- Drain pipe and P-trap: Collect and dispose of used water through the sewer system.
Every part must be securely sealed and correctly sloped to avoid leaks, clogs, or code violations. See Product & Price

READ MORE: How to Plumb a Prehung Door
Plumbing Codes and Permit Considerations
Always check with your local building department before starting. Most jurisdictions require:
- Plumbing permits for new shower installations
- Compliance with residential plumbing code (UPC or IPC)
- Inspections after rough-in and before walls are closed
Skipping permits could mean fines or having to rip out and redo your work later.
Tools and Materials You’ll Need
Having the right tools makes your job faster, safer, and cleaner. Gather these before you start.
Essential Plumbing Tools
- Pipe cutter or tubing cutter. See Product & Price
- Pipe wrench or adjustable wrench. See Product & Price
- Plumber’s torch (for copper pipes). See Product & Price
- PEX crimper (if using PEX). See Product & Price
- Tape measure and level. See Product & Price
- Teflon tape and pipe dope
- Drill and hole saw. See Product & Price
Pipes, Fittings, and Valves Checklist
- Shower mixing valve
- Shower riser pipe. See Product & Price
- Shower head and flange
- ½-inch or ¾-inch copper, PEX, or CPVC pipe
- 2-inch PVC or ABS pipe for drain. See Product & Price
- P-trap
- Drop ear elbow for shower head. See Product & Price
- Pipe supports and clamps
Make sure all materials match in type (don’t mix copper with galvanized, etc.) and are code-compliant for your area.

Planning the Shower Layout
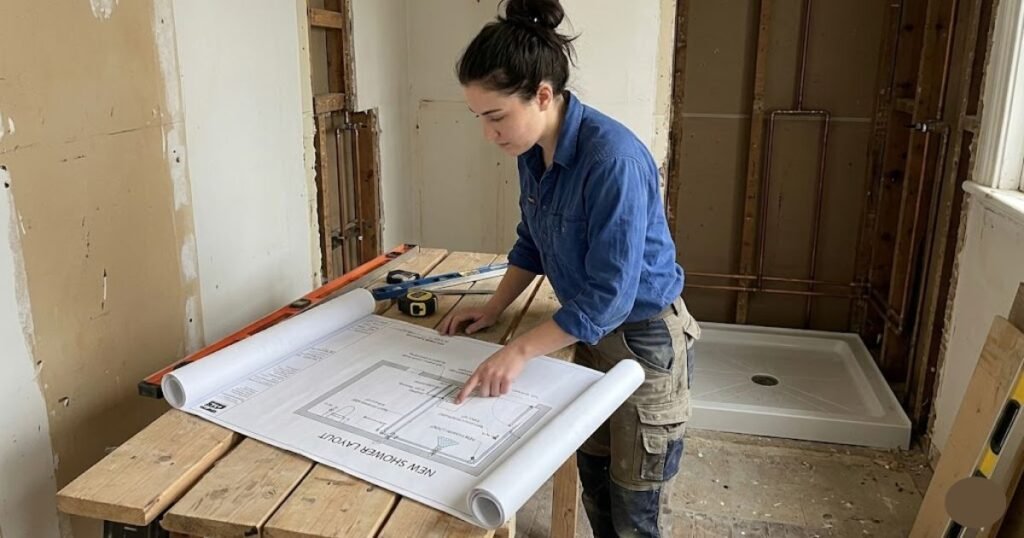
Before cutting any pipe, take time to map out where everything will go. Proper planning prevents frustration later on.
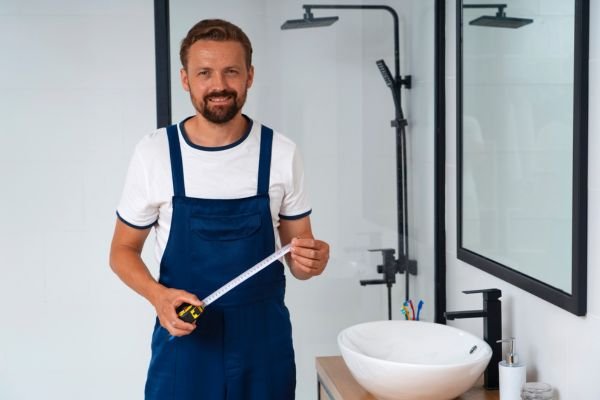
Measuring and Mapping Your Plumbing Lines
Start by:
- Marking the shower location and framing out the walls if needed
- Measuring the height for the shower head (usually 72 to 80 inches from the floor)
- Measuring valve height (typically 36 to 48 inches)
- Determining where the water lines and drain will enter and exit
Sketch the layout and take pictures for reference.
READ MORE: How Much Does a Plumber Charge to Install a Toilet
Choosing the Right Location for Fixtures
Avoid placing water lines on exterior walls in cold climates to prevent freezing. Keep everything accessible for future maintenance, and ensure there’s enough space for framing, blocking, and fasteners.
Rough-In Plumbing for the Shower
This step involves installing the pipes and valve inside the wall framing—before drywall or tile goes up.
Water Supply Line Installation
- Run ½-inch or ¾-inch pipes from your home’s main hot and cold water lines to the location of your shower valve.
- Use sweat fittings for copper, crimp rings for PEX, or solvent weld for CPVC.
- Secure lines to studs with pipe clamps every few feet.
Leave some slack in PEX to allow for expansion and contraction.
Installing the Shower Valve and Mixing Controls
- Mount the shower valve in the wall according to the manufacturer’s depth guide.
- Connect hot and cold water lines to the correct inlets.
- Install the shower riser pipe from the top of the valve to the shower head drop ear elbow.
Use a blocking brace behind the valve and elbow to prevent movement.
Running Drain Lines
A properly installed shower drain system ensures that water use quickly and from cleanliness. Improper drainage can occur later after water pooling, slow drainage and repair of expensive pipeline.
Shower Pan Drain Positioning
- The drain location should match the type of shower base or pan you’re installing.
- Most standard pans have a center drain, but some may be offset—always check the specs.
- Ensure that your framing below the shower pan allows enough space for the P-trap and horizontal waste pipe.
Connecting the P-Trap and Waste Line
- Use 2-inch PVC or ABS pipe for the drain system—this is standard and required by most plumbing codes.
- Attach the P-trap directly below the shower drain. It must align perfectly to prevent leaks or poor flow.
- Maintain a ¼ inch per foot slope toward the main drain line to ensure gravity helps carry waste water efficiently.
Dry-fit everything first to confirm alignment, then glue the joints using PVC cement or ABS solvent, depending on your material.

Connecting Hot and Cold Water Lines
Now that your valve is mounted and the rough plumbing is in place, the time has come to hook hot and cold water lines.
Pipe Size and Material Options
You can use:
- Copper: Durable and code-compliant, but requires sweating (soldering).
- PEX: Flexible, fast to install, and freeze-resistant. Ideal for DIYers.
- CPVC: Easy to cut and glue but can be brittle over time.
½-inch pipe is typically sufficient for shower supply lines, but ¾-inch lines can be used to ensure better water pressure—especially for high-flow fixtures.
Securely Connecting and Testing for Leaks
- Use Teflon tape on threaded joints and fittings to prevent leaks.
- After connections are made, pressurize the system and check every joint for drips.
- Make sure valves are set to “off” before turning on the water supply.
It’s better to find leaks now—before drywall, tile, and trim hide your plumbing work forever.
READ MORE: How Long Does a Water Heater Take to Heat Up?
Installing the Shower Head and Controls
At this stage, your plumbing should be pressure-tested and watertight. Now, you can install the exterior components of your shower system.
Mounting Height and Positioning Tips
Standard shower-head height is typically between 72 and 80 inches from the floor, but for taller users or when installing a rain-style head you may want to raise it to about 84 inches. Securely attach the drop-ear elbow to a horizontal brace behind the wall and connect your riser pipe; because the finished wall will cover this fitting and you’ll simply thread the shower arm into the elbow later, it’s important that the elbow is mounted solidly and is leak-free.
Sealing and Pressure Testing
- Use plumber’s tape (Teflon tape) on all threaded fittings.
- Hand-tighten first, then use a wrench for a snug fit—don’t over-tighten.
- Cap the shower riser and pressure test the full system by turning on the water and checking for leaks at all joints and valves.
This is your final chance to catch problems before you cover the pipes.

Pressure Testing the System
It is necessary to do a thorough pressure test before attaching your shower wall. Leaving it can cause hidden leaks and expensive damage.
How to Perform a Proper Pressure Test
- Cap all outlets (shower head and valve spouts).
- Turn on the main water supply.
- Leave the system pressurized for 15–30 minutes.
- Check for drops in pressure or visible water around joints and fittings.
For added assurance, place paper towels under fittings and joints—this makes even small leaks easier to spot.
Fixing Leaks and Rechecking Connections
If you find a leak, turn off the water immediately, then tighten fittings or reapply Teflon tape where needed and replace any faulty or cross-threaded components. Retest after each fix to confirm it’s resolved — it’s worth taking the time to get it perfect now before walls and tile go up.
Preparing for Inspection
If your local code requires an inspection, schedule it before closing up your shower walls.
What Inspectors Look For
- Proper pipe support and secure fittings
- Water-tight connections
- Correct slope on drain pipes
- Compliance with hot/cold orientation (hot on the left)
- Approved materials (e.g., no mixed pipe types without proper adapters)
Be sure to leave the valve and fittings fully visible—remove drywall or install a temporary panel if needed.
Common Issues That Fail Inspection
- Mixed-use of incompatible pipe materials (e.g., copper + galvanized)
- Improper drain slope
- Inaccessible or unsupported fittings
- Missing or loose pipe clamps
Failing inspection may delay your project, so double-check your work before the appointment.
READ MORE: Can a Water Heater Explode If Turned Off?
Finishing Up the Shower Plumbing
Once your shower has passed inspection or been pressure-tested successfully, you’re ready to complete the final plumbing touches before closing the walls and installing finishes.
Insulating Pipes and Securing Lines
Especially in cold climates, pipe insulation is important to prevent freezing and reduce heat loss:
- Wrap foam insulation sleeves around the hot and cold supply lines.
- Use zip ties or tape to secure them in place.
- Make sure the pipes are firmly attached to framing members using pipe brackets or clamps every 4 feet for horizontal runs and every 6 feet for vertical runs.
This eliminates rattling, expansion sounds, and ultimate damage through pipe motion.
Getting Ready for Tile or Enclosure Installation
Before installing backer board or tile, double-check that all pipes are aligned correctly and flush with the wall, ensure the shower valve depth matches the manufacturer’s guide for finished wall thickness, and leave access to any shutoff or diverter valves as required. Once everything is confirmed, install moisture-resistant drywall or cement board, seal the seams, and you’ll be ready to finish the shower with tile, acrylic panels, or other waterproof materials.
Common Mistakes to Avoid
Some mistakes in shower plumbing are easy to make—and expensive to fix later. Here are the top things to watch out for.
Incorrect Slope on Drain Pipes
A flat or uphill slope will trap water, leading to:
- Clogs
- Foul odors
- Slow drainage
Always maintain a minimum of ¼ inch per foot slope on your horizontal drain pipes. Use a level to confirm.
Mixing Incompatible Pipe Materials
Don’t connect copper directly to galvanized pipe or mix ABS and PVC without approved transition fittings.
- Use a dielectric union when connecting dissimilar metals.
- Use transition cement or a flexible coupler for joining ABS to PVC (only if code permits).
Incompatibility can cause corrosion, leaks, or failed inspections.
Other mistakes to avoid:
- Reversing hot and cold lines
- Over-tightening fittings, leading to cracks
- Not pressure-testing before closing the walls
READ MORE: How Much Does It Cost to Reroute Plumbing?
When to Hire a Professional Plumber
Even experienced DIYers sometimes hit a wall—literally or figuratively. Here’s when it’s smart to bring in the pros.
Complex Remodels or Old Plumbing Systems
Call a plumber if:
- You’re rerouting or relocating plumbing across the room
- You find old galvanized pipes or signs of corrosion
- You’re combining new systems with legacy plumbing
- You need to move drainage or venting systems
Professionals have equipment and know-how to get such complex jobs done faster and to code.
Dealing with Permits and Code Violations
If your local area requires a permit or inspection and you’re unsure how to prepare:
- A licensed plumber can handle permits, documentation, and inspections.
- They’re familiar with local codes and less likely to make mistakes that cause delays or added costs.
If time is short or you want the peace of mind that the job is done right, this is money well spent.

Conclusion
Plumbing may look like a challenging project, but with careful planning, correct equipment and focus on expansion, it is completely notable for a skilled diyer. From water lines and drainpipes to installing valves and risers, each step plays an important role in working firmly and running for years. Take your time to test every connection, test for leaks and follow all local codes. Whether you are adding a new bathroom or upgrading an old, the proper shower plumbing is the foundation of a great bath experience.
FAQs
Can I plumb a shower myself?
Yes, if you have basic plumbing skills and follow the code requirements. New installations or major remodels may still require permit and inspection.
What’s the proper height for a shower head?
The standard height is 72–80 inches from the shower floor. You can adjust it based on user height or fixture style (like rain heads).
Do I need a permit to plumb a new shower?
In most areas, yes. Especially if you’re modifying existing water or drain lines. Always check with your local building authority.
How long does it take to plumb a shower?
A skilled DIYer can complete the rough-in over a weekend. Add extra time for inspection, pressure testing, and finishing.
What pipe size is best for a shower?
Use ½-inch pipe for water supply and 2-inch pipe for the drain. Always ensure pipes are supported and sloped correctly.

