There is almost nothing quite as irritating as settling in for a peaceful evening at home, only to hear the steady, rhythmic drip-drip-drip of a leaking bathroom fixture echoing down the hall. A shower head leaking from head is one of the most common residential plumbing issues across American households. Beyond the sheer annoyance of the sound, a dripping shower wastes gallons of precious water every single day, driving up municipal utility bills and potentially causing long-term water damage to your bathroom fixtures.
Whether you are dealing with a light spray leaking from the nozzle or a continuous stream dripping overnight, understanding why this happens is the first step toward a permanent fix. Fortunately, many shower head leaks are minor DIY projects that require nothing more than a wrench, a roll of plumber’s tape, and a few minutes of your time. Lets deep dive into “Shower Head Leaking From Head: Causes & Fixes”
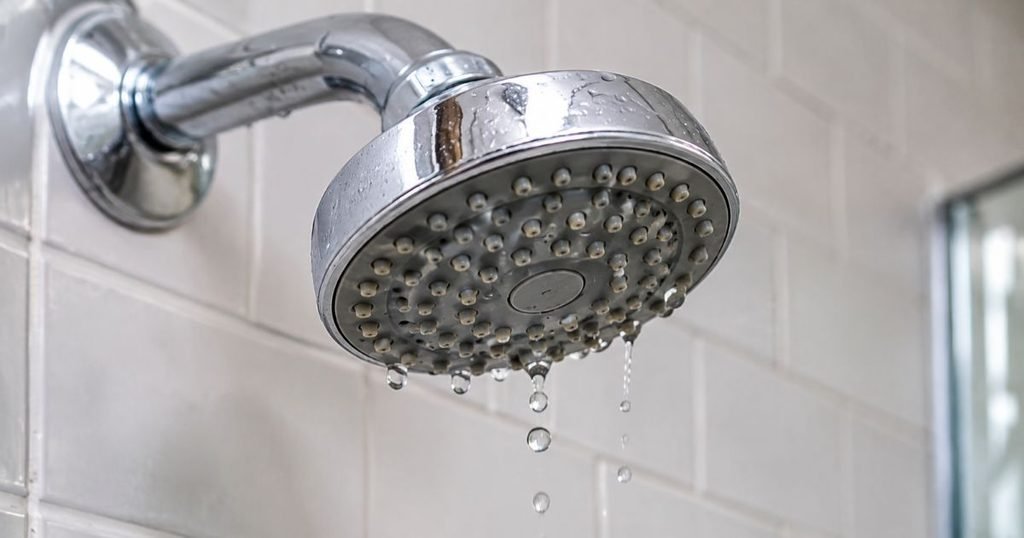
Why Is My Shower Head Leaking From the Head?
Before you grab your toolbox, it helps to understand the root causes behind a leaking shower head. Residential plumbing systems experience constant water pressure, temperature fluctuations, and mineral exposure, all of which wear down fixture components over time. Here are the most frequent culprits:
1. Worn-Out Rubber Washers or O-Rings
Inside the connection point where your shower head meets the shower arm, you will find a small rubber washer or O-ring. This gasket creates a watertight seal. Over years of hot water exposure and pressure, rubber loses its elasticity, cracks, or flattens out, allowing water to escape around the threads.
2. Loose Shower Head Connections
Vibrations from water flow and normal wear and tear can cause a shower head to wiggle loose over time. Even a fraction of a turn is enough to compromise the seal, resulting in water weeping out of the connection joint.
3. Mineral Deposits and Hard-Water Buildup
Hard water common in many regions across the United States contains high levels of calcium and magnesium. As water evaporates from your shower head nozzles, it leaves behind mineral scale. This white, crusty buildup can distort the rubber seals or force the internal diverter valves slightly open, leading to a persistent drip.
4. Damaged or Cracked Shower Head Components
Modern shower heads often feature internal plastic channels or delicate spray faces. If a shower head is dropped during cleaning, over-tightened during installation, or damaged by freezing temperatures in uninsulated exterior walls, hairline cracks can develop, causing water to leak from unexpected spots.
5. Faulty Shower Valve Cartridge
If your shower head continues to drip steadily even when the faucet handle is turned completely off, the issue is likely not the shower head itself. Instead, the problem stems from a worn-out shower valve cartridge hiding behind the wall handle. This cartridge regulates water flow and pressure; when its internal O-rings fail, water slips past the closed valve.
6. Worn Faucet Seals
In older American homes featuring two-handle shower faucets (separate hot and cold knobs), rubber seat washers inside the faucet stem deteriorate over time, letting water trickle through to the shower head.
READ MORE: Plumber for Clogged Shower Drain: When to Call & Cost
Common Signs of a Leaking Shower Head
Recognizing the specific symptoms of your plumbing issue helps you pinpoint whether you are dealing with a simple surface repair or an internal valve failure. Watch for these common warning signs:
- Continuous Dripping After Use: Water continues to drip from the nozzles for hours after the shower is turned off.
- Water Leaking Around the Connection: Moisture pooling at the exact point where the shower head meets the metal shower arm.
- Erratic Spray Patterns: Water shooting out sideways or unevenly due to mineral-clogged nozzles.
- Water Leaking Even When Handle Is Off: A steady drip that persists regardless of handle position, pointing directly to a faulty shower valve.
- Hissing or Whistling Sounds: Water forcing its way through a partially compromised seal or degraded valve cartridge.
How to Identify Where Your Shower Head Is Leaking
Proper diagnosis saves you time and money. Use the troubleshooting breakdown below to locate the source of your leak before taking anything apart.
| Symptom | Likely Cause | Recommended Action |
| Slow drip from spray face right after use that stops within 5 minutes | Residual water draining from the internal reservoir chamber | Normal behavior; no action required. |
| Persistent, slow drip from nozzles hours after the shower is turned off | Worn shower valve cartridge or deteriorated faucet washers | Inspect and replace the shower valve cartridge or stem washers. |
| Water spraying or weeping from the threaded connection to the shower arm | Missing/damaged internal washer, loose connection, or bad plumber’s tape | Unscrew, clean threads, replace washer, and apply fresh PTFE tape. |
| Water leaking from the swivel ball joint of an adjustable shower head | Worn internal rubber gasket or loose swivel nut | Tighten the swivel collar or replace the shower head unit. |
READ MORE: How to Plumb a Shower Valve (Step-by-Step DIY Guide)
How to Fix a Shower Head Leaking From the Head (Step-by-Step)
If your inspection reveals that the leak is happening at the shower head itself or its direct connection, you can easily handle this repair yourself. Follow these step-by-step instructions.
DIY Tools and Materials Checklist
- Adjustable wrench or channel-lock pliers
- Old cleaning cloth or soft towel
- White vinegar (for cleaning mineral deposits)
- Small scrub brush or old toothbrush
- Replacement rubber washers / O-rings (standard size)
- PTFE plumber’s tape (Thread-seal tape)
Step 1: Turn Off the Shower and Inspect the Leak
Before starting any plumbing repair, ensure the shower handle is firmly in the “Off” position. While you do not necessarily need to shut off the main home water supply for a simple shower head replacement, keeping the handle closed prevents accidental water flow while you work. Observe where the water is pooling to confirm the leak’s origin.
Step 2: Remove the Shower Head
Wrap a clean cloth or towel around the base connection nut of the shower head to protect its finish from scratching. Using your adjustable wrench or pliers, grip the cloth-covered nut and turn it counterclockwise to loosen it. Once loose, unscrew the shower head completely by hand from the shower arm.
Safety Tip: Never apply excessive force when turning the shower arm extending from the wall, as bending or twisting it can rupture concealed pipes behind the tile.
Step 3: Clean Mineral Deposits and Dirt
Inspect the threaded end of the shower arm and the inside of the shower head’s inlet. If you notice white crusty calcium deposits, submerge the shower head in a bowl of warm white vinegar for 30 to 60 minutes. Use a soft brush to scrub away loosened mineral buildup from the threads and nozzles. Rinse thoroughly with clean water.
Step 4: Inspect and Replace the Rubber Washer or O-Ring
Look inside the recessed connection inlet of the shower head. You should see a flat rubber washer or mesh screen washer. If this rubber ring is flattened, cracked, stiff, or missing entirely, it is the primary cause of your leak. Pry the old washer out with a small flathead screwdriver and insert a fresh, correctly sized rubber washer into the recess.
Step 5: Plumber’s Tape Where Appropriate
Inspect the male threads on the metal shower arm extending from the wall. Remove any old, shredded plastic tape. Wrap new PTFE plumber’s tape (often called Teflon tape) around the threads clockwise 2 to 3 times, pulling it taut so it molds into the thread grooves.
Note: Plumber’s tape seals the threaded joint, but it cannot compensate for a missing or damaged internal rubber washer.
Step 6: Reinstall the Shower Head
Thread the cleaned and repaired shower head back onto the shower arm by hand, turning it clockwise. Ensure it threads smoothly without cross-threading. Once hand-tightened, use your cloth and wrench to give it a final snug turn about a quarter to a half turn past hand-tight. Avoid over-tightening, as this can crack plastic connector nuts.
Step 7: Turn On the Water and Test for Leaks
Turn on the shower valve to test your repair. Let water run through the head for 30 seconds, then turn it off completely. Inspect the connection joint and spray face. Check that water flow is even, the spray pattern is clean, and no moisture appears around the threaded connection.
What If the Shower Head Keeps Dripping After Turning It Off?
If you have cleaned the unit, replaced the washer, and applied fresh plumber’s tape, but your shower head dripping when turned off persists, the problem lies deeper in your plumbing system.
Residual Water Drainage vs. Real Leaks
It is completely normal for a shower head to release a few final drips for one to two minutes after you turn off the handle. This is simply residual water draining out of the internal reservoir and spray chambers. However, if the dripping continues indefinitely forming puddles or keeping you awake at night you are dealing with an active pressure leak.
Faulty Shower Valve Cartridge
In single-handle modern shower setups, a pressure-balancing valve cartridge controls both water temperature and volume. When internal seals inside this cartridge wear down, water bypasses the closed valve, trickling past the shower arm and out of the shower head. Replacing a shower valve cartridge requires shutting off your home’s main water supply, removing the handle and trim plate, and pulling the old cartridge using a specialized cartridge puller tool.
READ MORE: Why My Tankless Water Heater Shuts Off During Shower — Fixes & Costs
How Much Does It Cost to Fix a Leaking Shower Head in the USA?
Repair costs vary widely depending on whether you tackle the job yourself or hire a licensed professional. Below is a realistic overview of average US material and labor costs based on standard hardware store pricing and plumbing service rates.
| Repair Item / Service | Estimated Cost Range | Description |
| DIY Cleaning Supplies (Vinegar, brush) | $3 – $7 | Basic household items for removing mineral scale. |
| Replacement Rubber Washers / O-Rings | $1 – $5 | Pack of standard plumbing washers from a local hardware store. |
| PTFE Plumber’s Tape | $2 – $4 | Standard roll of thread-seal tape. |
| Replacement Shower Head | $15 – $60 | Ranging from basic fixed heads to mid-range multi-setting models. |
| Shower Valve Cartridge Replacement (Part) | $20 – $70 | OEM replacement cartridge for brands like Moen, Delta, or Kohler. |
| Professional Plumber Labor & Basic Repair | $150 – $350 | Standard service call fee plus labor for accessible fixture repairs. |
| Complex Valve Repair / Behind Wall Work | $350 – $800+ | Extensive valve replacement involving drywall or tile cutting. |
Disclaimer: Prices vary depending on your geographic location, fixture brand, plumbing accessibility, and local contractor rates. Always request an upfront estimate from licensed professionals before approving work.
When Should You Call a Professional Plumber?
While a simple shower head replacement or washer swap is an ideal weekend DIY project, certain plumbing scenarios require professional expertise. You should contact a licensed plumber if you encounter:
- Water Leaking Behind the Wall: If you notice damp drywall outside the shower enclosure, warped tiles, or ceiling stains on the floor below, water is escaping behind the wall.
- Damaged Shower Arm or Concealed Pipes: A rusted or broken shower arm stuck inside the wall drop-ear elbow requires specialized extraction.
- Persistent Dripping After Seal Replacement: If you replaced washers and shower heads, but the drip continues, the issue involves an inaccessible or difficult-to-service shower valve.
- Stuck or Corroded Valve Cartridges: Older brass valves can seize up tightly, and applying excessive force risks snapping the valve body inside the wall, turning a minor repair into a major plumbing emergency.
Calling a professional early prevents minor leaks from turning into catastrophic structural water damage and mold growth.
READ MORE: How to Fix Low Water Pressure in Your Shower— Step-by-Step DIY Guide
How to Prevent Your Shower Head From Leaking Again
Proactive maintenance extends the lifespan of your bathroom fixtures and keeps leaks at bay:
- Clean Regularly: Soak your shower head in a vinegar bag or remove it for cleaning every 3 to 6 months to prevent mineral buildup.
- Inspect Seals Routinely: Check connection points during bathroom cleaning sessions for early signs of moisture weeping.
- Avoid Overtightening: When installing accessories, tighten securely by hand and use a wrench only for a slight final turn to prevent crushing internal washers.
- Use Compatible Parts: Always purchase manufacturer-approved replacement washers and cartridges that match your specific shower fixture brand.
Frequently Asked Questions
Why is my shower head leaking even when the water is turned off?
When a shower head continues to drip after the water is shut off, it typically indicates a worn-out shower valve cartridge or deteriorated faucet stem washers behind the wall handle. These internal components fail to create a complete water shutoff, allowing water to continuously trickle past the closed valve and out through the shower head.
How do I stop my shower head from dripping?
To stop a drip, first identify the source. If the leak is at the connection point, unscrew the shower head, clean the threads, replace the worn rubber washer inside, wrap the shower arm with PTFE plumber’s tape, and reinstall it securely. If the drip comes from the nozzles while the handle is off, you likely need to replace the shower valve cartridge.
Can a leaking shower head be fixed without replacing it?
Yes, most leaking shower heads can be repaired without buying a new unit. Replacing a flattened rubber O-ring, clearing out hard-water mineral buildup with white vinegar, or re-sealing the threaded connection with plumber’s tape will usually solve the problem without requiring a full fixture replacement.
Why does my shower head leak from the nozzle?
A nozzle leak is usually caused by residual water draining from the internal chamber immediately after use, which is normal. However, if the nozzle leaks continuously all day long, it points to a faulty internal diverter valve or a leaking shower valve cartridge that fails to hold back water pressure when the handle is closed.
How much does it cost to fix a leaking shower head?
A DIY fix using new rubber washers and plumber’s tape typically costs less than $10 in materials. Replacing a faulty shower head ranges from $15 to $60. If you hire a professional plumber to diagnose and replace a worn shower valve cartridge, labor and parts generally total between $150 and $350 depending on accessibility.
Final Thoughts
Dealing with a shower head leaking from head can be frustrating, but it is rarely a complex crisis when addressed promptly. By identifying whether your leak stems from a worn washer, mineral buildup, or a faulty internal valve, you can choose the right path forward. Simple DIY fixes like cleaning, replacing washers, and applying fresh plumber’s tape take only minutes and save you money. However, never hesitate to call a licensed professional plumber when dealing with concealed wall plumbing, stubborn valves, or persistent leaks. Taking care of small drips today protects your home from costly water damage tomorrow.

