Most residential plumbing runs quietly behind drywall, beneath floorboards, and underground, which makes it easy to ignore until a pipe bursts or a drain backs up into the basement. A slow drip inside a wall cavity or a corroding shut-off valve rarely announces itself with dramatic fanfare at first, yet hidden moisture can rot framing, ruin flooring, and trigger mold growth long before a puddle appears on the kitchen floor.
Scheduling a professional plumbing inspection gives homeowners, buyers, and landlords a clear picture of how their water supply, fixtures, drainage, and water heater are actually performing before small wear turns into structural damage. In this guide, you will learn what a residential evaluation covers, how to spot early warning signs, what pricing looks like across the United States, and how to hire a qualified local plumber. Lets deep dive into “Plumbing Inspection: Checklist, What It Includes & Cost”
What Is a Plumbing Inspection?
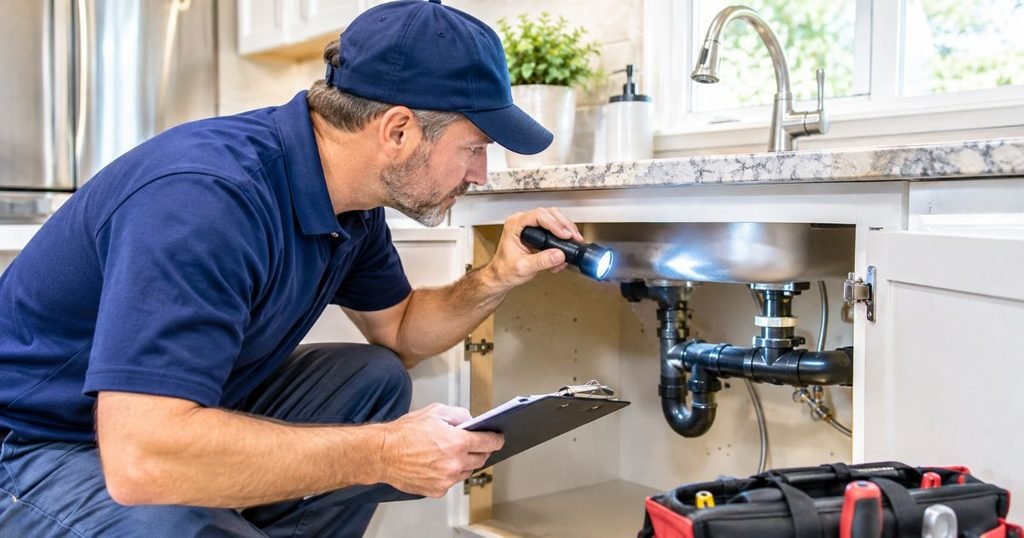
A plumbing inspection is a systematic, hands-on assessment of a home’s freshwater supply lines, fixtures, drain-waste-vent (DWV) piping, water heating equipment, and accessible valves performed by a qualified plumbing professional. Rather than waiting for an active leak or clogged main line to force an emergency repair, the plumber evaluates visible components and tests normal water flow to identify deterioration, improper installations, safety hazards, and developing leaks.
During a typical residential plumbing inspection, the plumber walks through both the interior and exterior of the property, checking basements, crawl spaces, utility closets, bathrooms, kitchens, and outdoor hose bibs. Depending on the scope agreed upon beforehand, the evaluation can take two distinct forms:
- Routine Visual Plumbing Inspection: A non-invasive review of all accessible pipes, fixtures, traps, shut-off valves, and the water heater. The plumber operates faucets and toilets, checks for visible moisture or corrosion, and tests static water pressure.
- Complete Plumbing System Evaluation: A deeper diagnostic assessment often requested before buying an older home or after recurring plumbing trouble that pairs a visual walkthrough with specialized testing such as a video sewer line camera inspection, thermal imaging, or acoustic leak detection.
It is also important to understand the difference between a general home inspection and a licensed plumber inspection. General home inspectors follow broad standards of practice such as those published by the American Society of Home Inspectors (ASHI) or the International Association of Certified Home Inspectors (InterNACHI) to check a home’s roof, electrical, HVAC, structure, and basic plumbing operation. While general home inspectors turn on faucets and flush toilets, they typically do not run sewer cameras, disassemble components, or diagnose complex underground pipe failures. A dedicated whole house plumbing inspection is performed by a residential plumbing specialist who works on piping systems daily and can accurately estimate repair scopes and code compliance.
READ MORE: 24 Hour Emergency Plumber Near Me: Urgent Plumbing Help & Costs
What Does a Professional Plumbing Inspection Include?
Knowing what does a plumbing inspection include helps you compare quotes and verify that critical areas of your house are not overlooked. While exact checklists vary by plumbing company, property layout, and local regulations, a thorough residential inspection covers seven primary zones.
Water Supply Pipes and Connections
Your home’s supply network delivers pressurized clean water from the municipal main or private well to every fixture. The plumber inspects all exposed supply lines in basements, crawl spaces, attics, and under-sink cabinets, paying close attention to the pipe material:
- Copper: Durable and long-lasting, though older copper joints can develop pinhole leaks or green oxidation where water chemistry is acidic or dissimilar metals meet without dielectric unions.
- PEX (Cross-Linked Polyethylene): Flexible modern tubing valued for freeze resistance and fewer fittings; inspectors check for proper support straps, kinked bends, and secure crimp or expansion rings.
- CPVC and PVC: Rigid plastic piping commonly used in residential builds; older CPVC can become brittle over time, making cracked fittings or strained joints a key focus.
- Galvanized Steel: Often found in homes built before the 1960s, galvanized pipes corrode from the inside out, restricting water flow and leaching rust into the tap water.
Alongside pipe materials, the plumber checks joints, elbows, and supply stops for weeping moisture, mineral crusting, or loose fittings, and measures incoming water pressure with a gauge typically looking for safe residential pressure between 40 and 80 psi, as excessively high pressure strains seals and appliances.
Faucets, Sinks, and Toilets
Everyday fixtures are the most frequent sources of wasted water. According to the U.S. Environmental Protection Agency (EPA) WaterSense program, household leaks can waste nearly 10,000 gallons of water annually in an average home, with worn toilet flappers and dripping faucets leading the list. During a home plumbing inspection, the plumber tests every indoor and outdoor faucet for smooth valve operation, steady flow, aerator blockages, and drips around the spout or handles.
Under sinks, the inspector checks P-traps, tailpieces, and shut-off valves for dampness or warped cabinetry. For toilets, the plumber flushes each unit to verify strong bowl clearing, checks tank components (fill valves, flappers, and overflow tubes) for silent running, and gently tests the toilet base to ensure the wax ring and closet bolts hold the bowl firmly to the floor without rocking.
Bathroom and Kitchen Plumbing
Bathrooms and kitchens concentrate heavy water usage and drainage demands into compact spaces. In bathrooms, the plumber inspects showerheads, tub spouts, diverter valves, and accessible shower pan drainage, watching for slow-draining tubs or water seeping past tile and caulking.
In the kitchen, the evaluation extends beyond the main faucet and basket strainer to include connected appliances where accessible and included in the service scope:
- Garbage Disposal: Checking the mounting flange, discharge tube, and underside housing for leaks, rust, or electrical cord wear.
- Dishwasher Connections: Inspecting the hot water supply line, drain hose routing, and high loop or air gap installation designed to prevent dirty sink water from backing up into the dishwasher.
- Refrigerator Ice Maker Line: Checking accessible braided stainless steel or copper tubing behind or beneath the unit rather than fragile plastic saddle-valve lines prone to splitting.
READ MORE: Sewer Line Camera Inspection Cost
Drain, Waste, and Vent Systems
Once water goes down the drain, gravity carries wastewater through your drain, waste, and vent (DWV) system. Drainpipes remove wastewater, P-traps hold a water barrier to block sewer gases from entering living spaces, and vent pipes extending through the roof equalize air pressure so drains flow smoothly without gurgling.
During the inspection, the plumber runs water simultaneously in multiple fixtures to observe drainage speed and listen for gurgling sounds that point to partial blockages or venting issues. They also examine visible cast-iron, ABS, or PVC drain stacks in the basement or crawl space for cracks, sagging hangers, corroded cleanout plugs, and signs of past backups or sewer odors.
Water Heater Inspection
Whether you own a conventional storage tank or a tankless unit, your water heater works around the clock and carries specific safety considerations. Following maintenance and safety principles highlighted by the U.S. Department of Energy (DOE) and residential plumbing standards, a water heater inspection examines:
- Tank and Fitting Condition: Checking the top cold-water inlet, hot-water outlet, and bottom drain valve for rust, weeping, or active leaks.
- Temperature and Pressure (T&P) Relief Valve: Verifying that this critical safety valve is present, properly rated, and connected to a downward-sloping discharge pipe terminating safely near the floor—never capped or threaded closed.
- Venting and Combustion Safety (Gas Models): Inspecting the flue draft hood and exhaust pipe for proper upward slope, tight joints, and signs of backdrafting or soot.
- Sediment and Age: Reviewing the manufacturer’s serial number to estimate unit age (traditional tank heaters often last 8 to 12 years) and noting rumbling noises or cloudy hot water that indicate mineral sediment buildup at the bottom of the tank.
Main Water Shut-Off Valve and Plumbing Valves
Every homeowner should know where their main water shut-off valve is located before a pipe bursts. During an inspection, the plumber locates the main shut-off commonly found in a basement, crawl space, garage, utility room, or exterior meter box and checks whether it is a modern quarter-turn ball valve or an older multi-turn gate valve. Gate valves frequently seize or strip internally after years without use. The plumber also inspects individual fixture shut-off valves, pressure-reducing valves (PRVs), and exterior frost-free hose bibs for corrosion, mineral buildup, and accessibility.
Sewer Lines and Underground Plumbing
Your home’s main sewer lateral carries all household wastewater from the foundation out to the municipal sewer main or private septic tank. Because this line is buried underground, a standard visual walkthrough cannot inspect the interior condition of buried pipe walls.
However, if a plumber sees slow drains throughout the house, gurgling toilets, or mature trees planted directly over the sewer path, they may recommend a separate sewer line inspection. Using a waterproof fiber-optic camera fed through a main cleanout, the plumber can spot tree root intrusion, cracked clay or cast-iron pipe sections, bellied (sagging) lines that trap waste, or heavy grease blockages. Keep in mind that underground piping and pipes sealed behind finished walls are not automatically included in a basic visual inspection unless specialized camera or leak detection services are added.
READ MORE: Plumbing Repair Cost
Complete Home Plumbing Inspection Checklist
Use the plumbing inspection checklist below to track what a professional evaluates during a whole-house visit and to keep tabs on basic visible components between professional checkups.
| Inspection Area | What to Check | Potential Warning Signs |
| Water supply pipes | Visible pipes, joints, hangers, and static water pressure | Green/white mineral crust, rust, dampness, sagging pipes, pressure over 80 psi |
| Faucets | Handles, spouts, aerators, and under-sink supply lines | Persistent dripping, reduced water flow, stiff handles, moisture under valves |
| Toilets | Flushing strength, tank fill/flapper parts, and base stability | Phantom running, rocking bowl, water pooling at the base, weak flush |
| Sinks | Basin rim seal, basket strainer, P-trap, and drain speed | Slow draining, gurgling, warped cabinet floor, musty smell under the sink |
| Showers and tubs | Showerheads, diverters, tub spouts, caulk, and drain flow | Standing water around ankles, dripping spout when shower is on, soft wallboard |
| Water heater | Tank body, T&P relief valve, discharge pipe, and flue vent | Rust streaks, pooling water in drain pan, popping noises, scorch marks near flue |
| Drainage system | Accessible DWV stacks, cleanouts, traps, and appliance hoses | Recurring clogs, gurgling drains, corrosion on cast-iron hubs, loose traps |
| Main shut-off valve | Valve location, handle movement, and packing nut condition | Seized handle, mineral deposits around stem, difficult access behind storage |
| Sewer system | Main cleanout cap, floor drains, and multi-fixture drainage | Sewage odors in basement, water backing up in lowest tub/drain, soggy yard spots |
| Exterior plumbing | Hose bibs, irrigation backflow preventers, and sump pump | Dripping spigots, missing vacuum breakers, stuck sump float, failed discharge check |
Signs Your Home Needs a Plumbing Inspection
You do not need to wait for water to pour through the ceiling to call a plumber. Paying attention to subtle changes in water usage, drainage, and household odors helps you schedule a water leak inspection before structural damage escalates.
- Unexpected Increases in Water Bills: If your household habits have not changed but your monthly utility bill jumps noticeably, a silent toilet flapper leak, underground supply line leak, or malfunctioning irrigation valve could be wasting thousands of gallons.
- Low or Inconsistent Water Pressure: Weak flow at a single faucet often means a clogged aerator, whereas low pressure across the entire house can indicate corroded galvanized piping, a failing pressure-reducing valve, or a hidden supply leak.
- Slow-Draining Sinks and Showers: One sluggish bathroom sink usually points to localized hair and soap buildup, but multiple slow drains on the same floor suggest a deeper branch line obstruction or venting issue.
- Frequently Clogged Drains: Relying on chemical drain cleaners every few weeks masks an underlying problem such as grease accumulation, misaligned piping, or early root intrusion while harsh chemicals can corrode older metal pipes.
- Water Stains on Ceilings or Walls: Yellowish or brown rings on drywall directly below a bathroom or kitchen almost always signal an active or intermittent leak from a supply joint, shower pan, or drain trap above.
- Damp Floors and Unexplained Moisture: Warm spots on a concrete slab floor, buckling hardwood planks, or peeling vinyl near a toilet or dishwasher warrant prompt investigation.
- Mold or Musty Odors: Persistent earthy smells inside vanity cabinets, closets backing up to showers, or basements point to trapped moisture feeding mold growth behind surfaces.
- Unusual Pipe Noises: Loud banging when a washing machine shuts off (water hammer), whistling valves, or whistling pipes indicate pressure surges or worn washers that can loosen joints over time.
- Rusty or Discolored Water: Brownish or reddish tint coming only from the hot water tap points to a corroding water heater tank, while discolored cold water often indicates aging iron or galvanized supply pipes.
- Recurring Toilet Problems: Toilets that require double-flushing, refill randomly at night, or bubble when a nearby sink drains signal internal valve wear or downstream venting/drainage restrictions.
- Sewer Odors or Wastewater Backups: Foul sulfur or sewage smells coming from floor drains or basement sinks mean either a dry P-trap has lost its water seal or wastewater is backing up in the main line.
Safety Note — Routine Inspection vs. Plumbing Emergency: A scheduled inspection is ideal for slow drips, aging fixtures, and preventive checkups. However, if you experience active flooding, a suspected natural gas or propane leak near a gas water heater, raw sewage backing up into living areas, or water leaking near electrical panels or outlets, take immediate safety action shut off the main water supply, evacuate if you smell gas, avoid standing water near live electricity, and contact emergency services or an emergency plumber right away.
READ MORE: Seasonal Plumbing Tips & Tricks: Prep, Protect & Save All Year
How Much Does a Plumbing Inspection Cost in the USA?
When homeowners search for plumbing inspection cost, they often see wide price ranges because a quick visual check of a one-bathroom condo requires far less labor and equipment than a whole-house evaluation with video sewer scoping on a large property. Based on 2026 national cost data from HomeAdvisor and Angi, a standard residential plumbing inspection in the United States typically costs between $100 and $500, with many homeowners paying around $300 for a comprehensive visit. When specialized diagnostics such as a sewer line camera inspection are included, total costs commonly range from $350 to $1,375 or more.
| Inspection Type / Service | Typical 2026 U.S. Price Range | What Is Usually Included |
| Standard Visual Plumbing Inspection | $100 – $200 | Walkthrough of visible supply/drain pipes, fixtures, water heater, shut-off valves, and pressure check |
| Average Residential Plumbing Inspection | ~$300 (typical midpoint) | Comprehensive whole-home fixture testing, water heater safety check, and written findings report |
| Standalone Sewer Camera Inspection | $250 – 1,175+(average~995) | High-resolution fiber-optic video scoping of the main sewer line to locate roots, cracks, or clogs |
| Combination Visual + Camera Inspection | $350 – $1,375+ | Complete interior/exterior visual inspection paired with main sewer line video diagnostics |
| After-Hours / Emergency Trip Fee | +$150 – $300 (plus higher hourly rates) | Urgent dispatch outside regular business hours for active leaks, backups, or safety hazards |
Note: These figures reflect 2026 national estimates rather than fixed quotes. Actual prices depend on your local market and specific inspection scope.
Several practical variables determine where your quote falls within these ranges:
- Home Size and Bathroom Count: A 3,500-square-foot home with four bathrooms, a wet bar, and multiple water heaters takes significantly longer to test than a 1,100-square-foot ranch with one bath.
- Age and Condition of Plumbing: Homes built before the 1970s often contain mixed pipe materials (such as galvanized steel transitioned to copper or PEX) and older cast-iron drains that require closer scrutiny.
- Accessibility of Pipes: Open basement ceilings make inspecting supply and drain runs straightforward, whereas slab-on-grade construction or tight crawl spaces require more time and specialized tools.
- Geographic Location and Labor Rates: Plumbing labor rates commonly averaging $45 to $200 per hour across the U.S. are noticeably higher in major metropolitan areas like New York or Los Angeles than in smaller Midwestern or Southern markets.
- Diagnostic Add-Ons: Thermal imaging, hydrostatic testing, or locating an inaccessible sewer cleanout will add to the base inspection fee.
DIY Plumbing Inspection vs. Professional Plumbing Inspection
Homeowners can and should perform basic visual walk-throughs every few months to catch obvious drips or running toilets. Still, a DIY check has clear limits compared to a professional plumbing inspection.
| Comparison Factor | DIY Homeowner Check | Professional Plumbing Inspection |
| Inspection Depth | Surface-level check of visible faucets, under-sink cabinets, and toilets | Comprehensive evaluation of supply lines, DWV piping, valves, water heater, and pressure |
| Diagnostic Equipment | Flashlight, basic moisture check, food coloring for toilet leak tests | Calibrated pressure gauges, moisture meters, thermal cameras, fiber-optic sewer scopes |
| Hidden Leak Detection | Limited to visible water stains, puddles, or warped cabinetry | Able to trace moisture behind walls, under slabs, and inside buried sewer laterals |
| System & Code Knowledge | Basic familiarity with normal fixture operation | Deep understanding of pipe compatibility, venting physics, backflow protection, and safety rules |
| Safety Considerations | Safe for non-invasive visual checks; risky if disassembling valves or gas vents | Trained to safely inspect gas water heater flues, T&P valves, and pressurized systems |
| Upfront Cost | Free (aside from basic homeowner supplies) | Typically $100 – $500+ depending on home size and diagnostic scope |
| Complex Issue Diagnosis | Identifies symptoms (e.g., slow drain or low pressure) | Pinpoints root causes (e.g., root intrusion, failed PRV, improper slope) with repair options |
What you can safely check yourself: Look under every sink with a flashlight while running water, check around toilet bases for dampness, drop a few drops of food coloring into the toilet tank to see if color seeps into the bowl without flushing (a classic sign of a worn flapper), test your main shut-off valve visually for rust, and review your monthly water meter reading when no water is running inside the house.
When to call a licensed professional: Leave sealed wall cavities, underground sewer lines, gas water heater venting, main pressure-reducing valves, and recurring multi-drain backups to a qualified plumber who has the diagnostic instruments and licensing to evaluate them safely.
READ MORE: How Much Does It Cost to Reroute Plumbing?
What Happens During a Professional Plumbing Inspection?
Understanding the step-by-step workflow of a professional plumbing inspection helps you prepare your home such as clearing stored items out from under sinks and around the water heater so the plumber can work efficiently. While exact steps vary by company and service agreement, a typical appointment follows this sequence:
- Initial Discussion with the Homeowner: The plumber asks about your goals for the visit (routine maintenance, pre-purchase evaluation, or investigating a specific issue) and notes the age of the home.
- Review of Known Plumbing Issues: You share any history of slow drains, noisy pipes, past water damage, or recent repairs so the plumber knows where to focus extra attention.
- Examination of Accessible Water Supply Pipes: Starting where water enters the house, the plumber checks the main shut-off valve, pressure-reducing valve, exposed supply piping, and pipe supports in the basement, crawl space, or utility room.
- Testing Accessible Plumbing Fixtures: The plumber turns on faucets, showers, tubs, and outdoor spigots, checks water temperature delivery, and flushes every toilet to verify proper fill and drainage cycles.
- Checking Drainage Performance: Multiple fixtures may be run together to test how quickly water clears the traps and whether any gurgling or backup occurs in lower-level drains.
- Examining Visible Water Heater Components: The plumber inspects the water heater tank or tankless unit, T&P relief valve, discharge piping, shut-off valve, and exhaust venting for safety and wear.
- Looking for Visible Leaks and Water Damage: Using flashlights, mirrors, and moisture meters where needed, the plumber checks under sinks, around tub surrounds, and along exposed ceilings for dampness or staining.
- Identifying Potential Plumbing Concerns: Any worn components, improper connections, aging materials, or safety hazards are documented along with their severity.
- Preparing an Inspection Report: Many reputable companies provide a written or digital summary often with photos or video clips outlining the condition of each inspected area.
- Providing Repair or Maintenance Recommendations: Before leaving, the plumber walks you through the findings, separating urgent safety or leak issues from routine preventive maintenance, and provides clear estimates if repairs are requested.
What Tools Do Plumbers Use During a Plumbing Inspection?
Modern residential plumbers rely on more than a flashlight and a wrench to evaluate hidden systems without tearing open drywall. Depending on the inspection package you select, a technician may use several specialized tools:
- Sewer Camera Systems: Waterproof, self-leveling high-definition cameras attached to a flexible push rod allow plumbers to inspect the inside of main sewer lines and locate exact problem depths using a surface sonde locator.
- Plumbing Inspection Cameras (Borescopes): Slim, articulated inspection cameras let plumbers peek inside tight wall cavities, under tubs, or behind appliances through small access openings.
- Moisture Meters: Pin and pinless moisture meters measure hidden dampness inside drywall, wood subfloors, and baseboards even before visible water stains appear.
- Thermal Imaging Cameras: Infrared cameras detect subtle temperature differences caused by evaporating moisture or hot water leaks behind walls and beneath concrete slabs.
- Water Pressure Gauges: Threaded directly onto a hose bib or laundry faucet, a pressure gauge measures static incoming water pressure and helps diagnose failed pressure-reducing valves.
- Acoustic Leak Detection Equipment: Sensitive listening devices amplify the sound of pressurized water escaping from underground supply lines or slab piping.
- Flashlights and Telescoping Inspection Mirrors: Essential for inspecting the backs of valves, hidden solder joints, and tight spaces behind water heaters and toilets.
- Basic Plumbing Diagnostic Tools: Combustible gas detectors (for gas water heater connections), infrared thermometers (to verify hot water delivery temperatures), and level gauges to check drainpipe pitch.
Not every routine inspection requires thermal imaging or acoustic sensors; plumbers select tools based on your home’s symptoms and the level of diagnostic testing you authorize.
READ MORE: AC Tune-Up Service Near Me
How to Choose a Reliable Plumbing Inspection Company
When searching online for plumbing inspection services or a plumbing inspection near me, taking a few minutes to vet credentials protects you from incomplete evaluations or unnecessary upsells. Look for these core qualifications:
- Proper State or Local Licensing: Plumbing licensing requirements vary by state, county, and municipality across the U.S.—some states issue statewide master and journeyman licenses, while others regulate licensing at the city or county level. Verify that the company holds active credentials required in your jurisdiction.
- Insurance Coverage: Confirm that the business carries active general liability insurance and workers’ compensation coverage to protect your property while technicians are on-site.
- Residential Plumbing Experience: Choose a company that regularly services residential homes similar to yours—especially if you own an older historic property, a slab-foundation house, or a home with a private well and septic system.
- Clear Inspection Scope and Limitations: A trustworthy plumber explains upfront what is included in the base fee, what requires extra diagnostic equipment, and what cannot be inspected without invasive access.
- Written Inspection Reports: Especially for pre-purchase evaluations or rental properties, insist on a written report detailing findings rather than verbal comments alone.
- Transparent Pricing: Look for clear flat-rate or hourly pricing disclosed before the technician arrives, with no hidden dispatch fees.
- Verified Customer Reviews: Check recent local reviews on Google, the Better Business Bureau (BBB), or Angi to see how the company communicates, shows up on time, and stands behind its work.
Questions to ask before booking your appointment:
- What does your standard plumbing inspection include?
- Are sewer camera inspections included, or are they priced as a separate add-on?
- Do you inspect both tank and tankless water heaters?
- Will I receive a written inspection report with photos of any issues found?
- Are additional diagnostic tests (like thermal imaging or slab leak detection) charged separately?
- Are your plumbers properly licensed and insured for residential work in my area?
- If you discover a serious plumbing problem, do you provide itemized repair estimates without obligation?
Final Thoughts:
Your home’s plumbing system works behind the scenes every single day, yet small leaks, aging valves, and hidden drainage issues rarely fix themselves. Investing a few hundred dollars in a professional plumbing inspection gives you clear, objective answers about the health of your pipes, fixtures, water heater, and sewer line helping you prevent avoidable water damage, plan repairs on your own terms, and protect one of your biggest financial investments.
Frequently Asked Questions
What does a plumbing inspection include?
A standard residential plumbing inspection includes checking visible water supply pipes, testing faucets, sinks, showers, and toilets for leaks and proper drainage, inspecting the main water shut-off valve, measuring water pressure, and evaluating the water heater’s condition and safety valves.
How much does a plumbing inspection cost in the USA?
In the United States, a standard visual plumbing inspection typically costs between $100 and $500, with many homeowners paying around $300. Adding a fiber-optic sewer line camera inspection generally brings total costs to between $350 and $1,375 or more, depending on home size, pipe accessibility, and local labor rates.
How often should a home plumbing system be inspected?
Inspection frequency depends on your property’s age, pipe materials, and maintenance history. Newer homes in good condition often benefit from a check every two years, while homes over 30 years old, properties with galvanized or cast-iron piping, and homes with recurring leaks or clogs should generally be inspected annually.
Is a plumbing inspection necessary when buying a house?
While not legally required, a dedicated plumbing and sewer camera inspection is strongly recommended before buying a house. General home inspectors only perform basic surface checks, whereas a licensed plumber can uncover hidden pipe corrosion, failing water heaters, or damaged underground sewer lines—giving you valuable leverage for repair negotiations before closing.
Can a plumber detect hidden leaks during a plumbing inspection?
Yes, plumbers can often detect hidden leaks using non-invasive diagnostic tools such as moisture meters, thermal imaging cameras, acoustic listening devices, and water pressure gauges. While a basic visual inspection only covers exposed pipes, adding specialized leak detection equipment helps pinpoint concealed moisture behind walls, under floors, or beneath concrete slabs.
Sources
- U.S. Environmental Protection Agency (EPA) — WaterSense: Fix a Leak Week & Household Water Leak Statistics
- U.S. Department of Energy (DOE) — Energy Saver: Water Heating Maintenance and Safety Guidelines
- American Society of Home Inspectors (ASHI): ASHI Standard of Practice for Home Inspections (Plumbing Systems)
- International Association of Certified Home Inspectors (InterNACHI): International Standards of Practice for Performing a General Home Inspection
- International Code Council (ICC): International Plumbing Code (IPC) & International Residential Code (IRC) Overview
- Angi & HomeAdvisor (2026 Cost Guides): How Much Does a Plumbing Inspection Cost? (2026 U.S. Pricing Data) and How Much Does a Sewer Line Camera Inspection Cost? (2026 Data)

