Ever wondered why that shiny tank in your basement or garage is occasionally gurgling or making popping noises? It might be begging for a good flush. Over time, minerals and sediment settle in the bottom of a water heater tank, and this build-up acts like rocks in a stream, reducing efficiency and causing stress on the unit. Draining (flushing) your water heater annually or as needed is like an oil change for your furnace of hot water – it helps your heater run smoother and last longer. Lets deep dive into “How to Drain a Hot Water Heater: Step by Step DIY Guide”

READ MORE: How to Flush a Tankless Water Heater (Step-by-Step Guide)
Tools and Materials You’ll Need
- Garden hose: A sturdy hose long enough to reach from the water heater’s drain spigot to a safe drain area (floor drain or outdoors).
- Adjustable wrench or pliers: To loosen stubborn valves or fittings.
- Flat-head screwdriver: Many drain valves open with a screwdriver; keep one handy.
- Bucket(s) or containers: Handy for catching water if you can’t route it directly to a drain.
- Rags or towels: For spills and wiping up drips.
- Gloves and safety goggles: To protect your hands and eyes from hot water or debris.
- Hose adapter (optional): Some older valves need an adapter to attach a hose.
- Teflon tape (optional): Useful if you remove a valve or fitting.
Each of these tools helps make the job easier and safer. Now, let’s talk about safety because safety first!
“Don’t let scale cut your heater’s life in half. Protect your investment and ensure a decade of hot showers with the Chromex Tankless Flush Kit. With a pro-grade 1/6HP pump and certified descaler, it’s the easiest way to double your unit’s lifespan.” See Below-

READ MORE: How to Fix Cold Water Sandwich on a Tankless Heater: DIY Solutions That Actually Work
Safety First: Precautions Before You Begin
Before you unleash a torrent of hot water, take a moment to prepare safely. Water heaters hold scalding water and are tied into electricity or gas, so caution is key. Here are the must-do safety steps:
- Cut the Power and Fuel: If your heater is electric, flip the breaker off. If it’s gas, turn the gas shut-off valve off or switch the thermostat to “Pilot”. This prevents the burner or elements from firing while the tank is empty. (Electric units must be off or the exposed elements can burn out if the tank runs dry.)
- Shut Off Cold Water: Close the cold-water inlet valve on top of the heater. This stops more hot water from entering the tank while you drain it.
- Let the Tank Cool (If Possible): For extra safety, turn off the heater an hour or so before draining to let the water cool. Some experts even recommend doing the shutoff the night before to ensure the water inside isn’t scalding hot.
- Ventilate (Gas Heaters): If you have a gas heater, make sure the area is well-ventilated. This helps prevent any gas buildup in case of a leak.
- Wear Protective Gear: Hot water can burn, and sediment can be harsh on your skin. Pull on heavy-duty gloves and safety glasses. If your heater has been acting up, a dust mask isn’t a bad idea to avoid inhaling any rust or chemical odors.
- Check for Leaks: Lay down towels or plastic sheeting around the tank in case of drips, and make sure your drain hose is secure (to prevent flooding).
Pro tip: Have a helper or at least keep your cell phone nearby if this is your first time. That way, you can hold the hose or dab at leaks while monitoring things—two hands are often better than one! If anything seems too tricky, stop and consider getting professional help. With these precautions, it’s time to drain and flush.
“Powerful 1/6HP pump. Long-reach hoses. Maximum lifespan. See Below-

READ MORE: How to Replace a Water Heater Anode Rod: Step by Step DIY Guide
Step-by-Step Guide to Draining Your Water Heater
Follow these steps in order. Don’t skip anything – each one protects you or ensures a complete flush.
Step 1: Turn Off the Gas/Electric and Cold Water Supply
First things first: cut the heater’s fuel source. For a gas heater, locate the small gas line going into the heater – it has a shut-off valve on it. Turn that valve perpendicular (90°) to the pipe to shut off the gas flow. For an electric heater, find its breaker in your panel and switch it off. Now the heater won’t fire up during the process.
Next, completely shut off the cold-water supply to the heater. The cold inlet is usually a lever or knob on a pipe at the very top of the tank (often with a blue handle, while hot is red). Turning this off means no more water enters the tank while you’re draining it.
Remember: Even after shutting off gas/electric, the water in the tank may still be dangerously hot. That’s why we let it cool first if possible. Now the utilities are off and you’re ready for the drain hose.
Step 2: Attach a Garden Hose to the Drain Valve
Locate the drain valve at the bottom of your heater tank. It’s usually a spigot or threaded outlet on the side or bottom of the tank. Remove any protective cover, and screw on your garden hose to the drain valve’s fitting. Make sure it’s snug – you want a good seal so hot water doesn’t spray everywhere.
Run the other end of the hose to a safe drain point: a floor drain, a utility sink, or outdoors onto concrete (never onto soil if there’s rust or chemicals). If you have a basement floor drain, that’s ideal. Otherwise, aim outside but don’t spray anyone’s feet or the siding!
If a hose won’t reach, fill bucket(s) instead. It’s slower, but catching hot water in buckets and dumping it elsewhere still works (just carefully empty them far from your heater and away from anyone’s path).
Keep clear: Water gushing out can be hot, so stand to the side as you attach the hose and walk it to the drain. Use a wrench if the valve is stiff – just don’t turn so hard that you break it.

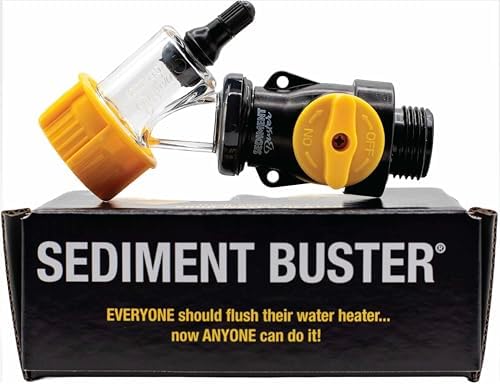
- MULTIPLE BENEFITS – Extend the lifetime of your water heater, improve its efficiency, reduce your energy bill, and incre…
- WORKS GREAT – Other flushing methods only remove small loose sediment particles where the Turbo Tank Cleaner physically …
- UNIVERSAL – Cleans all water heater tank types, gas and electric (not for tankless water heaters).
READ MORE: How to Clean Sediment from a Water Heater
Step 3: Open a Hot Water Faucet to Relieve Pressure
Before opening the drain valve, open a hot-water tap in your house (the one closest to the heater, ideally). This is like lifting a finger off the top of a straw full of water – it lets air into the system and prevents a vacuum from forming.
With the faucet open, briefly turn on the cold-water inlet so that cold water pushes any trapped hot water or air bubbles out through the open hot tap. You’ll see some water pour from that faucet – this is normal. After a minute or so, you can shut that faucet off. The goal is to relieve pressure so that when you open the drain, water flows smoothly.
Step 4: Open the Drain Valve and Flush Out Sediment
Now for the main event. Use your screwdriver or the valve handle to open the drain valve. Hot water (and gunk!) will rush out through the hose. Stand back — the water will be very hot, and it might spray if the valve isn’t tight.
Let the tank drain for several minutes. You’ll see initially a mixture of water and sediment. Repeat the flush by closing and reopening the valve a couple of times if needed; this stirs up more sediment. If the flow sputters or slows to a trickle, you can briefly turn the cold-water inlet back on (for just a second) to break up any clogs – then resume draining.
Be patient: Sediment can be stubborn. Keep draining until the water runs almost clear. If sediment blocks the valve, it may limit flow; in severe cases, it’s best to call in an expert. However, usually a good flush (and maybe a gentle poke at the valve opening with a small screwdriver) will clear it out.
Once most water is out, flush the heater by letting a little fresh water in and draining again. (Open the cold inlet briefly, then drain again.) Continue until the water exiting is clear of visible sediment.
- UL Verified V699054 for heat & pressure
- Easy to use with instructions & videos
- Add years to the life of your water heater
Step 5: Close the Valve, Refill the Tank, and Restart the Heater
Great job – you’ve flushed out the old water! Close the drain valve tightly (you might hear one final gurgle). Remove the hose. Now open the cold-water inlet fully to refill the tank.
Turn on the hot-water faucet you opened earlier. At first you’ll get air and maybe a stream of cold; once the air is purged and the tank refills, a steady trickle of water will come from that faucet. At that point, shut the faucet off.
Finally, restore power or gas. Switch the circuit breaker back on, or turn the gas valve to “On” and relight the pilot (if it went out). The burner or elements will start heating the fresh water. Keep an eye (and ear) out for any leaks around the drain valve or fittings as pressure builds up.
Caution: Some heaters advise never firing the burner on an empty tank. Double-check that water is flowing smoothly from the hot faucet (meaning the tank is full) before restarting the heater. Follow your heater’s manual to make sure all procedures are safe.
Once the heater is back on, wait a bit and test a hot tap in your home. You should have hot water again – and hopefully, fewer clunks and better heat.
READ MORE: Water Leak Repair Near Me
Maintenance Tips to Prolong Your Heater’s Life
Draining your heater is a great start. For a truly long-lived water heater, add these habits:
- Flush Regularly (Annually or Biannually): Make tank draining part of your yearly or every-other-year maintenance routine. Frequent flushing keeps sediment low and efficiency high. In hard water areas, stick to yearly.
- Inspect the Anode Rod: The anode rod sacrifices itself to prevent tank rust. Check it every 3-5 years and replace it if it’s more than half corroded. A fresh anode can save the tank from rusting out.
- Test the T&P Valve: Lift the temperature-pressure relief (T&P) valve lever every few months. It should spew a bit of water when lifted and stop when let go. A stuck or leaking T&P valve is a safety hazard, so replace it if it doesn’t seat properly.
- Set Safe Temperatures: Keep the thermostat around 120–125°F. Higher than that wastes energy and speeds scale buildup; lower can risk bacterial growth. In fact, 120°F is the recommended safe setting by experts.
- Insulate Pipes and Tank: An insulating blanket on an older tank and foam sleeves on exposed hot pipes reduce heat loss, meaning your heater runs less often.
- Fix Leaks Promptly: After each flush, glance under the tank and around valves. Even a small drip can indicate trouble. Catching a leak early can save a flood later.
- Vacation Mode or Water Off (When Away): If you’ll be gone for a while, set your electric heater to “Vacation” mode or turn off the gas. Also consider shutting off the water supply – that way a frozen or burst pipe won’t empty your tank.
- Listen to Your Heater: Rumbling or popping noises are red flags for sediment. Discolored water or an eggy smell often means sediment or bacteria. Addressing these ASAP (with flushing or a new anode) prevents bigger issues.
By combining regular flushing with these simple checks, your heater will have a much longer, trouble-free life.
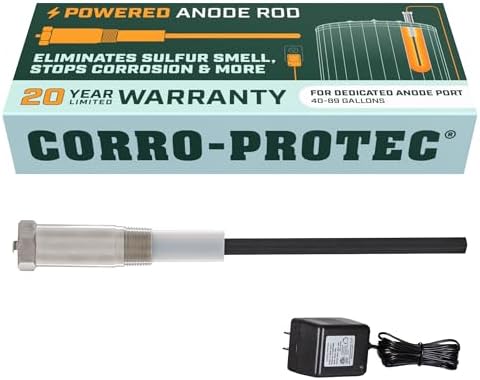
- HASSLE-FREE HOT WATER – Corro-Protec’s powered anode rods are revolutionizing the water heater maintenance by preventing…
- SAY GOODBYE TO ODORS – Eliminate your water heater odor problem by removing the rotten egg smell in hot water with our a…
- PERMANENT CORROSION PROTECTION – Designed to replace your 40-89-gallon water heater’s hex head anode rod, it can defend …
READ MORE: Hard Water Impact on Water Heater Lifespan — Signs, Fixes, and Costs
Troubleshooting Common Issues
Even the best-maintained heater can hit a snag. Here are quick tips for frequent woes:
- No Hot Water or Lukewarm Output: First, confirm your heater is getting power or gas. Check the circuit breaker and gas valve (and relight the pilot if needed). If the heater is on but water stays cool, an element (electric) or thermocouple (gas) may have failed. Sediment could also be reducing effective capacity. Draining often restores lost volume.
- Insufficient Hot Water: If you run out of hot water quickly, your tank may be too small for your household’s needs, or the dip tube inside the heater could be cracked. Heavy sediment can also reduce how much hot water you effectively have. If resizing isn’t an option, a thorough flush might help.
- Noisy Heater (Popping, Rumbling): These sounds mean sediment at the bottom. A good flush will usually quiet it down. If the noise persists after draining, have a pro check the burner or heating element.
- Foul Odor (Rotten Eggs): Usually from bacteria or a spent anode. Flushing can clear it up in many cases. If the smell lingers, replace the anode (or use a different alloy) and consider flushing with a disinfectant as a last resort.
- Leaking Tank: If water is leaking from the tank itself (not a valve), corrosion has likely eaten through the metal – the heater should be replaced. If a valve or fitting leaks after your flush, gently tighten it or replace it if needed. Pressure relief valves should only drip when heating; a constant drip means the valve may need replacing.
- Rusted or Colored Water: This indicates internal corrosion or piping issues. Flushing might improve it temporarily, but rust that keeps returning usually means you’ll need a new tank or new plumbing. Replacing a rusty anode can help slow this.
- High Energy Bills: Built-up sediment acts like insulation on the heating element/burner, so the heater runs longer and harder to get water hot. If your bills jump, try flushing the tank. Also make sure your thermostat isn’t set higher than needed.
- Drain Valve Won’t Open: This can happen if mineral deposits jam the valve. Don’t force it excessively. Try gently nudging it with a screwdriver and briefly opening the cold inlet to back-flush. If that fails, you may have to cut off the valve and replace it – always shut off the water before doing that.
When in doubt on any issue, consult your heater’s manual or a professional. But with the above steps and maintenance, most common problems can be prevented or solved at home.

- 【ONE YEAR WARRANTY】Z Turn-up Kit Includes (2) 4500W 240V COPPER Water Heater Element, Insert Length: 13-9/16″. 3500W@208…
- 【ONE YEAR WARRANTY】Includes (1) Upper Water Heater Thermostat, (1) Lower Water Heater Thermostat, 120V ~ 480V
- 【Interchangeable】Therm-O-Disc Type Thermostat, Can interchange with APCOM type.
READ MORE: Fix Leaky Bathroom Faucet
Frequently Asked Questions
How often should I drain my water heater?
Most professionals recommend flushing or draining your heater every 1–2 years. If you notice rusty water, popping noises, or have very hard water, do it annually. Keeping up with this schedule prevents major sediment buildup.
Is draining a gas water heater different from an electric one?
The actual draining steps are the same for both. The main difference is how you shut off power: flip the circuit breaker for an electric heater, or shut the gas valve (and switch the control to “Pilot” if applicable) for a gas heater.
What tools do I need for draining a water heater?
You’ll want basic tools: a garden hose, adjustable wrench or channel-lock pliers, and a flat-head screwdriver are the essentials. The hose attaches to the drain valve; the screwdriver opens the valve; pliers/wrench help with tight fittings. You’ll also need buckets to catch water and some towels.
Can I reuse the water I drained?
Yes! The drained water is just regular tap water that was heated. If it’s not too hot, you can pour it on thirsty plants or use it for cleaning tasks. (In fact, shutting off the heater a bit early “allows you to reuse the drained water for plants,” experts note.)
What if the drain valve is clogged or won’t open?
Sediment buildup can jam the valve. First, try gently prying it open with the screwdriver. You can also briefly open the cold inlet to try to back-flush it. If it’s irreversibly stuck or broken, shut off the water and replace the valve.
Final Verdict
Draining your water heater is a simple yet powerful way to keep hot water flowing smoothly. By turning off the power/gas and water, attaching a hose, relieving system pressure with a faucet, and then opening the drain valve until the tank runs clear, you remove harmful sediment that can clog, noise-up, and shorten the life of the heater. After draining, simply refill the tank and restart the heater, and it’s good as new.
Regular flushing, along with checking the anode rod and valves, will greatly extend the life of your water heater and prevent nasty surprises (like loud bangs or leaks) down the road. With the steps above, you’ve effectively given your heater fresh plumbing, ensuring efficient performance and warm showers for a long time.
Now grab that hose and tackle the job. You may be surprised how easy it is to give your water heater some well-deserved TLC. Good luck and stay safe!

