As a residential plumber, I get more urgent calls about the kitchen sink than almost any other fixture in the house. Because your kitchen is the command center for cooking, cleaning, handwashing, and food prep, even a minor plumbing hiccup brings daily routines to a grinding halt. Knowing the basics of kitchen sink repair can save you from a major headache when trouble strikes.
In this comprehensive guide, you will learn how your sink system actually works, how to diagnose the most common household sink problems, step-by-step instructions for safe DIY fixes, realistic repair costs across the United States, and clear guidelines on when it is time to put down the wrench and call a licensed plumber. Lets deep dive into “Kitchen Sink Repair: Common Problems, DIY Fixes & Costs”
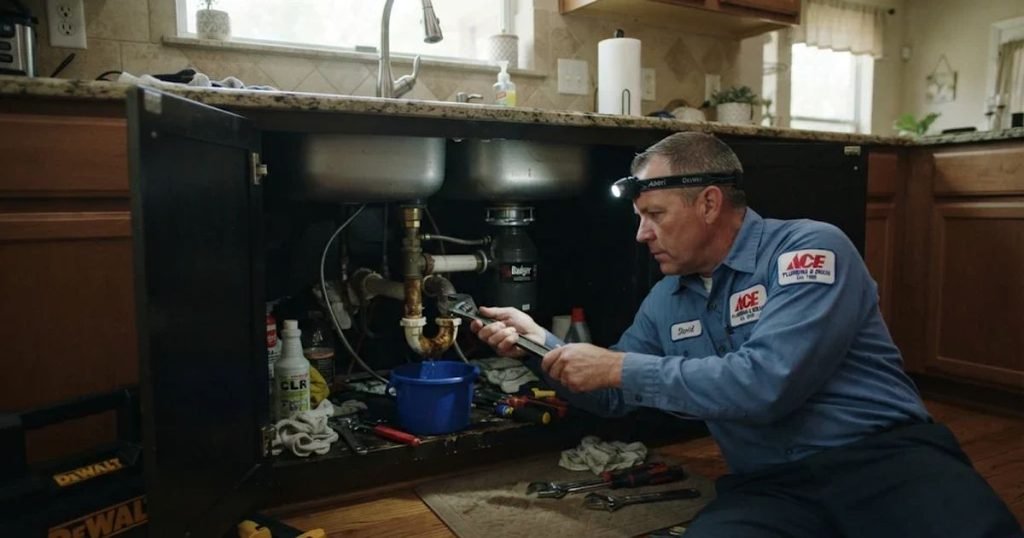
What Is Kitchen Sink Repair?
In simple terms, kitchen sink repair involves diagnosing, fixing, or replacing damaged or worn-out components within your sink basin, water supply lines, faucet assembly, or drainage system. Unlike a simple vanity sink in a powder room, the kitchen sink is a hardworking hub that handles hot grease, food particles, heavy cookware, and constant water pressure every single day.
To troubleshoot a problem accurately, it helps to understand how the distinct parts of your sink setup work together:
- The Sink Basin: The bowl (or bowls) mounted into your countertop, typically made of stainless steel, porcelain-enameled cast iron, fireclay, or granite composite. Repairs here usually involve resealing rim edges or fixing chipped surfaces.
- The Faucet Assembly: Includes the spout, handles, internal cartridges or washers, aerator, and pull-down sprayer hose. Faucet repair targets leaks at the spout, base, or handles.
- Supply Lines: Flexible braided stainless steel or PEX tubes that carry hot and cold water from the shutoff valves on the wall up to the faucet.
- The Drain Strainer Basket: The metal or plastic assembly sealed into the bottom of the sink basin that catches large food scraps and connects the sink to the drainpipe below.
- The P-Trap: The curved, U-shaped section of pipe beneath the sink. It holds a small barrier of water that prevents smelly, hazardous sewer gases from rising into your kitchen while catching heavy debris.
- The Garbage Disposal: An electrically powered unit mounted beneath one drain opening that grinds food waste into tiny particles before flushing them into the drain line.
Pinpointing the exact source of a failure is half the battle. Water naturally follows gravity and travels along the underside of pipes before dripping off the lowest point. A puddle under the P-trap might actually originate from a loose faucet supply line two feet higher, or a worn-out strainer basket putty seal. Taking five minutes with a flashlight and dry paper towels to trace the moisture saves you from replacing parts that were never broken in the first place.
READ MORE: How to Install Kitchen Sink Plumbing: Step by Step
Most Common Kitchen Sink Problems
When homeowners search for how to fix a kitchen sink, they are usually dealing with one of ten recurring issues. Recognizing the symptoms makes choosing the right repair much easier.
1. Kitchen Sink Clogged or Draining Slowly
- Symptoms: Water pools in the basin during dishwashing and takes minutes to empty, or backs up completely.
- Possible Causes: Accumulated cooking grease that solidifies inside cool pipes, coffee grounds, starchy foods (like pasta or potato peels), soap scum, or a blockage further down the branch drain line.
- Solutions: Remove surface debris, use a flat-bottomed sink plunger, clear the P-trap, or use a manual hand auger (drain snake).
2. Kitchen Sink Leaking Underneath
- Symptoms: Dampness on the cabinet floor, warped wood, musty odors, or active dripping inside the base cabinet.
- Possible Causes: Loose slip nuts on plastic drain pipes, a failing plumber’s putty seal around the sink strainer, a cracked garbage disposal housing, or a leaking sprayer hose.
- Solutions: Dry all pipes thoroughly, run water while watching with a flashlight to locate the drip, and tighten connections or replace worn rubber washers.
3. Dripping or Leaking Kitchen Faucet
- Symptoms: Constant dripping from the spout after handles are turned off, or water pooling around the base of the faucet on the countertop.
- Possible Causes: Worn-out internal cartridges, O-rings, rubber washers, or valve seats caused by mineral buildup and daily friction.
- Solutions: Shut off the water supply, disassemble the faucet handle, and install manufacturer-specific replacement cartridges or seals.
4. Low Water Pressure from the Kitchen Faucet
- Symptoms: A weak stream from the kitchen tap while bathroom faucets and showers maintain normal pressure.
- Possible Causes: Calcium and sediment clogging the faucet aerator screen, a kinked flexible supply line under the sink, partially closed shutoff valves, or debris inside the faucet cartridge.
- Solutions: Unscrew and clean the aerator tip, check that wall shutoff valves are fully open, and flush out sediment.
5. Kitchen Sink Drain Pipe Leaking
- Symptoms: Water drips specifically when draining a full sink or running the dishwasher, rather than continuously.
- Possible Causes: Worn bevel washers inside slip-joint connections, misaligned pipes putting stress on joints, or corroded metal tailpieces in older homes.
- Solutions: Realign the drain pipes so they sit flush without tension, replace worn plastic or rubber washers, and hand-tighten slip nuts.
6. Loose or Damaged P-Trap
- Symptoms: Dripping from the curved pipe under the sink, visible cracks in PVC or ABS plastic, or rusted holes in older chrome-plated brass traps.
- Possible Causes: Accidental bumps from cleaning supplies stored under the sink, thermal expansion and contraction from boiling water, or age-related corrosion.
- Solutions: Perform a kitchen sink P-trap repair by tightening loose slip nuts or installing a new matching 1-1/2-inch P-trap kit.
7. Garbage Disposal Not Working
- Symptoms: The unit hums loudly without spinning, makes no sound at all when flipped on, or drains sluggishly.
- Possible Causes: A tripped internal overload reset button, a jammed flywheel (often from a bone fragment, fruit pit, or silverware), or a tripped circuit breaker.
- Solutions: Cut power, clear obstructions safely using an Allen wrench in the bottom hex socket, and press the red reset button.
8. Kitchen Sink Making Gurgling Noises
- Symptoms: Glugging or bubbling sounds coming from the drain as water empties or when the dishwasher runs.
- Possible Causes: A partial clog trapping air in the drain line, or a blocked/improperly installed plumbing vent pipe (or faulty Air Admittance Valve).
- Solutions: Clear partial drain blockages with a snake, or have a plumber inspect the venting system.
9. Bad Smells Coming from the Kitchen Sink Drain
- Symptoms: Persistent rotting food odors or sharp sewer smells wafting up from the basin.
- Possible Causes: Rotting organic residue clinging to the inside of the garbage disposal splash guard, biofilm buildup in the tailpiece, or a dry P-trap allowing sewer gas through.
- Solutions: Scrub the rubber disposal baffle, flush the drain with baking soda and hot water, and ensure water runs regularly to keep the P-trap filled.
10. Rust, Corrosion, or Damaged Sink Components
- Symptoms: Orange rust stains around the drain flange, flaking metal pipes, cracked porcelain enamel, or separating caulk along the countertop rim.
- Possible Causes: Harsh chemical cleaners, scratched protective coatings, aging galvanized or brass plumbing, or breakdown of silicone sealant.
- Solutions: Scrape and re-caulk sink edges, replace corroded metal drain assemblies with durable PVC, or evaluate the basin for replacement if structural cracks appear.
READ MORE: Kitchen Sink Draining Very Slowly? Step by Step DIY Fixes
How to Repair a Kitchen Sink: Step-by-Step DIY Solutions
1. How to Unclog a Kitchen Sink Safely
- Tools & Materials: Flat-bottomed cup plunger, bucket, old towels, rubber gloves, hand-crank drain snake (auger), dish soap.
- Step-by-Step Instructions:
- Bail out standing water from the sink basin into your bucket until only two inches of water remain (enough to cover the plunger cup).
- If you have a double-bowl sink, stuff a wet rag tightly into the second drain opening to create a tight air seal.
- Place the plunger squarely over the clogged drain, press down gently to expel air, and pump firmly up and down 10 to 15 times before pulling up sharply.
- If plunging fails, place a bucket under the P-trap, unscrew the slip nuts to remove the trap, and clear any trapped grease or food inside it.
- Feed a manual drain snake into the wall drain stub-out, turning the handle clockwise until you hook or break through the blockage, then retrieve the snake and reassemble the P-trap.
- Safety Precautions: Never use a plunger if you have already poured liquid chemical drain cleaner into the sink; splashing caustic chemicals can cause severe skin and eye burns.
- Mistakes to Avoid: Avoid forcing a metal drain snake aggressively around sharp bends, which can crack older PVC pipes.
- When to Call a Pro: If a 25-foot snake cannot reach the clog or water backs up into other fixtures, the blockage is likely in your main sewer line.
2. How to Fix a Leaking Pipe Under the Kitchen Sink
- Tools & Materials: Flashlight, dry paper towels, bucket, channel-lock pliers, replacement slip-joint washers, rags.
- Step-by-Step Instructions:
- Wipe all under-sink pipes completely dry with paper towels.
- Turn on the faucet and watch closely with a flashlight to spot the exact joint where water first emerges.
- If the drip is coming from a plastic compression nut, turn it clockwise by hand—or gently a quarter-turn with channel-lock pliers—to snug it up.
- If tightening stops just short of sealing, unscrew the nut, slide it back, and inspect the beveled plastic washer underneath.
- Replace any flattened, cracked, or split washer with an identical size (typically 1-1/2 inch for kitchen drains), ensuring the beveled edge faces the pipe opening, then re-tighten.
- Safety Precautions: Protect your eyes from dripping water and debris when looking upward inside tight cabinets.
- Mistakes to Avoid: Do not over-tighten plastic PVC slip nuts with heavy wrenches; excessive torque cracks the collar and ruins the fitting.
- When to Call a Pro: Call a plumber if the leak originates inside the wall behind the cabinet or from corroded copper or galvanized supply pipes.
3. How to Tighten or Replace a Loose P-Trap
- Tools & Materials: Bucket, sponge, channel-lock pliers, new 1-1/2-inch PVC or ABS P-trap kit, hacksaw (if trimming tailpiece length).
- Step-by-Step Instructions:
- Position a bucket directly beneath the U-bend of the P-trap to catch the standing water inside.
- Unscrew the two large slip nuts connecting the curved J-bend to the vertical tailpiece and the horizontal wall arm.
- Empty the trapped water into the bucket and clean away any gunk inside the pipes.
- If replacing the trap, compare the new parts side-by-side with the old assembly to verify alignment.
- Slide the new nuts and beveled washers onto the pipes, position the J-bend so it aligns without pulling or twisting, and hand-tighten the nuts firmly.
- Run water for two minutes and check every joint with a dry tissue.
- Safety Precautions: Wear gloves when handling old drain traps, as trapped food residue harbors bacteria.
- Mistakes to Avoid: Never install an “S-trap” configuration (which drops straight down into the floor without a horizontal vent arm), as S-traps siphon dry and violate modern U.S. plumbing codes.
- When to Call a Pro: Hire a plumber if the wall drain stub-out is rusted, broken off flush with the wall, or needs rerouting to accommodate a deeper sink.
4. How to Fix a Dripping Kitchen Faucet (and Replace a Washer or Cartridge)
- Tools & Materials: Adjustable wrench, Allen wrench set, Phillips/flathead screwdrivers, needle-nose pliers, replacement cartridge or washers/O-rings, white vinegar, cloth.
- Step-by-Step Instructions:
- Turn off both hot and cold angle stop valves under the sink, then open the faucet lever to relieve residual water pressure.
- Plug the sink drain so tiny screws cannot fall down the pipe.
- Pry off the decorative cap on the faucet handle to expose the set screw, loosen it with an Allen wrench or screwdriver, and lift the handle off.
- Unscrew the retaining ring or bonnet nut using an adjustable wrench (wrap the jaws in a cloth to prevent scratching chrome finishes).
- Pull the worn cartridge straight up (or remove the stem and rubber seat washer on older two-handle compression faucets).
- Bring the old cartridge to a local hardware store to match the exact brand (such as Moen, Delta, Kohler, or Pfister) and model.
- Wipe mineral buildup from inside the faucet body with vinegar, insert the new cartridge following the manufacturer’s alignment tabs, reassemble, and turn the water back on slowly.
- Safety Precautions: Make sure the angle stop valves close completely before removing the cartridge; otherwise, pressurized water will spray out of the faucet body.
- Mistakes to Avoid: Do not force a stuck cartridge out with brute force use a dedicated cartridge puller tool if mineral deposits have seized it in place.
- When to Call a Pro: If your under-sink shutoff valves are frozen or leak when turned, have a plumber replace the valves before servicing the faucet.
5. How to Fix a Loose Kitchen Sink Drain Connection
- Tools & Materials: Plumber’s putty (for stainless steel sinks) or 100% neutral-cure silicone sealant (for porous stone/composite sinks), channel-lock pliers, putty knife, rags.
- Step-by-Step Instructions:
- Disconnect the P-trap and tailpiece directly beneath the sink strainer basket.
- Unscrew the large locknut under the sink basin (use needle-nose pliers in the strainer slots from above to keep the basket from spinning).
- Lift the strainer out of the sink and scrape away every trace of old, hardened putty from both the sink flange and the basin opening.
- Roll a half-inch-thick rope of fresh plumber’s putty between your palms and press it evenly around the underside rim of the strainer flange. (Check your sink manufacturer’s guide first—natural stone and some composite sinks require silicone rather than oil-based putty to prevent staining).
- Press the strainer firmly into the drain hole, slide the rubber gasket and cardboard friction washer onto the threads underneath, and tighten the locknut until excess putty squeezes out evenly around the top rim.
- Wipe away excess putty, reconnect the tailpiece and P-trap, and test for leaks.
- Safety Precautions: Watch out for sharp stamped-metal edges on the underside of stainless steel sink basins.
- Mistakes to Avoid: Never omit the cardboard friction washer between the rubber gasket and the metal locknut; without it, tightening the nut twists and bunches the rubber gasket, causing immediate leaks.
- When to Call a Pro: If the sink basin itself is bent or corroded around the drain opening, a professional should assess whether it can be sealed safely.
6. How to Troubleshoot a Garbage Disposal
- Tools & Materials: 1/4-inch hex (Allen) wrench, flashlight, long-handled tongs or needle-nose pliers.
- Step-by-Step Instructions:
- Turn the wall switch off and unplug the garbage disposal cord underneath the sink (or flip off the breaker at your electrical panel).
- Shine a flashlight into the disposal chamber and use tongs or pliers never your fingers to remove visible obstructions like bottle caps, bones, or silverware.
- Insert a 1/4-inch Allen wrench into the center hex socket on the very bottom of the disposal motor housing.
- Work the wrench back and forth manually until the flywheel breaks free and spins smoothly in both directions.
- Plug the unit back in, press the small red overload reset button on the bottom of the unit until it clicks, turn on cold water, and test the switch.
- Safety Precautions: Never place your hand inside a garbage disposal opening, even when the wall switch is turned off.
- Mistakes to Avoid: Do not repeatedly flip the wall switch on while the motor is humming; doing so overheats the motor windings and can permanently burn out the unit.
- When to Call a Pro: If the disposal trips your home’s circuit breaker immediately upon turning on, or if water leaks from the bottom casing (indicating a failed internal seal), replace the unit or call a professional.
READ MORE: Pipe Leaking Under Sink: Causes, Fixes & Plumber Costs
Tools and Materials Needed for Kitchen Sink Repair
Keeping a basic plumbing kit in your garage or utility closet lets you respond quickly before a small drip turns into cabinet damage. Here is what you need and where each item belongs:
- Adjustable Wrench: Essential for loosening and tightening brass hex nuts on faucet supply lines and faucet mounting hardware without rounding off corners.
- Channel-Lock Pliers (Tongue-and-Groove Pliers): Ideal for gripping wide plastic slip nuts on P-traps, tailpieces, and strainer locknuts.
- Plumber’s Putty: A soft, non-hardening sealing compound used exclusively beneath metal sink strainer flanges and faucet baseplates on non-porous sinks (such as stainless steel or porcelain). Never use plumber’s putty on threaded pipe joints or natural stone countertops where oil stains can occur.
- Plumber’s Tape (PTFE Thread Seal Tape): Wrapped clockwise 3 to 4 times around tapered metal pipe threads (such as shower arms or threaded galvanized/brass fittings) to lubricate and seal threads. Do not apply PTFE tape to plastic P-trap slip joints or compression fittings with rubber washers; those rely on mechanical compression, and tape can actually prevent them from seating properly.
- Drain Snake (Hand Auger): A 15- to 25-foot flexible coiled cable used to hook hair, grease plugs, and food blockages deep inside branch drain lines.
- Bucket and Old Towels: Non-negotiable for catching standing water when disconnecting P-traps or flushing supply lines.
- Screwdrivers (Phillips, Flathead, and Precision Allen Wrenches): Needed for removing faucet handle set screws, hose clamps on dishwasher drain lines, and unjamming disposals.
- Replacement Washers and Cartridges: Assorted 1-1/2-inch beveled slip-joint washers, flat hose washers, O-rings, and brand-specific faucet cartridges.
- Appropriate Drain and Plumbing Fittings: Spare 1-1/2-inch PVC/ABS slip nuts, extension tailpieces, and braided stainless steel supply lines (commonly 3/8-inch compression by 1/2-inch FIP).
Kitchen Sink Repair Cost in the USA
Understanding typical kitchen sink repair cost ranges helps you budget realistically and spot unfair quotes. Across the United States, licensed plumbers typically charge between $75 and $150 per hour, though major metropolitan areas like New York City, San Francisco, Boston, and Seattle often see hourly rates closer to $150 to $200+. Many plumbing companies also charge a minimum service call or diagnostic fee of $75 to $150, which is frequently credited toward the repair if you approve the work.
The table below outlines approximate national cost ranges for common kitchen sink services, combining standard parts and professional labor:
| Repair or Service Type | Approximate DIY Cost (Parts Only) | Approximate Professional Cost (Parts + Labor) | Typical Time Required |
| Drain Unclogging | $10 – $35 | $125 – $300 | 30 – 90 minutes |
| Faucet Repair (Cartridge/Seals) | $15 – $50 | $150 – $325 | 45 – 90 minutes |
| Faucet Replacement | $100 – $350 | $250 – $650+ | 1 – 2 hours |
| Leaking Pipe Repair (Under-Sink) | $5 – $25 | $150 – $350 | 45 – 90 minutes |
| P-Trap Replacement | $10 – $25 | $150 – $300 | 30 – 60 minutes |
| Sink Drain / Strainer Repair | $15 – $40 | $150 – $325 | 1 – 1.5 hours |
| Garbage Disposal Repair | $0 – $30 | $125 – $275 | 30 – 60 minutes |
| Garbage Disposal Replacement | $120 – $350 | $300 – $650+ | 1 – 2 hours |
| Kitchen Sink Replacement | $200 – $800+ | $500 – $1,500+ | 2 – 5 hours |
Note: Figures above are approximate U.S. estimates and will vary depending on your zip code, fixture brand, cabinet accessibility, and whether hidden water damage or code upgrades are required.
READ MORE: Best Under Sink Hot Water Heater
Key Factors That Influence Your Final Price
- Parts and Fixture Quality: Replacing a standard builder-grade faucet costs far less than installing a touchless commercial-style pull-down faucet or a heavy cast-iron farmhouse basin.
- Emergency Plumbing Fees: Calling for emergency kitchen plumbing repair on nights, weekends, or holidays typically adds a 1.5x to 2x surcharge or an extra $100 to $250 dispatch fee. If you can turn off the under-sink valve and wait until regular weekday business hours, you will save substantially.
- Accessibility and Hidden Corrosion: If corroded shutoff valves break when turned, or if old galvanized drain pipes crumble inside the wall, the scope shifts from a quick fixture swap to pipe replacement.
DIY Kitchen Sink Repair vs. Hiring a Professional Plumber
Deciding whether to grab your toolbox or search for kitchen sink repair near me comes down to risk, complexity, and your comfort level with household plumbing.
| Comparison Factor | DIY Kitchen Sink Repair | Hiring a Licensed Plumber |
| Repair Complexity | Best for visible, accessible tasks: unclogging drains, swapping P-traps, tightening slip nuts, cleaning aerators, and replacing standard faucet cartridges. | Necessary for behind-the-wall leaks, soldering copper, rerouting drain lines, electrical hardwiring, and main sewer clogs. |
| Equipment Requirements | Basic hand tools (pliers, adjustable wrench, bucket, manual drain snake). | Motorized drum augers, hydro-jetters, pipe threaders, soldering torches, and diagnostic cameras. |
| Potential Costs | Very low ($5 to $50 for common parts), saving $100+ in labor per visit. | Higher upfront cost ($150 to $650+ for most repairs), including labor and overhead. |
| Safety Considerations | Minimal risk when water shutoffs work properly and electrical power is disconnected before disposal work. | High safety standards for pressurized water lines, electrical circuits, and toxic sewer gases. |
| Risk of Water Damage | Moderate improperly seated washers or over-tightened plastic nuts can cause slow drips that warp cabinets overnight. | Low professionals pressure-test joints and spot secondary weak points before leaving. |
| Long-Term Reliability | Reliable for straightforward part swaps if manufacturer instructions are followed carefully. | High backed by workmanship warranties and strict compliance with local plumbing codes. |
When Should You Call a Professional Plumber?
Even seasoned DIYers know when a plumbing issue crosses the line into professional territory. Contact professional kitchen sink repair services right away if you notice any of these red flags:
- Persistent or Recurring Drain Clogs: If your sink slows back down a week after snaking it, heavy grease buildup or tree roots may be obstructing your main branch line.
- Leaks Inside Cabinets or Behind Walls: Water stains on drywall, bubbling paint, or dampness coming from behind the back cabinet panel indicate a hidden pipe failure.
- Damaged or Corroded Plumbing Pipes: Flaking galvanized steel pipes, green pinhole corrosion on copper lines, or brittle, cracked cast-iron drains require specialized cutting and joining tools.
- Sewer-Like Odors or Wastewater Backup: Foul sewer gas smells that persist despite a full P-trap or dirty wastewater rising up into your sink when you flush a toilet or run the washing machine point to a serious venting or main sewer line problem.
- Multiple Drains Clogging Simultaneously: When your kitchen sink, dishwasher, and downstairs bathroom drain all back up together, the blockage sits deep in your home’s main drain stack.
- Significant Water Pressure Problems: Sudden pressure drops across multiple fixtures can signal a failing pressure-reducing valve (PRV) or a hidden supply line leak.
- Garbage Disposal Electrical Issues: If a disposal lacks an under-sink outlet and is hardwired directly into your home’s electrical circuit, or if it repeatedly trips your breaker, leave the wiring to a licensed plumber or electrician.
- Water Damage, Mold Concerns, or Suspected Hidden Leaks: Soft, spongy cabinet floors, black mold growth, or unexplained spikes in your water bill warrant a thorough professional leak inspection.
READ MORE: How to Plumb a Double Sink: Step by Step
How to Prevent Future Kitchen Sink Problems
A few simple daily habits prevent roughly 80% of common kitchen sink emergencies:
- Never Pour Cooking Grease, Fats, or Oils Down the Drain: Bacon grease, butter, and cooking oil look like liquids when hot, but they solidify into concrete-like blockages inside cool drainpipes. Pour grease into a disposable container or jar and toss it in the trash.
- Use a Mesh Sink Drain Strainer: A $5 stainless steel mesh strainer catches rice, coffee grounds, eggshells, and food scraps before they enter your P-trap.
- Run Cold Water When Operating Your Garbage Disposal: Always run a strong stream of cold water for 10 seconds before, during, and 15 seconds after running the disposal. Cold water keeps grease solid so the blades chop it up and flush it out rather than smearing it along pipe walls.
- Keep Unsuitable Foods Out of the Disposal: Never grind fibrous vegetables (celery, corn husks, onion skins), expandable starches (pasta, rice, potato peels), bones, fruit pits, or coffee grounds.
- Clean Your Sink and Drain Weekly: Flush the drain once a week with a kettle of hot tap water (avoid boiling water if you have older PVC joints that might soften) and scrub the rubber disposal baffle with dish soap and a brush to stop odors.
- Skip Harsh Chemical Drain Cleaners: Store-bought caustic drain openers generate intense heat that can warp PVC pipes, corrode metal traps, and harm septic systems and they rarely clear solid grease clogs completely.
- Check Under-Sink Connections Monthly: When grabbing dish soap or trash bags, shine your phone flashlight along the P-trap and shutoff valves to catch slow drips early.
- Schedule Periodic Plumbing Inspections: If your home is more than 30 years old, having a plumber inspect shutoff valves, supply lines, and main drains every couple of years prevents unexpected failures.
Frequently Asked Questions
How much does it cost to repair a kitchen sink in the USA?
In the United States, professional kitchen sink repair typically costs between $125 and $350 for common fixes like drain unclogging, P-trap replacement, or faucet cartridge repair. More involved projects, such as replacing a garbage disposal or installing a new kitchen faucet, generally range from $250 to $650+, while full sink replacement runs $500 to $1,500+. DIY parts usually cost $5 to $50.
How do I fix a leaking kitchen sink underneath?
First, dry all pipes and fittings under the sink with paper towels, then run the water while watching with a flashlight to pinpoint the drip. If a plastic drain slip nut is leaking, hand-tighten it or replace the beveled washer inside. If water drips from the sink strainer basket, remove it, clean off the old sealant, and reinstall it using fresh plumber’s putty or silicone.
Can I unclog a kitchen sink without calling a plumber?
Yes, most minor kitchen sink clogs can be cleared without a plumber. Start by bailing out excess standing water and using a flat-bottomed sink plunger (blocking the second drain with a wet rag on double sinks). If plunging does not work, place a bucket underneath, remove and clean out the P-trap, or use a manual 25-foot drain snake to break up deeper grease and food blockages.
Why is my kitchen sink leaking from the drain pipe?
A kitchen sink drain pipe usually leaks due to a loose slip-joint nut, a worn or flattened rubber bevel washer, misaligned pipes putting tension on a joint, or a deteriorated plumber’s putty seal under the sink strainer basket. In older homes, corroded brass or galvanized metal tailpieces can also develop tiny rust pinholes that drip whenever water drains.
When should I replace my kitchen sink instead of repairing it?
You should replace your kitchen sink if the basin has structural cracks, deep chips exposing rusting cast iron, or corrosion holes around the drain opening that prevent a watertight seal. Replacement also makes sense if your sink is over 15 to 20 years old and experiencing recurring rim leaks, or if you are already upgrading countertops and cabinetry.
Conclusion
A healthy kitchen sink keeps your household running smoothly, and most everyday headaches from sluggish drains and dripping faucets to loose P-traps are straightforward to diagnose once you know what each part does. Catching moisture early, avoiding grease down the drain, and tackling safe, accessible DIY repairs with the right washers and hand tools can save you hundreds of dollars over the life of your home.


Pingback: Fix Leaky Bathroom Faucet - Plumbing Guider