By: Istiak Editorial (HVAC & home-systems writer). Reviewed by a licensed HVAC contractor and checked against DOE, ENERGY STAR, ACCA and AHRI guidance.
Ducted air conditioning, often called central AC, is a popular choice for cooling entire homes efficiently. If you’re a U.S. homeowner in a single-family house, townhouse, or small multi-family building, and you’re between 30 and 65 years old, you might be exploring ways to beat the heat without relying on noisy window units or patchy room-by-room solutions. This guide is for you whether you’re dealing with an old system that’s on its last legs or building a new home and want whole-house comfort.
We’ll break down everything simply: how ducted AC works, the different types available, its upsides and downsides, and how it stacks up against alternatives like ductless mini-splits or window units. You’ll get real numbers on costs, including what drives prices up in different regions, plus tips on energy savings to keep your bills in check.
We’ll cover the installation process step by step, maintenance basics to avoid breakdowns, and how to know if ducted is the right fit for your space. Expect practical examples, like a homeowner story from Texas, and a handy checklist for picking a reliable installer.
What is ducted air conditioning & how it works
A ducted (central) air-conditioning system cools air in one central location and distributes it through a network of ducts to supply registers around the house. The system typically has four main components:
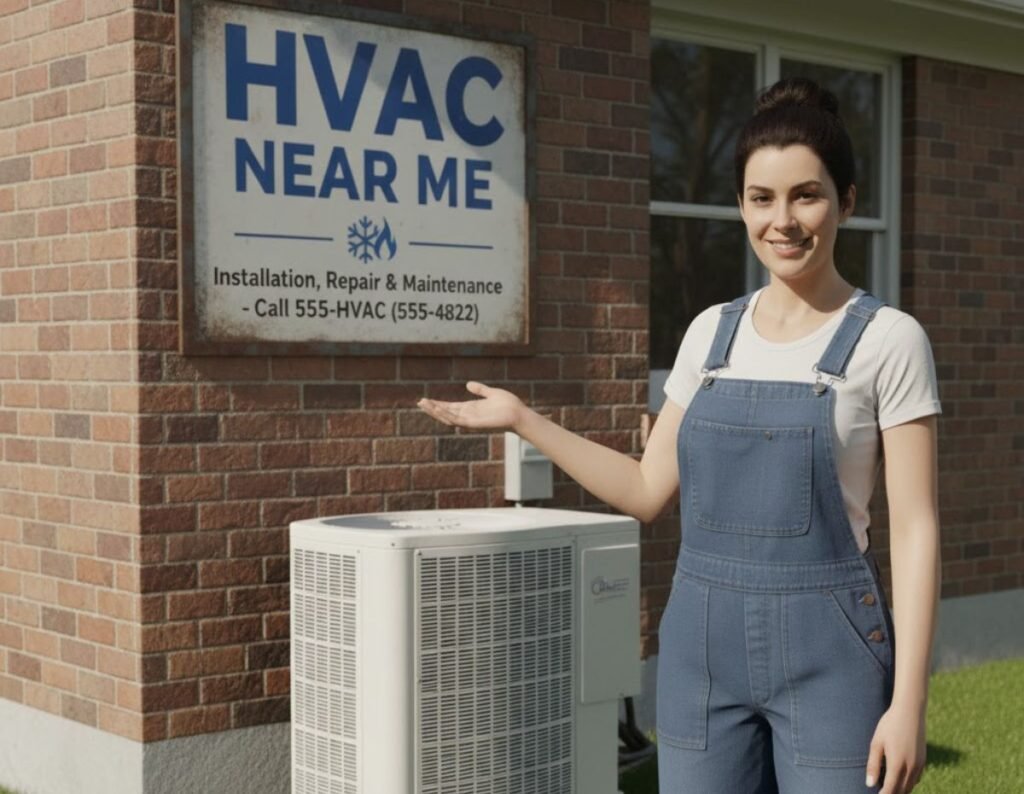
- Outdoor condenser (compressor): the big metal box on the slab or pad outside your house that rejects heat to the outdoors.
- Indoor air handler (evaporator + blower): often located in a closet, attic or basement; it cools the refrigerant and moves conditioned air into ducts.
- Ductwork: supply ducts (push cool air out) and return ducts (pull warm room air back to the air handler).
- Registers / grilles / thermostat / controls: where cooled air enters rooms and where you control the system.
In operation, refrigerant in the outdoor condensing unit absorbs heat from indoor air (via the indoor coil). The blower pushes cooled air into the supply ducts; warm return air is cycled back. Regular cycles maintain the setpoint temperature throughout the house. This centralized approach contrasts with room-by-room cooling (window units, portable ACs) or wall-mounted indoor units paired with outdoor compressors (ductless mini-splits).
Because central systems use ducts, they are usually quieter in living spaces (the blower and compressor are out of sight) and provide consistent temperature control for the whole home. That said, well-designed ducts and proper airflow are essential poorly sized ducts or leaky ductwork erode comfort and efficiency. The U.S. Department of Energy explains the basic airflow loop and the role of supply and return ducts in a central system.
Types of ducted systems

Not all ducted systems are the same. Common varieties include:
- Central split systems: The most common setup — outdoor condensing unit + indoor air handler/furnace coil. Works with either gas furnace (for heat) or heat pump (for heat & cool).
- Packaged units: All components in a single outdoor unit (often used where indoor space is limited). Packaged units sit on the roof or pad.
- Variable-speed systems: These have variable-speed compressors and blowers that modulate output for better comfort and lower energy use (run longer at lower capacity).
- Multi-split (but ducted) systems: Multi-compressor systems sized to serve multiple air handlers less common for full ducted whole-house applications, more common in hybrid setups.
- Heat pumps (ducted): A ducted heat pump provides cooling and efficient electric heating; increasingly popular as gas furnaces are phased out in some regions.
Energy performance reporting and test procedures have shifted to SEER2 ratings (an updated testing procedure reflecting installed conditions). When shopping, note whether ratings are SEER or SEER2 and whether a system qualifies for ENERGY STAR or federal tax incentives (see efficiency & incentives section).
READ MORE: Air Conditioning Companies — Compare, Costs & How to Choose
Pros & cons of ducted AC
Pros
- Whole-house comfort — centralized airflow provides consistent temperatures across rooms.
- Aesthetics — vents and grilles are less obtrusive than wall-mounted indoor units; most mechanical equipment is hidden.
- Quiet living spaces — main noise sources (outdoor unit and blower) are out of sight; bedrooms are typically quieter.
- Zoning possible — with dampers and multiple thermostats you can zone the house for different temperatures.
- Resale value — many buyers expect central HVAC in single-family homes.
Cons
- Higher upfront cost — full ducted installations (especially with new ductwork) cost more than single-room solutions. Typical installed central systems vary widely (see cost section).
- Duct issues — leaky, poorly insulated, or badly designed ducts reduce efficiency and comfort.
- Installation complexity — a full install requires load calculations, duct design, permits, and skilled labor.
- Retrofit limits — in tight or historic homes, adding ducts can be invasive and pricey; sometimes mini-splits are a better retrofit choice.
- Maintenance — ducts and filters require attention; dirty ducts or clogged filters reduce airflow.
Bottom line: ducted systems are often the best option for new builds or homes with existing ductwork where whole-house comfort and low-profile aesthetics matter. For some retrofits or small spaces, ductless mini-splits may be more cost-effective.
Comparison table — ducted AC vs common alternatives
Quick comparison of the main home cooling options — local prices vary.
| Feature | Ducted AC (central) | Ductless Mini-Split | Packaged Unit | Window/Portable AC | Best For |
| Average installed cost (small/med/large home) | $6,000-$20,000 (depends on ductwork). | $3,000-$12,000 (per zone; multi-zone adds cost). | $8,000-$18,000 (roof or pad install). | $150-$600 (unit cost) + no install. | Whole-house cooling, traditional homes |
| Typical SEER range | 14–24 SEER (now SEER2 metrics in listings). | 16–30+ SEER (highly efficient). | 13–18 SEER. | N/A (room EER ratings). | Whole home; quieter |
| Whole-house vs room | Whole-house | Typically zone/room | Whole-house (packaged) | Room only | Varies |
| Installation complexity | High (Manual J + Manual D recommended). | Medium (wall mounting + line sets) | High | Low | New builds / full replacements |
| Required ductwork | Yes | No | Yes (often existing) | No | Homes with existing ducts |
| Noise level | Low in occupied rooms | Low–medium (indoor unit noise) | Moderate | High | Quiet bedrooms |
| Zoning capability | Yes (with dampers) | Yes (per indoor unit) | Limited | No | Flexible control |
| Aesthetics / visibility | Low visibility | Indoor units visible on walls | Moderate | Visible | Minimal visual impact |
| Typical lifespan (years) | 15–20+ | 10–20+ | 12–18 | 3–10 | Longevity |
| Maintenance needs | Filters, ducts, coils | Filters, condensate lines | Filters, coils | Filter cleaning | Regular upkeep |
| Energy efficiency (relative) | Very good (with high SEER2) | Often best per-zone efficiency | Moderate | Poor | Efficiency per home |
| Common retrofit challenges | Duct routing, ceilings, chases | Exterior mounts, multiple indoor heads | Roof access | Window fit | Depends on layout |
(Short commentary: the table shows where ducted systems shine whole-house aesthetics and quiet operation and where mini-splits win easier retrofit and zone-by-zone efficiency.)
READ MORE: Portable AC Unit
Cost breakdown & what affects price
Typical price ranges (ballpark, 2025–2026):
- Small home / condo (existing ducts, simple swap): $4,000–$8,000.
- Medium home (partial ductwork, higher SEER unit): $7,000–$14,000.
- Large home or full duct replacement (new ducts + higher efficiency equipment): $12,000–$30,000+.
These are ranges — your number depends on many factors:
1. Equipment level (unit capacity & efficiency): Higher SEER2 / variable-speed units cost more upfront but save on electric bills. Manufacturer brand and AHRI certification also affect price
2. Ductwork condition: If you already have compatible, well-sealed ducts, cost drops substantially. Adding or replacing ducts is often the single largest variable — expect $2,000–$12,000 depending on home complexity.
3. Labor & regional rates: Labor rates vary widely by metro area. HVAC installation is skilled work; high-cost areas (e.g., major metro regions) will push totals higher. HomeAdvisor and other trade cost aggregators show national averages but check local bids.
4. Permits & inspections: Local permits and code compliance (seismic straps, refrigerant handling certifications, condensate drain rules) add time and fees. Your contractor should include permit costs in the estimate.
5. Add-ons and upgrades: Smart thermostats, zoning dampers, upgraded indoor air quality components (HEPA/UV), condensation pump installs, or electrical panel upgrades increase cost.
6. Removal & disposal: If an old unit or ducts must be removed, there’s disposal and possible refrigerant recovery fees.
7. Seasonal timing: Installations in spring or fall (shoulder seasons) may be cheaper and faster than peak summer time.
How to read estimates:
A good written estimate breaks out equipment, labor, ductwork, permits, and warranties. Beware “too cheap” bids that skip Manual J sizing or propose grossly undersized ductwork; that’s often a recipe for poor comfort and callbacks.
Tip: Ask for equipment model numbers, SEER2 ratings, AHRI certification, warranty details (compressor vs parts vs labor), and an itemized scope. If you want financing, many dealers partner with lenders compare APRs and terms.
Energy efficiency & running costs
How efficiency is measured:
The Seasonal Energy Efficiency Ratio (SEER) and now SEER2 measures cooling output per unit of electricity used over a cooling season. Higher numbers mean less energy use for the same cooling. Modern central systems commonly range from about 14 SEER2 to 24+ SEER2 depending on the model and region.
Typical running costs: Running costs depend on:
- Unit SEER2 rating,
- Local electricity rates,
- House size and insulation,
- Thermostat settings and occupant behavior.
A very rough illustration: upgrading from a 10 SEER (old) system to an 18 SEER2 unit can cut cooling electrical use by roughly 30–40% in many climates actual savings depend on hours of use and climate severity. Use seasonal calculators to estimate savings for your zip code.
Zoning & variable speed:
Zoning and variable-speed compressors significantly improve comfort and lower energy use because the system modulates output, avoids short cycling, and permits conditioning only occupied areas.
SEER2 & standards update:
New testing standards (SEER2/EER2/HSPF2) reflect more realistic installed conditions and should be the basis for comparing modern equipment. Make sure quoted ratings on estimates reflect the current metric the manufacturer uses.
READ MORE: LG Air Conditioner Review — Performance, Efficiency & Buyer’s Guide
Ways to lower running costs
- Keep thermostat modest (e.g., 74–78°F in summer when home), use programmable or smart thermostats.
- Improve attic and wall insulation and seal air leaks to reduce load.
- Ensure ducts are sealed and insulated, especially in unconditioned spaces.
- Use ceiling fans to allow higher thermostat setpoints while maintaining comfort.
- Regular maintenance: clean coils, replace filters, keep outdoor unit clear.
ENERGY STAR and DOE both recommend pairing efficient equipment with proper system design and duct sealing for best results.
Installation process & timeline
Typical steps:
- Initial contact & pre-screen: You call or request an estimate. The contractor asks about home age, existing ducts, and whether you want cooling only or cooling+heating (heat pump vs furnace).
- In-home survey / site visit: The pro performs a visual inspection and gathers data (square footage, ceiling heights, insulation levels, attic access, existing ducts). They should plan to run a Manual J load calculation and Manual D duct design.
- Manual J load calculation: Determines exact cooling load (size in tons) so the system isn’t oversized or undersized a critical step for comfort and efficiency.
- Duct design (Manual D) & mechanical plan: If new ducts or modifications are needed, the contractor designs duct routes, sizes, and registers.
- Permits: Contractor pulls permits and schedules inspections as required by local code.
- Installation day(s): Outdoor condenser placement, indoor air handler install, ductwork installation or modification, refrigerant line runs, electrical hookup, thermostat wiring.
- Start-up & commissioning: System is charged, airflow balanced, and contractor demonstrates controls and warranties.
- Final inspection & paperwork: Local inspector may sign off; contractor provides manuals and warranty paperwork.
Timeline: For a straight swap (same location, existing ducts): 1–3 days. For installs requiring moderate ductwork or electrical work: 3–7 days. For full duct builds, complex retrofits, or permitting delays: 1–3+ weeks from start to final sign-off. (Local permitting and parts availability can extend timelines.)
Common delays: Permit wait times, need for electrical panel upgrades, custom ductwork, or lead times on high-efficiency equipment in peak season.
Red flag: A contractor who sizes system only by tonnage (e.g., “you need a 3-ton because your house is X”) without a Manual J is skipping an important engineering step.
Maintenance & troubleshooting
Routine maintenance items
- Filter changes: Every 1–3 months depending on filter type and household (pets/dust). Clogged filters reduce airflow and can cause freeze-ups.
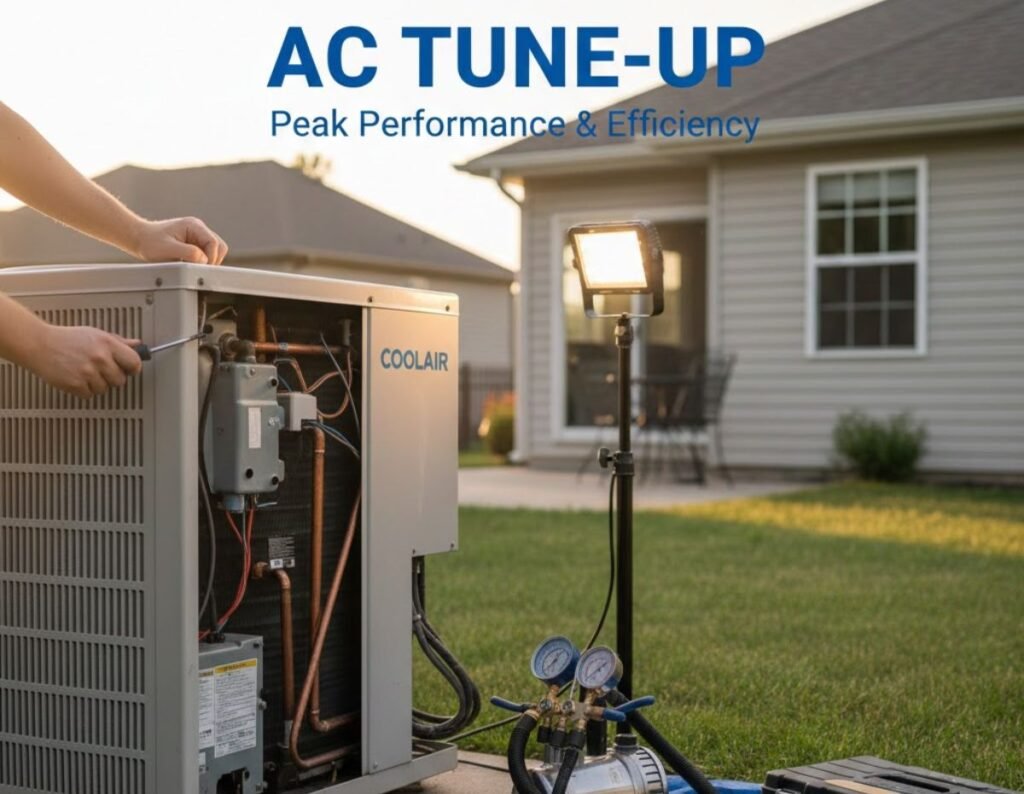
- Annual tune-up: Professional inspection of refrigerant charge, coil cleaning, blower motor check, electrical connections, and condensate drains.
- Duct inspection: Every few years (or sooner if you notice rooms that don’t cool). Seal and insulate ducts in unconditioned spaces.
- Keep outdoor unit clear: Remove plants, leaves, and debris; maintain 2–3 feet of clearance.
Common problems & quick checks
- Insufficient cooling: Check filter, thermostat settings, and outdoor unit operation. If the outdoor fan doesn’t run or the evaporator coil is frozen, call a pro.
- Hot/cold rooms: Likely duct balancing or register issues a zoning solution or register adjustments may help.
- Noisy operation: Rattles or buzzing can be loose panels; grinding or squealing motors need immediate professional attention.
- Short cycling: System turns on and off frequently often due to wrong size, refrigerant issues, or thermostat placement.
When to call a pro: strange smells, electrical burning, refrigerant leaks, compressor failures, or unsafe gas heating issues. For regular tune-ups, use licensed HVAC contractors with positive references and proper insurance.
READ MORE: Window Air Conditioner
Sizing & when ducted is the right choice
Sizing basics: Proper sizing is not about square footage alone Manual J takes into account insulation, windows and their orientation, occupant count, ceiling heights, and local climate. Oversized systems short-cycle and underperform; undersized systems run constantly and can never reach setpoint. Always insist on a Manual J calculation before purchase.
When ducted is the right choice
- You want whole-home conditioning and invisible equipment (vents vs wall-mounted units).
- Your home already has reasonably good ductwork.
- You prioritize quiet bedrooms and consistent temperatures.
- You’re planning a new build or major remodel and can incorporate ducts during construction.
When to consider alternatives
- You live in a small apartment or a historic house with no easy routing for ducts mini-splits might be better.
- You need a low-cost, short-term solution for one room window or portable ACs.
- You want rapid installation with minimal invasiveness mini-splits are often less invasive than full duct installs.
For multi-story homes, central ducted systems often provide the most consistent whole-house performance, but attention to return paths and zoning is crucial.
Financing, rebates & incentives
Financing options commonly include dealer financing, home-equity loans, personal loans, or energy-efficient product financing plans. Dealers often partner with lenders; compare APRs, fees, and total cost.
Rebates & tax incentives (U.S.):
- Federal energy tax credits and incentives have changed in recent years; some programs provide credits for qualifying high-efficiency heat pumps and central ACs if installed and meeting efficiency thresholds (SEER2/EER2). Check current eligibility and deadlines for credits like the Energy-Efficient Home Improvement Credit (25C) or other federal/state incentives.
- Many utilities and state programs offer rebates for high-efficiency equipment or duct sealing contact your local utility’s energy efficiency program.
- Requirements (product SEER2 thresholds, AHRI certification, contractor certification, installation dates) change, so request any rebate documentation up front from your installer.
Tip: If a tax credit or rebate requires specific ratings or AHRI certification, be sure the equipment model and contractor paperwork show compliance before you pay in full.
READ MORE: Mini Split Air Conditioners
How to choose an installer: checklist & red flags
Installer checklist
- License & insurance: Verify state license (if applicable) and current liability insurance.
- Manual J & Manual D: Confirm the contractor performs Manual J load calculations and Manual D duct design for the quoted system.
- Itemized written estimate: Equipment, labor, ductwork, permits, and warranty should be line-itemed.
- Equipment specifics: Model numbers, SEER2/EER2 ratings, AHRI certificate if required.
- References & reviews: Ask for recent local references or photos of similar jobs.
- Warranties: Clarify equipment manufacturer warranty and any labor or workmanship warranty.
- Permits & inspections: Contractor should pull permits and arrange sign-offs.
- Post-install support: Ask about maintenance plans, service response time, and what’s included in startup commissioning.
Red flags
- No load calculation: If a contractor sizes the system by rule-of-thumb without Manual J, walk away.
- Vague equipment specs: If they won’t show model numbers and efficiency ratings, don’t proceed.
- Huge lowball price: Too cheap often means skipped steps or inferior materials.
- Pressure to decide immediately: Reputable contractors provide time to review the estimate.
- No written warranty: Always get service and workmanship warranties in writing.
Questions to ask during quote
- “Can you show the Manual J and duct design?”
- “What is the system’s SEER2 and EER2 rating?”
- “Who will pull permits and do the final inspection?”
Conclusion
Ducted (central) air conditioning remains the go-to solution for quiet, whole-house comfort and clean aesthetics when a home either already has ducts or can accommodate them. The trade-offs are clear: higher upfront installation cost and more complex installation versus whole-home comfort, quieter rooms, and zoning capability. When in doubt, insist on Manual J and Manual D, compare three local bids, and make sure equipment ratings (SEER2/EER2) and rebate eligibility are documented in writing.
Ready to move forward? Request a site visit from a licensed HVAC contractor, ask for a Manual J and Manual D as part of the estimate, and download a pre-inspection checklist (see CTA below) to make sure your bids are apples-to-apples.
FAQs
1. Is ducted air conditioning better than ductless?
Ducted systems are usually better for whole-house cooling, consistency, and quieter rooms especially when a home already has ducts. Ductless mini-splits are often more efficient per zone and less invasive for retrofits. Choose ducted for full-house comfort and aesthetics; choose ductless for targeted zones or where ducts are impractical.
2. How much does it cost to install ducted central air?
Costs vary widely: $4,000–$8,000 for simple replacements with existing ducts, $7,000–$14,000 for typical mid-sized homes, and $12,000–$30,000+ when full ductwork is required or high-end equipment is chosen. Local labor, duct condition, and efficiency levels drive price. Get three itemized bids.
3. What SEER rating should I choose?
Aim for the highest SEER2 you can reasonably afford that meets rebate and tax-credit thresholds. Modern central systems commonly run from mid-teens to mid-twenties SEER2; variable-speed units perform best in real homes. Higher SEER2 means more upfront cost but lower running expenses.
4. How long does installation take?
A straight equipment swap with existing ducts: 1–3 days. Moderate duct modifications: 3–7 days. Major retrofits (new ducts, permits) can take 1–3+ weeks from start to final inspection. Permit wait times and parts lead times can extend the schedule.
5. Do central systems qualify for tax credits or rebates?
Some high-efficiency systems (meeting SEER2/EER2 thresholds and program rules) qualify for federal or utility incentives. Program details change, so confirm model eligibility and required paperwork with your contractor and utility before purchase.
Authoritative sources referenced: U.S. Department of Energy (Energy Saver), ENERGY STAR, ACCA (Manual J & Manual D), AHRI, HomeAdvisor / industry cost guides, IRS/ENERGY STAR guidance on tax credits.