Every homeowner eventually faces the dilemma of an aging, stubborn, or malfunctioning plumbing fixture. Whether you are dealing with a persistent dripping sound that keeps you awake at night, ugly mineral buildup that won’t scrub away, or simply want to modernize an outdated kitchen or bathroom, learning how to replace a faucet is one of the most rewarding DIY projects you can tackle.
A failing faucet is more than just an aesthetic annoyance. A constant drip can waste hundreds of gallons of water over a few months, driving up your utility bills. Furthermore, corrosion inside old fixtures can restrict water flow, degrade water quality, or lead to hidden leaks underneath your cabinets that cause silent structural water damage.
The good news is that faucet replacement does not always require calling an expensive professional plumber. With basic hand tools, a bit of patience, and a clear step-by-step approach, most homeowners can safely complete a kitchen faucet installation or bathroom faucet installation in just a few hours. In this guide, we will walk you through everything you need to know from selecting the right hardware and gathering the tools needed to replace a faucet to executing a clean, leak-free installation. Lets deep dive into “How to Replace a Faucet: Step-by-Step DIY Guide | Expert Tips”
When Should You Replace a Faucet Instead of Repairing It?
Before diving into a project, many homeowners wonder whether they should fix their current fixture or invest in a full faucet replacement. While swapping out a worn O-ring, washer, or cartridge can often cure a minor leak, there comes a point where repairing an old fixture is throwing good money after bad.
Here are the key indicators that it is time to replace a sink faucet entirely:
- Constant dripping despite repairs: If you have already replaced the cartridge, washers, or springs and the faucet continues to leak, the internal valve seat or housing is likely worn down beyond repair.
- Visible corrosion and rust: Pitting, bubbling chrome, and greenish mineral crust (oxidation) around the base or handles indicate that the metal is degrading from the inside out.
- Cracked faucet bodies: Even hairline cracks in porcelain, cast brass, or composite bodies will eventually widen under water pressure, leading to sudden leaks.
- Repeated leaks around the faucet base: If water continually pools on your countertop every time you turn the handle, the internal seals have failed permanently.
- Difficult-to-find replacement parts: Older or proprietary faucet brands often discontinue replacement cartridges, making a modern install a new faucet upgrade much more cost-effective.
- Frequent repairs and maintenance: If you find yourself fixing the same fixture every six months, upgrading saves time, frustration, and water waste.
READ MORE: Outdoor Faucet Frozen? How to Thaw, Fix & Prevent Pipes
Repair vs. Replace Comparison Table
| Issue | Repair Option | Replace Option |
| Single minor drip | Replace cartridge, washer, or O-ring | Not necessary unless vintage fixture is damaged |
| Persistent dripping after part replacement | Re-clean valve seats or replace entire valve assembly | Recommended if fixture is over 10 years old |
| Surface wear & cosmetic fading | Clean with vinegar/lime remover or polish | Recommended for aesthetic upgrades |
| Severe corrosion or mineral scaling | Scrape and clean (temporary fix) | Recommended to prevent sudden structural failure |
| Cracked spout or base | None (Epoxy is unsafe and temporary) | Mandatory immediate replacement |
| Loose handle or wobbling | Tighten set screw or mounting nut | Replace if mounting threads are stripped |
Types of Faucets You Can Replace
Understanding the type of fixture you currently have and what you want to upgrade to ensure a smooth transition. Residential plumbing features several common faucet styles:
- Single-handle faucets: Control both water temperature and volume with one lever. They are popular in both kitchens and bathrooms due to their ease of use.
- Double-handle faucets: Feature separate handles for hot and cold water. These offer a traditional or classic aesthetic and are very common in older homes.
- Pull-down kitchen faucets: Feature a spray wand that pulls downward from the spout, offering an ergonomic reach and a high-arch design ideal for filling large pots.
- Pull-out kitchen faucets: Similar to pull-down models, but the spray head pulls outward toward you on a flexible hose, making them great for shallower sinks.
- Centerset bathroom faucets: Designed for sinks with three pre-drilled holes where the handles and spout are integrated into a single base plate (deck plate) spanning 4 inches.
- Widespread bathroom faucets: Feature independent hot and cold handles separated from the spout by 8 inches or more, mounted individually through separate holes.
- Wall-mounted faucets: Installed directly onto the wall above the sink or basin, requiring supply lines routed behind the drywall. These are common in modern bathroom designs and vessel sinks.
- Touchless and motion-sensor faucets: Operated via electronic sensors or a light touch on the body or spout, offering enhanced hygiene and water conservation.
READ MORE: How Much Does It Cost to Replace a Faucet?
Things to Check Before Buying a Replacement Faucet
Rushing out to buy a shiny new fixture without checking your sink configuration is the #1 cause of DIY installation failure. Before purchasing, verify the following specifications:
- Number of existing sink holes: Look underneath your sink or on the deck. Sinks can have anywhere from one to four holes. Your new faucet must match the number of holes, or you will need to purchase an escutcheon (deck plate) to cover unused holes.
- Faucet hole spacing: Measure the distance between the center of the hot and cold holes. Standard centerset sinks measure 4 inches, while widespread configurations typically measure 8 inches or more between handle centers.
- Sink and countertop compatibility: Consider whether your sink is a drop-in (top-mount) or undermount design, and whether your countertop is thick granite, quartz, laminate, or stainless steel, which dictates how faucet mounting hardware secures underneath.
- Faucet height and spout reach: Ensure a kitchen faucet isn’t too tall for upper cabinets or windowsills, and check that a bathroom faucet spout aligns directly over the sink drain to prevent splashing.
- Supply line connections and sizes: Check if your existing shutoff valves use 3/8-inch compression fittings or 1/2-inch IPS connections. Buying standard braided lines matching your new faucet saves multiple trips to the hardware store.
- Deck-mounted vs. wall-mounted designs: Never attempt to replace a deck-mounted faucet with a wall-mounted model unless you are prepared to open up the wall and reroute plumbing supply pipes.
- Manufacturer installation requirements: Read the product box or online manual to confirm required clearance behind the backsplash and under-sink space for weighted hoses (on pull-down models).
- WaterSense-labeled faucet options: For bathroom upgrades, look for EPA WaterSense-labeled models, which use at least 20% less water than standard faucets without sacrificing performance or pressure.
Tools and Materials Needed to Replace a Faucet
Having the right tools on hand before you slide underneath the sink will make your DIY faucet replacement go smoothly. Gather the following equipment:
- New replacement faucet: Complete with gaskets, mounting nuts, and hardware.
- Adjustable wrench (8-inch or 10-inch): Essential for tightening supply lines and nuts.
- Basin wrench: A specialized long-handled tool with a pivoting jaw designed specifically to reach awkward, deeply recessed mounting nuts behind the sink basin.
- Screwdrivers (Phillips and flathead): Needed for removing handles, cover plates, or old screw-type mounts.
- Pliers (Slip-joint or tongue-and-groove): Helpful for gripping stubborn fittings or holding backing nuts.
- Plumber’s putty: Used to create a watertight seal under the base plate (only when permitted by the manufacturer; modern silicone-based faucets often prohibit putty).
- Silicone sealant (Clear or matching): Used around the base perimeter if specified in the manufacturer instructions.
- New braided stainless-steel supply lines: Highly recommended to replace old, kinked, or corroded rigid copper supply tubes.
- Bucket: To catch residual water trapped inside old supply lines and traps.
- Towels or rags: To keep the workspace dry and clean up spills.
- Flashlight or work light: Crucial for illuminating the dark, cramped space underneath the sink cabinet.
- Safety glasses and gloves: Protects your eyes from falling rust flakes and debris and hands from sharp metal edges.
- Penetrating oil (e.g., WD-40 or PB Blaster): Applied to stubborn, rusted mounting bolts or fittings to loosen them before turning with a wrench.
READ MORE: What Causes Low Water Pressure in One Faucet
How Much Time Does It Take to Replace a Faucet?
Setting realistic expectations prevents frustration. For an experienced plumber, swapping a standard faucet can take 30 to 45 minutes. However, for a DIY homeowner working in a tight cabinet space, a typical faucet replacement takes 1 to 3 hours.
The installation time varies significantly depending on several real-world factors:
- Kitchen vs. bathroom: Kitchen faucets often involve weighted hoses, spray diverters, and tight spaces behind deep basins, making them slightly more time-consuming than standard bathroom faucets.
- Accessibility underneath the sink: If your cabinet contains pull-out trash cans, cleaning supplies, or deep plumbing traps, clearing out the workspace adds time.
- Condition of existing shutoff valves: If your old valves turn smoothly, shutting off water takes seconds. If they are corroded, stuck, or leak when turned, you will have to shut off the home’s main water supply, adding extra steps.
- Rusted or corroded mounting hardware: Corroded brass nuts rusted to steel sink bolts can resist standard wrenches, requiring penetrating oil or a hacksaw blade to cut through.
How to Replace a Faucet Step by Step
Follow these clear, numbered instructions carefully to ensure a secure, leak-free installation.
Step 1 – Turn Off the Water Supply
- Locate the hot and cold water shutoff valves directly underneath the sink cabinet.
- Turn both valves clockwise until they are completely closed.
- Crucial safety rule: If the under-sink valves are old, stuck, or fail to completely stop the flow, you must locate and shut off your home’s main water supply valve (usually located in the basement, utility room, or near the water meter).
- Never attempt to disconnect supply lines while water is still pressurized, or you will flood your cabinet instantly.
Step 2 – Release Water Pressure and Drain Remaining Water
- Go back to the faucet and turn the handle on. If you have a single-handle faucet, move it to the center position. For double-handle models, open both hot and cold handles.
- Allow any remaining water trapped in the lines to drain out completely.
- Place your bucket and towels directly underneath the shutoff valves and supply connections to catch any residual water dripping from the lines.
Step 3 – Disconnect the Existing Water Supply Lines
- Use your adjustable wrench to loosen the coupling nuts connecting the faucet supply lines to the shutoff valves. Turn counterclockwise (remember: “measure right to tighten, left to loosen”).
- If a fitting feels stubborn or stuck, hold the body of the shutoff valve steady with a second wrench (backing wrench) to prevent twisting or snapping the copper supply pipe inside the wall.
- Let any remaining water drain into your bucket.
Step 4 – Remove the Old Faucet
- Look underneath the sink deck to locate the faucet mounting hardware—usually large plastic or brass nuts threaded onto mounting studs attached to the faucet body.
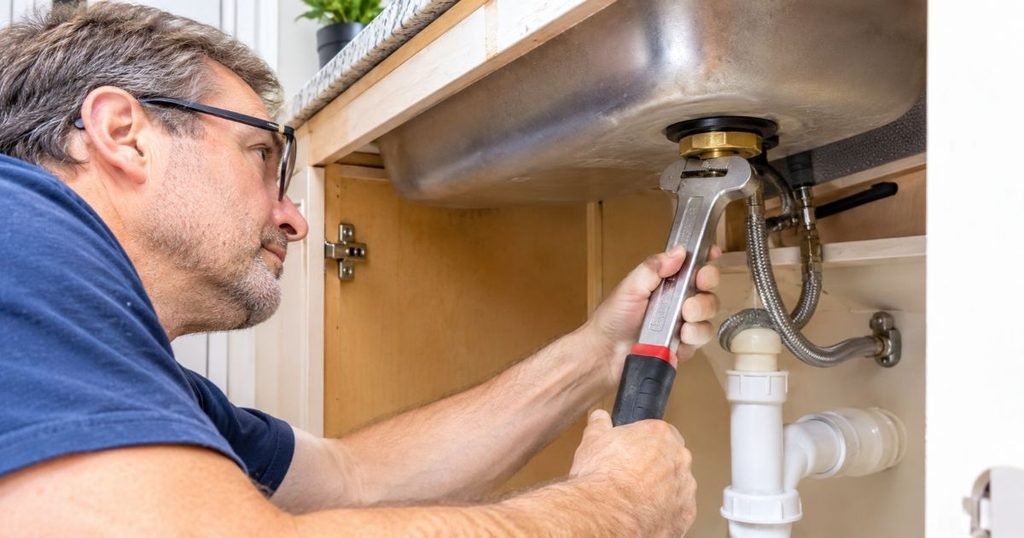
- If you cannot reach the nuts with your hands or an adjustable wrench, use a basin wrench. Reach up behind the sink basin, clamp the pivoting jaw onto the mounting nut, and turn counterclockwise.
- Disconnect any separate sprayer hoses, quick-connect fittings, or counterweights.
- Remove the mounting hardware and retaining brackets completely.
- Carefully lift the old faucet straight up and out from the top of the sink or countertop.
- Note: Corrosion, mineral deposits, and tight cabinet access can make removal difficult. If a mounting nut is rusted solid, apply penetrating oil, let it sit for 15 minutes, or use a mini hacksaw to carefully cut the bolt.
Step 5 – Clean the Sink or Countertop Surface
- Over years of use, grime, hard water scale, and old plumber’s putty build up underneath the old faucet base.
- Use a putty knife, scraper, or abrasive pad along with warm soapy water or a mild descaling solution to thoroughly clean the mounting area.
- Ensure the mounting surface is completely clean, smooth, and dry before installing the replacement faucet. Any leftover debris can compromise the new watertight seal.
Step 6 – Prepare and Install the New Faucet
- Read the manufacturer’s installation instructions thoroughly, as assembly steps vary between brands and models.
- Assemble any upper components, handles, or escutcheon plates as directed.
- Position the rubber gasket, foam pad, or a bead of plumber’s putty/silicone on the underside of the faucet base (following manufacturer guidelines).
- Insert the faucet hoses and mounting studs down through the correct mounting holes in the sink or countertop.
- Align the faucet properly so the spout faces forward and handles operate smoothly.
- Secure the mounting hardware underneath by hand-tightening the nuts, then snugging them gently with a wrench or basin wrench.
- Warning: Overtightening mounting nuts can crack porcelain sinks, warp metal decks, or strip plastic threads. Snug is sufficient.
Step 7 – Connect the Water Supply Lines
- Connect the hot and cold supply lines to the corresponding hot (usually left) and cold (usually right) shutoff valves.
- If your new faucet features integrated flexible supply lines, connect them directly to the shutoff valves. If it requires separate supply hoses, attach them to the faucet shanks first before connecting to the valves.
- Ensure hoses are smooth and looping gently without any sharp twists, kinks, or tight bends that could restrict water flow.
- Tighten the compression nuts securely following the manufacturer’s tightening instructions (typically hand-tight plus a quarter-turn with a wrench).
- Plumber’s tape rule: Plumber’s tape (PTFE tape) should only be used on compatible male threaded pipe connections (like IPS tapered threads) when specified. Do not apply plumber’s tape to standard compression fittings that use rubber cone washers, as the seal relies on the compression washer, not the threads.
Step 8 – Reconnect Additional Faucet Components
- If you are installing a kitchen faucet, reconnect the pull-down sprayer hose to the quick-connect fitting or outlet tube underneath the spout.
- Install any required hose weight assemblies onto the pull-down spray hose at the designated marker. The weight ensures the spray wand retracts smoothly back into the spout without catching on under-sink pipes.
- For bathroom sinks with a pop-up drain, connect the lift rod strap and clevis assembly according to the manufacturer’s manual.
Step 9 – Turn the Water Supply Back On
- Ensure the new faucet handle is in the closed (off) position.
- Slowly reopen the hot and cold water shutoff valves (turn counterclockwise). Watch closely for any immediate leaks around the valve connections.
- Unscrew and remove the faucet aerator (the small screen nozzle at the tip of the spout) by hand.
- Open the faucet handle to both hot and cold positions and let water run freely for 60 seconds. This flushes out any trapped air, pipe scale, or loose debris from the new lines before it can clog the aerator.
- Turn off the water, clean out any debris trapped in the aerator screen, and screw it back onto the spout.
Step 10 – Test the New Faucet and Check for Leaks
- Test the hot and cold water functions, checking for smooth handle operation and proper temperature mixing.
- Check water pressure and flow rate.
- Take your flashlight and inspect underneath the sink cabinet thoroughly. Check:
- The supply line connections at the shutoff valves.
- The supply connections underneath the faucet body.
- The mounting nut area for any trickling moisture.
- The drain area if any pop-up assembly parts were disturbed.
- Leave a dry paper towel flat on the cabinet floor under the plumbing; if there is a slow drip, the paper towel will show moisture immediately. Re-check the connections after using the faucet over the next 24 to 48 hours.
READ MORE: Fix Leaky Bathroom Faucet
How to Replace a Kitchen Faucet vs. a Bathroom Faucet
While the core mechanics of connecting water lines and tightening mounting nuts are similar, kitchen faucet installation and bathroom faucet installation have distinct differences in scope and complexity.
Kitchen vs. Bathroom Installation Comparison
| Feature | Kitchen Faucet | Bathroom Faucet |
| Faucet Design | High-arc spouts, single-handle, pull-down or pull-out sprayers | Centerset, widespread, or single-hole low-profile designs |
| Mounting Configuration | Usually 1 to 4 holes; often includes a deck plate | Usually 1-hole, 3-hole centerset (4″), or widespread (8″) |
| Number of Connections | Hot supply, cold supply, and pull-down sprayer hose/weight | Hot supply and cold supply lines |
| Sprayer Attachments | Integrated pull-down wand or side spray hose | Typically none (unless specialized utility basin) |
| Drain Assembly Considerations | Rarely involves sink drain linkage; connects to garbage disposal/trap | Frequently involves connecting sink pop-up drain rod and ball rod mechanism |
| Installation Complexity | Moderate (tighter workspace behind deep sink basins) | Straightforward and quick (more open cabinet clearance) |
Kitchen faucets often involve managing retractable hoses, quick-connect locking clips, and counterweights in a cramped cabinet space alongside garbage disposals and dish drain lines. Bathroom faucets, by contrast, are more compact but frequently require coordinating the sink’s pop-up stopper linkage behind the vertical tailpiece.
How Much Does It Cost to Replace a Faucet in the USA?
When budgeting for a faucet upgrade, costs vary depending on whether you choose a DIY approach or hire a professional.
Faucet Material & Hardware Costs
- Basic replacement faucet (Standard bathroom or kitchen): $45 – $120
- Midrange faucet (Pull-down kitchen or stylish widespread bath): $130 – $350
- Premium and touchless faucet (Smart, motion-sensor, or designer finishes): $350 – $900+
- Supply lines (Pair of braided stainless steel hoses): $15 – $30
- Plumber’s putty, silicone, or miscellaneous hardware: $5 – $15
Professional Plumber Labor Costs
If you decide to hire a licensed US residential plumber rather than doing it yourself, expect the following labor expenses:
- Standard professional labor rate: $150 – $350 for a straightforward faucet swap.
- Additional plumbing modifications: Extra charges ($100 – $250) may apply if shutoff valves are corroded, supply pipes need soldering or cutting, or if your countertop requires custom hole drilling.
Total Cost Summary: A DIY replacement typically costs the price of the faucet and supplies ($60 – $400 total). Hiring a professional brings the total cost to $250 – $700+ depending on fixture quality, regional labor rates, and under-sink plumbing conditions.
READ MORE: Hearing Water Running in Walls When No Faucets Are On?
Common Faucet Replacement Mistakes to Avoid
Even seasoned DIYers can run into trouble if they overlook simple details. Avoid these common faucet installation mistakes:
- Forgetting to shut off the water: The fastest way to flood a kitchen is disconnecting a supply line while pressure is active. Always double-check your shutoff valves.
- Purchasing an incompatible faucet: Buying a 3-hole widespread faucet for a single-hole sink means it physically won’t fit without major counter modifications. Measure your sink holes first!
- Ignoring the number of sink holes: Failing to check hole counts leaves you with exposed holes on the deck unless you buy a matching deck plate.
- Reusing damaged supply lines: Old rigid copper lines or stiff braided hoses degrade internally. Always install new flexible braided stainless-steel supply lines.
- Overtightening mounting nuts: Applying excessive wrench force to plastic or brass mounting nuts can crack porcelain sinks, break studs, or warp sink decks. Hand-tight snug plus a quarter-turn is plenty.
- Using plumber’s putty where prohibited: Some modern metallic or composite finishes react poorly to oil-based plumber’s putty, staining the surface or voiding warranties. Always follow manufacturer sealing instructions.
- Applying plumber’s tape to unsuitable fittings: Wrapping PTFE tape onto rubber-washer compression fittings prevents the rubber from sealing correctly against the mating surface. Use tape only on tapered male pipe threads.
- Reversing hot and cold connections: Connecting the left supply line to cold and right to hot reverses your handle operations. Keep hot on the left and cold on the right.
- Forgetting to flush the supply lines: Debris and pipe scale loosened during installation will clog your new aerator instantly if you don’t flush the lines before screwing the aerator back on.
- Failing to inspect for leaks: Turning the water on and walking away is a recipe for disaster. Always run the water, check under the cabinet with a flashlight, and leave a dry paper towel to catch slow seepage.
What to Do If Problems Occur After Replacing a Faucet
Even with careful installation, minor issues can occasionally pop up. Use this troubleshooting guide to diagnose and resolve them quickly:
| Problem | Possible Cause | Recommended Solution |
| Faucet leaks underneath | Loose or damaged connection | Inspect supply and mounting connections; tighten gently or replace worn rubber washers. |
| Water leaks around the base | Incorrect gasket or sealing | Check mounting and sealing instructions; re-apply silicone or reposition the base gasket. |
| Low water pressure | Debris caught in aerator | Unscrew the aerator tip, clear out trapped sediment, flush lines, and screw it back on. |
| Hot and cold water reversed | Incorrect supply connections | Switch the hot and cold supply lines at the shutoff valves underneath the sink. |
| Faucet handle feels loose | Improper mounting or assembly | Remove handle cap, tighten the internal set screw, or secure mounting hardware underneath. |
| Sprayer does not work | Incorrect hose connection | Check the quick-connect fitting under the sink to ensure it clicked securely into place. |
| Water continues flowing after shutoff | Faulty shutoff valve | Stop work, shut off the main water supply, and replace the failing under-sink shutoff valve. |
READ MORE: Shower Head Leaking From Head: Causes & Fixes
When Should You Hire a Professional Plumber?
While most faucet replacements are straightforward DIY projects, there are specific situations where calling a licensed professional plumber is the safest and wisest choice:
- Shutoff valves that are stuck, leaking, or damaged: If an old gate or ball valve snaps or refuses to turn off completely, forcing it can flood your home.
- Severely corroded supply lines: Rusted iron or heavily corroded galvanized pipes can crumble when touched, requiring professional pipe replacement.
- Broken or damaged plumbing connections: If threads inside the wall or P-trap are stripped, professional soldering or PVC replacement is required.
- Wall-mounted faucet replacement: Rerouting in-wall supply pipes to match a new wall-mounted fixture requires cutting drywall and plumbing expertise.
- Major countertop or sink modifications: Drilling extra holes in granite, quartz, or solid surface countertops requires specialized diamond-hole saw bits and precision equipment.
- Unfamiliar plumbing configurations: If your home features specialized custom plumbing or commercial-grade fixtures, expert guidance prevents costly damage.
- Persistent leaks after installation: If you have checked and tightened every connection and water continues to seep, an underlying structural defect may require professional intervention.
Frequently Asked Questions
Can I replace a faucet myself without hiring a plumber?
Yes. If you have basic hand tools, can follow manufacturer instructions, and can safely turn off your water supply, replacing a standard kitchen or bathroom faucet is a very manageable DIY weekend project that takes 1 to 3 hours.
How long does it take to replace a kitchen or bathroom faucet?
A straightforward faucet replacement typically takes between 1 and 3 hours. However, time can vary depending on cabinet accessibility, whether under-sink shutoff valves operate smoothly, and if you encounter stubborn, rusted mounting hardware.
Do I need to replace the water supply lines when replacing a faucet?
Yes, it is strongly recommended. Old supply lines degrade, kink, or develop weakened rubber seals over time. Installing new braided stainless-steel supply lines ensures a secure, leak-free connection and prevents future water damage.
Can I replace a faucet without turning off the main water supply?
You can replace a faucet without turning off the main water supply only if your under-sink hot and cold shutoff valves are fully functional and shut off tightly. If those valves leak or do not close completely, you must turn off your home’s main water supply.
How much does a plumber charge to replace a faucet?
Professional plumber labor costs generally range from $150 to $350 for a standard faucet installation. Total costs will be higher if the plumber needs to replace faulty shutoff valves, modify supply lines, or perform extra structural work.
Final Thoughts:
Replacing a faucet is one of the most satisfying home improvement projects you can take on. By selecting a compatible faucet, gathering the right tools and materials, reading the manufacturer’s installation instructions carefully, shutting off the water before unhooking anything, and meticulously testing every connection for leaks, you can transform your kitchen or bathroom while saving money on labor.
Take a moment today to inspect your existing sink setup, measure your mounting holes, and choose a replacement fixture that fits your home’s style and functional needs. With a little preparation, you will enjoy a sparkling, leak-free upgrade that serves your household for years to come!

