Many U.S. homeowners know the panic of an AC that just won’t cool. Your thermostat is on “Cool,” the fan is running, but the air coming out of the vents is warm or lukewarm. In this guide, we explain why your air conditioner isn’t cooling properly and what you can do about it.
We’ll start with a brief overview of how your AC is supposed to work, then cover the most common causes of warm air (clogged filters, thermostat problems, refrigerant leaks, etc.), how to check them yourself, and when to call an HVAC pro. We’ll also compare DIY fixes vs. professional repair vs. full system replacement (with a handy table), discuss costs, and offer maintenance tips. By the end, you’ll know how to troubleshoot safely, estimate repair costs, and make the repair-or-replace decision with confidence. Lets deep dive into “AC Not Blowing Cold Air? Causes, DIY Fixes & When to Call a Pro”

READ MORE: Emergency AC Service Near Me: How to Get Fast, Trusted Help
How an air conditioner is supposed to cool
An air conditioner cools your home by moving heat from inside to outside using four main parts:
- Compressor (outside): Pressurizes refrigerant so it can carry heat.
- Condenser coil & fan (outside): Releases heat to the outdoors.
- Evaporator coil (inside): Absorbs heat from your indoor air, making the air feel cold.
- Blower / air handler & ductwork (inside): Pushes cooled air through your vents.
Thermostat tells the system to start. Refrigerant circulates between the indoor and outdoor units, changing from liquid to gas and back while carrying heat. Proper airflow (unblocked vents, clean filter) and correct refrigerant levels are essential if airflow or refrigerant is off, the system can’t cool well or might freeze up. When you see warm air at vents, ice on coils, or the compressor not running, these are clues to what part of that system may be failing.
Top causes for AC not blowing cold air
Below are the most common problems, each with symptoms, how to check safely, DIY steps (when reasonable), typical cost and time ranges, and safety notes.
1. Clogged or dirty air filter
Symptoms: Weak airflow, unit runs longer, uneven cooling, dust around vents.
How to check: Open the return grille, remove the filter, hold it up to light. If you can’t see light through it, it’s dirty.
DIY steps: Replace disposable filters or clean permanent filters every 1–3 months. Use the correct size and MERV rating recommended by manufacturer.
Estimated cost (DIY): $5–$30 for standard disposable filters; $25–$80 for higher-quality filters. Time: 5–15 minutes.
Safety note: Easy and safe. Regular filter changes prevent many problems.
2. Thermostat misconfiguration or failure
Symptoms: AC won’t start, short cycling, indoor unit runs but not cooling to set temp, thermostat displays odd readings.
How to check: Ensure thermostat is set to “Cool,” correct fan setting, and temperature lower than room temp. Replace batteries if digital. Try a quick reset (turn off power at thermostat or breaker for 30 seconds).
DIY steps: Replace batteries, verify settings, or replace a broken thermostat (smart models cost more).
Estimated cost: $0–$10 for batteries; thermostat replacement $70–$350 (DIY) depending on model. Time: 15–60 minutes.
Safety note: Turn off power before opening wall thermostat if working with wiring.
READ MORE: Heat Pump Making Noise Outside Unit: Causes, Fixes & When to Call a Pro
3. Low refrigerant (leak)
Symptoms: AC runs but blows lukewarm air, longer run cycles, hissing near refrigerant lines, ice on evaporator coil.
How to check: Look for oily residue on refrigerant lines, or white frost/ice on indoor coil or refrigerant lines.
DIY steps: You cannot safely or legally handle refrigerant or repair major leaks — call a licensed HVAC tech. You can, however, keep airflow clear (clean filter) to reduce coil freezing while waiting.
Estimated cost: $200–$800 for refrigerant recharge if leak is accessible and small; $500–$2,000+ if leak repair requires duct/condenser part replacement. Time: 2–6+ hours.
Safety note: Refrigerant work requires EPA-certified technicians; do not attempt to add refrigerant yourself.
4. Frozen evaporator coil
Symptoms: Reduced or no cold air, visible ice on indoor coil or refrigerant lines, water dripping around indoor unit once it thaws.
How to check: Turn off the compressor and inspect the indoor coil (visual ice). If the coil is iced, the system needs to thaw before troubleshooting.
DIY steps: Turn unit off and switch fan to “on” to help thaw (or turn whole system off and let thaw for several hours). Replace/clean filters and check airflow. Do not chip ice off coils.
Estimated cost: $0–$100 for DIY (filter, thawing) vs $100–$500+ for pro diagnosis and repairs (cleaning, blower motor, refrigerant). Time: thawing takes hours; repairs vary.
Safety note: Ice often signals airflow restrictions or low refrigerant — call a pro if it recurs.
5. Faulty compressor (outside unit)
Symptoms: Outdoor unit silent or humming but not starting, system runs but no cooling, frequent tripping of breakers.
How to check: If outdoor fan or compressor isn’t running while indoor fan runs, that’s a red flag. Look for burn smells or oil on unit.
DIY steps: No — compressor issues require professional diagnosis. You can check breakers and disconnect switches first.
Estimated cost: $1,200–$3,500+ to replace compressor (parts and labor), depending on unit. Time: 4–8+ hours.
Safety note: High-voltage component — dangerous to work on.
6. Blocked vents or duct issues
Symptoms: Some rooms cold, others not; low airflow; dust buildup; strange noises in ducts.
How to check: Walk home and feel vents, inspect visible ducts for kinks or disconnections in accessible crawlspaces/attics.
DIY steps: Remove floor/ceiling vent grills and clean; ensure vents are open; check attic/crawlspace duct connections if safe to do. Use return vents unobstructed.
Estimated cost: DIY cleaning $0–$50; professional duct sealing/repair $200–$1,500+. Time: 1–8 hours.
Safety note: Avoid entering tight attics without proper safety; consider a pro for major duct repairs.
READ MORE: Heat Pump Running but Not Cooling: Causes, Fixes & When to Call a Pro
7. Electrical component failure (capacitor, contactor)
Symptoms: Outdoor unit won’t start, clicking noise, short cycles, unit struggles to start.
How to check: Visual inspection for burn marks on contactor or bulging capacitors (requires opening disconnect — only if safe). If you hear loud clicking and the fan/compressor won’t run, suspect these parts.
DIY steps: Replacing capacitors/contactors involves high-voltage components — only experienced DIYers should attempt with power off and proper tools. Otherwise call a pro.
Estimated cost: $100–$400 for capacitor/contactor replacement (parts + tech). Time: 1–3 hours.
Safety note: High-voltage; risk of shock. Hire a licensed tech unless you’re qualified.
8. Failed blower motor (indoor)
Symptoms: Warm air at vents despite compressor running, weak airflow, unusual sounds from air handler.
How to check: If indoor blower doesn’t start but outdoor unit does, or blower runs slowly, check furnace/air handler fan settings and filter.
DIY steps: Clean around the blower area and replace filter; motor replacement is usually a pro job.
Estimated cost: $300–$1,200+ for motor replacement depending on model. Time: 2–6 hours.
Safety note: Contains electrical parts and sometimes refrigerant lines; use a pro.
9. Dirty condenser coil / poor outdoor airflow
Symptoms: AC runs longer, hotter outside unit, decreased cooling performance.
How to check: Look at outdoor unit — if fins/coils are clogged with debris, grass, or leaves, airflow is restricted.
DIY steps: Turn off power at disconnect and gently hose the coil from inside out, clear debris, trim vegetation 2–3 ft away.
Estimated cost: DIY cleaning: $0–$50; professional condenser cleaning: $75–$250. Time: 30–90 minutes.
Safety note: Turn power off before cleaning; don’t bend fins.
10. Oversized or undersized unit (poor comfort, short cycling)
Symptoms: Unit short-cycles (turns on and off frequently) or runs constantly but still doesn’t achieve comfort. Rooms unevenly cooled.
How to check: Look at unit age and model sizing details on the outdoor unit and compare with home size — a pro load calculation (Manual J) tells you for sure.
DIY steps: None practical — consult an HVAC professional for assessment and replacement advice.
Estimated cost: If replacement needed, full system replacement ranges widely — see replacement cost section. Time: 1–3 days for replacement.
Safety note: Incorrect sizing leads to humidity problems and higher energy bills.
READ MORE: Why Is My Heat Pump Blowing Warm Air? Causes, Fix, and Costs
Step-by-Step DIY Troubleshooting Checklist
If your AC isn’t blowing cold air, follow these safe steps before calling for service. Always power off at the breaker first to avoid shock. Then:
- Turn off power & reset breakers: Go to your electrical panel and switch off the AC breaker (and any disconnect near the outdoor unit). This prevents accidents as you inspect.
- Check/replace the air filter: Remove the air handler or return vent filter. If it’s dusty or clogged, replace it. A clogged filter can be the only problem. (DOE recommends changing filters every 1–2 months during cooling season.)
- Inspect thermostat settings: Make sure it’s set to “Cool,” the fan setting is “Auto,” and the temperature is set lower than the room. If your thermostat has a RESET or ON/OFF switch, try turning it off for 30 seconds then on again. Replace batteries if needed.
- Look for ice or frost: If you suspect a frozen coil, turn off the system and let it defrost fully (leave the blower fan on “On” mode to speed thaw if you like). Do not chip the ice. Check again after thawing with a fresh filter and vents open.
- Clear airflow in vents: Walk through the house and ensure all supply registers and return grilles are open and unobstructed. Move furniture or rugs away from vents.
- Check outside unit: Remove any debris (leaves, grass, or dirt) from around the condenser. Trim vegetation so there is at least 2 feet of clearance. Gently brush dirt off the coils if needed.
- Inspect electrical panel: Make sure the AC’s circuit breaker has not tripped. Reset it if it has, and see if the AC starts. If it trips again immediately, this indicates a likely short – stop and call a pro.
- Listen and look for signs: Turn the AC back on and listen. If you hear unusual buzzing, clicks, or no sound at all from the outdoor unit, note that. Also smell: a burning odor from the unit is a warning. These signs suggest professional help is needed.
Safety first: If you encounter high-voltage components or suspect refrigerant issues, stop and call a professional. Only certified technicians should handle refrigerants or open the unit’s control panel. In fact, federal law requires HVAC technicians to be certified to service refrigerant systems. If any wires look burned or components look melted, leave it powered off and get an expert.
By doing these checks, you’ve likely isolated easy fixes (like filters or thermostat). If the AC still blows warm air after all these steps, it’s time to call in an HVAC professional.
Compare: DIY Fixes vs Professional Repair vs Full Replacement
| Problem / Cause | Typical symptom(s) | DIY fix possible? | Difficulty level | Estimated cost (USD range) | Typical time to fix | When to call a pro |
| Clogged/dirty air filter | Weak airflow, long run times | Yes | Easy | $5–$80 | 5–15 min | If replacing filter doesn’t restore cooling |
| Thermostat misconfiguration/fault | Unit won’t run or short cycles | Yes (simple) | Easy / Moderate | $0–$350 | 15–60 min | If thermostat wiring or replacement needed |
| Frozen evaporator coil | Ice on indoor coil, low cooling | Partial (thaw + filter) | Moderate | $0–$500+ | Hours to thaw; repairs 1–4 hrs | If it refreezes or recurs |
| Low refrigerant (leak) | Lukewarm air, hissing, ice | No | Unsafe | $200–$2,000+ | 2–8+ hrs | Always — refrigerant work requires certified tech |
| Faulty compressor | No cooling, outdoor unit silent/humming | No | Unsafe | $1,200–$3,500+ | 4–8+ hrs | Always |
| Blocked vents / duct issues | Uneven cooling, low airflow | Yes (basic) | Easy–Moderate | $0–$1,500 | 1–8 hrs | For major duct repair or sealing |
| Electrical component failure (capacitor/contactor) | Clicking, no start | Sometimes (experienced DIY) | Hard / Unsafe | $100–$400 | 1–3 hrs | If unsure or high-voltage parts involved |
| Dirty condenser coil / poor airflow | Unit runs hot, poor cooling | Yes (cleaning) | Moderate | $0–$250 | 30–90 min | If cleaning doesn’t help or coils damaged |
Note: Prices vary by region, unit make/model, and complexity. Use ranges to plan and get local estimates for accuracy.
READ MORE: What Size Heat Pump Do I Need? Homeowner Sizing Guide
When to call an HVAC pro — clear signs and what to expect
Call a technician if:
- The system doesn’t cool after basic DIY checks (filter, thermostat, breakers).
- You see or smell burning, sparks, or persistent tripping of breakers.
- There’s ice on coils that keeps coming back.
- You suspect a refrigerant leak (hissing, oily residue) — refrigerant handling requires a licensed tech.
- The compressor or outdoor unit won’t run even though power is on.
- The unit is older than 10–15 years and problems are frequent.
Questions to ask your HVAC service:
- Are you licensed and EPA-certified for refrigerant work?
- Can you provide an itemized written estimate?
- What parts and labor warranty do you offer?
- Do you recommend repair or replacement, and why?
- How long will the work take and when can you start?
On emergency service: If your home is dangerously hot (for infants, elderly, or pets) or you have a gas furnace with gas smell, call immediately and consider temporary cooling solutions (fans, go to cooler place) while waiting.
READ MORE: Heat Pump Not Cooling? Causes, Fixes & Homeowner Troubleshooting
How Much Repairs and Replacements Typically Cost
Pricing in HVAC can vary widely, but here are ballpark figures (in USD) for common fixes and upgrades. Use these as rough ranges your costs may differ by location, unit size, and labor rates. Always get a written quote.
- Air filter replacement: $10–$25 for a decent pleated filter; negligible if you do it yourself.
- Thermostat repair: Batteries cost a few dollars; replacing a simple manual thermostat runs under $100. A smart thermostat (with installation) can be $150–$300.
- Evaporator coil cleaning: DIY with a no-rinse cleaner is under $20 for supplies. Professional indoor coil cleaning (if heavily soiled) may cost $100–$200.
- Refrigerant recharge (non-R-22): If legally needed (leak repair + recharge), expect around $200–$600. Trane estimates R-410A costs about $40–$90 per pound installed (systems usually need 2–4 lb). R-22 costs more (over $100/lb) due to scarcity. This does not include leak repair labor.
- Capacitor replacement: $200–$400 total, parts+labor. Capacitors themselves are inexpensive; most cost is the service call.
- Blower motor replacement: On average about $560, though it can range $300–$1,500 depending on motor size and type.
- Evaporator (indoor) coil replacement: $600–$2,000. This is rarely needed unless the coil is damaged or leaking.
- Compressor replacement: $1,500–$3,000 for a typical split-system unit (part + labor).
- New AC system (full replacement): For a central AC with a new condenser, evaporator coil, and installation, you’re generally looking at $5,000–$11,000 for a modern, efficient system. This wide range depends on capacity, efficiency rating, and labor (a large home or high-SEER unit costs more). Note that installing R-22 replacements is often higher due to refrigerant.
Because labor varies, it’s best to ask for an itemized quote. Also remember that prices fluctuate: for example, HVAC suppliers note R-22 refrigerant has spiked in price over the last decade, making repairs on old systems very expensive.
How to prevent AC problems — maintenance tips
- Change filters regularly: Every 1 month for cheap fiberglass, 2–3 months for pleated filters, or per manufacturer.
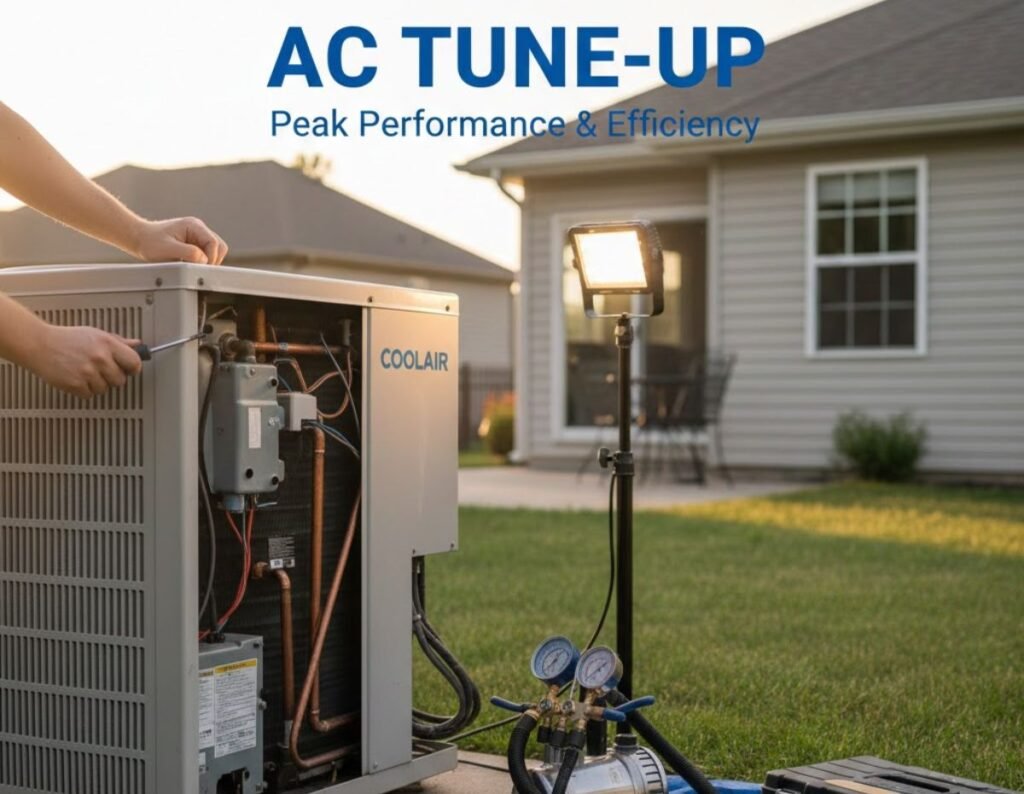
- Schedule an annual tune-up: Spring inspection and cleaning catch small problems early.
- Keep outdoor unit clear: Trim 2–3 ft of clearance, no mulch/leaf piles on top.
- Clean condensation drain: Flush with a cup of household bleach or follow manufacturer instructions to avoid clogs.
- Use a programmable thermostat: Reduces wear and can prevent short cycling.
- Check ductwork: Ensure vents are open and sealed; seal gaps with mastic or metal tape (not cloth duct tape).
- Watch for noise and irregular cycling: Address early to avoid bigger failures.
READ MORE: Weil‑McLain Boiler Reviews (2026) — Models, Costs, Pros & Cons
Decision guide: Repair, replace, or temporary fix?
Use this quick checklist to decide:
- Age of unit: >12–15 years — replacement often makes sense.
- Repair cost vs replacement cost: If repair >50% of replacement price, consider replacing.
- Frequency of breakdowns: Multiple repairs in 2–3 years → replace.
- Efficiency concerns: If your system is low SEER and energy bills are high, replacement with a higher-efficiency unit may pay back over time.
- Comfort & performance: If the system can’t maintain humidity or temperature even after repairs, replacement is better.
- Budget & timing: Consider a temporary repair to get through a season if replacement cost or timing is an issue but weigh long-term costs.
FAQs
Why is my AC blowing warm air?
The most common reasons are simple airflow or setting issues. A dirty air filter or closed vents can block airflow, so you feel only warm air. A wrong thermostat setting (or dead batteries) can also cause warm air. In many cases, changing the filter and checking thermostat settings fixes it. Other causes include a frozen coil or low refrigerant.
What should I check first if my AC isn’t cooling?
Start with the easiest steps. Turn off power and inspect the air filter replace it if it’s dirty. Ensure the thermostat is set to “Cool” and the temperature is lower than room temp. Check that all vents are open. Look at the outdoor unit: clear any debris. After these checks, you can move to more involved steps or call a pro if needed.
How do I know if my AC refrigerant is low?
Low refrigerant usually means a leak. Signs include ice on the indoor coil, a hissing sound near the refrigerant lines, or the AC running constantly but still blowing warm air. You often can’t fix it yourself it requires a certified HVAC technician to find the leak and recharge the system.
Can I recharge my AC refrigerant myself?
No. It’s illegal and unsafe for a homeowner to handle refrigerant. Only EPA-certified technicians can buy or handle air conditioning refrigerants. If your AC needs refrigerant, call a professional. DIY refrigerant “kits” are not allowed unless you have the certification, and using them incorrectly can damage the system or environment.
When should I replace my AC instead of repairing it?
Generally, consider replacing if your AC is older than 10–15 years or uses obsolete refrigerant (like R-22), or if repair costs exceed about half the price of a new unit. Frequent breakdowns and rising energy bills are also signs a new, more efficient system may save money long-term.
How much does it cost to fix an AC not cooling?
It depends on the problem. Simple fixes like filter replacement cost almost nothing. A capacitor or thermostat might be $100–$40=0. A refrigerant recharge could be a few hundred dollars. Major fix=es – like a compressor replacement – can run $1,500–$3,000. Always =get an estimate. If in doubt, compare the repair quote to the cost of a new system; sometimes replacing an old AC is the better investment.
Conclusion
If your AC not blowing cold air, start with quick, safe checks: thermostat, filter, breakers, and outdoor unit clearance. For anything involving refrigerant, major electrical parts, or the compressor, call a licensed HVAC technician. Get at least two written estimates for major repairs or replacement, and weigh age, repair cost, and efficiency before deciding. Need help interpreting a technician’s estimate or want a checklist to give to the tech? Reply with your symptoms and any model/age details and I’ll help you evaluate the options.