As a professional plumber who has spent years crawling through chilly crawlspaces and troubleshooting frozen utility walls across the United States, I can tell you one thing with absolute certainty: few things ruin a crisp winter morning faster than turning on your shower and getting nothing but silence or a chilling trickle of ice-water. For homeowners who enjoy the endless, on-demand luxury of an exterior tankless water heater, winter brings both beauty and a very real operational threat.
Many homeowners ask me: Can an outdoor tankless water heater freeze? The short answer is yes. Even though modern units are engineered with advanced technology, they are not invincible. Relying blindly on factory settings or ignoring your equipment until the first blizzard hits is a recipe for cracked copper heat exchangers, flooded exterior walls, and catastrophic repair bills.
In this comprehensive guide, we will break down everything you need to know to protect your investment, ensure continuous hot water, and avoid costly winter plumbing emergencies. Lets deep dive into “How to Winterize an Outdoor Tankless Water Heater”
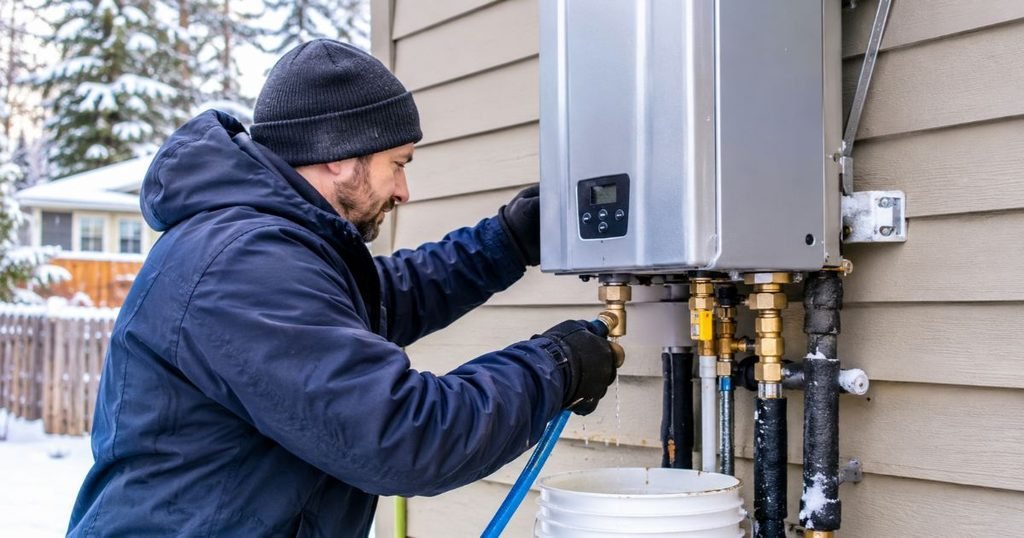
Why Should You Winterize an Outdoor Tankless Water Heater?
To understand the importance of tankless water heater winter preparation, you first need to understand how freezing temperatures interact with plumbing systems. Water is a unique substance; as it transitions from a liquid to a solid, it expands by approximately 9 percent. When water trapped inside a closed copper pipe or a sensitive heat exchanger freezes, that expansion generates immense internal pressure often exceeding 2,000 pounds per square inch. No residential plumbing material can withstand that kind of force.
Outdoor installations face severe exposure compared to their indoor counterparts. When sub-freezing winds blow against an exterior metal housing, they rapidly strip away ambient warmth. If the water inside the unit or its connecting lines drops below 32 degrees Fahrenheit, ice forms quickly.
The most vulnerable components include:
- The Primary Heat Exchanger: Usually constructed of thin copper tubing designed for maximum thermal transfer, making it exceptionally prone to splitting when water freezes inside its coils.
- Inlet and Outlet Water Lines: Unprotected pipes entering and exiting the bottom of the unit.
- Isolation Valves and Pressure Relief Valves: Brass and bronze fittings that hold standing water and are vulnerable to cracking.
- Condensate Drain Lines: In high-efficiency condensing models, residual acidic water can freeze and block drainage, causing internal backups and error code shutdowns.
READ MORE: How to Winterize Plumbing: Step-by-Step Guide for Homeowners
Does an Outdoor Tankless Water Heater Have Built-In Freeze Protection?
A common misconception among homeowners is that if an appliance is rated for outdoor installation, it takes care of itself entirely. While top-tier brands like Rinnai, Rheem, and Navien equip their outdoor tankless water heaters with sophisticated tankless water heater freeze protection systems, these mechanisms have specific operating limitations.
How Built-In Freeze Protection Works
Most modern outdoor tankless units feature internal electric heating blocks or ceramic strip heaters wrapped around critical internal water pathways, paired with precise temperature sensors. When the internal temperature drops to a certain threshold (usually around 36°F to 38°F), these heating elements automatically activate to keep the water inside the unit from freezing.
Crucial Limitations You Must Know
- Electrical Dependency: Built-in freeze protection requires continuous electrical power. If your home loses power during a winter storm, these internal heaters stop working immediately.
- Gas Supply: For gas-fired units, some systems also rely on electronic components and gas availability to maintain standby readiness.
- External Pipe Vulnerability: Internal freeze protection only warms the interior components of the chassis. It does not protect the external hot and cold water supply lines, isolation valves, or gas pipes hanging below or beside the unit.
- Wind Chill Factor: Severe, howling winter winds can overwhelm internal heaters by rapidly drawing heat away from the metal cabinet faster than the internal elements can generate it.
When evaluating your equipment, always consult your specific manufacturer documentation. For instance, Rinnai units often feature built-in ceramic heaters effective down to specific negative ambient temperatures only when power is uninterrupted. Navien and Rheem units similarly rely on internal freeze-sensing technology, but explicitly state in their manuals that external piping must be insulated by the installer or homeowner. Never assume built-in features make external outdoor tankless water heater freeze protection foolproof.
When Should You Winterize an Outdoor Tankless Water Heater?
Timing is everything when it comes to tankless water heater winter maintenance. Waiting until frost coats your lawn or a weather alert warns of an impending hard freeze is usually too late.
- The Ideal Preparation Window: Begin your annual winter inspection and preparation in early autumn (September or October), well before the first overnight freeze occurs. This gives you ample time to purchase supplies, test insulation, and address minor repairs without rushing.
- Regional Climate Considerations: Homeowners in northern tiers, New England, the upper Midwest, and high-altitude regions face prolonged sub-zero stretches and need robust, multi-layered protection. Homeowners in transitional climates (such as the Pacific Northwest, Mid-Atlantic, or parts of the South) may only experience a handful of hard freezes each winter, but a single unexpected polar vortex can catch an unprepared system off guard.
- Monitoring Weather Warnings: Keep a close eye on local forecasts during late autumn and winter. If a multi-day freeze with temperatures lingering below 25°F is predicted, verify that your power supply is stable, insulation is intact, and emergency backup plans are ready.
READ MORE: Seasonal Plumbing Tips & Tricks: Prep, Protect & Save All Year
Tools and Materials Needed to Winterize
Before diving into physical maintenance, gather your supplies. Having the right tools on hand makes the process efficient and safe.
Homeowner Supply Checklist
- Closed-Cell Pipe Insulation Sleeves: Foam polyethylene or rubber pipe insulation cut to fit your specific pipe diameters.
- Outdoor-Rated Heat Tape (Heating Cable): Self-regulating heating cable approved for exterior pipe wrapping (ensure it is rated for outdoor use).
- Weather-Resistant Insulation Materials: UV-resistant tape, zip ties, or weather-proof wrapping tape to secure exterior insulation.
- Manufacturer-Approved Pipe Covers / Enclosures: Optional insulated jackets designed specifically to fit over exterior water connections or entire wall units.
- Adjustable Wrench & Channel-Lock Pliers: For checking fittings and unions.
- Standard & Phillips Screwdrivers: For removing the unit’s front cover panel during inspection.
- Bucket or Shallow Drain Container: For catching residual water during service checks or flushing.
- Work Gloves & Safety Glasses: To protect your hands and eyes from sharp sheet metal edges and debris.
- Owner’s Installation and Operation Manual: Essential for model-specific guidelines.
Pro-Tip: Simple pipe insulation, external visual checks, and wrapping accessible piping are completely safe for DIY homeowners. However, any work involving gas line modifications, electrical rewiring, or internal component replacement requires a licensed professional plumber.
How to Winterize an Outdoor Tankless Water Heater: Step-by-Step
This comprehensive process is designed to help you methodically protect outdoor tankless water heater in winter conditions. Follow these steps carefully.
Step 1: Read the Manufacturer’s Winterization Instructions
Every tankless water heater is built slightly differently. Before touching a single valve, locate your model number and review the winter care section in your manufacturer’s manual. Understanding whether your unit requires specific clearance, specialized drain valves, or unique power settings prevents costly mistakes.
Step 2: Inspect the Outdoor Tankless Water Heater
Turn off power to the unit briefly at the breaker panel and carefully remove the front outer casing (usually held by a few screws at the bottom). Perform a thorough visual inspection:
- Housing: Check for cracks, loose panels, or gaps where cold drafts can enter.
- Water & Gas Connections: Look for signs of minor weeping, mineral crust, or corrosion around fittings.
- Electrical Wiring: Ensure wire nuts, conduit connections, and terminal blocks are secure and free from moisture damage.
- Existing Insulation: Examine any foam insulation installed during initial setup to ensure it hasn’t degraded, chewed through by rodents, or peeled away. Reattach and secure the cover once your inspection is complete.
Step 3: Insulate Exposed Hot and Cold Water Pipes
The pipes leading into and out of the bottom of your tankless unit are the most frequent victims of winter freezing.
- Measure the exposed copper or PEX water lines extending from the wall to the unit.
- Cut closed-cell foam pipe insulation sleeves to length, slip them over both the hot and cold water pipes, and seal the longitudinal slit using self-sealing adhesive or heavy-duty outdoor duct tape.
- Ensure there are zero gaps around elbows, unions, or shut-off valves. If necessary, wrap irregular fittings with weather-resistant insulating tape.
Step 4: Install Outdoor-Rated Heat Tape When Appropriate
If you live in an extremely cold climate where temperatures regularly drop below 15°F for extended periods, standard foam insulation may not be enough.
- Install an outdoor-rated, self-regulating heat tape along the water supply lines and the lower plumbing manifold.
- Self-regulating cables adjust their heat output based on ambient temperatures, preventing overheating.
- Plug the heat tape into a nearby weather-resistant GFCI (Ground Fault Circuit Interrupter) outlet. Never use indoor-rated extension cords or indoor heating cables outdoors.
Step 5: Protect the Unit From Direct Wind Exposure
Wind chill is a major hazard for exterior plumbing. If your tankless water heater is mounted on a windy, exposed gable or corner of your house, it will lose heat rapidly.
- Consider installing a manufacturer-approved weather cover or protective enclosure cabinet around the unit.
- Crucial Safety Warning: Never block combustion air intakes, exhaust vent terminations, pressure relief valve discharge pipes, or required service clearances. Suffocating a gas appliance creates a severe carbon monoxide hazard.
Step 6: Check the Electrical Power Supply
Because built-in freeze protection relies entirely on electricity, your tankless water heater must remain plugged in or wired to the live electrical panel all winter long.
- Verify that the power cord is securely plugged into an outdoor, weather-proof GFCI receptacle with an in-use cover, or that the dedicated electrical switch is in the “ON” position.
- Never unplug your outdoor tankless water heater to “save energy” during freezing weather.
Step 7: Check Gas Supply and Water Connections
Inspect the gas shut-off valve, sediment trap (drip leg), and gas flexible connector. Ensure the gas supply is fully active and uninterrupted. For gas-powered tankless units, both electricity and gas work in tandem to support internal climate management systems. Do not attempt to modify gas lines yourself; call a professional if you smell gas or notice corrosion.
Step 8: Inspect Condensate Drain Lines (If Applicable)
If you own a high-efficiency condensing tankless water heater, it produces acidic liquid condensate during normal operation.
- This condensate flows through a small internal trap and out via a PVC or flexible drain tube.
- If this tube runs outdoors or through an unheated garage, the standing water inside it can freeze and block drainage, triggering an error code and shutting down the appliance.
- Insulate exterior condensate lines thoroughly or route them to an indoor drain if permitted by local building codes.
Step 9: Test the System and Monitor Its Performance
Once insulation and safety checks are complete, restore power and test the system. Turn on a hot water faucet inside your home. Verify that the unit fires up smoothly, delivers hot water quickly, and displays no error codes or leaks. Regular monitoring throughout the winter ensures early detection of any operational anomalies.
READ MORE: Cheapest Way to Heat a House: 10 Affordable Options Compared
How to Drain an Outdoor Tankless Water Heater Before Winter
There are times when insulating and running built-in heaters isn’t enough such as when you are closing up a vacation home for the winter, leaving the property vacant for an extended period, or expecting a severe, prolonged grid failure. In these scenarios, you must drain outdoor tankless water heater systems completely.
When Draining is Necessary
- The property will remain unheated and unoccupied during freezing months.
- Extended power outages threaten the unit with no alternative backup power available.
- The manufacturer explicitly recommends draining during prolonged shutdowns.
The General Draining Procedure
- Step 1: Turn off the electrical power supply to the unit at the breaker box.
- Step 2: Shut off the gas supply valve leading to the water heater.
- Step 3: Shut off the cold water supply valve feeding the unit.
- Step 4: Open multiple hot water faucets inside your home to relieve internal water pressure and drain standing lines.
- Step 5: Locate the water filter drain plug and hot/cold water drain valves at the bottom of the unit (refer to your owner’s manual for exact locations). Place your catch bucket underneath.
- Step 6: Carefully open the drain valves to let all trapped water empty completely out of the heat exchanger and plumbing connections.
- Step 7: Activate the pressure relief valve lever briefly to ensure air enters the system, helping all water escape.
- Step 8: Once fully drained, leave the drain valves open or closed according to your manufacturer’s specific restart guidelines, and post a clear reminder note near the unit so no one accidentally turns the water back on while the drains are open.
Note: Draining procedures vary significantly between brands (Rinnai vs. Navien vs. Rheem). Never force a valve or assume a universal sequence. If you are uncertain about your model’s drainage ports, call a licensed plumber to prevent stripping threads or damaging internal brass fittings.
Should You Keep an Outdoor Tankless Water Heater Running During Winter?
Deciding whether to keep your unit operational or shut it down depends entirely on how you use your home during the colder months.
| Winter Protection Method | Main Purpose | Best Use Case | Important Limitation |
| Built-in Freeze Protection | Protects internal components | Normal winter habitation and daily hot water use | Requires specified continuous operating conditions and stable power |
| Pipe Insulation | Reduces heat loss and surface freezing | Exposed water pipes leading to/from the unit | Does not guarantee freeze prevention in extreme sub-zero winds |
| Outdoor-Rated Heat Tape | Provides supplemental pipe heating | Severely cold climates with vulnerable exterior piping | Requires proper electrical installation and a working GFCI outlet |
| Wind Protection | Reduces direct wind chill exposure | Exposed outdoor installations on windy gables | Must preserve required combustion and service clearances |
| Automatic Drain-Down System | Drains water during qualifying outages | Areas prone to winter power interruptions | Not all internal components may drain automatically without manual steps |
| Manual Winterization | Removes standing water entirely | Extended shutdowns, vacant vacation homes, or prolonged grid failure | Must follow model-specific instructions precisely; requires full restart later |
READ MORE: Luxaire Furnace Review: Prices, Efficiency & Comparison
What Happens If the Power Goes Out During Freezing Weather?
A winter blizzard rolls through, snapping power lines across your neighborhood. The lights flicker and go dark. For most household appliances, this is a temporary inconvenience. For an outdoor tankless water heater, however, a power outage is an immediate red flag.
When power cuts out:
- Internal Freeze Protection Fails: The ceramic heating blocks and electronic sensors turn off instantly.
- Rapid Freezing Occurs: Depending on how low the ambient temperature drops and how hard the wind is blowing, unprotected water inside a static heat exchanger can begin freezing in as little as 30 to 60 minutes.
- The Backup Plan: If you live in an area prone to frequent winter blackouts, consider investing in a portable generator or an uninterruptible power supply (UPS) compatible with your tankless water heater’s electrical draw (most units only draw 100–300 watts during normal operation, though ignition draws more briefly). Alternatively, if an extended outage is predicted and temperatures remain below freezing, safely shutting down and draining the unit is your safest defense against catastrophic freeze damage.
Common Mistakes to Avoid
Homeowners often make well-intentioned errors that inadvertently put their plumbing at risk. Avoid these common pitfalls:
- Assuming Built-In Protection Covers Everything: Thinking internal heaters protect external pipes and valves is the #1 cause of winter burst pipes.
- Unplugging the Heater in Winter: Unplugging the unit to save standby electricity deactivates its core freeze protection system.
- Ignoring Exposed Valves and Fittings: Leaving isolation valves, unions, and pressure relief valves uninsulated.
- Using Indoor-Rated Heat Tape Outdoors: Using standard indoor heating cables outdoors creates severe electrical shock and fire hazards.
- Blocking Air Intake or Exhaust Openings: Wrapping the unit too tightly or installing makeshift wind blockers that suffocate combustion airflow.
- Neglecting Condensate Drainage: Forgetting that high-efficiency condensing units have condensate lines that can freeze and crack.
- Forgetting About Power Outages: Failing to have an emergency plan for grid failures during sub-zero storms.
- Draining Incorrectly: Forcing valves or guessing the drain sequence, resulting in stripped threads or incomplete drainage.
Signs Your Outdoor Tankless Water Heater May Be Frozen
If a freeze catches you off guard, recognizing the warning signs early can help you minimize damage before a pipe ruptures completely. Watch for:
- No Hot Water: Turning on a hot faucet yields only cold water or zero flow.
- Reduced Water Flow: Sluggish or sputtering water flow, indicating partial ice blockage inside the line.
- Unusual Error Codes: Digital displays flashing error codes associated with ignition failure, low water flow, or temperature sensor faults (e.g., Code 11 or 12 on many Rinnai models).
- Visible Ice: Frost buildup or visible ice encasing the bottom manifold, water connections, or gas pipes.
- Water Leaks Upon Thawing: As temperatures rise slightly during the day, previously frozen cracks in copper coils or fittings begin spraying water.
- Unusual Noises: Banging, clanking, or whistling sounds when trying to draw hot water.
What to Do If Your Unit Freezes
- Stop Using It Immediately: Turn off the power and water supply to prevent further pressure buildup.
- Never Use Open Flames: Do not use a propane torch, heat gun, hair dryer on high heat, or open flame to thaw frozen pipes or heat exchangers. Extreme, localized heat causes rapid metal expansion, leading to explosive ruptures.
- Safe Thawing: Allow natural warming, use gentle ambient heat (like a safe, monitored space heater placed at a safe distance outdoors), or call a licensed professional immediately.
How Much Does It Cost to Winterize an Outdoor Tankless Water Heater?
Budgeting for winter maintenance is straightforward, and DIY preventative care is remarkably affordable compared to emergency repairs.
- DIY Materials (Pipe Insulation & Tape): $20 – $75 total for foam sleeves, weather tape, and outdoor-rated heat cables.
- Professional Plumbing Winterization Service: $150 – $350 for a professional technician to perform a comprehensive winter check, insulate exterior lines, test components, and verify proper operation.
- Emergency Freeze-Damage Repairs: $800 – $3,500+ if a copper heat exchanger bursts or main supply lines crack, requiring professional emergency replacement parts and labor.
Investing a small amount of time and money in annual tankless water heater winter maintenance easily prevents these staggering emergency expenses.
When Should You Call a Professional Plumber?
While many steps of tankless water heater winter preparation are DIY-friendly, certain situations demand a licensed professional:
- You are unsure about the correct model-specific draining or shutdown procedure.
- You notice active water leaks, gas odors, or corroded fittings.
- Internal components are already frozen and you need safe, professional thawing.
- Your unit experiences repeated freeze-protection system failures or persistent error codes.
- You need to install specialized automatic drain-down equipment or hardwired backup power solutions.
Comparison Table
| Feature / Consideration | Built-In Protection Only | Full Winterization (Insulation + Heat Tape + Checks) |
| External Pipe Safety | None (pipes remain exposed) | Fully protected against freezing |
| Power Outage Resilience | Poor (relies on continuous electricity) | Moderate (insulation slows heat loss during outages) |
| Wind Chill Defense | Limited to internal chassis | Enhanced with proper insulation and safe wind shielding |
| Cost | Free (factory feature) | $20 – $75 (DIY materials) |
| Peace of Mind | Low during severe storms | High throughout the entire winter season |
FAQs
How do I winterize an outdoor tankless water heater?
To winterize an outdoor tankless water heater, inspect the unit, insulate all exposed hot and cold water pipes with closed-cell foam sleeves, install outdoor-rated heat tape if you live in a severe climate, ensure the unit remains plugged in for built-in freeze protection, and keep combustion vents completely unblocked. If the home will be vacant, follow manufacturer instructions to drain all standing water from the system.
Can an outdoor tankless water heater freeze in winter?
Yes, an outdoor tankless water heater can freeze if sub-zero temperatures and severe wind chills overwhelm internal components, or if a winter power outage disables the unit’s built-in electric freeze-protection system. Unprotected exterior water pipes and valves are especially vulnerable to freezing and bursting.
Should I leave my tankless water heater plugged in during winter?
Yes, you should always leave your outdoor tankless water heater plugged in and powered on during the winter. Modern units rely on continuous electricity to power internal heating elements and temperature sensors that prevent internal freezing. Unplugging the unit removes its active freeze protection.
How cold can an outdoor tankless water heater withstand?
Most outdoor tankless water heaters can withstand freezing temperatures down to manufacturer-specified thresholds (often around -22°F to -30°F) provided they have continuous electrical power, active gas supply, proper pipe insulation, and protection against severe wind chill. Always check your specific owner’s manual for exact temperature ratings.
Do I need to drain my outdoor tankless water heater in winter?
You generally do not need to drain your tankless water heater during normal winter habitation if it has power and proper pipe insulation. However, you must completely drain the unit if the property will remain vacant and unheated, if you anticipate a prolonged winter power outage with no backup power, or if required by the manufacturer during extended shutdowns.

