Why is my bathtub not draining? In most residential plumbing systems, the culprit is a tangled mass of human hair, body hair, pet fur, and sticky soap scum binding together just beneath the drain crosshairs or inside the P-trap. But can I fix a clogged bathtub drain myself? Absolutely. Many common blockages can be cleared with basic household tools and a little bit of elbow grease before you ever need to call in a professional.
Before diving into professional services, homeowners can try several effective DIY strategies, ranging from cleaning the stopper to using hand augers. Whether you are dealing with a sluggish flow or standing water in bathtub fixtures, understanding how your plumbing works empowers you to tackle the problem safely and efficiently. Lets deep dive into “Bathtub Won’t Drain? Common Causes & 10 Easy to Fixes”
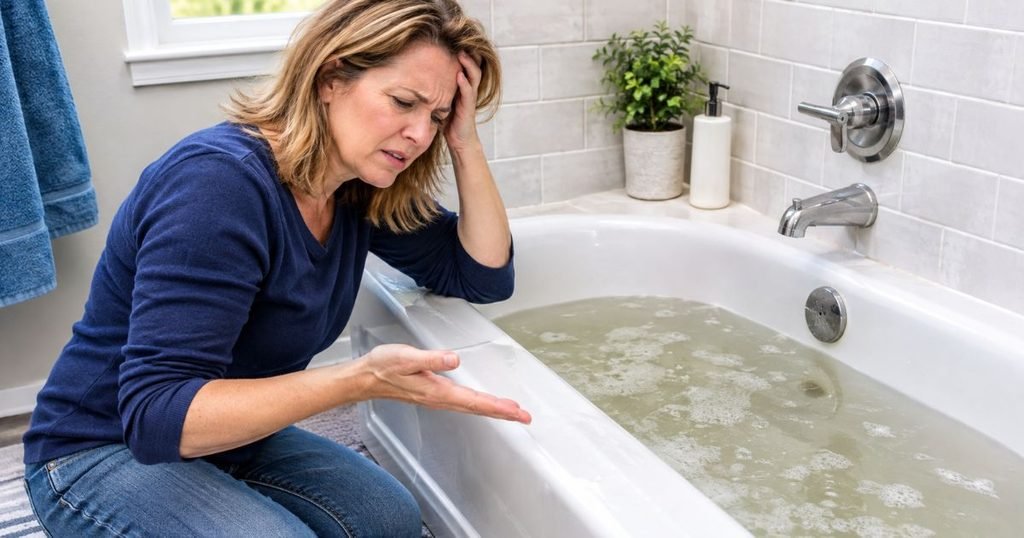
Why Is My Bathtub Not Draining?
To fix a stubborn drainage issue successfully, you first need to understand what is happening inside your pipes. Unlike kitchen sinks that primarily trap food particles and grease, bathroom tubs face a unique combination of organic debris. Here are the most common reasons why a bathtub won’t drain:
- Hair Buildup Inside the Drain: This is public enemy number one. Every time you wash your hair, strands slip past the drain guard or crossbars. Over time, hair weaves itself into a dense mat that acts like a net, catching everything else that flows down the pipe.
- Soap Scum and Body-Product Residue: Traditional bar soaps contain animal fats or vegetable oils that react with minerals in tap water, creating a sticky, wax-like substance known as soap scum. This residue coats the interior walls of your pipes, narrowing the passageway and anchoring loose hair in place.
- Dirt and Other Debris Accumulation: Mud, clay, and outdoor dirt washed off during a bath or post-workout shower settle at the bottom of the P-trap, combining with soap and hair to form a heavy sludge.
- A Clogged or Incorrectly Adjusted Bathtub Stopper: Sometimes the pipe is completely clear, but the mechanical stopper itself is stuck, misaligned, or gummed up with hair and grime, preventing it from lifting high enough to let water escape.
- Mineral Deposits and Hard-Water Buildup: If you live in an area with hard water, calcium and magnesium deposits can accumulate inside older pipes over the years, gradually choking off water flow.
- Blockages in the P-Trap or Drainpipe: The P-trap is the curved section of pipe located directly beneath the tub. Its job is to hold standing water to block sewer gases from entering your home, but this curve is also a natural trap for heavy debris and foreign objects.
- Older or Damaged Plumbing Pipes: In older homes featuring galvanized steel or cast-iron pipes, interior corrosion can create rough surfaces where hair and debris snag easily, causing frequent clogs.
- Main Sewer Line Problems: If multiple fixtures in your home such as the toilet, bathroom sink, and bathtub are draining slowly or backing up simultaneously, the issue likely extends far beyond your individual tub into the main sewer line.
READ MORE: Safe Enzyme Drain Cleaners — The Eco-Friendly Way to Keep Drains Clear
Signs Your Bathtub Drain Is Clogged
Catching a plumbing problem early can save you from dealing with a catastrophic wastewater backup. Watch out for these warning signs that indicate your bathtub drain is struggling:
- Water Drains More Slowly Than Usual: If water takes longer to spiral down while you’re showering, or if you notice a pool forming around your feet before the tub finally empties, your pipes are beginning to constrict.
- Standing Water Remains After Bathing: This is the most obvious sign. If you step out of the shower and find an inch or two of water refusing to budge, your drainage path is severely restricted or completely blocked.
- Water Completely Stops Draining: A total blockage means that hair, soap scum, and scale have fused together to form an impenetrable plug, sealing off the pipe entirely.
- Gurgling Sounds Come from the Drain: If you hear bubbles, glugging, or gurgling noises as the water tries to push past a restriction, it indicates trapped air escaping through the vent or water forcing its way around a partial blockage.
- Unpleasant Smells Coming from the Bathtub: Trapped organic matter, rotting hair, and stagnant water bacteria generate foul odors that waft up through the drain opening.
- Water Backs up into Other Bathroom Fixtures: If flushing the toilet or running the bathroom sink causes water to bubble up into your bathtub, you are dealing with a downstream blockage in the branch drain or main sewer line.
Minor symptoms like a slow drain or localized hair clogs are usually easy to manage yourself. However, multi-fixture backups, foul sewer odors, and gurgling sounds are red flags that point to deeper, more complex plumbing troubles.
How to Fix a Bathtub That Won’t Drain (10 DIY Methods)
When faced with a bathtub not draining, don’t panic. Work your way through these ten tried-and-true DIY methods, starting with the simplest and least invasive solutions.
1. Remove and Clean the Bathtub Drain Stopper
Many bathtub blockages are actually trapped right at the surface, tangled around the stopper mechanism itself. Before shoving tools down your pipes, inspect and remove your stopper.
- Tools or Materials Needed: Pliers, a flathead screwdriver, an old toothbrush, and paper towels.
- Step-by-Step Instructions:
- Identify your stopper type: pop-up, lift-and-turn, push-and-pull, or toe-touch.
- For a lift-and-turn stopper, turn the knob counterclockwise while holding the body, locate the set screw beneath the cap, loosen it with an Allen wrench, and lift the stopper off.
- For a toe-touch or push-and-pull stopper, unscrew the entire assembly by turning the cap counterclockwise (you may need to hold the base with pliers if it spins freely).
- Wipe away accumulated hair, soap scum, and slime from the stopper rocker arm and pin using paper towels and an old toothbrush soaked in warm, soapy water.
- Reinstall the stopper and test the drainage.
- When It Works Best: Ideal for superficial hair clogs and stoppers that fail to open fully.
- Important Precautions: Do not overtighten brass or chrome stopper parts when reinstalling, as excessive torque can strip the delicate threads inside the crossbar.
- When to Stop: If the stopper mechanism is rusted solid or refuses to unscrew, stop to avoid snapping the crossbar inside the drain shoe.
2. Remove Visible Hair and Debris
Once the stopper is out of the way, you have a clear line of sight into the drain throat.
- Tools or Materials Needed: A small flashlight, a pair of rubber gloves, and needle-nose pliers or a bent wire coat hanger.
- Step-by-Step Instructions:
- Shine your flashlight directly down the drain opening to locate the blockage.
- Put on your rubber gloves.
- Use your fingers, needle-nose pliers, or a small hooked wire to gently grab and pull out any visible clumps of hair and gunk.
- Pull straight up slowly to avoid breaking the clump apart inside the pipe.
- Discard the extracted sludge directly into the trash.
- When It Works Best: Perfect for clogs located right near the top of the drain crossbars.
- Important Precautions: Never force rigid metal wires deep into the pipe, as you can scratch plastic PVC or puncture older metal pipes.
- When to Stop: If the blockage is completely out of reach or feels hard and unyielding, move on to a flexible tool.
3. Use a Bathtub Plunger
Plunging isn’t just for toilets. A standard cup plunger or better yet, a dedicated flat-bottomed or accordion bathtub plunger can create enough hydraulic pressure to break up minor blockages.
- Tools or Materials Needed: A bathtub plunger (flat-bottomed style works best on smooth tub surfaces), and a clean rag or washcloth.
- Step-by-Step Instructions:
- Wipe away any standing water if it’s excessively deep, leaving just enough water to submerge the rubber bell of the plunger.
- Crucial Step: Locate the bathtub overflow plate (the metal or plastic drain opening near the top front of your tub) and seal it tightly using a wet, folded washcloth or heavy-duty tape. If you don’t seal the overflow, air will simply escape through it instead of applying pressure to the clog.
- Place the plunger cup squarely over the main drain opening, ensuring a tight seal.
- Pump the handle vigorously up and down 5 to 10 times with steady, rhythmic force.
- Quickly pull the plunger away and watch to see if the standing water rushes down the drain.
- When It Works Best: Excellent for dislodging soft clogs, soap buildup, and loose debris caught just past the P-trap.
- Important Precautions: Do not use aggressive, violent plunging motions that could crack vintage porcelain-coated cast-iron tubs or stress glued PVC joints.
- When to Stop: If plunging yields no results after three separate attempts, the clog is too dense or solid for hydraulic pressure.
4. Try a Plastic Drain Snake
Plastic hair-removal zip strips often sold as inexpensive, flexible barbed plastic snakes are phenomenal tools for residential bathrooms.
- Tools or Materials Needed: A flexible plastic barbed drain snake (readily available at any hardware store).
- Step-by-Step Instructions:
- Remove the drain stopper to expose the open drain hole.
- Insert the flexible plastic strip gently down into the drain opening.
- Feed it downward carefully, twisting or rotating it slightly as it encounters minor bends in the pipe.
- Once you feel resistance (indicating you’ve reached the hair clog), push and pull the tool up and down a few times so the side barbs can latch onto the hair mat.
- Slowly pull the snake back up out of the drain. It will typically emerge wrapped in a surprising amount of dark hair and slime.
- Wipe the debris off with a paper towel, rinse the tool, and repeat until the strip comes out clean.
- When It Works Best: Specifically designed for stubborn hair clogs tangled inside the upper drain pipe and P-trap.
- Important Precautions: Never force the plastic strip aggressively; if it catches permanently on a pipe fitting, pulling too hard can snap the plastic handle.
- When to Stop: If the plastic snake comes back clean but the bathtub still won’t drain, the blockage is located deeper in the system beyond the reach of a short strip.
READ MORE: How to Fix Clogged Drains: DIY vs Professional Repair
5. Use a Handheld Plumbing Drain Auger
If a plastic strip isn’t long enough, a handheld drum auger (often called a plumber’s snake) gives you extra reach and mechanical advantage.
- Tools or Materials Needed: A handheld drain auger (typically featuring a 15-to-25-foot flexible steel cable stored inside a plastic or metal housing), old towels, and a bucket.
- Step-by-Step Instructions:
- Remove the bathtub drain stopper and position an empty bucket beneath the drain area if necessary.
- Loosen the thumb screw on the auger housing to release a few inches of the steel cable.
- Feed the cable tip into the drain opening until you feel it hit a hard obstruction or the curve of the P-trap.
- Tighten the thumbscrew and crank the handle clockwise while gently pushing the cable forward. The flexible auger head will bore into or hook onto the blockage.
- When you feel the cable break through the resistance or catch the clog, crank in reverse while pulling the cable slowly out of the pipe.
- Flush the drain thoroughly with warm water to clear remaining sediment.
- When It Works Best: Highly effective for deep clogs located past the P-trap or further down the branch drain line.
- Important Precautions: Exercise caution when navigating the sanitary tee or P-trap bends. If you feel heavy resistance that doesn’t give way, stop immediately forcing the steel cable can puncture old or corroded pipes.
- When to Stop: If the metal cable gets completely wedged or twists into a kink inside the wall, stop and call a professional plumber to prevent pipe damage.
6. Flush With Hot Water
Thermal energy can help dissolve and break down soft grease, oils, and soap scum adhering to pipe walls.
- Tools or Materials Needed: A kettle or large pot for heating water.
- Step-by-Step Instructions:
- Bring a gallon of water to a near boil on your stove.
- Carefully carry the hot water to the bathroom.
- Slowly and steadily pour the hot water directly down the bathtub drain opening in a continuous stream.
- Wait a few minutes to see if the heat breaks down the soap residue, then run the tap to check drainage.
- When It Works Best: Useful for preventative maintenance or minor clogs driven by soap scum and body oils.
- Important Precautions: Never pour boiling water directly into porcelain-enameled cast-iron or acrylic bathtubs if the porcelain is ice-cold, as thermal shock can cause the porcelain to crack or craze. Furthermore, never pour boiling water into older PVC plastic pipes or glued slip-joint fittings, as excessive heat can soften PVC and compromise pipe joints. Use hot tap water (around 120°F to 140°F) for safety.
- When to Stop: If the water does not drain after one hot water flush, do not repeat it endlessly; move to mechanical clearing methods.
7. Try Baking Soda and Vinegar Carefully
A classic eco-friendly home remedy relies on a chemical reaction between baking soda and vinegar to loosen minor organic buildup.
- Tools or Materials Needed: 1 cup of baking soda, 1 cup of white vinegar, and hot water.
- Step-by-Step Instructions:
- Clear any standing water out of the bathtub as much as possible.
- Pour 1 cup of dry baking soda directly down the open bathtub drain.
- Follow the baking soda immediately with 1 cup of warm white vinegar.
- Immediately cover the drain with a plug or wet cloth to trap the fizzing chemical reaction inside the pipes, forcing the bubbling action downward against the clog.
- Let it sit undisturbed for 15 to 30 minutes.
- Flush the drain thoroughly with a gallon of hot tap water.
- When It Works Best: Great for dissolving light grease, soap scum, and minor surface grime.
- Important Precautions: Understand its limitations: baking soda and vinegar will not dissolve solid clumps of human hair. It is purely a mild grease-and-scum dissolver.
- When to Stop: If the clog is hair-based, this method will have virtually no effect. Do not rely on it for heavy blockages.
8. Inspect the Bathtub Overflow and Stopper Mechanism
Sometimes the drainpipe is completely clear, but the linkage inside the overflow plate is malfunctioning, keeping the stopper partially closed.
- Tools or Materials Needed: A screwdriver.
- Step-by-Step Instructions:
- Locate the metal or plastic overflow faceplate on the wall of the tub beneath the faucet.
- Unscrew the two mounting screws holding the faceplate in place.
- Carefully pull the faceplate forward. Attached to it will usually be a long metal linkage arm with a rocker weight or spring at the bottom (trip-lever assembly).
- Inspect the linkage for accumulated hair, corrosion, or misaligned parts.
- Clean off any hair wrapped around the linkage, adjust the linkage rod length if necessary to ensure it lifts the stopper fully, and re-secure the faceplate.
- When It Works Best: Best when the tub drains slowly even though the drain throat looks clean, or when the trip lever feels loose and floppy.
- Important Precautions: Do not let the internal linkage drop down inside the wall cavity when removing the faceplate, or you will have to fish it out with a wire hanger.
- When to Stop: If the internal mechanical linkage is broken, rusted through, or incompatible with your tub design, replacement parts or a professional plumber will be needed.
9. Check for a Deeper Drainpipe Blockage
When standard DIY tools like plastic strips and hand augers fail to reach or clear the obstruction, the blockage has likely migrated deep into the horizontal waste arm or the vertical stack.
- Tools or Materials Needed: Flashlight, bucket, channel-lock pliers.
- Step-by-Step Instructions:
- Inspect the exposed plumbing beneath your bathtub (if you have an access panel in an adjoining closet, hallway, or basement ceiling).
- Look for signs of leaks, wet drywall, or corrosion around the P-trap and sanitary tee.
- If accessible, place a bucket underneath the P-trap, loosen the slip-nut fittings with channel-lock pliers, and check inside the trap for compacted debris or foreign objects.
- Clean the trap thoroughly and reassemble tightly.
- When It Works Best: Effective when an object (like a toy cap or shampoo bottle lid) has dropped past the drain shoe and wedged firmly in the trap.
- Important Precautions: Always place a bucket underneath before opening any drain trap, as stagnant water inside the trap will spill out immediately. Ensure rubber washers are seated correctly when reassembling to prevent leaks.
- When to Stop: If your bathtub plumbing is completely enclosed behind finished walls and ceilings with no access panel, do not attempt to cut into drywall or PVC yourself call a licensed plumber.
10. Contact a Professional Plumber
When every DIY trick in the book has failed and standing water stubbornly refuses to budge, it’s time to call in reinforcement.
- Tools or Materials Needed: Phone, local plumber contact info.
- Step-by-Step Instructions:
- Stop attempting DIY fixes that could worsen pipe damage.
- Contact a licensed, insured local plumbing contractor.
- Explain the symptoms clearly (e.g., standing water, multi-fixture backup).
- Let the professional deploy commercial-grade motorized drain snakes, hydro-jetting equipment, or sewer camera inspections.
- When It Works Best: Necessary for severe, deep-seated blockages, structural pipe failures, or main sewer line obstructions.
- Important Precautions: Avoid pouring chemical drain cleaners right before calling a plumber, as residual chemicals can splash back and cause severe chemical burns to the technician working on the open pipe.
- When to Stop: This is the final step when all safe home remedies are exhausted.
READ MORE: Best drain snake for home use — buyer’s guide for U.S. homeowners
What NOT to Do When Your Bathtub Won’t Drain
When frustration sets in, it is easy to make hasty mistakes that turn a minor plumbing hiccup into an expensive disaster. Keep these critical safety rules in mind:
- Do Not Mix Different Chemical Drain Cleaners: Never mix commercial liquid drain openers (such as bleach-based formulas with acid-based formulas). Doing so can trigger a violent chemical reaction, releasing toxic chlorine gas or causing explosive boiling and splashing.
- Do Not Mix Bleach, Ammonia, Acids, or Other Household Chemicals: Combining household cleaning agents creates hazardous fumes that irritate respiratory tracts and burn skin upon contact.
- Do Not Plunge or Use a Drain Snake After Chemical Cleaner Has Been Poured: If chemical drain cleaner is sitting in your bathtub drain, plunging or snaking can splatter caustic liquid high into the air, landing on your skin, eyes, or bathroom fixtures and causing severe chemical burns.
- Do Not Force Metal Tools into Delicate Drain Assemblies: Jamming rigid metal rods or screwdrivers blindly into plastic P-traps or old, thin-walled brass pipes can puncture or crack the plumbing, leading to hidden leaks behind your walls or under the floorboards.
- Do Not Pour Boiling Water into Tubs or Pipes Without Checking Material Compatibility: As noted earlier, boiling water can crack porcelain-coated cast iron and warp PVC slip-joints.
- Do Not Repeatedly Use Harsh Chemicals: Pouring corrosive chemical drain cleaners down your pipes over and over eats away at metal pipe threading, degrades rubber gaskets, and destroys plumbing infrastructure.
- Do Not Ignore Sewage Orders or Wastewater Backing Up: If raw sewage is backing up, stop using all water fixtures immediately. Ignoring this warning sign can lead to major structural contamination and massive remediation costs.
How Much Does It Cost to Fix a Clogged Bathtub Drain in the USA?
Understanding what you might spend helps you weigh the value of DIY efforts against hiring a professional. Pricing varies depending on geographic location, labor rates, and the severity of the blockage.
| Service or Solution | Typical Cost Considerations |
| DIY plastic drain-cleaning tool | $3 to $8 (one-time purchase at a hardware store) |
| Manual drain snake (hand auger) | $15 to $35 (basic tool purchase) |
| Professional bathtub drain cleaning | $100 to $275 (averages around $225 for standard tub/shower clearing) |
| Professional drain augering / snaking | $150 to $300 (depending on cable length and clog depth) |
| Advanced plumbing camera inspection | $250 to $350 (pinpoints exact blockage location and pipe condition) |
| Main sewer line cleaning | $200 to $800+ (required if multiple fixtures are clogged simultaneously) |
Factors Affecting Final Plumbing Costs:
- Location and Local Labor Rates: Urban areas with higher costs of living generally feature higher hourly plumber rates than rural regions.
- Severity and Type of Clog: A simple hairball near the surface takes minutes to clear, whereas compacted grease, scale, or tree root intrusion requires heavy-duty machinery.
- Accessibility of the Drainpipe: If your bathtub lacks an access panel and the plumber must work through cramped spaces or crawlspaces, labor time increases.
- Age and Condition of Plumbing: Older homes with fragile cast-iron or galvanized pipes require delicate handling to avoid breaking brittle infrastructure.
- Emergency or After-Hours Service: Calling a plumber on a holiday, weekend, or late at night typically incurs emergency dispatch fees ranging from $150 to $300 on top of standard labor costs.
READ MORE: How Much Does a Plumber Cost to Unclog a Drain?
When Should You Call a Professional Plumber?
While home remedies solve a vast majority of minor clogs, certain scenarios demand the expertise, specialized training, and heavy-duty equipment of a licensed professional:
- The Bathtub Remains Completely Blocked: If you’ve tried plunging, snaking, and cleaning the stopper, yet standing water refuses to budge an inch, the clog is too dense for handheld tools.
- Multiple Drains Are Backing Up Simultaneously: When your bathtub, bathroom sink, and toilet all drain sluggishly or overflow at the same time, the blockage is located downstream in the main drainage stack.
- Water Backs up When Flushing the Toilet: This is a classic symptom of a main sewer line vent blockage or severe branch line obstruction that requires professional intervention.
- Persistent Sewage Odors Are Present: Foul, rotten-egg smells emanating from your drains indicate dried-out P-traps, venting issues, or raw sewage accumulation in the sewer line.
- Gurgling Sounds Occur in Multiple Plumbing Fixtures: Bubbling air trapped in the system points to ventilation failures or deep pipe restrictions.
- Repeated Clogs Occur Within a Short Period: If you clear your bathtub drain every two weeks only for it to clog again, you likely have a structural pipe defect, pipe sag (belly), or heavy root intrusion.
- Pipes Appear Damaged or Corroded: Rusted metal pipes or leaking PVC joints under the tub require immediate professional replacement to prevent water damage.
How to Prevent Your Bathtub Drain From Clogging Again
An ounce of prevention is worth pounds of expensive plumbing repairs. Follow these simple preventive habits to keep your bathtub flowing freely year-round:
- Install a Bathtub Hair Catcher: Purchase a silicone or stainless-steel mesh hair strainer that sits over your drain opening. It catches loose hair before it ever enters the pipe while still allowing water to flow smoothly.
- Remove Hair from the Stopper Regularly: Make it a habit every week or two to wipe down your drain stopper and pull away any stray hairs.
- Clean the Drain Opening Periodically: Flush your drain monthly with a mixture of hot tap water and mild dish soap to prevent soap scum from bonding to the pipe walls.
- Avoid Washing Large Amounts of Hair Down: Brush your hair thoroughly before stepping into the shower or bath to minimize the loose strands washing down the drain.
- Inspect the Stopper Mechanism Occasionally: Ensure your stopper lifts fully and closes securely without catching debris.
- Schedule Professional Inspections: If your home is older, consider having a plumber run a sewer camera through your lines every few years to catch minor scale buildup before it turns into an emergency backup.
Simple Weekly and Monthly Maintenance Routine:
- Weekly: Wipe down the drain cover and remove trapped surface hair. Run hot tap water down the drain for 60 seconds after your bath.
- Monthly: Pour a bucket of hot tap water down the drain to melt away minor soap film accumulation. Check the operation of the drain stopper and overflow lever.
Bathtub Won’t Drain: DIY Fix vs. Professional Plumbing Service
| Feature | DIY Fix (Plunger, Snake, Stopper Cleaning) | Professional Plumbing Service |
| Cost | $0 to $35 (cost of basic tools) | $100 to $350+ (depending on service type) |
| Time Required | 15 to 45 minutes | 1 to 2 hours |
| Tools Needed | Plumber’s snake, gloves, plunger, flashlight | Motorized augers, hydro-jets, sewer cameras |
| Suitable Clog Types | Surface hair clogs, soap scum, minor P-trap blockages | Deep pipe clogs, main line blocks, root intrusion |
| Risk of Damaging Plumbing | Low to moderate if tools are used carelessly | Very low (handled by licensed professionals) |
| When Preferred | For minor, localized, and recurring slow drains | For total blockages, multi-fixture backups, or sewage issues |
Frequently Asked Questions
Why is my bathtub full of water and won’t drain?
A bathtub full of water that refuses to drain is typically caused by a dense, compacted hairball combined with soap scum and body oils trapped right beneath the drain crossbars or inside the P-trap. Over time, this organic mass seals off the pipe completely. In more severe cases, a blockage in your home’s main branch drain or sewer line can also trap water in the tub.
How do you unclog a bathtub drain full of hair?
To clear a hair clog, start by removing the bathtub drain stopper. Shine a flashlight down the opening and use a pair of needle-nose pliers or an inexpensive plastic barbed hair-removal snake to hook and pull out the hair mat. If the clog is deeper, feed a handheld mechanical drain auger into the pipe, crank the handle to break up the mass, and flush the drain thoroughly with warm water.
What is the fastest way to unclog a bathtub drain?
The fastest way to clear a minor bathtub drain clog is by removing the stopper, manually pulling out any visible hair with a gloved hand or plastic tool, and using a cup plunger. Sealing the overflow plate with a wet rag while plunging creates the necessary hydraulic pressure to force the blockage through the P-trap and restore normal water flow in just a few minutes.
Can baking soda and vinegar unclog a bathtub drain?
Baking soda and vinegar can help dissolve light soap scum, grease, and minor surface grime through their fizzing chemical reaction. However, they are not effective against solid clumps of human hair, which are the primary cause of most bathtub clogs. Use this method as a routine maintenance cleaner rather than a guaranteed fix for severe hair blockages.
When should I call a plumber for a clogged bathtub drain?
You should call a professional plumber if your bathtub remains completely blocked after trying standard DIY methods like plunging and snaking. Other critical signs include water backing up into multiple fixtures simultaneously, gurgling sounds in your pipes, unpleasant sewage odors, or wastewater backing up when you flush your toilet, as these indicate a serious main sewer line problem.
Final Thoughts:
Dealing with a bathtub that won’t drain can put a damper on your day, but it’s a manageable problem when approached methodically. Always start with the simplest, least invasive solutions such as cleaning your bathtub stopper and pulling out visible hair with a plastic tool before moving on to plunging or hand augering.
Remember to prioritize safety: avoid mixing harsh chemical drain cleaners, never force rigid metal tools blindly into delicate pipes, and respect the material limits of your plumbing system. If your DIY efforts don’t resolve the issue, or if you encounter multi-fixture backups, foul sewage odors, and gurgling sounds, do not hesitate to contact a qualified local plumber. Addressing stubborn clogs promptly protects your home from water damage and keeps your plumbing system running smoothly for years to come.
Plumbing Safety Disclaimer
The information provided in this article is for educational and informational purposes only. Plumbing systems vary by age, material, and local building codes. Always wear appropriate safety gear, turn off water supplies when necessary, and consult a licensed, insured professional plumber before undertaking complex repairs or if you are unsure of your ability to complete a task safely.

