Winter in the United States brings cozy evenings by the fireplace, holiday celebrations, and beautiful snowscapes. Unfortunately, it also brings one of the most stressful plumbing emergencies a homeowner can face: frozen water pipes. When harsh winter weather drops temperatures below freezing, water inside residential plumbing can turn to ice. Because water expands as it freezes, this creates immense pressure inside the pipe network, frequently leading to cracked joints, split lines, and catastrophic water damage when the ice thaws.
Knowing how to thaw frozen pipes safely and quickly can save you thousands of dollars in emergency repair bills and prevent extensive structural damage to your home. Whether you are dealing with a completely dry kitchen faucet during a morning freeze or noticing frost on exposed lines in your basement, taking prompt, measured action is essential. Lets deep dive into “How to Thaw Frozen Pipes Safely: A Step-by-Step Guide”
Why Do Water Pipes Freeze?
To understand how to fix frozen pipes, it helps to understand the underlying science. Water has a unique molecular property: as it transitions from a liquid to a solid, it expands by approximately nine percent. When winter temperatures plunge, plumbing pipes located in unheated or under-insulated areas drop in temperature rapidly.
Several primary factors cause frozen pipes in house structures:
- Extreme Outdoor Temperatures: When the mercury drops well below freezing for extended periods, frost lines deepen, chilling exterior walls and crawl spaces.
- Poorly Insulated Water Pipes: Pipes located in attics, crawl spaces, and exterior walls lack adequate thermal protection, exposing them directly to frigid drafts.
- Drafts and Air Leaks: Small gaps, cracks, or unsealed penetrations in the home’s exterior let biting winter air blow directly onto indoor water supply lines.
- Unheated Spaces: Unheated basements, detached garages, and vacant rental properties often lose ambient heat quickly during a cold snap.
When water inside a pipe freezes, it forms an ice plug. This block prevents water from flowing to your fixtures, while pressure continues to build between the ice blockage and the closed faucet. This trapped pressure is what causes frozen plumbing pipes to burst.
READ MORE: Best Practices to Prevent Frozen Pipes
How to Tell If Your Pipes Are Frozen
Catching a frozen water supply line early is the best way to prevent a full-blown plumbing emergency. Homeowners should watch for several clear warning signs during cold weather:
- Little or No Water From Faucets: Turning on a handle and getting only a weak trickle or absolute silence is the classic indicator of a frozen pipe.
- Reduced Water Pressure: A noticeable drop in pressure at one or more fixtures usually points to partial freezing inside the supply line.
- One Working Faucet: If your kitchen sink works fine but the upstairs bathroom has no water, the freezing is likely isolated to a specific branch line.
- Visible Frost or Ice: Exposed copper or PEX pipes in the basement or garage covered in frost or exterior ice crystals indicate immediate freezing.
- Unusual Plumbing Noises: Clanking, whistling, or banging sounds when you open a valve can signal expanding ice or restricted water flow.
- Bulging or Cracked Pipe Sections: Visible warping, swelling, or hairline cracks mean the pipe has already suffered structural damage from expanding ice.
- Unexpected Leaks: Sometimes a frozen pipe in winter only reveals itself when temperatures rise slightly, melting the ice and exposing a split seam.
It is important to distinguish frozen pipes from other household issues. For example, a closed shut-off valve will stop water instantly without frost on the pipes, while a clogged aerator will reduce flow at a single sink while leaving other fixtures functioning normally.
Where Do Pipes Usually Freeze in a House?
Not all plumbing lines are equally vulnerable. Water lines freeze most often in areas exposed to cold outdoor drafts or unconditioned spaces. When inspecting your home, pay close attention to these common trouble spots:
- Under Kitchen and Bathroom Sinks: Cabinets built against exterior walls trap stagnant air, shielding pipes from household heating vents.
- Inside Exterior Walls: Supply lines running through outside walls lack interior thermal insulation unless specifically protected.
- Unheated Basements and Crawl Spaces: These subterranean spaces remain chilly throughout winter, especially if foundation vents are left open.
- Attics: Vertical supply lines running to second-floor bathrooms often freeze in uninsulated attic spaces.
- Garages: Attached and detached garages experience sub-freezing temperatures quickly, threatening utility supply lines and hose bibs.
- Outdoor Faucets and Hose Bibs: Uninsulated exterior spigots frequently freeze back into the interior wall if garden hoses are left attached.
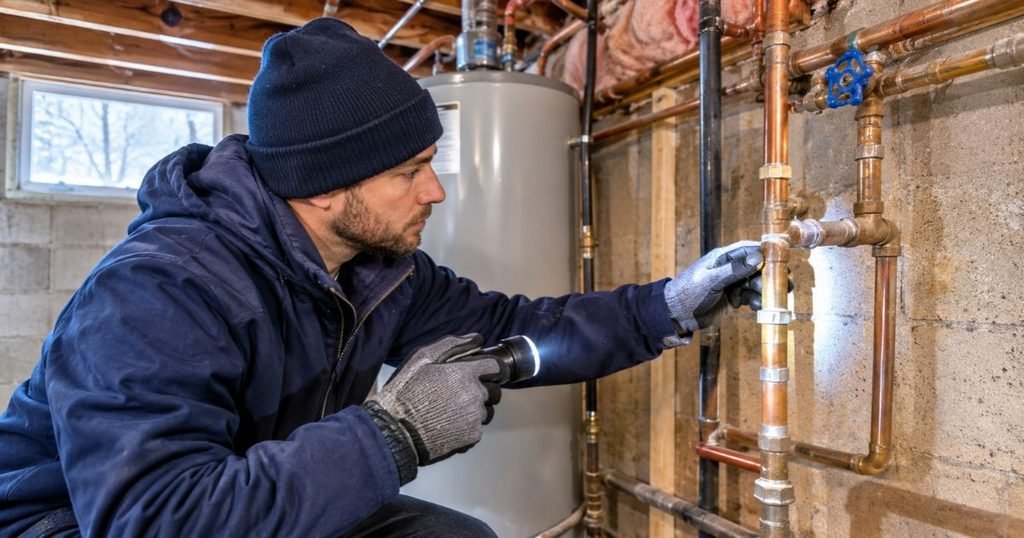
Homeowners can inspect accessible basement, crawl space, and under-sink plumbing safely with a flashlight, checking for frost buildup or unusually cold metal surfaces.
READ MORE: How to Safely Unfreeze PVC Pipes: A Step-by-Step Guide
What to Do Before Thawing Frozen Pipes
Before you attempt any DIY thawing, safety must be your top priority. Preparation prevents minor plumbing issues from turning into major property damage or personal injury. Take these essential steps first:
- Locate and Test Your Main Water Shut-Off Valve: Know exactly where your main water valve is and ensure it closes completely. If a pipe bursts while thawing, you need to shut off the water instantly.
- Inspect for Visible Cracks and Leaks: Carefully examine accessible pipe sections. If a pipe is already split, do not attempt to thaw it without shutting off the water first.
- Turn Off the Water if a Leak is Suspected: If you notice bulging or active dripping, shut off the main supply right away.
- Open the Affected Faucet: Leave the faucet handle wide open. As ice inside the pipe melts, steam and water need an escape route to relieve pressure.
- Inspect Nearby Plumbing Lines: Frozen pipes rarely occur in complete isolation. Check adjacent pipes in the same wall cavity or run.
- Prioritize Electrical Safety: Keep extension cords, power strips, and heating devices well away from puddles, wet floors, and damp crawl spaces.
- Protect Furniture and Belongings: Move items out from under sinks or vulnerable ceilings so you can catch any unexpected drips.
When to call a professional: If the frozen section is hidden deep inside a finished wall, if you cannot locate the shut-off valve, or if multiple lines are frozen simultaneously, stop DIY efforts and contact a licensed plumber.
How to Thaw Frozen Pipes: 5 Safe Methods
Once safety precautions are complete, you can begin the thawing process. Always work with gentle, controlled heat, starting near the faucet and working your way back toward the frozen blockage. This allows trapped steam and melting water to escape safely through the open faucet.
1. Use an Electric Hair Dryer
An electric hair dryer is one of the safest and most effective tools for thawing exposed plumbing pipes.
- Identify the Accessible Frozen Pipe: Locate the uninsulated or frosty section of copper or PEX pipe.
- Begin Near the Faucet: Start warming the pipe closest to the open faucet and gradually move your way backward toward the solid ice block.
- Keep the Dryer Moving: Never hold the hair dryer in one spot too long. Continuous movement distributes heat evenly and prevents thermal shock to the pipe material.
- Maintain Distance from Water: Ensure the cord and dryer stay clear of standing water or damp surfaces to prevent electrical hazards.
- Practice Patience: Gradual heating allows the ice to melt smoothly without generating explosive steam pressure inside the line.
2. Use an Electric Heating Pad
Electric heating pads offer a steady, wrapping heat source for easily accessible straight pipe runs.
- Wrap the Pad Around the Pipe: Secure a standard electric heating pad directly around the frozen section of the pipe.
- Set to Low or Medium: Avoid cranking the pad to its highest setting immediately; gentle, consistent warmth is ideal.
- Follow Manufacturer Guidelines: Never wrap a heating pad in a way that traps moisture against electrical components.
- Monitor Continuously: Stay in the area and check the pipe every few minutes to gauge thawing progress and ensure safe operation.
3. Apply Warm Towels to Frozen Pipes
Using warm towels is a traditional, fire-safe method that works exceptionally well for tight spaces and delicate plumbing lines.
- Soak Towels in Warm Water: Submerge clean hand towels or rags in hot tap water, then wring them out so they are damp, not dripping.
- Wrap the Frozen Pipe: Carefully wrap the warm, damp towels completely around the frozen section of the pipe.
- Replace as They Cool: As the towels absorb the cold from the ice, they will chill quickly. Re-soak them in warm water and reapply.
- Ideal for Exposed Plumbing: This method is gentle and highly effective for small copper or PVC pipe sections under sinks and in utility rooms.
4. Use a Portable Space Heater
If a frozen pipe is located in an open basement, utility room, or crawl space, warming the entire ambient area can thaw the line safely.
- Warm the Surrounding Area: Place a portable electric space heater in the room or space containing the frozen plumbing.
- Maintain Safe Clearances: Keep the heater at least three feet away from furniture, insulation, cardboard boxes, and combustible materials.
- Never Leave Unattended: Monitor the space heater constantly while it runs.
- Prioritize Electrical Safety: Damp basements increase shock risks; ensure your heater is plugged into a GFCI-protected outlet.
5. Increase Warm Air Circulation Around Exposed Pipes
Sometimes simple environmental adjustments are all it takes to resolve minor freezing under kitchen and bathroom counters.
- Open Cabinet Doors: Swing open kitchen and bathroom vanity doors under sinks to let warm indoor air reach the plumbing against exterior walls.
- Improve Airflow: If necessary, place a small room fan nearby to gently push warm air into cramped cabinet spaces.
- Keep Home Heated: Ensure your home thermostat is set to a consistent temperature (at least 65°F) during severe winter weather.
- Effective for Under-Sink Lines: This passive method works wonders for resolving minor freezing in vulnerable sink supply lines before they turn into solid blocks.
Thawing Method Comparison
| Thawing Method | Best For | Important Safety Consideration |
| Hair Dryer | Accessible exposed pipes | Keep away from water and keep moving |
| Heating Pad | Exposed straight pipe sections | Follow manufacturer instructions; monitor closely |
| Warm Towels | Accessible small pipe sections | Replace towels frequently as they cool |
| Space Heater | Warming surrounding rooms or basements | Keep away from flammable materials and damp floors |
| Warm Air Circulation | Pipes under kitchen and bathroom cabinets | Maintain safe indoor temperatures and open doors |
READ MORE: How to Winterize an Outdoor Tankless Water Heater
How to Thaw Frozen Pipes Behind Walls
Frozen water pipes located inside exterior walls or ceilings present a unique challenge because they are completely hidden from direct view.
- Recognize Drywall Warning Signs: If your faucets run dry and visible pipes in the basement feel warm, the blockage is likely inside an exterior wall cavity.
- Identify the Likely Location: Note which rooms or fixtures are affected and trace the wall line where supply runs are located.
- Avoid Random Cutting: Never start cutting holes in drywall blindly. You risk slicing into electrical wires or making unnecessary structural damage.
- Warm the Surrounding Room: Turn up your thermostat, place space heaters near the cold wall, and open interior doors to encourage warm air circulation through the wall cavity.
- Call a Professional: If warming the room does not restore flow within a couple of hours, contact a licensed plumber who has specialized infrared cameras and pipe-thawing equipment.
How to Thaw Frozen Pipes Under a Sink
Kitchen and bathroom sinks are among the most frequent locations for winter plumbing trouble. Follow this practical DIY guide to clear a frozen sink line:
- Open Cabinet Doors: Clear out cleaning supplies and open all cabinet doors beneath the sink to let room air circulate.
- Check the Exposed Lines: Inspect both the hot and cold water supply lines for frost, condensation, or rigid ice stiffness.
- Keep the Faucet Open: Leave the sink faucet handles open so melting water can drain out.
- Apply Gentle Heat: Use a hair dryer on a medium setting or wrap the supply line in warm, damp towels.
- Monitor Progress: Listen for the sound of rushing water or watch for flow to resume at the faucet.
- Check for Leaks: Once water returns, inspect all fittings, shut-off valves, and flexible supply connectors for cracks or drips.
- Store Chemicals Safely: Remember to move household cleaners and chemicals away from temporary heating equipment and safely out of reach of children.
What NOT to Do When Thawing Frozen Pipes
When dealing with frozen pipes, panic can lead homeowners to try dangerous shortcuts. Using improper techniques can start house fires, cause severe personal injury, or rupture your plumbing system. NEVER use any of the following methods:
- Blowtorches: Open flames reach extreme temperatures instantly, creating massive fire hazards and vaporizing water inside pipes into explosive steam pressure.
- Open Flames: Matches, lighters, or propane torches should never touch plumbing pipes.
- Propane or Kerosene Heaters: Unvented combustion heaters placed near walls or pipes risk igniting building materials.
- Charcoal Stoves or Grills: Never bring outdoor grills or charcoal burners indoors to thaw pipes; they produce lethal carbon monoxide gas.
- Boiling Water Poured Directly Over Pipes: Pouring boiling water directly onto cold metal or plastic pipe creates sudden thermal shock, often shattering the pipe instantly.
- Excessive or Uncontrolled Heat: Rapid temperature spikes in frozen pipes cause immediate pressure fractures.
- Electrical Appliances Near Standing Water: Using hair dryers or heating pads in flooded areas without proper grounding risks severe electrical shock.
Always prioritize safety. If a thawing method feels risky, stop immediately and call a professional.
READ MORE: Heat Pump Running but Not Cooling: Causes, Fixes & When to Call a Pro
How Long Does It Take to Thaw Frozen Pipes?
Homeowners often ask how long the thawing process takes, but there is no universal answer. Thawing time depends on several key variables:
- Pipe Material: Copper conducts heat quickly and often thaws faster than PEX or rigid PVC.
- Length of the Frozen Section: A localized ice block an inch long will clear much faster than a frozen stretch running ten feet through an exterior wall.
- Severity of Freezing: A pipe with slush takes minutes to clear; a completely solid ice plug can take an hour or more of steady warming.
- Accessibility: Pipes sitting out in an open basement thaw faster than pipes trapped behind insulation and drywall.
- Ambient Temperature: Colder surrounding air slows down the thawing process.
- Method Used: Consistent, controlled heat sources work steadily, while passive room warming takes longer.
Some minor frozen sections thaw in 15 to 30 minutes, while hidden or severely frozen lines can take several hours. If a pipe does not show signs of thawing after an hour of safe DIY effort, call a licensed plumber.
What to Do After Frozen Pipes Thaw
Successfully restoring water flow is a major relief, but your work is not finished yet. Once the ice melts, take these post-thaw steps:
- Restore Water Slowly: If you shut off your main water valve, turn it back on very gradually to minimize pressure surge shock in the plumbing lines.
- Watch for Leaks and Cracks: Carefully inspect the previously frozen pipe section for weeping joints, pinhole leaks, or split seams.
- Check Fittings and Valves: Look closely at threaded connections, solder joints, and compression fittings under sinks.
- Inspect Surrounding Areas: Check nearby walls, ceilings, cabinets, and floors for signs of hidden water damage.
- Test Every Faucet: Run both hot and cold water through every fixture in the home to ensure balanced pressure throughout the system.
- Monitor Water Pressure: If pressure remains unusually low, a hidden partial blockage or undetected split may still exist.
If you discover a burst pipe after thawing, shut off your main water valve immediately and call an emergency plumber.
How to Prevent Water Pipes From Freezing Again
The best way to deal with frozen pipes is to stop them from happening in the first place. Taking proactive winterization steps protects your home year after year:
- Insulate Exposed Pipes: Wrap foam pipe insulation around water lines in unheated basements, crawl spaces, and garages.
- Use Approved Heat Tape: Install thermostatically controlled heat tape or heating cables on vulnerable exterior supply lines.
- Seal Air Leaks: Caulk gaps around windows, doors, electrical outlets, and plumbing penetrations that let cold drafts in.
- Keep Garage Doors Closed: Keep garage doors shut tightly during freezing weather, especially if water supply lines run through or above the garage.
- Open Cabinet Doors: Leave under-sink cabinet doors open during severe cold snaps to let warm air circulate.
- Maintain Indoor Heating: Keep your thermostat set to a consistent temperature, day and night. The American Red Cross recommends keeping your thermostat at no lower than 55°F when away from home during winter.
- Allow Faucets to Drip: During extreme freezes, let vulnerable faucets drip slightly to keep water moving continuously through the lines.
- Disconnect Outdoor Hoses: Disconnect, drain, and store garden hoses before freezing weather arrives.
- Shut Off Outdoor Spigots: Close interior shut-off valves for exterior hose bibs and drain the outdoor lines.
- Insulate Crawl Spaces and Attics: Ensure crawl space vents and attic access panels are properly sealed and insulated.
- Arrange Home Checks: If traveling during winter, have a trusted neighbor or family member check your home regularly.
READ MORE: PEX vs Copper Piping: Which Is Better for Your Home?
When Should You Call a Professional Plumber?
While minor frozen pipe incidents can often be resolved with safe DIY methods, certain situations require professional expertise and commercial equipment. Call a licensed plumber if:
- Frozen Pipes Are Inside Walls or Ceilings: Accessing hidden lines safely without destroying drywall requires professional tools.
- Pipes Have Burst or Cracked: Visible splits, major leaks, or spraying water require immediate professional repair.
- Multiple Water Lines Are Frozen: Widespread freezing indicates a major system-wide issue or severe structural cold intrusion.
- No Accessible Frozen Section: If you cannot find or reach the ice block safely, stop working.
- Persistent Water Pressure Problems: Unexplained pressure drops after thawing can indicate internal pipe damage.
- Repeated Freezing: If the same pipe freezes every winter, a plumber can redesign the run or add professional insulation.
- Frozen Water Meters: Utility-owned water meters or service lines should never be tampered with; call your local water utility or a certified plumber.
Hiring a licensed professional prevents compounding water damage and ensures your plumbing meets local building codes.
Frequently Asked Questions
How do you thaw frozen pipes quickly?
To thaw frozen pipes quickly and safely, open the affected faucet to relieve pressure and use an electric hair dryer or warm, damp towels. Always start warming the pipe near the faucet and work backward toward the frozen block. Avoid using open flames, blowtorches, or boiling water, as rapid, uncontrolled heat can cause pipes to burst or start a house fire.
Can you thaw frozen pipes with a hair dryer?
Yes, an electric hair dryer is one of the best tools for thawing accessible frozen pipes. Set it to a medium heat setting and keep the dryer moving constantly along the pipe, starting near the faucet and working back toward the ice. Ensure the cord and dryer stay clear of any standing water or damp surfaces to prevent electrical shock hazards.
How long does it take for frozen pipes to thaw naturally?
Natural thawing time varies widely depending on the ambient room temperature, pipe material, length of the frozen section, and how severely the water is frozen. Some minor frozen lines may thaw naturally within a few hours once indoor heating is increased, while heavily frozen pipes or lines in unheated areas can remain blocked indefinitely until active heat is applied.
Should I turn off the water if my pipes are frozen?
Yes, it is wise to locate and be ready to operate your main water shut-off valve immediately when dealing with frozen pipes. If the ice blockage has already caused the pipe to crack or split, turning off the water prevents major flooding and extensive structural damage the moment the ice begins to melt.
How can I tell if a frozen pipe has burst?
Signs of a burst pipe include sudden water leaks, pooling water, or wet drywall appearing as the ice thaws. You may also notice a drastic, unexplained drop in water pressure or hear water running inside wall cavities when all household faucets are completely closed. If you suspect a burst pipe, shut off the main water supply immediately.
Final Thoughts
Dealing with frozen water pipes is an urgent test of patience and resourcefulness for any homeowner. By acting quickly, applying safe and gradual heating methods, and avoiding dangerous shortcuts like open flames, you can successfully resolve minor freezing incidents and protect your home from devastating water damage. Always inspect your plumbing thoroughly after thawing, and take proactive preventive measures—such as insulating exposed lines and sealing drafts—before the next winter cold snap strikes. If a frozen pipe is hidden inside a wall, damaged, or cannot be thawed safely on your own, do not hesitate to contact a licensed professional plumber to handle the repair.
Sources
- American Red Cross — Preventing and Thawing Frozen Pipes
- National Weather Service — Winter Weather Safety Guidelines
- Centers for Disease Control and Prevention (CDC) — Winter Storm Preparedness
Homeowner Safety Disclaimer
This article is provided for informational and educational purposes only and does not constitute professional plumbing, engineering, or legal advice. Plumbing systems vary by home, region, and age. Homeowners should exercise caution when performing DIY plumbing maintenance. If you are unsure of your plumbing layout, suspect structural damage, or encounter a burst pipe, immediately shut off your main water supply and consult a licensed, insured professional plumber.

