When a toilet shifts or rocks, it places constant stress on the internal wax seal, the mounting bolts, and even the flooring beneath it. Left unchecked, what starts as a minor annoyance can quickly escalate into a severe water leak, ruined subflooring, unpleasant sewer odors, and costly structural repairs.
Fortunately, learning how to fix a wobbly toilet is entirely achievable for most DIYers. Depending on the root cause whether it is a simple matter of loose closet bolts, an uneven bathroom floor, a deteriorated wax ring, or damaged toilet flange problems you can often resolve the issue in under an hour with basic household tools.
In this comprehensive guide, we will explore why toilets become unstable, how to diagnose the problem safely, step-by-step repair instructions, cost estimates, and when it is time to call a licensed professional plumber. Lets deep dive into “How to Fix a Wobbly Toilet: Causes & Easy DIY Solutions”
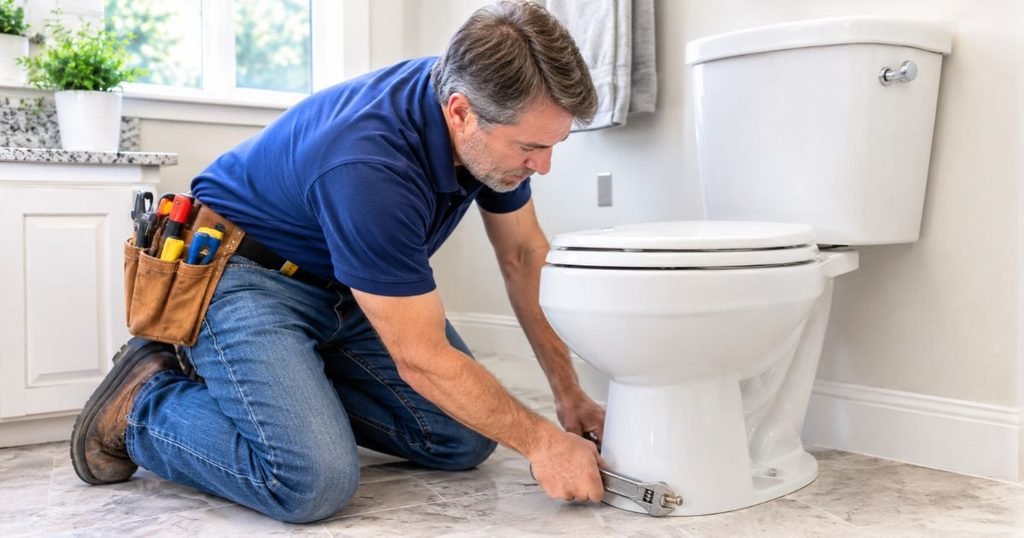
Why Is My Toilet Wobbly?
Before you can perform a successful wobbly toilet repair, you must understand the underlying mechanical culprit. A toilet is a heavy porcelain fixture anchored to the bathroom floor through specific structural components. When it moves, one or more of these connection points have failed or shifted. Here are the most common reasons a toilet becomes loose at the base:
- Loose or Corroded Toilet Mounting Bolts: Also known as closet bolts, these metal fasteners secure the base of the toilet to the toilet flange embedded in the floor. Over time, normal vibrations, daily use, and thermal expansion can cause the nuts securing these bolts to loosen. In older bathrooms, corrosion can weaken the bolts entirely.
- Uneven Bathroom Flooring: Bathrooms, especially older homes or DIY renovations, frequently feature slight surface irregularities. A toilet rocking on tile floor surfaces is extremely common when grout lines create uneven elevation or when tiles were laid without proper shimming underneath the porcelain base.
- Broken, Cracked, or Damaged Toilet Flange: The toilet flange is the plastic or cast-iron fitting that connects the base of the toilet to the home’s main drainage pipe. If the flange cracks, breaks around the bolt slots, or shifts due to settling, the toilet loses its secure anchor.
- Worn-Out or Improperly Installed Wax Ring: A wax ring sits between the bottom of the toilet bowl and the toilet flange to create a watertight and airtight seal. When a toilet rocks, it repeatedly compresses and damages this wax seal, breaking its integrity and leading to a toilet base leaking scenario.
- Loose Toilet Base or Missing Toilet Shims: If a toilet was installed without proper shims during initial construction or after a flooring upgrade, microscopic gaps remain between the porcelain skirt and the finished floor. Every time weight is applied, the porcelain shifts to bridge the gap.
- Damaged Subfloor or Water-Related Floor Deterioration: If a slow leak has gone unnoticed for months, water can saturate the wooden subfloor (plywood or oriented strand board) surrounding the toilet drain. As the wood rots and softens, the mounting hardware loses its grip, causing the entire toilet to sink or wobble.
READ MORE: Toilet Tank Not Filling With Water: Causes & How to Fix It
Is a Wobbly Toilet Dangerous?
Many homeowners wonder if a slightly unstable toilet is truly an urgent issue or if it can wait until the weekend. While a minor rock caused purely by a slightly uneven tile may not cause immediate disaster, ignoring an unstable toilet carries significant risks:
- Wax Seal Failure: The wax ring is a soft, malleable seal. Constant rocking deforms, flattens, and tears the wax, destroying its ability to contain wastewater and sewer gases.
- Wastewater Leakage and Odors: Once the wax seal breaks, every flush forces blackwater or graywater and noxious sewer gases out through the base of the toilet rather than down the drainpipe. This creates foul odors and unsanitary conditions.
- Subfloor Water Damage: Leaking water pools invisibly underneath the toilet bowl, soaking into the subfloor, floor joists, and surrounding drywall.
- Mold and Mildew Growth: Trapped moisture in dark subfloor cavities creates a breeding ground for toxic mold, posing potential indoor air quality and health concerns.
- Costly Structural Repairs: What could have been fixed with a pack of plastic shims or a new set of bolts can quickly turn into a multi-thousand-dollar subfloor reconstruction project if rot sets in.
Understanding Harmless vs. Serious Movement: A harmless movement is typically defined as a microscopic rock on a hard tile surface where the bolts are completely tight, no water is present, and no foul odors exist (easily solved with shims). Serious movement involves visible gaps, squishy flooring, water pooling around the base, or bolts that spin freely without tightening.
Understanding Key Plumbing Components & Quick Reference Guides
To help you navigate your repair with total confidence, let’s break down the essential terminology, followed by a quick troubleshooting matrix and a breakdown of repair difficulties and time frames.
Component Definitions
- Toilet Mounting Bolts (Closet Bolts): Heavy-duty threaded bolts anchored vertically into the toilet flange slots, passing through the base of the bowl and secured with nuts and washers.
- Toilet Flange: A round plastic, brass, or cast-iron ring anchored to the subfloor that connects the toilet outlet to the sewer line and holds the closet bolts.
- Wax Ring: A ring made of sanitary petroleum wax (often with a plastic funnel horn) compressed between the bottom of the toilet and the flange to seal out water and sewer gas.
- Toilet Shims: Small, wedge-shaped plastic pieces designed to slide under the porcelain base of a toilet to eliminate gaps and level the fixture.
Quick Troubleshooting Matrix
| Symptom | Likely Cause | Recommended Solution |
| Toilet rocks slightly side-to-side; bolts are loose | Loose closet bolts | Carefully tighten mounting nuts |
| Toilet rocks on tile floor; bolts are tight | Uneven tile/grout or missing shims | Insert plastic toilet shims and trim |
| Bolts spin freely or won’t tighten | Corroded bolts or broken flange slots | Replace closet bolts or install flange repair kit |
| Water pooling or foul sewage odor at base | Failed wax ring or loose base seal | Perform toilet wax ring replacement |
| Floor feels spongy or soft when stepping near toilet | Subfloor rot from long-term leak | Call professional plumber / replace subfloor |
READ MORE: Why Won’t My Toilet Flush? 10 Causes & Fixes
DIY Difficulty Rating and Estimated Repair Time
| Repair Method | DIY Difficulty Level | Estimated Repair Time |
| Tightening bolts | Beginner (Very Easy) | 10 – 15 minutes |
| Installing toilet shims | Beginner (Easy) | 15 – 30 minutes |
| Replacing toilet bolts | Beginner to Intermediate | 30 – 45 minutes |
| Replacing wax ring | Intermediate | 1 – 2 hours |
| Flange / Subfloor repair | Advanced (Professional recommended) | 3 – 5+ hours |
Tools and Materials Needed to Fix a Wobbly Toilet
Before you begin your wobbly toilet repair, gather your equipment. Having everything on hand prevents frustrating mid-project trips to the hardware store.
- Adjustable Wrench: For tightening and loosening closet bolt nuts.
- Standard and Phillips Screwdrivers: For removing decorative caps and screw fasteners.
- Plastic Toilet Shims: Essential for leveling and stabilizing the base.
- Replacement Toilet Bolts (Closet Bolts): In case existing bolts are stripped, bent, or heavily corroded.
- Utility Knife: For cutting excess plastic shims and slicing old caulk beads.
- Bucket and Sponge: For bailing out residual water if removing the toilet bowl.
- Old Towels and Rags: For cleaning and soaking up spills.
- Replacement Wax Ring or Wax-Free Seal: Required only if you are lifting the toilet.
- Bathroom-Grade Silicone Caulk: For a clean, sanitary finish around the base (optional, depending on code).
- Protective Gloves: Essential for hygiene during plumbing repairs.
Note: The exact materials you need will depend entirely on the diagnosis you make during Step 1.
READ MORE: Cost to Replace Toilet Flange: Price & DIY Guide
How to Fix a Wobbly Toilet: Step-by-Step DIY Methods
Follow these systematic steps to diagnose and resolve your toilet stability issues safely.
Step 1 – Inspect the Toilet and Identify the Problem
Begin by gently pushing against the sides of the toilet tank and bowl to see how and where it rocks. Does it tilt front-to-back or side-to-side?
- Inspect the entire perimeter of the porcelain base where it meets the floor. Look for pooling water, damp patches, discoloration, or cracks in the ceramic.
- Check the bolt caps on either side of the bowl base. Are they loose?
- Sniff around the base to check for subtle sewer odors.
- Press firmly on the flooring immediately surrounding the toilet to ensure the subfloor is solid and firm.
Step 2 – Tighten Loose Toilet Bolts
If your inspection reveals that the toilet moves because the mounting hardware is loose, you can easily perform how to tighten toilet bolts by following these steps:
- Pry off the decorative plastic bolt caps on both sides of the toilet base using a flathead screwdriver or utility knife tip.
- Inspect the exposed nuts and washers. If they are heavily rusted, corroded, or spinning in place, you may need to cut them off with a hacksaw and install replacement bolts.
- Take your adjustable wrench and gently turn each nut clockwise to tighten it.
- Alternate between the left and right sides, giving each nut a half-turn at a time to ensure the toilet pulls down evenly.
- Crucial Warning: Do not overtighten the bolts. Porcelain is extremely brittle. If you apply excessive torque with your wrench, the porcelain base of the toilet will crack, instantly turning a minor fix into an expensive toilet replacement. Stop tightening the exact moment the toilet stops rocking and the nuts feel snug.
Step 3 – Use Toilet Shims to Stabilize the Base
If your toilet bolts are already tight, but the fixture still rocks, you are dealing with an uneven floor. This is where toilet shims come into play.
- Clean and dry the floor around the base of the toilet.
- Gently rock the toilet to identify where the gaps exist between the porcelain and the floor tiles.
- Slide plastic toilet shims into the gaps one by one. Push them in by hand or tap them gently with a small hammer until they wedge firmly in place. Do not force thick wooden shims, as wood can absorb moisture and rot; always use rot-proof plastic shims.
- Test the stability of the toilet by sitting on it again. If it is completely firm, you have successfully learned how to stabilize a toilet.
- Using a sharp utility knife, score the protruding plastic shims flush against the outside of the porcelain base. Carefully bend them back and forth until they snap off cleanly.
Step 4 – Check the Toilet Flange
If tightening the bolts and adding shims does not solve the wobble, or if the bolts spin endlessly without tightening, you are likely facing toilet flange problems.
- The toilet flange may be cracked, warped, or broken at the bolt slots where the T-bolts slide in.
- If the flange is sitting too low relative to the finished floor (common after laying thick new tile over old flooring), the toilet bowl cannot compress against the wax ring properly.
- In many cases, you can install a stainless steel flange repair ring over the damaged existing flange to restore solid mounting anchor points without replacing the entire drainage pipe assembly.
Step 5 – Replace the Wax Ring if Necessary
When a toilet has rocked for an extended period, the wax ring is guaranteed to be compromised. Performing a toilet wax ring replacement is a slightly more advanced DIY task because it requires completely disconnecting and lifting the toilet bowl.
- Shut off the water supply: Turn the toilet supply valve clockwise until fully closed.
- Drain the tank and bowl: Flush the toilet to empty most of the water. Use a sponge and bucket to remove the remaining water from the tank and trap.
- Disconnect the supply line: Unscrew the water supply hose from the bottom of the toilet tank. Keep a towel handy for drips.
- Remove mounting nuts: Remove the nuts and washers from the closet bolts on both sides of the base.
- Lift the toilet: With a helper if possible, carefully lift the toilet straight up off the floor bolts. Place it gently on a padded surface (like an old towel) on its side or back to prevent chipping the porcelain.
- Scrape away old wax: Use a putty knife to scrape away the old, flattened wax ring from both the bottom of the toilet horn and the top of the toilet flange. Stuff a rag temporarily into the open flange opening to block sewer gases while you work.
- Inspect flange and floor: Thoroughly inspect the flange and surrounding subfloor for cracks, rot, or weakness.
- Install the new seal: Remove the rag from the flange. Place your new wax ring (or modern rubber/foam wax-free seal) firmly onto the flange or attach it to the bottom horn of the bowl according to manufacturer directions.
- Reinstall the toilet: Carefully align the toilet bowl mounting holes over the closet bolts and lower the toilet straight down. Press down firmly with your body weight to compress the wax ring evenly.
- Secure and test: Reinstall the plastic washers and nuts, tightening them gently and evenly (remembering not to overtighten). Reconnect the water supply, turn the valve back on, let the tank fill, and flush multiple times while checking for any signs of a toilet base leaking.
Step 6 – Check for Damaged or Uneven Flooring
If during the wax ring replacement you notice that the subfloor feels spongy, damp, or crumbly, the structural wood has suffered water damage. You must pause your plumbing repair and replace the damaged section of plywood or subfloor before reinstalling the toilet. Reinstalling a heavy toilet onto rotten wood guarantees immediate future wobbling and structural failure.
READ MORE: Toilet Replacement Cost in USA
Common Mistakes to Avoid When Fixing a Wobbly Toilet
When tackling toilet stabilization, DIYers often make critical errors that worsen the problem. Avoid these common pitfalls:
- Overtightening Toilet Bolts: Applying brute force with a wrench to stop a wobble almost always cracks the porcelain tank or bowl base, requiring a brand-new toilet.
- Using Inappropriate Materials as Shims: Shimming a toilet with folded cardboard, matchbooks, or untreated wood is a temporary fix. Moisture in the bathroom will rot organic materials, causing the wobble to return. Always use plastic shims.
- Ignoring Water Around the Toilet Base: Assuming condensation is to blame for water pooling near the toilet is dangerous. Water is almost always a sign of a failed wax seal.
- Applying Caulk to Hide an Underlying Leak: Caulk is cosmetic. Using a thick bead of caulk to glue a wobbly toilet to the floor masks the movement and traps leaking sewage against the subfloor, accelerating rot.
- Replacing the Wax Ring Without Inspecting the Flange: If the flange itself is broken, putting a brand-new wax ring on it will do nothing to stop the rocking or future leaks.
- Ignoring Soft or Rotten Flooring: Never bolt a toilet down over compromised subflooring.
Should You Caulk Around the Base of a Wobbly Toilet?
Homeowners often ask whether they should caulk around the base of their toilet. The short answer is: Yes, but only after the toilet is 100% stable and mechanically sound.
- The Purpose of Caulk: Caulking the front and sides of a toilet base provides a clean, professional aesthetic and prevents mop water, dust, and urine from seeping under the porcelain.
- The Golden Rule: Caulk is never a substitute for mechanical repair. It cannot compensate for loose bolts, missing shims, or a broken flange.
- Building Code Considerations: Local plumbing codes and building standards in many US jurisdictions recommend leaving a small un-caulked gap (about 2 inches) at the very back of the toilet base. This intentional opening ensures that if the wax ring ever fails in the future, water will leak out visibly onto the floor rather than remaining trapped out of sight, rotting your subfloor silently.
How Much Does It Cost to Fix a Wobbly Toilet?
The cost to fix a wobbly toilet varies widely depending on whether you tackle the project yourself or hire a professional plumber, as well as the severity of the underlying damage.
Cost Comparison Table: DIY vs. Professional Labor
| Repair Type / Scope | Estimated DIY Cost (Materials Only) | Estimated Professional Cost (Parts & Labor) |
| Tightening loose toilet bolts | $0 (Free using existing tools) | $75 – $150 (Service call minimum) |
| Installing toilet shims | $3 – $8 | $90 – $175 |
| Replacing toilet bolts | $5 – $12 | $100 – $200 |
| Replacing toilet wax ring | $10 – $25 | $150 – $350 |
| Repairing or replacing toilet flange | $15 – $40 | $250 – $550 |
| Repairing damaged subflooring | $50 – $150 (materials) | $500 – $1,500+ |
| Hiring a plumber (general rate) | N/A | $100 – $250 per hour |
Disclaimer: Estimated prices vary by geographic location, labor rates, accessibility, and the extent of hidden water damage. Plumbers typically charge a standard diagnostic service dispatch fee.
READ MORE: How Much Does a Plumber Charge to Unclog a Toilet?
When Should You Call a Professional Plumber?
While minor bolt tightening and shimming are ideal weekend DIY projects, certain red flags require the expertise of a licensed US residential plumber:
- The Toilet Flange is Cracked or Severely Damaged: Replacing or casting a new cast-iron or heavy plastic flange often requires specialized cutting and gluing tools.
- The Subfloor Feels Soft or Shows Signs of Rot: If your floor gives way or feels spongy around the toilet, carpentry and subfloor reinforcement are required.
- Water is Leaking from Underneath the Toilet: Persistent base leaks indicate a failed seal or damaged drainage alignment that demands professional intervention.
- The Toilet Remains Unstable After Tightening and Shimming: If structural alignment issues persist, an expert eye is needed to diagnose foundation or rough-in plumbing errors.
- The Mounting Bolts are Broken or Corroded in Place: Snapped bolts stuck inside cast-iron flanges can be extremely difficult to extract without professional drill equipment.
- You Feel Uncomfortable Removing the Toilet: If lifting a heavy ceramic bowl or breaking water supply lines makes you uneasy, a professional will complete the job safely and efficiently.
Addressing these issues early prevents minor instability from transforming into expensive home structural emergencies.
How to Prevent Your Toilet From Becoming Wobbly Again
Once you have successfully stabilized your toilet, follow these practical maintenance tips to keep it secure for years to come:
- Inspect Mounting Bolts Periodically: Check the tightness of your closet bolt nuts once or twice a year during routine bathroom deep cleanings.
- Address Small Leaks Immediately: Never ignore even a tiny puddle around the base of your toilet.
- Keep the Base and Floor Dry: Prevent moisture buildup by using bathroom exhaust fans during and after showers.
- Avoid Rocking or Excessive Pressure: Teach household members not to lean aggressively sideways or stand on the rim of the toilet bowl.
- Check for Floor Movement: If you notice tiles shifting or cracking near the toilet, investigate moisture issues immediately.
- Ensure Proper Flange Installation: If you ever remodel your bathroom flooring, make sure the toilet flange is raised to sit flush with the new finished floor height.
- Use Quality Shims: Always rely on sturdy, waterproof plastic shims rather than improvised household items.
Frequently Asked Questions
Why does my toilet wobble when I sit on it?
Your toilet wobbles because the base is no longer making uniform contact with the floor. This is typically caused by loose mounting bolts, uneven tile flooring, a shifting toilet flange, or a deteriorated wax seal underneath the bowl.
Can I fix a wobbly toilet without removing it?
Yes! If the toilet simply rocks slightly because of an uneven floor or loose mounting bolts, you can easily tighten the closet bolts or slide plastic toilet shims underneath the base without ever lifting or removing the toilet.
How do I stop my toilet from rocking on a tile floor?
To stop a toilet from rocking on tile, first check and gently snug your closet mounting bolts. If the bolts are tight but gaps remain between the porcelain and the uneven tile grout lines, wedge plastic shims into the gaps, test stability, and trim the excess plastic flush with a utility knife.
Can a wobbly toilet cause a water leak?
Absolutely. A wobbly toilet repeatedly flexes and crushes the wax ring seal located beneath the bowl. Once this wax seal breaks, flushing the toilet will cause wastewater and sewer gas to leak out onto your bathroom floor and subfloor.
How much does it cost to fix a wobbly toilet?
If you fix it yourself using shims or by tightening bolts, the cost is practically nothing (under $10). If you hire a professional plumber to replace a wax ring or repair a damaged flange, expect to pay anywhere from $150 to $550 depending on labor rates and parts.
Final Thoughts:
A wobbly toilet is more than just a minor household annoyance; it is an early warning sign of mechanical wear or structural shifting that demands your attention. By identifying the root cause early, whether it is a loose bolt, an uneven tile floor, or a failing seal, you can protect your bathroom from costly water damage and unpleasant odors.
Take a few minutes today to inspect your bathroom fixtures. If your toilet rocks, try tightening the mounting hardware or inserting stable plastic shims. For more complex problems involving leaking seals, broken flanges, or spongy subfloors, do not hesitate to contact a qualified professional plumber to protect your home’s structural integrity.

