There are few household emergencies quite as anxiety-inducing as pushing down the toilet handle only to watch the water sit stagnant or rise dangerously close to the rim. Whether you are getting ready for work in the morning or winding down for the night, a toilet that fails to flush can instantly disrupt your routine and cause panic.
Fortunately, most toilet flushing issues stem from a few predictable mechanical or blockages-related culprits. Lets deep dive into “Why Won’t My Toilet Flush? 10 Causes & Fixes”
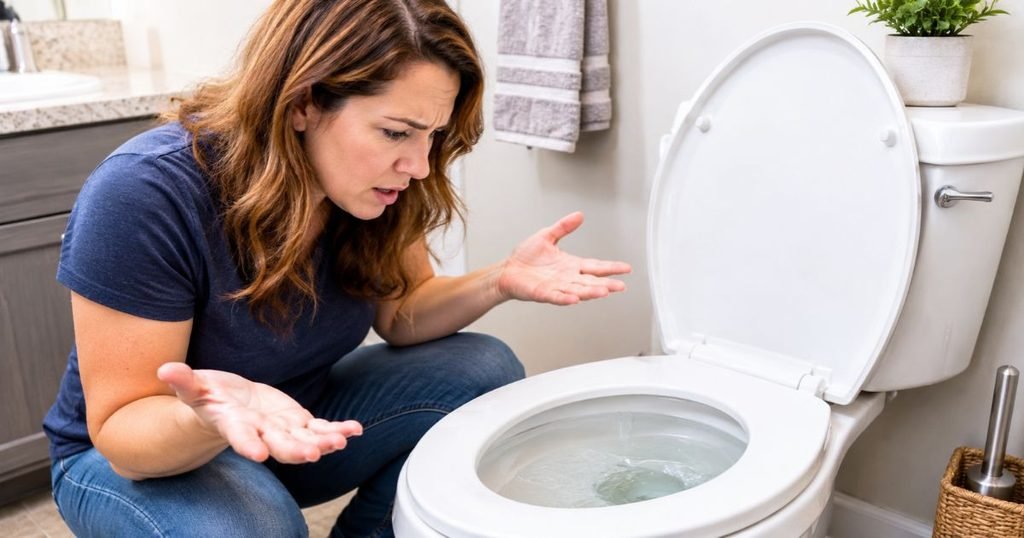
Why Won’t My Toilet Flush?
When a toilet fails to operate properly, understanding the connection between the tank mechanism and the bowl drainage is essential. Below is a quick troubleshooting guide linking common symptoms to their underlying causes.
| Toilet Problem | Possible Cause |
| Handle moves but nothing happens | Disconnected chain or broken handle lever |
| Toilet tank has no water | Closed water supply valve or faulty fill valve |
| Toilet flushes weakly | Low tank water level or clogged rim jets |
| Bowl fills but doesn’t drain | Clogged toilet trap or main drain line |
| Toilet won’t flush but isn’t clogged | Flapper, fill valve, or water-level issue |
| Toilet keeps running continuously | Damaged flapper or faulty fill valve seal |
READ MORE: Cost to Replace Toilet Flange: Price & DIY Guide
10 Common Reasons Your Toilet Won’t Flush
Understanding why your toilet refuses to cooperate requires a look beneath the lid and down into the porcelain trap. Here are the ten most frequent reasons US homeowners encounter toilet flushing problems.
1. Clogged Toilet Drain
A clogged toilet drain is the most common reason a bowl fills with water after you push the handle but refuses to drain away. While toilets are engineered to handle human waste and standard toilet paper, foreign objects such as wet wipes (even those labeled “flushable”), paper towels, feminine hygiene products, cotton swabs, and children’s toys frequently cause stubborn blockages.
Warning signs:
The water level in the bowl rises significantly after flushing and drains away very slowly or not at all.
How to fix it:
Use a heavy-duty flange plunger (bell-shaped with an inner funnel flap) to create a tight seal over the drain hole. Plunge firmly up and down 10 to 15 times. If plunging fails, you may need to use a toilet auger (plumber’s snake) to break up or retrieve the obstruction without scratching the porcelain.
2. Low Water Level in the Toilet Tank
Gravity is what makes a toilet flush, and gravity relies entirely on a sufficient volume of water dropping rapidly from the tank into the bowl. If your tank water level is too low, the rush of water will lack the mass and velocity needed to trigger a siphon effect.
How to check:
Remove the tank lid and look at the water line. Water should typically sit about one inch below the top of the overflow tube (or reach the manufacturer’s water line mark stamped inside the tank wall).
Fixing it:
Adjust the float on your fill valve. If you have a float ball on a metal arm, gently bend the arm upward so the valve shuts off at a higher level. If you have a modern cylinder float, turn the adjustment screw clockwise to raise the float height.
3. Broken or Loose Toilet Flush Handle
The flush handle is the mechanical trigger that initiates every flush. Over years of daily use, the metal or plastic nuts securing the handle inside the tank can loosen, or the arm lever itself can snap under pressure.
How to fix:
Remove the tank lid and push the handle from the outside while watching the internal components. If the handle spins freely or the arm fails to lift the chain, the retaining nut may be loose. Note that toilet tank locknuts feature reverse threads (turn clockwise to loosen, counter-clockwise to tighten). If the arm is cracked or rusted through, replace the entire handle assembly for less than $10 at any local hardware store.
4. Disconnected or Broken Toilet Chain
Inside the tank, the lift chain connects the flush handle lever to the rubber flapper. If this chain unhooks, snaps, or is adjusted with too much slack, pressing the handle will do nothing because the flapper will never lift to release the water.
How to fix:
Look inside the tank. If the chain is dangling or unhooked from either the handle arm or the flapper hook, simply reattach it. Ensure there is about 1/2 inch of slack when the flapper is closed; if it is too tight, the flapper won’t seal properly, causing a constant running leak. If the metal beaded chain has rusted or broken, replace it with a stainless steel chain or heavy-duty nylon cord.
5. Faulty or Damaged Toilet Flapper
The flapper is the rubber seal at the bottom of the toilet tank that holds water in reserve. Over time, exposure to chlorine and mineral-rich municipal water causes rubber flappers to warp, harden, or degrade. When a flapper loses its flexibility, it may not seal correctly or may slam shut too quickly, resulting in a weak or failed flush.
How to inspect and replace:
Turn off the water supply valve behind the toilet, flush to drain the tank, and unhook the old flapper from the pegs on the overflow tube. Take the old flapper to the store to match the exact size (usually 2-inch or 3-inch models), or buy a universal adjustable replacement. Snap the new flapper into place and reconnect the chain.
6. Faulty Toilet Fill Valve
The fill valve is responsible for refilling the tank after every flush. If the valve mechanism becomes clogged with mineral scale or internal seals wear out, the tank may fill extremely slowly, stop filling halfway, or fail to refill entirely.
Signs of trouble:
Hissing sounds, delayed tank refilling, or a tank that remains empty after a flush.
How to fix:
Modern fill valves (such as Fluidmaster or Korky models) are relatively easy to replace. Turn off the water supply, drain the tank, disconnect the water supply line underneath, remove the locking nut, lift out the old valve, drop in the new one, and reconnect. Always follow manufacturer guidelines.
7. Partially Closed Water Supply Valve
Sometimes the problem isn’t inside the toilet at all, but rather the supply line feeding it. If the angle stop valve (shut-off valve) located on the wall behind the toilet is partially or fully closed, perhaps bumped during cleaning or plumbing work the tank will not receive enough water to flush properly.
How to check:
Locate the water supply valve on the wall near the base of the toilet. Turn the handle counter-clockwise to ensure it is opened all the way.
Caution:
Never force a stuck valve aggressively, as older brass or PVC valves can snap or leak. If the valve is stuck or leaking around the packing nut, it’s best to call a professional plumber.
8. Clogged Toilet Rim Jets or Siphon Jet
Even if your tank fills completely and your flapper opens wide, your toilet may still exhibit a weak flush if the water delivery ports inside the bowl are blocked. Over time, calcium, lime, and rust deposits build up inside the small rim holes under the toilet rim and the larger siphon jet at the bottom of the bowl.
How to fix:
Scrub the rim holes using a curved wire brush or an old toothbrush dipped in a mixture of white vinegar. For stubborn mineral clogs inside the rim channels, pour warm (not boiling) white vinegar into the overflow tube inside the tank, let it sit for a few hours to dissolve scale deposits, and then flush. Never use boiling water in a porcelain toilet bowl, as thermal shock can crack the ceramic.
9. Blocked Sewer Line or Plumbing Vent
If your toilet is not clogged at the trap level, but you notice that other fixtures in your home such as your bathtub, shower, or sink are draining slowly or gurgling when you flush, the issue likely extends beyond a single fixture. A main sewer line blockage or a blocked roof plumbing vent can prevent proper airflow and drainage, causing toilets to back up or refuse to flush.
Professional diagnosis:
Sewer line issues require professional intervention. A plumber will typically use a video sewer camera inspection to locate roots, collapses, or heavy grease buildup in your main lateral line.
10. Damaged or Outdated Toilet Components
Toilets are workhorses, but internal plastic flush valves, gaskets, and porcelain mechanisms do wear out over decades of use. If you find yourself constantly replacing flappers, adjusting chains, and dealing with intermittent flushing failures on a toilet that is 25 to 30 years old, the internal waterways and flush valves may simply be degraded beyond reliable repair.
READ MORE: What to Do When a Toilet Overflows: Step-by-Step Fixes
Why Won’t My Toilet Flush but Isn’t Clogged?
One of the most perplexing scenarios for homeowners is discovering that their toilet bowl is clear of waste and toilet paper, yet pressing the handle produces no flush at all. When a toilet won’t flush but isn’t clogged, the issue is almost always mechanical or hydraulic rather than a drainage blockage.
Key Causes of a Non-Clogged Non-Flushing Toilet:
- Low Tank Water Level: The tank is not storing enough water to create the siphon needed in the bowl.
- Disconnected Flush Chain: The handle moves freely because nothing is lifting the flapper.
- Damaged Flapper: The flapper is deteriorating, slipping off its pins, or closing prematurely.
- Faulty Fill Valve: The valve is stuck, preventing water from entering the tank after a previous flush.
- Broken Flush Handle: The internal lever is snapped or loose, disconnecting user action from the flapper.
- Blocked Rim Holes: Mineral scale prevents water from entering the bowl efficiently.
Distinguishing Mechanical vs. Drainage Problems
- Mechanical Problem: The tank is empty, the handle feels limp, or water sits in the tank but doesn’t enter the bowl. The bowl itself does not fill up with wastewater when you try to flush.
- Drainage Clog: The tank is full, water dumps into the bowl normally, but the water level rises sharply and stays there without draining away.
How to Fix a Toilet That Won’t Flush: Step-by-Step Troubleshooting
Before calling a professional, you can diagnose and resolve most common toilet problems yourself with a systematic approach.
The 7-Step DIY Troubleshooting Process
- Check the Water Supply: Ensure the shut-off valve on the wall is turned fully counter-clockwise.
- Inspect Tank Water Level: Remove the tank lid. Is the water at least one inch below the overflow tube? If not, adjust your float.
- Check Handle and Chain: Press the handle. Does it lift the flapper? Reconnect or adjust the chain if there is too much slack.
- Inspect the Flapper: Look for warping, cracks, or a poor seal. Replace it if it is worn out.
- Examine the Fill Valve and Float: Make sure the fill valve isn’t stuck and that the float moves freely up and down the shaft.
- Look for Clogs: If the tank is full and water dumps into the bowl but stays there, use a flange plunger to clear a trap blockage.
- Test the Flush: Once adjustments or repairs are complete, refill the tank and test the flush mechanism twice.
Essential Tools for Toilet Troubleshooting
- Flange Plunger: Specifically designed for toilets with an extended rubber flap for a tight seal.
- Toilet Auger (Plumber’s Snake): For reaching deep clogs past the toilet trap.
- Adjustable Wrench: For tightening supply lines and flush handle nuts.
- Replacement Flapper & Fill Valve: Universal repair parts available at any hardware store.
- Rubber Gloves & Safety Glasses: Essential for hygiene and protection.
- Bucket and Towels: For catching residual water when servicing tanks or supply lines.
READ MORE: How Much Does a Plumber Charge to Unclog a Toilet?
How to Flush a Toilet When the Handle Isn’t Working
If your handle snaps off or the internal lever fails right when you need to use the bathroom, you don’t have to panic. You can manually operate the toilet safely using these temporary methods:
- Manually Lifting the Flapper: Remove the tank lid, reach in wearing a rubber glove, and gently lift the rubber flapper upward. Water will rush into the bowl, executing a normal flush.
- Using a Bucket Flush: If the tank has no water or the flush mechanism is completely broken, fill a bucket with 1 to 2 gallons of water. Pour it swiftly and directly into the center of the toilet bowl from about knee height. The sudden rush of water will trigger a natural gravity flush.
- Avoid Repeated Flushing: Never keep flushing if the bowl is already full of water or draining slowly, as this will result in an overflow onto your bathroom floor.
When Should You Call a Professional Plumber?
While many toilet issues are straightforward DIY weekend projects, certain warning signs indicate a deeper plumbing problem that requires professional expertise, licensing, and specialized tools.
Call a Plumber Immediately If:
- Multiple Drains Are Backing Up: If your bathtub or sink gurgles or backs up when you flush the toilet, you have a main sewer line blockage.
- Sewage Appears in Fixtures: Raw sewage backing up into your bathtub or shower poses a severe health hazard.
- Repeated Overflows: A toilet that overflows persistently despite plunging indicates a deep obstruction or venting failure.
- Persistent Gurgling Noises: Gurgling sounds throughout your home’s plumbing system point to blocked vent stacks or mainline venting issues.
- Leaks Around the Base: Water pooling around the toilet base often indicates a failed wax ring or a cracked toilet bowl, which can rot subflooring.
- Persistent Failure: If you have replaced internal parts, adjusted water levels, and cleared clogs, but the toilet still refuses to flush, internal trap damage may be present.
How Much Does It Cost to Fix a Toilet That Won’t Flush?
Repair costs vary depending on whether you tackle the job yourself or hire a licensed US plumber. Below is a realistic 2026 price comparison covering typical parts, labor, and service calls.
| Repair / Service Type | DIY Material Cost | Professional Cost (Parts + Labor) |
| Toilet Flapper Replacement | $5 – $15 | $75 – $150 |
| Flush Handle Replacement | $8 – $20 | $90 – $175 |
| Fill Valve Replacement | $10 – $25 | $120 – $250 |
| Toilet Clog Removal (Plunging/Auger) | $15 – $40 (Tool purchase) | $100 – $225 |
| Flush Valve Repair / Assembly | $15 – $35 | $150 – $300 |
| Main Sewer Line Diagnosis & Snaking | N/A (Requires equipment) | $250 – $600+ |
| Standard Plumber Service Call Fee | N/A | $75 – $200 (Often applied to repair) |
Note: Professional costs vary depending on your geographic region in the US, emergency after-hours dispatch fees, and accessibility.
READ MORE: Toilet Replacement Cost in USA
How to Prevent Toilet Flushing Problems
Proactive maintenance can save you hundreds of dollars in emergency plumbing bills and keep your bathroom fixtures operating smoothly for years.
- Follow the “Three Ps” Rule: Only flush pee, poop, and paper. Never flush wet wipes, facial tissues, paper towels, cotton balls, or dental floss.
- Use Reasonable Toilet Paper: Avoid stuffing excessive amounts of thick, multi-ply paper in a single flush.
- Inspect the Tank Periodically: Open your tank twice a year to check for chain wear, mineral buildup, and flapper degradation.
- Keep Supply Valves Accessible: Make sure storage items do not block access to the water shut-off valve behind the toilet.
- Address Minor Issues Early: A running toilet or a sluggish flush is an early warning sign; replace parts before they fail completely.
- Use Toilet-Safe Cleaners: Avoid harsh chemical drain cleaners that can corrode internal rubber seals and degrade porcelain glazes.
Repair or Replace Your Toilet: Which Is Better?
When facing persistent toilet problems, homeowners often wonder whether they should keep paying for individual repairs or invest in a brand-new fixture. Consider the following factors:
- Age of the Toilet: Toilets older than 25 years often feature outdated, inefficient flush designs (consuming 3.5 to 5 gallons per flush) and worn internal pathways.
- Frequency of Repairs: If you are replacing flappers, fill valves, and seals every few months, repair costs will quickly surpass the cost of a new, water-efficient EPA WaterSense certified 1.28-gallon toilet.
- Cracks and Leaks: Any hairline crack in the porcelain bowl or tank is non-repairable and requires immediate toilet replacement to prevent catastrophic water damage.
- Water Efficiency: Upgrading to a modern high-efficiency toilet can significantly lower your monthly municipal water bill.
Frequently Asked Questions
Why won’t my toilet flush when the tank is full?
If your tank is full of water but pressing the handle does nothing, the issue is typically mechanical. The lift chain may be disconnected or broken, the flush handle lever may be loose, or the rubber flapper at the bottom of the tank is failing to lift when the handle is depressed.
Why is my toilet not flushing but not clogged?
When a toilet bowl is empty of debris and water drains freely from the bowl when poured manually, but the toilet won’t flush normally, the problem lies in the tank. Check for low water levels, a disconnected flush chain, a worn flapper, or a closed water supply valve.
How do I fix a toilet that won’t flush?
Start by checking the water supply valve behind the toilet and inspecting the water level inside the tank. Next, test the flush handle and lift chain to ensure they properly open the flapper. If the tank mechanism works but waste remains in the bowl, use a flange plunger to clear a trap blockage.
Can I manually flush a toilet without a handle?
Yes. If your handle or internal lever breaks, you can remove the tank lid and manually lift the rubber flapper to release water into the bowl. Alternatively, you can pour a bucket of water directly into the center of the bowl from knee height to trigger a gravity flush.
When should you call a plumber for a toilet that won’t flush?
You should call a licensed plumber if you experience recurring toilet overflows, multiple drains backing up simultaneously, sewage appearing in bathtubs or showers, persistent gurgling noises, or water leaking around the base of the toilet fixture.
Final Thoughts
Dealing with a toilet that refuses to flush can be stressful, but understanding how your plumbing system works empowers you to take control. Whether it is a simple disconnected chain, a worn-out flapper, or a stubborn clog, starting with basic troubleshooting checks will often save you time and money.
Remember that while minor mechanical adjustments and plunging are manageable DIY tasks, recurring backups, sewer line issues, and structural leaks require the expertise of a professional plumber. Keep your plumbing maintained, avoid flushing prohibited items, and don’t hesitate to call a qualified local professional when a plumbing problem exceeds your DIY comfort zone.

