Upgrading to a smart thermostat is one of the most practical home improvements you can make. Replacing a manual or standard programmable thermostat allows you to control your heating and cooling from anywhere, set custom automation schedules, and optimize energy consumption.
Many smart thermostat models such as the Google Nest Learning Thermostat, ecobee Smart Thermostat Premium, Honeywell Home T9, and Amazon Smart Thermostat can be installed in about 20 to 30 minutes. However, safety and compatibility verification must come first. Misidentifying wires or forcing incompatible equipment can lead to blown control board fuses or damaged equipment.
This expert-backed guide covers everything required to evaluate your heating, ventilation, and air conditioning (HVAC) system, manage common wiring challenges, execute a safe installation, and configure smart features. Lets deep dive into “Step-by-Step DIY Smart Thermostat Installation Guide”
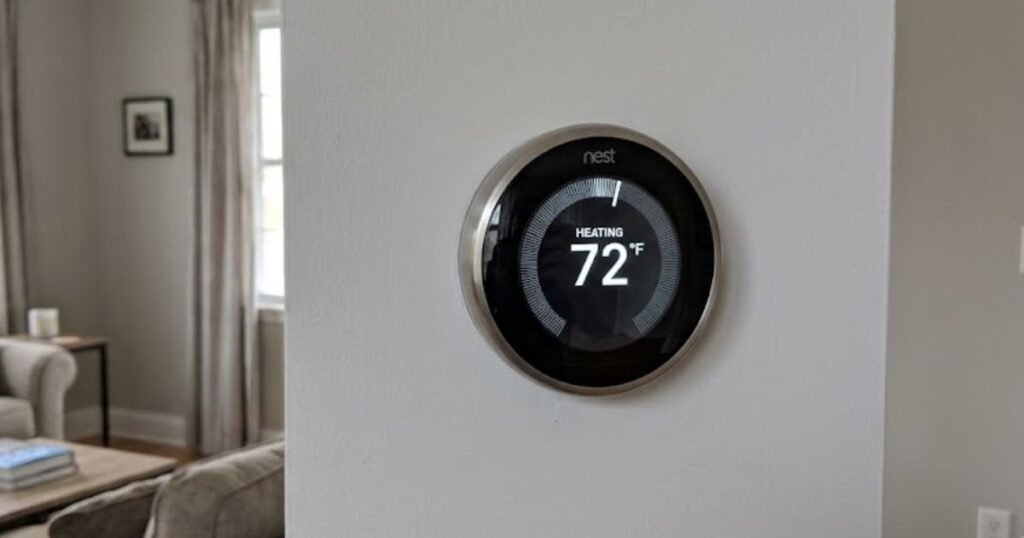
What Is a Smart Thermostat?
A smart thermostat is a Wi-Fi-connected device that replaces your traditional thermostat and gives you far more control over your home’s heating and cooling. Instead of manually adjusting a dial or punching in a weekly schedule, a smart thermostat can:
- Connect to your home Wi-Fi network so you can control it from an app
- Learn your daily habits and build a schedule automatically
- Let you adjust the temperature remotely from anywhere
- Send you monthly or weekly energy usage reports
- Work with voice assistants like Alexa, Google Assistant, or Siri
- Use geofencing to detect when you leave or return home and adjust accordingly
- Integrate with other smart home devices, like smart plugs, sensors, or security systems
READ MORE: Best Honeywell Thermostat Models: Buyer’s Guide & Comparison
Benefits of Installing a Smart Thermostat
Homeowners upgrade for a mix of comfort and cost reasons. Here’s what you can typically expect:
- Lower energy bills — by automatically adjusting temperatures when you’re away or asleep
- Better overall comfort — with more precise temperature control and scheduling
- Remote access — adjust your thermostat from work, vacation, or the couch
- Vacation and away modes — reduce heating and cooling automatically when nobody’s home
- HVAC monitoring — some models alert you to system issues or maintenance needs
- Filter and maintenance reminders — so you don’t forget routine HVAC upkeep
- Utility rebates — many energy providers offer rebates for ENERGY STAR certified smart thermostats
- Increased home value — smart home features are increasingly attractive to buyers
It’s worth being realistic here: actual savings vary from household to household. Many homeowners see meaningful reductions in their energy bills, but the amount depends heavily on your climate, how consistently you used your old thermostat, and your home’s insulation and HVAC efficiency.
Before You Begin: Check HVAC Compatibility
This is the step people skip and it’s the one that causes the most headaches. Before buying or installing anything, confirm your smart thermostat works with your specific HVAC setup.
Compatible Systems (Low-Voltage 24V)
- Standard central air conditioning
- Gas or oil furnaces
- Electric forced-air furnaces
- Standard air-source heat pumps (single-stage and multi-stage)
- Hot water boilers (hydronic baseboard/radiator heating)
- Dual-fuel systems (heat pump paired with a fossil-fuel backup furnace)
Incompatible or Specialized Systems
- Line-Voltage Systems (120V / 240V): Electric baseboard heaters using thick, high-voltage wires capped with wire nuts are incompatible with standard 24V smart thermostats. These require specialized line-voltage smart controllers (such as Mysa).
- Millivolt Systems: Gas wall heaters or floor furnaces powered by a thermopile without external 24V power transformers require specialized relays.
- Proprietary Communicating Systems: Variable-capacity, high-efficiency inverter systems from brands like Carrier, Trane, or Lennox often use proprietary 2-wire or 4-wire digital communication protocols. Replacing these controllers with a standard 24V smart thermostat may cause loss of advanced variable-speed functionality unless an approved adapter harness is installed.
System Compatibility Matrix
| HVAC System Type | Control Voltage | Direct Smart Thermostat Compatibility | Notes |
| Central Air & Gas Furnace | 24VAC | High | standard C-wire or Power Extender Kit (PEK) required |
| Heat Pump (Air-Source) | 24VAC | High | Must support O/B reversing valve switching |
| Dual Fuel (Heat Pump + Gas) | 24VAC | Moderate-High | Requires correct app configuration for lockout temperatures |
| Electric Baseboards | 120V/240V Line Voltage | Incompatible | Requires dedicated line-voltage smart thermostat |
| Communicating Systems | Proprietary Digital | Moderate | Needs manufacturer 24V adapter module |
| Millivolt Gas Heaters | 750mV | Low | Requires 24V isolation relay and external transformer |
READ MORE: Best ecobee Smart Thermostat Review: Essential vs Enhanced vs Premium
Do You Need a C-Wire?
The “C-wire,” or common wire, is one of the most misunderstood parts of thermostat installation and one of the most important.
What it is: The C-wire provides continuous 24-volt power to your thermostat. Older mechanical and basic programmable thermostats didn’t need one because they ran on batteries or drew tiny amounts of power. Smart thermostats, with their Wi-Fi radios and color displays, typically need a steady power source.
Why it matters: Without a C-wire (or an approved alternative), some smart thermostats can struggle to stay powered, leading to Wi-Fi drops, slow response times, or a thermostat that won’t turn on at all.
How to check for one:
- Turn off power to your HVAC system at the breaker.
- Remove your existing thermostat’s cover.
- Look at the wires connected to the terminals.
- Check if a wire is connected to a terminal labeled “C.”
If you don’t have a C-wire, you still have options:
- Power extender kits (PEKs) — used by some Honeywell Home and other models to create a virtual common wire using existing wiring
- Nest Power Connector — Google’s accessory designed specifically for homes without a C-wire
- Rewiring — running a new C-wire from your HVAC control board to the thermostat (best left to a professional in most cases)
- Battery-compatible thermostats — some models can run on batteries alone, though with somewhat reduced functionality
A common misconception is that every smart thermostat absolutely requires a C-wire. That’s not strictly true; some thermostats can operate without a traditional C-wire under certain wiring configurations but many manufacturers strongly recommend one for full functionality and long-term reliability.
Tools You’ll Need
Gather these before you start so you’re not hunting for a screwdriver mid-install:
- Screwdriver (flathead and Phillips)
- Drill (for new wall anchors, if needed)
- Pencil (to mark mounting holes)
- Smartphone (for photographing wiring and app setup)
- Voltage tester (to confirm power is off)
- Wire labels or masking tape and a pen
- Needle-nose pliers
- Wall anchors (usually included with the thermostat)
- Level
- Flashlight
READ MORE: Is a Google Nest Thermostat Worth It? Review, Comparison & Buyer Guide
Safety Precautions
DIY Safety Tip: Never assume the power is off just because the thermostat screen is dark. Always verify with a voltage tester before touching any wires.
Keep these safety basics in mind throughout the process:
- Turn off power to your HVAC system at the breaker panel, not just at the thermostat.
- Use your breaker panel, not a wall switch, to fully cut power to the system.
- Verify power is off with a voltage tester before disconnecting any wires.
- Never touch energized wiring — if you’re not 100% sure the power is off, stop and check again.
- Protect your HVAC control board by handling wires gently and avoiding shorts (accidentally touching two wires together).
- Take photos before disconnecting anything.
That last point deserves its own emphasis: photographing your existing wiring before you touch a single wire is one of the most important steps in the entire process. If anything goes wrong or you need to reference the original setup later, that photo is your safety net.
Step-by-Step DIY Installation Guide
Step 1: Turn Off HVAC Power
Go to your breaker panel and switch off the breaker connected to your HVAC system. Confirm your thermostat screen goes dark.
Step 2: Remove the Thermostat Cover
Most covers pop off by hand or with gentle prying using a flathead screwdriver. Set it aside.
Step 3: Photograph the Existing Wiring
Take a clear, well-lit photo showing every wire and which terminal it’s connected to. Take a second photo from a different angle just in case.
Step 4: Label Every Wire
Use wire labels or masking tape to mark each wire with its terminal letter (R, C, W, Y, G, etc.) before disconnecting anything.
Step 5: Remove the Old Thermostat
Unscrew the old thermostat base from the wall. Gently pull the wires through, being careful not to let them fall back into the wall cavity.
Step 6: Install the Mounting Plate
Use the level to position your new thermostat’s mounting plate, mark the holes with a pencil, drill if wall anchors are needed, and secure the plate to the wall.
Step 7: Connect the Wires Correctly
Match each labeled wire to the corresponding terminal on your new thermostat. Here’s what each terminal typically controls:
- R – Power (24V, often from a transformer)
- Rc – Power for cooling system (in dual-transformer setups)
- Rh – Power for heating system (in dual-transformer setups)
- C – Common wire (continuous power)
- W – Heat
- Y – Cooling/compressor
- G – Fan
- O/B – Reversing valve (heat pumps)
- AUX – Auxiliary or emergency heat
- E – Emergency heat (heat pump systems)
Step 8: Mount the New Thermostat
Snap or screw the thermostat body onto the mounting plate, tucking wires neatly behind it.
Step 9: Restore Power
Head back to the breaker panel and switch the HVAC breaker back on.
Step 10: Complete App Setup
Download the manufacturer’s app (Nest, ecobee, Honeywell Home, etc.) and follow the on-screen setup instructions.
Step 11: Connect to Wi-Fi
Select your home network in the app and enter your password to get your thermostat online.
Step 12: Configure HVAC Settings
The app will typically detect your system type automatically based on the connected wires, but double-check the settings match your actual HVAC system.
Step 13: Run a Heating Test
Set the thermostat to heat mode and confirm your furnace or heat pump kicks on within a few minutes.
Step 14: Run a Cooling Test
Switch to cooling mode and confirm your AC system activates properly.
Step 15: Enable Smart Features
Turn on scheduling, geofencing, eco mode, and any other features you plan to use.
Pro Installer Tip: After testing heating and cooling, let the system run for a full cycle rather than shutting it off immediately. This helps you catch delayed issues, like a fan that doesn’t shut off or a compressor that short-cycles.
READ MORE: Best Energy Star Smart Thermostats: Reviews, Comparison, and Buying Guide
Smart Thermostat Wiring Color Guide
Wire colors are a helpful reference, but always confirm with your photo and labels — not every installer follows standard color conventions.
| Wire Color | Terminal | Function | Notes |
| Red | R (or Rc/Rh) | Power | Powers the thermostat from the transformer |
| Blue or Black | C | Common | Provides continuous power for smart thermostats |
| White | W | Heat | Activates the furnace or heat source |
| Yellow | Y | Cooling | Activates the AC compressor |
| Green | G | Fan | Controls the blower fan |
| Orange | O | Reversing valve (cool) | Used on heat pump systems |
| Dark Blue | B | Reversing valve (heat) | Used on heat pump systems |
| Gold/Brown | AUX/E | Auxiliary/Emergency heat | Backup heat for heat pumps |
Common Installation Mistakes
- Forgetting to shut off the breaker before starting work
- Mislabeling wires, leading to confusing troubleshooting later
- Loose wire connections in the terminal block
- Assuming a C-wire exists without checking first
- Choosing the wrong HVAC configuration in the app setup
- Skipping the compatibility check before purchasing
- Poor Wi-Fi signal at the thermostat’s location, causing connectivity issues
Common Mistake: Many homeowners set the wrong system type (like selecting “heat pump” for a standard gas furnace) during app setup. This can cause heating or cooling to behave unpredictably, so double-check this setting against your actual HVAC equipment.
READ MORE: Sensi Smart Thermostat Review & Comparison
Troubleshooting After Installation
| Issue | Likely Cause | What to Try |
| Blank screen | No power reaching thermostat | Check breaker, C-wire, or power accessory |
| No Wi-Fi connection | Weak signal or wrong password | Move router closer, re-enter credentials |
| Heat not working | W wire loose or mislabeled | Recheck wiring against your photo |
| AC won’t turn on | Y wire issue or system delay | Wait 5 minutes (compressor delay), check wiring |
| Fan always running | G wire miswired or fan setting stuck | Check fan setting in app, verify wiring |
| Incorrect temperature reading | Poor thermostat placement | Avoid direct sunlight, drafts, or vents nearby |
| Reboot loop | Insufficient power (no C-wire) | Install a power extender kit or C-wire accessory |
| App pairing problems | Wi-Fi network issue or outdated app | Update the app, restart router and thermostat |
Nest vs ecobee vs Honeywell Home Installation Difficulty
| Feature | Google Nest | ecobee | Honeywell Home |
| Typical Install Time | 20–30 minutes | 25–35 minutes | 20–30 minutes |
| C-Wire Requirement | Recommended (Power Connector available) | Recommended (PEK included with some models) | Varies by model (PEK often included) |
| Ease of Setup | Very beginner-friendly | Beginner-friendly, slightly more wiring options | Beginner-friendly |
| Mobile App | Strong, intuitive | Strong, detailed energy reports | Solid, straightforward |
| Alexa Compatible | Yes | Yes | Yes |
| Google Home Compatible | Yes | Yes | Yes |
| Apple HomeKit Compatible | No (varies by model) | Yes (select models) | Yes (select models) |
| Best For Beginners | Yes | Good, with more advanced features | Yes |
READ MORE: Best Programmable Thermostats | Top Rated Reviews
DIY vs Professional Installation
| Factor | DIY Installation | Professional Installation |
| Cost | Lower (just the thermostat) | Higher (labor costs added) |
| Time | 20–45 minutes for compatible systems | Often same-day, sometimes faster |
| Risk | Higher if wiring is unfamiliar | Lower, handled by a trained technician |
| Warranty | May still apply, check manufacturer terms | Often includes installation warranty |
| Best Situations | Standard 24V systems, clear wiring | Complex, zoned, or high-voltage systems |
| Skill Level Needed | Basic comfort with tools and electrical safety | Licensed HVAC technician |
Smart Features to Enable After Installation
Once your thermostat is up and running, take a few minutes to set up these features:
- Scheduling — set up your ideal temperatures for different times of day
- Learning mode — let the thermostat build a schedule based on your habits (available on select models)
- Vacation mode — automatically reduce heating/cooling when you’re away for extended periods
- Eco mode — energy-saving temperature ranges when you’re not home
- Geofencing — use your phone’s location to adjust temperature automatically
- Occupancy sensors — detect when rooms are in use (available on some models)
- Humidity control — monitor and manage indoor humidity levels
- Air quality monitoring — available on select higher-end models
- Energy reports — track your usage patterns over time
- Voice assistant integration — connect to Alexa, Google Assistant, or Siri
- Utility demand response programs — enroll for potential rebates or credits
READ MORE: 8 Best DREO Smart Tower Fans: Review & Comparison
How Much Money Can a Smart Thermostat Save?
This is the question most homeowners actually care about. While results vary by household, independent estimates often place potential savings in the roughly 10–15% range on heating and cooling costs, depending on your climate, occupancy patterns, and how your old thermostat was being used before the upgrade.
A few factors that influence your actual savings:
- Climate — homes in regions with extreme summers or winters tend to see bigger swings
- Occupancy — households that are frequently away benefit most from automated scheduling
- Prior habits — if you already used a programmable thermostat consistently, gains may be smaller
- HVAC efficiency — an aging or poorly maintained system won’t save as much, even with a smart thermostat
- Utility rebates — some providers offer upfront rebates that offset the purchase cost entirely
Money-Saving Tip: Check with your local utility company before buying. Many offer instant rebates or mail-in rebates for ENERGY STAR certified smart thermostats, sometimes covering a significant portion of the purchase price.
Maintenance Tips
Keep your smart thermostat running smoothly with a little routine upkeep:
- Install firmware updates as they become available
- Wipe down the screen and vents with a soft, dry cloth periodically
- Periodically check your Wi-Fi connection to make sure the thermostat stays online
- Replace batteries if your model uses them as backup power
- Run a seasonal test of both heating and cooling before each season starts
- Recalibrate sensors if you notice temperature readings drifting
- Keep an eye on HVAC filter reminders and change filters as recommended
When Should You Call an HVAC Professional?
DIY installation works well for most standard homes, but call a licensed HVAC technician if you run into any of the following:
- High-voltage (line voltage) thermostats, often found with electric baseboard heating
- Multi-stage HVAC systems with complex wiring configurations
- Boiler control systems that don’t match standard thermostat wiring
- Heat pump wiring uncertainty, especially with older or non-standard systems
- Missing or unlabeled wiring that doesn’t match any standard configuration
- Existing HVAC faults unrelated to the thermostat itself
- Damaged control boards on your furnace or air handler
- Any electrical concerns that make you uncomfortable proceeding
There’s no shame in calling in a professional. A wrong wiring connection can potentially damage your HVAC control board, which costs far more to repair than a technician’s service call.
Final Thoughts
Installing a smart thermostat is one of the more approachable DIY home upgrade projects out there for most standard 24V HVAC systems, it really can be a 20-to-30-minute job. But the keys to a smooth install are the same ones experienced technicians rely on every day: confirm compatibility first, prioritize safety at every step, and always photograph and label your wiring before you disconnect anything.
Take the time to understand your specific HVAC setup, follow manufacturer instructions closely, and don’t hesitate to call a professional if anything about your wiring looks unfamiliar or unusual. Get it right, and you’ll be enjoying a more comfortable, more efficient home with the added bonus of controlling your thermostat from wherever you are.
Frequently Asked Questions
Can I install a smart thermostat myself?
Yes, in most homes with standard 24V HVAC wiring, installing a smart thermostat is a manageable DIY project that typically takes 20–30 minutes. Homes with high-voltage systems, complex multi-stage setups, or unusual wiring are better suited for professional installation.
Do all smart thermostats require a C-wire?
Not always. Some smart thermostats can operate without a traditional C-wire using power extender kits or manufacturer-specific accessories, though many brands recommend a C-wire for full functionality and reliable performance.
How long does it take to install a smart thermostat?
Most DIY installations on compatible systems take between 20 and 30 minutes, not including HVAC compatibility research or app setup time.
What happens if I wire a smart thermostat incorrectly?
Incorrect wiring can prevent your heating or cooling system from working properly, and in some cases, it can damage your HVAC control board. Always double-check connections against your labeled wiring photo before restoring power.
Which smart thermostat is easiest for beginners?
Google Nest and Honeywell Home are generally considered beginner-friendly due to their intuitive setup process and clear in-app instructions, though ecobee is also a strong, DIY-friendly option with more advanced features.

