Discovering a burst water pipe in your home triggers instant panic. Within seconds, gushing water can ruin drywall, soak flooring, destroy personal belongings, and threaten your home’s electrical system.
When a pipe bursts, every second counts. Your immediate priorities are simple: stop the flow of water, protect your household from safety hazards, limit structural damage, and contact the right professionals. Lets deep dive into “What to Do When a Pipe Bursts: 10 Emergency Steps”
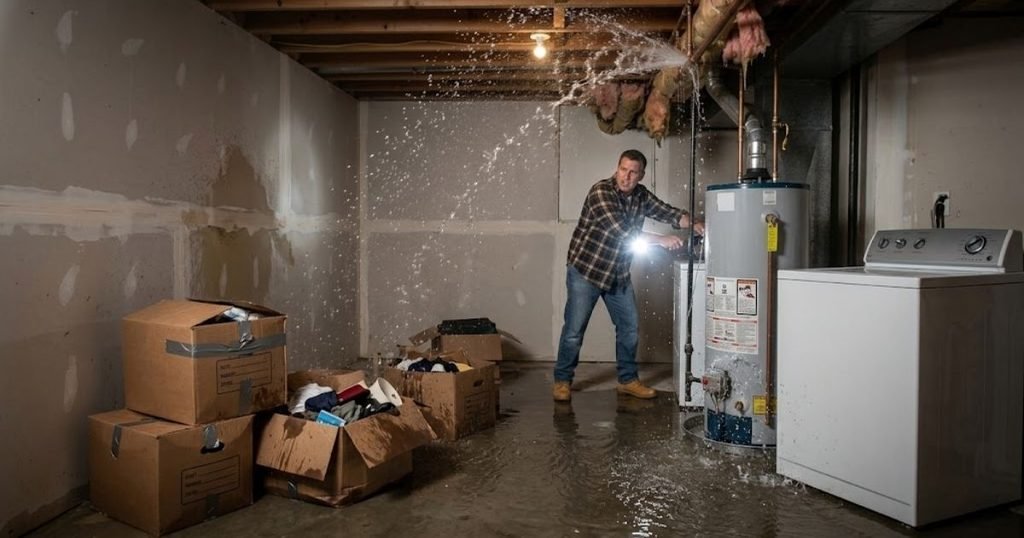
What Should You Do Immediately When a Pipe Bursts?
If water is actively flooding your home, follow this immediate emergency checklist before doing anything else:
1.1. Stay calm and assess safety:Look for electrical hazards first.
Check for standing water near power outlets, appliances, or your main breaker panel. If water is touching electrical sources, do not step into the room.
2.2. Shut off your main water supply:The single most important step.
Turn the main shutoff valve clockwise to stop the flow of incoming water instantly.
3.3. Drain the plumbing lines:Relieve remaining pressure.
Open cold water faucets at the highest and lowest points in your home to drain remaining water out of the pipes.
4.4. Call a licensed emergency plumber:Get professional help dispatched.
Contact a licensed plumber immediately so they can begin heading to your property while you mitigate water damage.
5.5. Turn off electricity if safe:Only if panel access is dry.
If water is near outlets or light fixtures and you can safely access the circuit breaker box without stepping in water, shut off power to the affected zones.
6.6. Document everything for insurance:Take photo and video evidence.
Capture photos and videos of the damaged pipe, standing water, and ruined belongings before starting cleanup.
7.7. Begin safe water removal:Prevent mold growth.
Mop up excess water, use a wet/dry vacuum for carpeted areas, and set up fans to circulate air.
READ MORE: How to Repair a Burst Water Pipe
Quick Reference Action Summary
| Step | Action | Objective | Priority |
| 1 | Main Water Shutoff | Kills incoming water pressure to halt flooding. | Immediate |
| 2 | Open Faucets | Drains remaining water in the lines; relieves pressure. | Immediate |
| 3 | Electrical Safety Check | Prevents electrocution risks in wet areas. | Immediate |
| 4 | Call Emergency Plumber | Gets professional repairs underway quickly. | High |
| 5 | Document & Contact Insurance | Preserves evidence for coverage claims. | High |
| 6 | Water Mitigation | Extracts water to reduce mold and structural rot. | Medium |
Step 1 — Shut Off the Main Water Supply
Turning off your home’s main water valve is the most critical action you can take during a plumbing emergency. Leaving the valve open allows dozens of gallons of pressurized water to dump into your living space every minute.
What is a Main Water Shutoff Valve?
The main shutoff valve controls the entire supply of municipal or well water entering your home. Closing this valve completely stops pressurized water from reaching any fixture or pipe.
Common Main Shutoff Locations
Depending on your regional climate and the age of your home, main shutoff valves are typically located in these spots:
- Basements or Crawl Spaces: Located on the interior perimeter wall closest to the front street, often near the water meter or pressure tank.
- Slab Foundations / Warm Climates: Located outdoors near an exterior hose bib, inside an utility closet, or next to the water heater.
- Water Meter Box: Located outdoors near the curb inside an underground plastic or concrete pit (may require a pentagon curb key or adjustable meter wrench).
Main Shutoff Valve Types
| Feature | Gate Valve (Older Homes) | Ball Valve (Modern Homes) |
| Control Mechanism | Round Wheel | Lever Handle |
| Operation | Turn clockwise multiple times until tight | Turn 90° until perpendicular to the pipe |
| Status Indicator | Requires testing resistance to confirm shutoff | Inline = Open Perpendicular = Closed |
How to Turn Off the Valve
- Ball Valves (Lever Handle): Turn the lever handle 90 degrees until it sits perpendicular to the pipe. When the handle forms a “T” with the pipe, the water is off.
- Gate Valves (Round Wheel): Turn the round handle clockwise (“righty-tighty”) until it stops. Be gentle with older gate valves; forcing a rusted valve can break the stem.
Safety Warning: Never force a badly rusted, frozen, or sticking valve. If you cannot operate the valve safely, or if it is submerged in standing water near electrical hazards, call your local municipal water utility or an emergency plumber immediately to perform a street-side shutoff at the curb stop.
READ MORE: Urgent Pipe Repair: What to Do Now, How Much It Costs
Step 2 — Open Faucets to Relieve Pressure
Once the main shutoff valve is completely closed, pressurized water remains trapped inside your home’s plumbing framework. If a pipe has burst or frozen, that trapped water keeps leaking into walls and ceilings.
How to Drain Your System
- Go to the lowest faucet in your home (such as a basement utility sink, outdoor hose bib, or ground-floor bathtub).
- Open the cold water tap fully.
- Open a faucet on the highest floor of the house.
Opening taps at high and low elevation allows air into the system while letting remaining standing water drain safely into sinks and tubs rather than out of the broken pipe.
Step 3 — Turn Off Electricity if Water Reached Electrical Areas
Water and electricity are a lethal combination. Standing water, dripping ceilings, or damp drywall near outlets, light fixtures, or appliance connections pose immediate electrocution risks.
Water Near Electrical Fixtures?
Is water leaking near electrical outlets, switches, lights, or other electrical fixtures?
Is the Circuit Breaker Panel in a Dry, Safe Location?
YES → Safe to Access
- Turn OFF the affected circuit breaker if you can do so safely.
- If necessary, turn OFF the main electrical switch.
- Keep away from any standing water.
NO → Do NOT Touch the Electrical Panel
- Do not step into standing water.
- Do not touch wet outlets, switches, or electrical equipment.
- Call a licensed electrician or your utility company for emergency assistance.
Severe Electrical Risk Warning Signs
- Water dripping directly from light fixtures or ceiling fans.
- Sizzling, popping, or buzzing sounds inside walls.
- Sparks or visible arching.
- Burning plastic or metallic odors.
- Standing water reaching wall outlets or electrical baseboards.
How to Safely Handle Electrical Hazards
- Never step into standing water to reach your main electrical panel or circuit breakers.
- If your breaker panel is in a clean, dry area away from the leak, switch off power to the specific rooms affected by water.
- If you must pass through standing water to access the breaker box, do not touch it. Contact your power utility company or a licensed electrician to perform an emergency power disconnect from the outside meter.
Step 4 — Find the Exact Location of the Burst
Once the immediate hazards are managed, locate the failure point. Finding the burst pipe helps your emergency plumber make quick repairs and minimizes structural demolition.
Common Locations for Burst Pipes
- Exterior wall cavities with insufficient insulation.
- Unheated crawl spaces, basements, and attics.
- Garages housing uninsulated supply lines.
- Cabinets beneath kitchen and bathroom sinks along exterior walls.
- Ceiling spaces beneath upper-floor bathrooms.
How to Spot Hidden Pipe Leaks
A water stain on a living room ceiling does not always mean the pipe burst directly above that spot. Water travels along joists, support beams, and drywall seams before leaking through the lowest point. Look for these indicators:
- Bulging, Sagging Drywall: Water collecting on top of ceiling sheets causes drywall to bow downward.
- Dripping Sounds or Hissing: Audible signs of pressurized leaks or residual water movement behind framing.
- Musty Odors and Discoloration: Dark yellow or brown rings appearing on paint or wallpaper.
- Loss of System Pressure: Drastic drops in fixture pressure before the main valve was closed.
Tip: If a ceiling drywall panel is bulging heavily with trapped water, place a large bucket underneath and carefully puncture the center of the bulge with a screwdriver or nail. Relieving this trapped weight prevents the entire ceiling sheet from collapsing under the load.
Step 5 — Call a Plumber
While minor fixture maintenance can be a weekend DIY project, a burst supply line requires professional intervention. Pressurized lines operate under 40 to 80 PSI, and improper repairs can lead to subsequent catastrophic failures.
When Professional Help is Mandatory
- The pipe is concealed behind drywall, tile, or structural masonry.
- The failure involves copper, PEX, CPVC, or galvanized steel main lines.
- The main shutoff valve failed or broke during operation.
- The pipe burst due to severe winter freezing across multiple runs.
- Wastewater or raw sewage is involved (drain line/sewer main backup).
Information to Tell Your Emergency Plumber
To speed up dispatch and service, give your plumber clear details over the phone:
- Pipe Material: Copper, PEX, PVC, galvanized iron, or unknown.
- Location: Basement, crawl space, interior wall, attic, or under slab.
- Water Status: Is the main water shutoff valve fully closed?
- Active Flooding: Is water still actively leaking or contained?
- Freeze Status: Did the pipe burst due to cold winter temperatures?
- Electrical Hazards: Has power been shut off to the wet area?
READ MORE: Signs Your Pipes Need Replacing — When to Repair vs. Replace & Costs
Can You Temporarily Stop a Burst Pipe Yourself?
If you must wait for an emergency plumber and need temporary water use for essential needs, short-term mitigation patches may help contain small pinhole leaks or minor cracks.
Temporary Containment Methods
- Rubber Tape and Hose Clamps: Wrap a section of thick rubber (such as a piece of garden hose or rubber gasket) around the leak and secure it tightly on both sides using adjustable stainless steel hose clamps.
- Commercial Pipe Repair Clamps: Metal sleeves fitted with internal rubber gaskets that bolt directly over broken pipe sections.
- Epoxy Putty: A two-part hand-moldable putty applied directly to clean, dry pipe surfaces to plug minor cracks.
Crucial Warning: Temporary patches are emergency containment measures, not permanent fixes. They cannot withstand full line pressure indefinitely. Never attempt DIY patches on gas lines, main sewer stacks, or high-pressure water lines behind closed walls.
What Not to Do When a Pipe Bursts
Avoiding common mistakes during a plumbing emergency saves thousands of dollars in secondary property damage and prevents severe injuries.
- ❌ DO NOT ignore minor leaks: Small hairline splits can open under pressure, turning into major floods.
- ❌ DO NOT step into standing water near power sources: Electrocution hazards are invisible.
- ❌ DO NOT use open flames to thaw frozen pipes: Propane torches or space heaters applied to frozen pipes present severe home fire hazards and heat-shock pipe risks.
- ❌ DO NOT operate electrical appliances in damp rooms: Keep wet/dry vacuums plugged into GFCI-protected outlets outside flooded zones.
- ❌ DO NOT throw away damaged property immediately: Insurance adjusters need physical or clear photographic proof of destroyed items before approving claims.
- ❌ DO NOT attempt self-cleanup of raw sewage: Blackwater backups contain hazardous bacteria, parasites, and pathogens requiring certified biohazard remediation.
How to Clean Up After a Burst Pipe
Once the leak is contained, structural cleanup must begin immediately. Mold spores can germinate on wet drywall, subflooring, and insulation in as little as 24 to 48 hours under warm conditions.
Step-by-Step Cleanup Procedure
- Extract Standing Water: Use mops, heavy towels, and wet/dry vacuums to remove surface water from hard flooring and carpets.
- Elevate Furniture: Place aluminum foil or plastic blocks under furniture legs to prevent wood stain from bleeding into carpets and slow structural rotting.
- Increase Air Circulation: Open interior doors and run high-velocity floor fans to push air across wet surfaces.
- Run Commercial Dehumidifiers: Pull moisture out of the air to prevent secondary humidity damage to ceilings and timber framing.
- Inspect Soft Materials: Remove wet rug padding, unsalvageable carpet, and saturated cardboard boxes. Drywall saturated with clean water for over 24 hours often requires removal and replacement.
When Should You Call a Water Damage Restoration Company?
A standard plumber fixes broken pipes; they do not dry out structural house framing, disinfect contaminated areas, or rebuild soaked walls.
Call a Water Restoration Professional If:
- Standing water covers more than one room or carpeted area.
- Water has seeped beneath hardwood flooring, tile subfloors, or deep into wall framing.
- Insulation inside exterior walls or floor joists is saturated.
- Ceilings are sagging or showing widespread water saturation.
- The water came from a contaminated source (sewer line backup or stagnant graywater).
- Mold growth or strong musty odors are present.
READ MORE: Best Practices to Prevent Frozen Pipes: A U.S. Homeowner’s Step-by-Step Guide
How Much Does It Cost to Repair a Burst Pipe?
Plumbing repairs and water remediation costs vary depending on pipe accessibility, regional labor rates, time of service (after-hours emergency fees), and damage severity.
Typical Cost Estimates
| Repair Category | Estimated Cost Range | Primary Price Factors |
| Basic Pipe Repair (Exposed) | $200 – $600 | Pipe material, joint accessibility, fitting requirements |
| Emergency After-Hours Service Fee | $150 – $350 (Flat fee) | Call-out timing (nights, weekends, holidays) |
| Concealed Pipe Repair (In Wall/Slab) | $600 – $2,200+ | Drywall cutting, masonry removal, structural repairs |
| Frozen Pipe Thawing & Repair | $400 – $1,500 | Extent of freeze line, number of damaged sections |
| Water Damage Restoration & Drying | $1,500 – $8,000+ | Square footage, extraction needs, structural drying |
Note: Price ranges are estimated averages across the United States. Always request written itemized estimates from licensed contractors before major work begins.
Does Homeowners Insurance Cover a Burst Pipe?
Homeowners insurance policies generally cover sudden and accidental water damage caused by burst plumbing lines, but coverage is not guaranteed in every scenario.
Was the pipe leak sudden and accidental?
YES → MAY BE COVERED
- Sudden pipe bursts
- Accidental water damage
- Frozen pipes when the home was properly heated
- Damage caused by the sudden release of water
NO → MAY NOT BE COVERED
- Long-term pipe deterioration or rot
- Gradual or unresolved leaks
- Damage from poor maintenance
- Negligence or failure to address a known problem
Important: Coverage varies by homeowners insurance policy. Your insurer may cover the resulting water damage while excluding the cost of repairing or replacing the failed pipe itself.
What Insurance Typically Covers
- Damage to drywall, framing, ceilings, and subflooring caused by the water release.
- Ruined personal belongings (furniture, electronics, clothing) listed in your policy.
- Water extraction and professional structural drying services.
- Temporary living expenses (loss of use) if your home is rendered uninhabitable during repairs.
What Insurance Commonly Excludes
- Repairing the pipe itself: Insurance pays to fix the property damaged by the water, but rarely pays for the small piece of pipe that failed.
- Negligence or Lack of Maintenance: If a pipe burst because you left a home unheated during winter without draining the system, or ignored a visible leak for months, the claim may be denied.
- Gradual Leaks: Long-term pinhole leaks causing mold over several months are treated as deferred maintenance.
READ MORE: Is Liquid Plumber Safe for Pipes?
What Causes Pipes to Burst?
Understanding why plumbing lines fail helps you address vulnerability spots before an emergency happens.
- Freezing Temperatures: As water freezes into ice inside a pipe, it expands by roughly 9%. This expansion pushes trapped water down the line toward closed faucets, creating massive hydraulic pressure spikes (often exceeding 2,000 PSI) that burst the pipe wall.
- High Water Pressure: Municipal water pressure spiking over 80 PSI puts constant strain on copper joints, solder connections, and flexible supply lines, causing premature failures.
- Corrosion and Age: Older galvanized iron and copper pipes thin over time due to hard water minerals or chemical reactions, leading to pinhole leaks and structural ruptures.
- Tree Roots and Soil Movement: Tree roots enter underground sewer pipes through microscopic joint gaps, expanding until the line cracks or collapses.
- Water Hammer: Fast-closing valves (found in washing machines and dishwashers) send shockwaves through unanchored pipes, loosening fittings over time.
Signs a Pipe May Be About to Burst
Caught early, a vulnerable pipe can be repaired before it ruptures and floods your home. Watch for these warning signs:
- Sudden Loss of Water Pressure: Indicates an active hidden leak bleeding off system pressure.
- Discolored or Rusty Water: Signals severe interior corrosion and pipe wall thinning.
- Loud Bangs or Clanging (Water Hammer): Unsecured pipes shaking violently inside wall cavities when valves close.
- Damp Drywall or Water Rings: Discoloration appearing on ceilings, baseboards, or walls.
- Frost on Exposed Pipes: Ice forming on exposed basement or garage plumbing runs during cold snaps.
- Unexplained Water Bill Spikes: Unseen underground or subfloor leaks wasting hundreds of gallons daily.
What to Do if a Pipe Bursts Because It Froze
Freezing weather is the leading cause of winter plumbing disasters. Follow these specialized steps for frozen pipe emergencies:
- Shut off the main water immediately: When an ice block thaws, water will flow out of the rupture point instantly.
- Open affected taps: Leave faucets open so melting ice and water can drain safely.
- Thaw pipes safely: Use a hair dryer, heating pad, or warm towels wrapped around the pipe.
- NEVER use open flames: Torches or blowtorches present severe fire risks and can heat-shock cold metal, causing immediate structural failure.
- Inspect unthawed sections: Check visible runs for cracks, bulges, or seam splits before turning the main water back on.
How to Prevent Pipes From Bursting
Taking simple preventive measures significantly lowers your risk of facing a disastrous pipe failure.
- [ ] Insulate Exposed Pipes: Wrap vulnerable supply lines in unheated areas (attics, basements, crawlspaces, garages) with foam insulation.
- [ ] Disconnect Outdoor Hoses: Detach, drain, and store all garden hoses. Turn off interior shutoff valves for outdoor spigots and drain the lines.
- [ ] Maintain Minimum Heat: Set your thermostat to at least 55°F (13°C), even when traveling, to keep indoor pipes warm.
- [ ] Expose Indoor Plumbing: Open cabinet doors under sinks in kitchens and bathrooms during deep freezes to allow warm room air to circulate around the pipes.
- [ ] Drip Vulnerable Faucets: Let faucets connected to uninsulated or exterior-wall pipes trickle slightly during extreme cold to relieve pressure and prevent freezing.
Essential Prevention Measures
- Insulate Vulnerable Pipes: Install foam pipe sleeves or heat tape over exposed supply lines in attics, crawl spaces, and unheated basements.
- Disconnect Outdoor Hoses: Remove garden hoses from exterior hose bibs before winter. Trapped water inside the bib expands back into the home wall cavity and bursts the fixture.
- Maintain Heat Settings: Keep your home’s heat set to no lower than 55°F (13°C), even when traveling or away for extended periods.
- Open Cabinet Doors: During severe winter freezes, keep cabinet doors under kitchen and bathroom sinks open to allow warm ambient room air to circulate around internal plumbing.
- Let Faucets Drip: Allow a slow, trickle of water to run through faucets connected to exterior wall pipes during deep freezes. Moving water is far less likely to freeze, and the open tap relieves dangerous pressure buildup.
- Install a Pressure Regulator: Ensure your home’s incoming water pressure stays between 40 and 65 PSI.
READ MORE: How to Clean Copper Plumbing Pipes
How to Prepare for a Burst Pipe Emergency
Being prepared cuts emergency response times from 20 minutes down to 30 seconds, saving your home from catastrophic water damage.
Your Plumbing Emergency Preparedness Plan
- Locate and Tag Your Main Valve: Identify your main water valve today. Brightly label it with a plastic tag so family members can locate it instantly in the dark.
- Clear Access: Keep the area surrounding your main shutoff valve clean and free of boxes or storage debris.
- Assemble Emergency Tools: Store an adjustable wrench, flashlight, pipe repair clamp, and wet/dry vacuum in an easily accessible location.
- Save Emergency Contacts: Program numbers for a licensed 24/7 plumber, your local water utility company, and your insurance carrier into your phone contacts.
When Is a Burst Pipe an Emergency?
Call a professional immediately if you notice any of these high-risk conditions:
- 🚨 Water cannot be stopped using the main shutoff valve.
- 🚨 Standing water approaches electrical outlets, light fixtures, or breaker panels.
- 🚨 Ceilings are sagging or bulging heavily under the weight of trapped water.
- 🚨 The leak involves raw sewage or blackwater drain lines.
- 🚨 The burst pipe is hidden deep within structural walls, subfloors, or slab foundations.
- 🚨 Rapid flooding is filling basements, crawl spaces, or main living areas.
Frequently Asked Questions
What should I do immediately when a pipe bursts?
Shut off your home’s main water supply valve right away to halt incoming water. Next, open cold water faucets throughout the house to drain remaining line pressure, check for electrical hazards near standing water, and call a licensed emergency plumber to make permanent repairs.
How do I shut off the water when a pipe bursts?
Locate your main water shutoff valve (commonly in the basement, crawl space, or near the outdoor water meter). Turn ball valves 90 degrees until the handle is perpendicular to the pipe, or turn wheel-style gate valves clockwise until completely tight.
Can I fix a burst pipe myself?
You can apply temporary emergency patches such as pipe repair clamps, rubber tape, or epoxy putty to stop small leaks while waiting for help. However, permanent repairs on pressurized water lines require professional pipe cutting, soldering, or press-fitting by a licensed plumber.
How much does it cost to repair a burst pipe?
Standard exposed pipe repairs generally cost between $200 and $600. If the broken pipe is hidden behind walls or beneath concrete slab foundations, or requires after-hours emergency dispatch, total repair costs can range from $600 to $2,200+, excluding water damage restoration.
Does homeowners insurance cover a burst pipe?
Homeowners insurance usually covers consequential water damage to floors, drywall, and belongings caused by a sudden and accidental pipe burst. However, policies rarely pay for the physical pipe repair itself and may deny claims caused by lack of maintenance, unheated homes, or long-term unresolved leaks.
Conclusion
Facing a burst pipe is stressful, but taking clear, fast action keeps a temporary plumbing crisis from turning into a total home disaster. Remember your core action order: stop the water first, eliminate electrical hazards, call a licensed plumber, document property damage for insurance, and dry out wet areas immediately.
If you are dealing with an active plumbing failure or suspect a hidden pipe leak inside your walls, contact a licensed emergency plumber right away to protect your home and restore your water system safely.

