Proper Rheem water heater installation is incredibly important. It’s not just a matter of connecting a couple of water hoses and plugging it into the wall. Depending on the exact Rheem model you’ve purchased, the installation process can involve complex plumbing connections, high-voltage electrical wiring, dangerous gas supply lines, specialized venting, and strict adherence to local building codes.
Because Rheem offers a massive lineup of equipment from traditional gas tanks and standard electric models to high-efficiency tankless units and hybrid heat pumps the installation requirements can vary wildly.
As a homeowner, you likely have a lot of questions. How much does Rheem water heater installation cost? Can I install a Rheem water heater myself, or do I need to call a plumber? Does Rheem installation require a permit?
In this comprehensive guide, we are going to break down everything you need to know. We’ll walk through the process step-by-step, explain the hidden costs, and give you the practical, real-world advice you need to ensure your home has safe, reliable hot water for years to come. Lets deep dive into “Rheem Water Heater Installation: Step by Step”
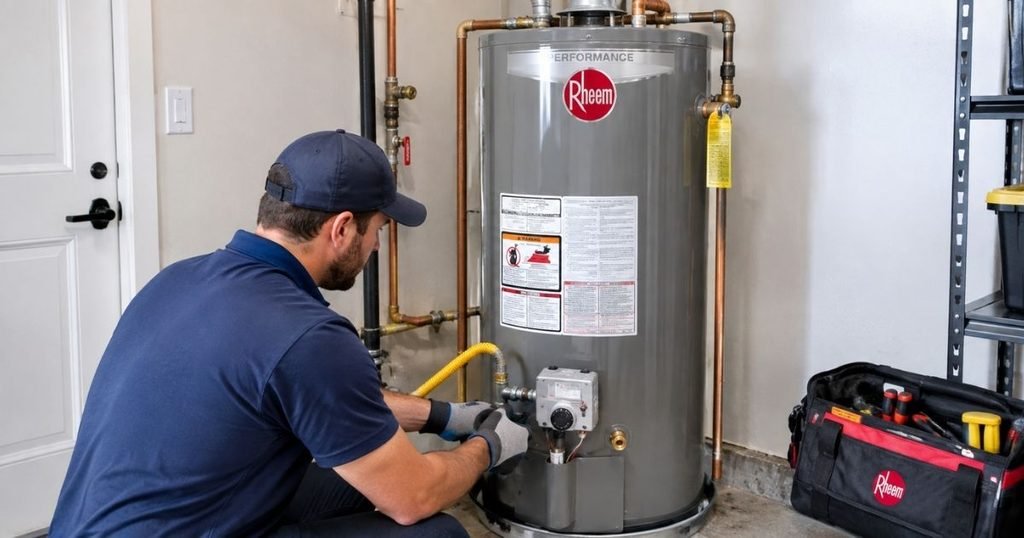
What Is Involved in Rheem Water Heater Installation?
If you’ve never watched a plumber replace a water heater, you might be surprised by how much work goes into the job. The overall installation process is a multi-step project that requires careful attention to detail.
Generally, professional water heater installation involves:
- Choosing the correct Rheem model: Ensuring the unit fits your space and meets your household’s hot water demands.
- Checking the installation location: Verifying that the floor can support the weight and that there is adequate clearance for safety and maintenance.
- Removing the old water heater: Draining gallons of old water, disconnecting utilities, and hauling away a heavy, rusted tank.
- Preparing plumbing connections: Adapting old copper, PEX, or CPVC pipes to fit the new unit.
- Connecting water supply lines: Installing new flex lines, shutoff valves, and an expansion tank if required by code.
- Connecting gas or electrical supply: Safely wiring a 240V circuit or properly sizing and connecting a natural gas or propane line.
- Installing required safety components: Fitting the temperature and pressure (T&P) relief valve and running its discharge pipe safely to the floor or an approved drain.
- Venting for applicable gas models: Connecting exhaust flues to safely carry carbon monoxide out of your home.
- Condensate drainage where required: Running drain tubes for high-efficiency tankless or heat pump models that create condensation.
- Filling and testing the system: Purging air from the tank and pipes.
- Checking for leaks: Inspecting every single water and gas joint.
- Starting and configuring the unit: Setting the thermostat to a safe 120°F and testing for proper operation.
The exact process you or your plumber will follow depends entirely on whether you are dealing with a traditional tank water heater, an electric model, a gas water heater, a tankless unit, or a modern heat pump water heater.
READ MORE: Best Rheem Tankless Gas Water Heater: Review, Cost & Comparison
Types of Rheem Water Heaters and Their Installation Differences
Not all water heaters are created equal. Rheem manufactures several different technologies, and the installation requirements shift dramatically depending on the fuel type and design.
Rheem Water Heater Installation Comparison
| Rheem Water Heater Type | Main Installation Requirements | Typical Complexity | Professional Help |
| Electric Tank | 240V circuit, water connections, T&P valve | Low to Moderate | Recommended (or Advanced DIY) |
| Gas Tank | Gas line, venting flue, combustion air, T&P valve | Moderate to High | Highly Recommended |
| Tankless (Gas) | Large gas line, dedicated venting (PVC/stainless), 120V outlet, condensate drain | High | Required |
| Heat Pump (Hybrid) | Space for airflow, 240V circuit, condensate drain | Moderate | Recommended |
Rheem Electric Tank Water Heater
Electric tanks are generally the most straightforward to install. Because there is no combustion taking place, you don’t have to worry about gas leaks, carbon monoxide, or running vent pipes through your roof. The primary focus for Rheem electric water heater installation is safely managing the 240-volt electrical connection and ensuring the plumbing lines, shutoff valves, and T&P relief protection are perfectly sealed and up to code.
Rheem Gas Tank Water Heater
Rheem gas water heater installation introduces combustion into the mix, which significantly raises the stakes. You must ensure the gas supply line is the correct diameter and has a dedicated shutoff valve. The unit requires proper combustion air (meaning it can’t be sealed in a tiny, airtight closet without ventilation) and a correctly sloped vent pipe to safely exhaust harmful gases outside.
Rheem Tankless Water Heater
If you are upgrading to a tankless system, expect a major installation project. Rheem tankless water heater installation almost always requires modifying your home’s infrastructure. These units heat water instantly, which requires a massive burst of energy. You will likely need to upgrade your gas line size (often to 3/4-inch pipe) to handle the required gas flow. You will also need to install dedicated venting (often PVC for high-efficiency condensing models), a standard electrical outlet to power the unit’s computer board, and a condensate drain line. Always refer to your specific model, as Rheem’s current tankless models have unique venting and gas-line compatibilities.
Rheem Heat Pump Water Heater
Heat pump (or hybrid) water heaters pull heat from the surrounding air to warm the water. They are incredibly energy efficient, but their installation requirements are unique. They require a specific volume of air space to operate efficiently (usually an open basement or garage). They also dehumidify the air, meaning they create condensation that must be safely drained away, similar to an air conditioner.
READ MORE: AO Smith vs. Rheem Water Heaters: Comparison & Expert Reviews
Rheem Water Heater Installation Requirements
Before you cut a single pipe or loosen a wire, you need to understand the structural and utility requirements for your new unit. Assuming your new heater will drop right into the exact same spot as the old one is a common homeowner mistake.
Here are the major installation requirements you need to check:
- Available Installation Space: Modern Rheem water heaters are physically wider and taller than models made 15 years ago due to updated federal insulation regulations.
- Flooring and Support: A full 50-gallon tank weighs over 500 pounds. The floor must be solid. If installing in an attic or over a finished living space, a metal or plastic drain pan is required.
- Water Supply Connections: You need appropriately sized cold water inlet and hot water outlet lines.
- Shutoff Valves: A dedicated cold water shutoff valve is legally required so you can isolate the heater during emergencies.
- Temperature and Pressure (T&P) Relief Valve: This is a critical safety device that prevents the tank from exploding if pressure gets too high.
- Electrical Supply: Electric tanks and heat pumps require dedicated 240V circuits. Tankless and power-vent gas models require standard 120V wall outlets.
- Gas Supply: Must be sized according to the appliance’s BTU rating.
- Venting and Combustion Air: Gas units must have an approved pathway to vent exhaust safely outside.
- Condensate Drainage: Required for heat pumps and high-efficiency gas condensing models.
- Expansion Tank: Most modern municipal water systems are “closed systems.” When water heats up, it expands. Local plumbing codes across the USA now heavily mandate the installation of a thermal expansion tank above the water heater to absorb this pressure.
Clearly, these requirements vary by fuel type and local jurisdiction. Never assume one set of wire sizes or vent specifications acts as a universal rule for all Rheem units.
Tools and Materials Needed
Whether you are watching a plumber work or tackling a basic electric replacement yourself, specific tools and materials are required. The exact parts must match your specific Rheem model and your local plumbing code.
Basic Plumbing Tools
- Adjustable wrenches (two are ideal)
- Pipe wrenches (for gas lines and black iron pipe)
- Tubing cutter (for copper or PEX)
- Screwdrivers (flathead and Phillips)
- Level and measuring tape
- Pliers and wire strippers
- Multimeter (to verify electricity is off)
- Gas leak detector fluid (for gas models)
Installation Materials
- Water connectors: Corrugated stainless steel or braided copper flex lines.
- Valves & Fittings: New ball-valve shutoffs and dielectric unions or nipples to prevent pipe corrosion.
- Safety gear: T&P discharge piping (usually copper or CPVC), an appropriately sized drain pan, and a thermal expansion tank.
- Gas components: A new flexible gas connector and yellow Teflon tape rated for gas.
- Venting components: B-vent piping for standard gas, or PVC/CPVC for power-vent/tankless models.
- Electrical components: Wire nuts, electrical tape, and conduit.
READ MORE: Gas vs Electric Water Heater Running Costs
Step-by-Step Rheem Water Heater Installation
To give you a clear overview of what professional water heater installation looks like, here is the standard step-by-step process.
Step 1 — Choose the Correct Rheem Water Heater
Before installation day, you must select the right unit. You have to consider your household size (a family of five needs more hot water than a couple), peak hot water demand, fuel type, and budget. If you want a tankless unit, you must verify your gas meter and lines can support the required flow rate.
Step 2 — Turn Off Utilities
Safety first. For electric models, the power must be shut off at the main breaker panel. A multimeter should be used to test the wires to ensure they are dead. For gas models, the main gas valve leading to the appliance must be shut off. Gas and 240-volt electricity can be fatal; professionals never cut corners here.
Step 3 — Drain and Remove the Old Water Heater
A garden hose is connected to the drain valve at the bottom of the old tank. The old water may be scalding hot, so it should be allowed to cool, or drained carefully to a safe location. Once drained, the old plumbing, gas, or electrical lines are disconnected, and the heavy tank is moved out of the way.
Step 4 — Prepare the Installation Area
The area is swept clean. The new drain pan is positioned on a level surface. The installer verifies there is adequate clearance around the unit for airflow, future service access, and combustible materials (like keeping drywall away from hot gas vents).
Step 5 — Connect the Water Lines
The installer will attach the cold water inlet and hot water outlet. Modern codes often require dielectric nipples to prevent different metals (like copper and steel) from reacting and corroding. The expansion tank is installed on the cold water line, and the new shutoff valve is secured.
Step 6 — Connect Electricity or Gas
For a Rheem gas water heater, the gas line is connected using a new, approved flexible gas connector. Proper pipe doping or gas-rated Teflon tape is used on threaded connections. Rheem documentation warns that inadequate gas supply can cause improper operation, soot buildup, and dangerous combustion conditions.
For a Rheem electric water heater, the wiring is routed into the junction box on top of the tank and secured with wire nuts according to the National Electrical Code (NEC) and the unit’s rating plate.
Step 7 — Install Venting or Condensate Drainage When Required
If installing a gas unit, the exhaust vent is connected. Draft hoods must be properly aligned, and vent pipes must have the correct upward slope to allow gases to escape naturally. For condensing tankless or heat pump models, a PVC condensate drain line is routed to a floor drain or a dedicated condensate pump.
Step 8 — Fill and Purge the Water Heater
Before the unit is turned on, it must be filled with water. The cold water valve is opened, and a hot water faucet inside the house is turned on. Air will violently sputter out of the faucet. Once the water runs in a smooth, solid stream, the tank is full. This is critical: If you turn on an electric water heater before it is completely full, the heating elements will “dry fire” and burn out in seconds. The installer will also check every new plumbing connection for drips.
Step 9 — Turn the Unit On and Test It
Finally, the gas is turned on and tested for leaks using a soapy water solution, or the breaker is flipped back on. The unit is set to a safe temperature (usually 120°F to prevent scalding). The installer waits for the water to heat up, tests the hot water at the faucets, and confirms no error codes are flashing on modern digital displays.
READ MORE: Gas Water Heater Replacement Cost — What Homeowners Pay & Why
Can You Install a Rheem Water Heater Yourself?
This is one of the most common questions homeowners ask. The answer requires a balanced look at your skills and the risks involved.
If you are replacing an existing electric tank water heater with an identical model, and you are a highly capable DIYer who understands basic wiring and plumbing, it is a manageable weekend project.
However, gas tank installation, tankless installation, and heat pump installation are generally best left to licensed professionals.
Making a mistake with a water pipe means you get a puddle on your floor. Making a mistake with a gas line or exhaust vent can lead to a catastrophic explosion or fatal carbon monoxide poisoning in your sleep. Rheem documentation for gas tankless models specifically states that installation and service should be performed by a qualified installer, service agency, or gas supplier.
Do not attempt gas fitting, major electrical panel upgrades, or code-regulated structural modifications without the appropriate licenses and qualifications.
Rheem Water Heater Installation Cost
What should you expect to pay? Water heater installation cost varies drastically across the USA based on your location, the model you choose, and the complexity of the job.
Here is a breakdown of the variables that affect your final bill:
| Cost Factor | Why It Affects Price |
| Water heater model | A basic electric tank is cheap; a high-efficiency condensing tankless unit is expensive. |
| Labor | Installation complexity dictates how many hours the plumber spends at your house. |
| Plumbing modifications | Old pipes may need to be rerouted, or expansion tanks added to meet modern codes. |
| Electrical work | Upgrading from gas to electric, or adding a heat pump, may require an electrician to pull new 240V wires. |
| Gas work | Upgrading to a tankless heater almost always requires increasing the gas line size for proper flow. |
| Venting | Installing new PVC venting through your roof or sidewall adds substantial labor and material costs. |
| Permits | City or county building permits carry mandatory fees. |
| Removal | Hauling away and legally disposing of the heavy old tank adds a fee. |
| Location | Maneuvering a tank into a cramped attic or a tight crawlspace takes more time and costs more. |
Because of these massive variables, you should always obtain multiple written estimates from local plumbers. Ask them to clearly itemize what is included (e.g., “Does this price include the permit and removing the old tank?”).
READ MORE: What Are the Signs of a Failing Water Heater: Is It Time to Replace?
Rheem Water Heater Installation vs. Replacement
Homeowners often use the words “installation” and “replacement” interchangeably, but plumbers view them very differently.
A straightforward replacement is when you swap an old 50-gallon Rheem gas tank for a new 50-gallon Rheem gas tank in the exact same spot. The pipes already line up, the gas line is the right size, and the vent is already through the roof. This is a fast, relatively affordable job.
A complex installation happens when you change the parameters. If you are changing fuel types (switching from an electric tank to a gas tankless unit), relocating the heater from the basement to the garage, or upgrading to a heat pump, it’s no longer a simple swap. These installations require reworking venting, running new electrical circuits, resizing gas lines, and bringing a potentially decades-old plumbing setup up to modern 2026 code standards. Naturally, complex installations cost significantly more.
Do You Need a Permit to Install a Rheem Water Heater?
In the vast majority of U.S. cities and counties, yes, you do need a permit to install or replace a water heater.
Permit requirements depend entirely on your local city, county, or municipal jurisdiction. You should always check with your local building or plumbing authority before starting work.
Why do local governments care about your water heater?
- Safety: An inspector ensures there are no gas leaks and that venting is safe to prevent carbon monoxide poisoning.
- Code compliance: They ensure things like expansion tanks and drain pans are installed to prevent property damage.
- Home insurance: If a non-permitted, DIY water heater explodes or floods your house, your insurance company may deny the claim.
- Future home sale: When you go to sell your home, buyers and inspectors will look for permit history on major utility upgrades.
READ MORE: How to Replace an Electric Hot Water Heater: Step by Step
Common Rheem Water Heater Installation Mistakes
Even experienced DIYers can stumble when installing a new unit. Here are the most common installation mistakes that lead to property damage or voided warranties:
- Dry firing electric elements: Turning the electricity on before the tank is completely full of water instantly burns out the upper heating element.
- Incorrect gas-line sizing: Trying to run a powerful tankless water heater on a small 1/2-inch gas line will starve the unit of fuel, causing error codes and potential safety shutdowns.
- Improper venting: Using the wrong type of pipe for exhaust (like using standard PVC instead of CPVC for high-temperature exhaust) can cause the pipe to melt and release carbon monoxide.
- Skipping the expansion tank: If your city has a closed water system and you don’t install an expansion tank, thermal expansion will slowly destroy your home’s plumbing and cause the water heater to leak prematurely.
- Incorrect electrical connections: Undersized wiring on an electric tank will overheat and cause a fire hazard.
- Ignoring manufacturer clearances: Pushing a heat pump into a tiny, unventilated closet prevents it from getting the air it needs to function, killing its efficiency.
- Poor condensate drainage: Failing to route the acidic condensate from a high-efficiency gas unit properly can ruin your floors or eat through metal pipes.
How Long Does Rheem Water Heater Installation Take?
There is no single timeframe for a water heater installation because every house is different.
If you are paying a professional for a straightforward, like-for-like tank replacement, the job typically takes 2 to 4 hours. This includes draining the old tank, making minor plumbing adjustments, and testing the new unit.
However, if you are doing a tank-to-tankless conversion, upgrading electrical services, or dealing with a complex basement or attic installation, the job can take a full day (8 to 10 hours) or even stretch into a second day. The plumber or installer should assess your existing system during their quote and provide a realistic time estimate based on your home’s infrastructure.
How to Choose a Rheem Water Heater Installer
If you’ve decided to hire a professional, don’t just pick the first name that pops up on a search engine. Protect your home by using this homeowner checklist to vet potential plumbers:
- Proper licensing: Verify they hold an active plumbing license in your state.
- Gas qualifications: If installing a gas unit, ensure they are certified for gas fitting.
- Knowledge of Rheem equipment: Ask if they have specific experience with Rheem, particularly for complex tankless or heat pump models.
- Permit experience: Ensure they will handle pulling the local permits and arranging the inspection.
- Written estimates: Never accept a verbal quote. Get a detailed, itemized written estimate.
- Proof of insurance: They should carry liability insurance in case they damage your property.
- Clear warranty information: Ask them to explain both the manufacturer’s warranty and their personal labor guarantee.
Rheem Warranty and Professional Installation
Rheem offers excellent warranties, but as a homeowner, you must review the exact documentation that comes in the box with your specific model.
Warranty terms vary significantly. For example, some premium Rheem tankless models boast a 15-year heat-exchanger warranty, a 5-year parts warranty, and 1-year labor coverage. Standard tanks might offer 6, 9, or 12-year tank warranties.
To protect this warranty, you must register your product with Rheem shortly after purchase. Furthermore, carefully read the installation requirements. If a unit fails because it was installed improperly (e.g., incorrect voltage, improper venting, no expansion tank), the manufacturer can deny the warranty claim. Always save your receipts, your permit documentation, and the installer’s invoice.
Rheem Water Heater Installation Checklist
Whether you are doing it yourself or monitoring a professional, use this quick checklist to ensure a successful job:
- [ ] Correct Rheem model and size selected for your home.
- [ ] Installation location checked for space and floor support.
- [ ] Manufacturer installation manual read and reviewed.
- [ ] Water shutoff valve verified and functional.
- [ ] Electrical or gas requirements verified.
- [ ] Venting pathway checked (for gas models).
- [ ] T&P relief valve and discharge pipe installed correctly.
- [ ] Expansion tank installed (if required by code).
- [ ] Old unit drained and removed safely.
- [ ] Water connections tightened and checked.
- [ ] Gas/electrical connections secured.
- [ ] System completely filled with water and purged of air.
- [ ] Unit turned on and tested for leaks.
- [ ] Local permit inspection scheduled.
- [ ] Warranty registered with Rheem.
When to Call a Professional Plumber
Even if you consider yourself handy, some situations demand immediate professional intervention. Stop work and call a licensed plumber or your utility company if you experience:
- A gas smell: If you smell sulfur or “rotten eggs,” leave the house immediately and follow your gas utility’s emergency procedures. Do not attempt to troubleshoot the appliance yourself.
- Electrical wiring problems: If the breaker repeatedly trips, or wires feel hot to the touch, call an electrician.
- Improper venting: If exhaust gases are blowing back into the house (backdrafting), shut the unit off immediately.
- Structural concerns: If you discover rotted flooring under the old tank, a carpenter or contractor must fix it before the new tank goes in.
- Error codes: If a newly installed tankless unit is flashing digital error codes you don’t understand, call for service.
Frequently Asked Questions
How much does it cost to install a Rheem water heater?
There is no universal price because costs depend heavily on the model you choose and your home’s infrastructure. A basic electric tank replacement might cost a few hundred dollars in labor, while upgrading to a high-efficiency gas tankless system can cost several thousand dollars due to necessary gas line upgrades, new venting, and complex labor. Always get a local written estimate.
Can I install a Rheem water heater myself?
A capable DIYer with plumbing and electrical experience might safely handle a basic, like-for-like electric tank swap. However, work involving natural gas, specialized venting, tankless systems, or electrical panel upgrades is highly dangerous and regulated by code. These jobs should be handled by a licensed professional to ensure safety and warranty compliance.
How long does it take to install a Rheem water heater?
If a professional is simply swapping out an old tank for an identical new one in an easily accessible basement, it usually takes 2 to 4 hours. If the job involves converting from a tank to a tankless system, rerouting pipes, or upgrading gas lines, it can take 8 to 10 hours or more.
Do I need a permit to install a Rheem water heater?
In most U.S. jurisdictions, yes. Local building authorities require permits for water heater replacements to ensure the unit is installed up to safety codes, properly vented, and free of gas leaks. Check with your local city or county plumbing authority before starting the project.
Is Rheem a good water heater brand?
Yes, Rheem is widely considered one of the most reliable and trusted HVAC and plumbing brands in the USA. They offer a massive range of products—from budget-friendly standard tanks to ultra-efficient condensing tankless units and hybrid heat pumps. The key to a good experience is selecting the right model for your specific hot water needs and ensuring it is installed perfectly according to the manual.
Final Thoughts
Successfully executing a Rheem water heater installation comes down to preparation and respect for the appliance. Whether you are putting in a reliable 50-gallon electric tank or a state-of-the-art condensing tankless unit, the fundamentals remain the same.
You must choose the right model for your household, deeply understand the structural and utility requirements, and follow the exact manufacturer instructions provided in the box. Never ignore local plumbing codes, always pull the necessary permits, and rigorously test the completed system for water and gas leaks before calling the job done.
If you are dealing with a direct electric tank swap and have the skills, you might tackle it yourself. But if your project involves gas lines, major electrical work, modifying exhaust venting, or significant plumbing upgrades, do not hesitate to call a professional. Get multiple written estimates, hire a qualified local plumber, and enjoy the peace of mind that comes with knowing your home’s hot water system is safe, efficient, and ready to perform.
Sources & Disclaimer
This guide is for informational purposes only. Installation requirements vary significantly by specific Rheem model, fuel type, and geographic location. Homeowners should always consult the official Rheem product documentation and installation manuals included with their specific unit. Furthermore, always verify local building, electrical, and plumbing codes with your local authority, and follow safety standards set by the U.S. Department of Energy. Never attempt unsafe electrical or gas work without the proper licensing and qualifications.

