A toilet tank not filling with water is a common plumbing issue that affects millions of American homes every year. Whether you live in an older historic home with decades-old plumbing or a modern suburban build with high-efficiency fixtures, toilet tanks rely on a delicate balance of mechanical parts to refill correctly after every single flush. When one component fails, gets clogged with mineral scale, or slips out of alignment, the entire refill cycle grinds to a halt.
The good news? You do not always need to call an expensive emergency plumber the moment your toilet refuses to cooperate. Many toilet filling problems are minor mechanical hiccups that a homeowner or renter can easily diagnose and fix with basic tools, a bit of patience, and a clear understanding of how gravity and water pressure work inside your porcelain fixture.
In this comprehensive guide, we will walk you through everything you need to know about why your toilet tank won’t fill, how to safely diagnose the root cause, and step-by-step instructions to get your bathroom back in working order. Lets deep dive into “Toilet Tank Not Filling With Water: Causes & How to Fix It”
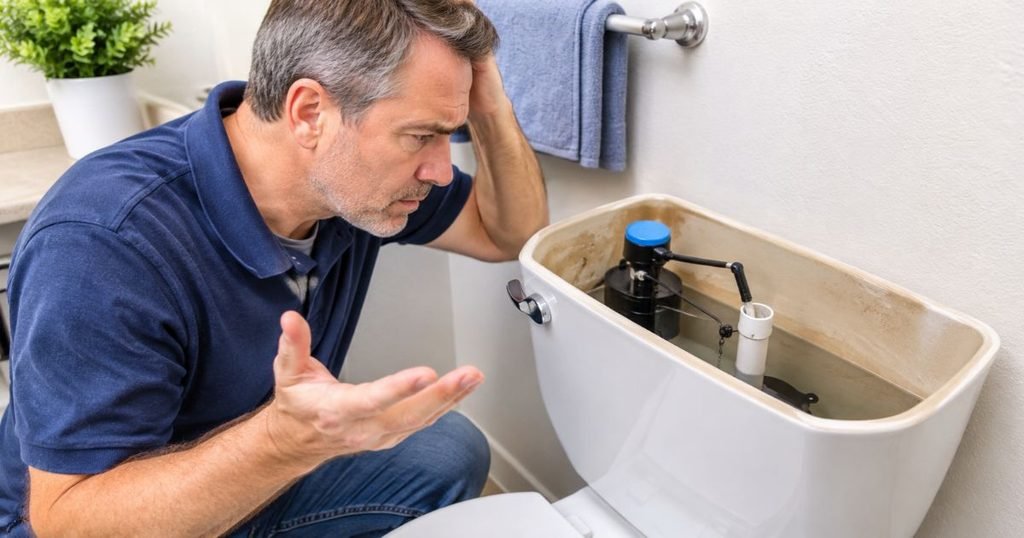
Why Is My Toilet Tank Not Filling With Water?
When a toilet tank stops filling, it usually means water is physically prevented from entering the tank, or it is escaping faster than the fill valve can replenish it. Understanding the root cause requires looking at how water travels from your home’s main water supply into the tank itself.
The most common reasons a toilet tank stops filling include:
- Closed or partially closed water supply valve: Someone might have shut off the valve during previous maintenance or cleaning, or it vibrated closed over time.
- Kinked or blocked water supply line: A flexible braided hose or rigid copper pipe that has been bent, pinched, or clogged with debris will choke off the water flow.
- Faulty or clogged fill valve: Sediment, hard water mineral scale, or worn-out internal rubber seals can prevent the fill valve from opening or letting water pass through.
- Incorrectly adjusted or stuck float: If the float cup or float ball is wedged against the tank wall or set too low, the fill valve thinks the tank is already full and shuts off prematurely.
- Low household water pressure or interrupted supply: Municipal water work or a failing pressure regulator can starve your plumbing fixtures of necessary water pressure.
- Debris and mineral buildup: Hard water common in many regions of the United States deposits calcium and lime inside valve mechanisms, jamming moving parts.
- Water escaping through a faulty flapper or flush valve: Sometimes water is entering the tank, but it leaks straight down into the bowl just as fast, making it look like the tank isn’t filling at all.
READ MORE: Why Won’t My Toilet Flush? 10 Causes & Fixes
How Does a Toilet Tank Filling System Work?
Before diving into repairs, it helps to understand how a standard gravity-flush toilet tank operates. While modern toilets come in various designs from traditional two-piece gravity toilets to sleek one-piece models and pressure-assisted systems the fundamental mechanics remain remarkably consistent.
Inside your toilet tank, you will find several key components working together in harmony:
- Water Supply Shutoff Valve: Located on the wall directly behind or beneath the toilet, this valve connects your home’s pressurized water supply to the toilet.
- Water Supply Line: A flexible braided stainless steel or vinyl hose that carries water from the wall shutoff valve up to the bottom of the toilet tank.
- Fill Valve (Ballcock): The vertical assembly mounted inside the tank that controls incoming water from the supply line.
- Float (Float Cup or Float Ball): A buoyant device attached to the fill valve that rises and falls with the water level, signaling the fill valve when to turn on and shut off.
- Flush Valve and Flapper: A large opening at the bottom of the tank covered by a rubber flap (the flapper) that lifts when you press the handle, releasing water into the bowl.
- Overflow Tube: An open vertical plastic pipe in the center of the tank that prevents water from spilling over the rim of the tank if the fill valve fails to shut off.
- Refill Tube: A small flexible plastic tube running from the fill valve over to the top of the overflow tube, designed to send a small stream of water into the bowl to restore the water seal after a flush.
When you push the flush lever, a connected chain lifts the flapper off the flush valve seat. Water rushes rapidly out of the tank and into the bowl, using gravity and siphon action to clear waste down the drain. As the water level drops, the float drops with it. This movement opens the fill valve, allowing pressurized water to rush up through the supply line and fill the tank back up. Once the water reaches the designated fill line, the rising float closes the fill valve, stopping the flow.
Common Reasons Your Toilet Tank Isn’t Filling With Water
Let’s examine the specific mechanical and plumbing failures that disrupt this delicate cycle.
1. Toilet Water Supply Valve Is Turned Off
The simplest and most frequently overlooked reason for a dry toilet tank is a closed water supply valve. Located near the floor behind the toilet, this shutoff valve controls the water path. If someone turned it off during a bathroom renovation, a repair, or while clearing a minor clog, and forgot to turn it back on, no water will enter the tank. Sometimes, older multi-turn valves become stiff, or quarter-turn ball valves get bumped accidentally by storage baskets or cleaning supplies.
2. Faulty or Clogged Toilet Fill Valve
Over years of service, internal components inside the fill valve wear down. Rubber seals can crack, plastic levers can snap, and internal diaphragms can become brittle. Furthermore, sediment from municipal water lines or corroded galvanized pipes can get trapped inside the valve assembly, preventing the internal plunger from retracting and allowing water to flow.
3. Toilet Float Is Stuck or Misadjusted
The float is the brain of your toilet’s water level regulation. In modern toilets, a plastic float cup rides up and down the vertical shaft of the fill valve. In older toilets, a copper or plastic float ball sits at the end of a metal float arm. If the float gets jammed against the side of the tank, the flush handle chain, or the refill tube, the valve will remain closed. Similarly, if the float is adjusted too low, the tank will stop filling long before it reaches the proper waterline.
4. Kinked or Blocked Water Supply Line
Most modern American homes use flexible braided stainless steel supply lines connecting the wall valve to the toilet tank. If the toilet was recently shifted during flooring installation, cleaning, or remodeling, the supply line might have become sharply bent or kinked. A severe kink restricts water volume and pressure, turning a normal refill into a frustrating trickle or stopping water entry entirely.
5. Low Water Pressure or Interrupted Water Supply
Sometimes the issue originates outside your bathroom. If your local utility company is performing main water line repairs in your neighborhood, or if your home’s pressure reducing valve (PRV) fails, household water pressure can plummet. If other faucets in your home are also experiencing weak flow or sputtering, the lack of water entering your toilet tank is likely an external pressure or supply issue.
6. Mineral Buildup or Debris Inside the Fill Valve
Hard water high in dissolved calcium and magnesium is prevalent across vast regions of the United States, including parts of the Midwest, Southwest, and Texas. When hard water evaporates inside a toilet tank, it leaves behind crusty white or yellow mineral deposits. Over time, these mineral scales accumulate inside the fill valve cap and moving parts, freezing the mechanism in place and blocking water transmission.
7. Faulty Flapper or Flush Valve
It is crucial to distinguish between a tank that receives no water and a tank that receives water but cannot hold it. If your fill valve is working and water is entering the tank, but the water level never rises because it immediately pours out through the bottom, the culprit is a warped, degraded, or debris-stuck flapper. When the rubber flapper fails to seal tightly against the flush valve opening, water continuously escapes into the bowl faster than the fill valve can replenish it.
8. Incorrect Refill Tube Position
The small refill tube running from the fill valve into the overflow pipe plays a vital role. If this tube falls out of the overflow pipe, water will spray inside the tank instead of the bowl. Conversely, if the tube is pushed too far down into the overflow pipe or lacks an anti-siphon clip, it can create a siphon effect that continuously pulls water out of the tank, preventing it from reaching a full level.
READ MORE: How to Fix Loud Banging in Pipes After Flushing Toilet?
How to Diagnose a Toilet Tank That Won’t Fill
Troubleshooting plumbing problems requires a methodical approach. Before running out to buy replacement parts, follow this step-by-step diagnostic checklist to pinpoint the exact issue.
- Remove the toilet tank lid carefully: Lift the porcelain lid off the tank and set it down safely on a padded surface or rug to prevent chipping.
- Check whether the tank is completely empty or partially filled: Note the water level. An entirely dry tank points toward a supply blockage or closed valve. A partially filled tank often points toward a stuck float or low water pressure.
- Listen for water entering the tank: Flush the toilet and listen closely. Do you hear hissing, trickling, or rushing water, or is it completely silent? Silence indicates water isn’t reaching the valve; hissing without rising water indicates a stuck valve or internal clog.
- Inspect the water supply shutoff valve: Look behind the toilet at the wall valve. Is the handle turned parallel to the pipe (open) or perpendicular (closed)?
- Examine the fill valve and float: Check if the float moves freely up and down its shaft or arm without catching on anything inside the tank.
- Check the supply line for kinks or visible damage: Trace the flexible hose from the wall to the tank bottom. Look for sharp bends, cracks, bulges, or moisture leaks.
- Look for water escaping through the flapper or overflow tube: Check if water is trickling continuously down into the toilet bowl while the tank is attempting to fill.
- Determine whether other household faucets have normal water flow: Turn on the bathroom sink faucet and shower. If water pressure is low everywhere, the issue is broader than just your toilet.
Toilet Troubleshooting Reference Matrix
| What You Notice | Possible Cause | Initial Check |
| No water enters the tank | Closed shutoff valve or blocked supply line | Check wall valve position and inspect supply hose for kinks |
| Tank fills very slowly | Restricted supply or clogged fill valve inlet | Test water pressure and check for mineral scaling |
| Tank fills but immediately loses water | Leaking flapper or degraded flush valve seat | Inspect rubber flapper seal and chain tension |
| Water keeps running endlessly | Faulty fill valve or incorrect float adjustment | Lift float manually to see if water flow stops |
| Tank fills only partially | Float adjusted too low or obstructed movement | Check float position against the manufacturer fill line |
READ MORE: Cost to Replace Toilet Flange: Price & DIY Guide
How to Fix a Toilet Tank Not Filling With Water
Once you have identified the likely culprit through your diagnosis, it is time to implement the fix. Here are detailed, beginner-friendly DIY repair instructions for each common scenario.
1. Open the Toilet Water Supply Valve
If your diagnosis reveals that the water supply valve is closed or partially restricted:
- Locate the shutoff valve on the wall behind the toilet.
- If it is a quarter-turn handle, rotate it so the handle runs parallel to the supply pipe.
- If it is an older multi-turn oval handle, turn it counterclockwise to open it fully. Do not force older, corroded valves with extreme muscle force, as older brass stems can snap and cause a major leak. If the valve resists firmly, turn off your home’s main water supply before attempting further maintenance.
- Listen for water rushing back into the tank once the valve is open.
2. Inspect and Straighten the Water Supply Line
A pinched supply line will starve your toilet of water volume:
- Turn off the water supply valve.
- Inspect the braided stainless steel or vinyl hose for sharp kinks, twists, or pinching caused by nearby objects.
- Gently untwist and straighten the line to restore a smooth internal pathway.
- If you notice cracks, fraying wires, weeping moisture, or severe corrosion on the fittings, do not attempt to patch it. Replace the supply line entirely with a new, code-compliant braided stainless steel toilet connector (available at any hardware store for under $10).
3. Adjust the Toilet Float
If your fill valve shuts off too early or fails to open because the float is misaligned:
- For modern float-cup valves: Locate the adjustment screw or clip on the side of the fill valve shaft. Turn the adjustment screw clockwise to raise the float and increase the water level, or counterclockwise to lower it. Ensure the float glides smoothly up and down without rubbing against the tank walls, flush lever chain, or refill tube.
- For traditional float-ball arms: Gently bend the metal float arm downward slightly to lower the water shutoff point, or upward to allow more water into the tank. Be careful not to bend the rod too aggressively, or the ball may press against the tank lid.
4. Clean a Clogged Toilet Fill Valve
Mineral scale and sediment often clog modern fill valves (such as Fluidmaster-style units). You can clean most modern valves without replacing them:
- Turn off the water supply at the wall valve.
- Flush the toilet to drain the remaining water out of the tank. Use a sponge to soak up any excess pooling at the bottom.
- Grip the top cap of the fill valve firmly with one hand, push down on the body, and twist the cap counterclockwise (usually a 1/8 to 1/4 turn) to release the cap assembly.
- Lift the cap off while keeping your hand over the valve opening to prevent water spray. Ask a helper to turn the wall valve on slowly for just one second to flush out loose sediment through the open valve body, then turn the water back off.
- Inspect the rubber seal inside the cap for debris or tears. Rinse it clean under a faucet.
- Reattach the cap by aligning the tabs, pressing down, and twisting clockwise until it locks securely into place. Turn the water supply back on.
5. Replace a Faulty Fill Valve
If cleaning the fill valve does not restore function, or if the internal plastic housing is cracked, replacing the fill valve is a straightforward DIY project that takes about 20 to 30 minutes:
- Turn off the water supply and flush the toilet to empty the tank completely. Sponge out the remaining water.
- Disconnect the flexible water supply line from the threaded shank at the bottom of the toilet tank. Keep a small bucket and towel ready to catch residual water.
- Unscrew the large plastic mounting nut securing the fill valve to the underside of the tank.
- Pull the old fill valve up and out of the tank.
- Insert the new universal fill valve (adjusting its height according to the manufacturer instructions so the top sits about 3 inches above the overflow tube).
- Secure the mounting nut underneath the tank hand-tight, then give it an extra 1/4 turn with pliers (do not overtighten, as porcelain can crack).
- Reconnect the water supply line to the new valve threads.
- Attach the refill clip and tube to the top of the overflow pipe.
- Turn on the water supply, check for leaks, and test the flush cycle.
6. Inspect or Replace a Damaged Flapper
If water is entering the tank but continuously leaking into the bowl:
- Turn off the water supply and drain the tank.
- Unhook the rubber flapper ears from the pegs on the sides of the flush valve seat, and disconnect the chain from the flush lever arm.
- Inspect the rubber flapper. If it feels stiff, warped, sticky, or shows cracks, it has degraded.
- Wipe clean the plastic or brass rim of the flush valve opening to remove any slimy biofilm or mineral scale.
- Install a new universal rubber flapper, hook it onto the mounting pegs, and attach the chain to the flush lever with a tiny bit of slack (about 1/8 inch of play) so it seals flush.
7. Check the Refill Tube
An improperly positioned refill tube can disrupt water equilibrium:
- Ensure the thin flexible tube leading from the fill valve is securely clipped to the top of the overflow tube.
- Make sure the tube is not pushed too far down into the overflow pipe below the water line, which can create a siphoning action that drains your tank prematurely. Trim the tube neatly with scissors if it is excessively long or drooping.
READ MORE: Toilet Replacement Cost in USA: Prices, Labor & More
Toilet Tank Not Filling but Water Is Running – What’s Wrong?
One of the most confusing scenarios homeowners encounter is a toilet where water is actively running, yet the tank never seems to fill up or reach its proper water line. This specific symptom points to a disconnect between water entering the tank and water escaping the tank.
To diagnose this issue accurately, consider the following distinctions:
- Water entering too slowly: The fill valve is partially clogged with debris or hard water scale, allowing only a weak trickle of water that cannot keep pace with normal evaporation or micro-leaks.
- Water entering but leaking into the bowl: The fill valve works fine, but a warped flapper or cracked flush valve seat allows water to drain straight down into the bowl as fast as it arrives. Because the water level never hits the target line, the fill valve stays open continuously, resulting in that annoying sound of running water echoing through your house.
- Incorrect float setting: The float is stuck too low, causing the fill valve to shut off prematurely, resulting in a weak, shallow pool of water in the tank that provides an ineffective flush.
Before replacing expensive plumbing parts, perform a simple food coloring test: Add a few drops of dark food coloring into your toilet tank and wait 15 minutes without flushing. If colored water appears in the toilet bowl without anyone flushing, your flapper or flush valve seal is leaking and needs replacement.
How Much Does It Cost to Fix a Toilet Tank That Won’t Fill?
Repair costs vary depending on whether you tackle the job yourself as a DIY project or hire a licensed professional plumber. Fortunately, most toilet tank refill issues are inexpensive to resolve.
Below is an overview of estimated costs in the United States, reflecting typical parts pricing and professional service rates.
Toilet Repair Cost Estimates
| Repair Type | Estimated DIY Cost (Parts Only) | Estimated Professional Cost (Parts + Labor) |
| Fill valve replacement | $10 – $25 | $125 – $250 |
| Flapper replacement | $5 – $12 | $90 – $175 |
| Supply line replacement | $8 – $20 | $100 – $200 |
| Professional plumber service call | N/A | $75 – $150 (diagnostic fee) |
| Complete toilet replacement | $150 – $400 | $350 – $750+ |
Factors Affecting Repair Costs
- Component Quality: Universal replacement parts (like Fluidmaster fill valves or standard rubber flappers) are inexpensive and widely available at home improvement centers like Home Depot and Lowe’s. Specialty or designer toilets (such as Kohler, Toto, or dual-flush European models) may require proprietary parts that cost slightly more.
- Labor Rates: Professional plumbing labor rates vary significantly across the United States. Plumbers in major metropolitan areas (such as New York, San Francisco, or Chicago) charge higher hourly rates (125–250/hr) compared to rural or suburban areas.
- Complexity and Access: If the shutoff valve is heavily corroded or frozen, a plumber may need to cut pipe, shut off the home’s main water supply, or replace the entire angle stop valve, increasing labor time and cost.
READ MORE: How Much Does a Plumber Charge to Install a Toilet
When Should You Call a Professional Plumber?
While many toilet tank filling issues are well-suited for DIY beginners, certain situations call for professional plumbing expertise. Do not hesitate to call a licensed plumber if you encounter any of the following:
- Corroded or stuck shutoff valve: If the wall shutoff valve is old, calcified, or begins leaking around the packing nut when touched, forcing it can break the pipe inside the wall, leading to a catastrophic indoor flood.
- Damaged water supply connection: If threaded pipe connections inside the wall or fragile copper stubs are damaged or leaking.
- Persistent water leaks: If replacing the fill valve or flapper does not stop chronic leaking or moisture pooling around the base of the toilet.
- Cracked toilet tank: A hairline fracture in the porcelain tank means the entire tank or toilet must be replaced immediately to prevent structural water damage.
- Extremely low household water pressure: If multiple fixtures across your home suffer from poor water flow, signaling a main water line or pressure regulator failure.
- Concealed or in-wall toilet tanks: Wall-hung toilets with concealed tanks require specialized access panels and professional servicing.
How to Prevent Your Toilet Tank From Stopping Filling Again
An ounce of prevention is worth a pound of cure. You can extend the lifespan of your toilet’s internal components and prevent future refill failures with a few simple maintenance habits:
- Inspect the tank periodically: Lift the lid twice a year to check for mineral buildup, fraying chains, or sluggish float movement.
- Avoid chemical drop-in bleach tablets: Avoid hanging or drop-in chemical cleaning tablets inside the tank. High concentrations of chlorine and bleach degrade rubber flappers, fill valve seals, and plastic gaskets prematurely. Use tank-safe cleaning methods instead.
- Address small leaks early: If you hear water trickling intermittently, replace the flapper immediately before it leads to inflated water bills and a completely dry tank.
- Operate valves gently: When shutting off water supply valves for maintenance, turn them smoothly without applying excessive brute force.
- Watch for hard water scaling: If your home has hard water, consider installing a whole-house water softener or periodically cleaning mineral scale off your fill valve cap.
Frequently Asked Questions
Why is my toilet tank not filling with water after flushing?
A toilet tank usually fails to fill after flushing because the water supply shutoff valve is closed, the water supply line is kinked, or the fill valve is clogged with mineral debris. If water is entering the tank but leaking out through the bottom, a faulty flapper is preventing the tank from holding water.
How do I fix a toilet tank that won’t fill with water?
Start by checking if the wall supply valve behind the toilet is fully open. Next, remove the tank lid to ensure the float moves freely up and down without jamming. If the supply valve is open and the float is clear, you may need to clean debris out of the fill valve or replace a worn-out fill valve assembly.
Why is my toilet tank not filling but water is running?
When water runs continuously without filling the tank, it usually means water is entering through the fill valve but escaping straight down into the bowl through a warped or degraded rubber flapper. Alternatively, a fill valve with worn internal seals may fail to shut off properly once the water reaches the target level.
Can a bad fill valve cause a toilet tank not to fill?
Yes, absolutely. Over time, internal rubber seals wear out, or mineral sediment clogs the water inlet ports inside the fill valve. When this happens, pressurized water cannot pass through the valve into the tank, leaving the tank completely dry or filling at an extremely slow trickle.
How much does it cost to fix a toilet tank that won’t refill?
If you fix it yourself, replacement parts like a universal fill valve or rubber flapper typically cost between $5 and $25 total. If you hire a licensed professional plumber, expect to pay between $100 and $250 for parts and labor, depending on your local plumbing rates and repair complexity.
Final Thoughts
Dealing with a toilet tank that refuses to fill can be stressful, but as we’ve explored, the issue almost always boils down to a manageable mechanical or supply problem. By checking the basics such as the water supply valve, the float mechanism, and the fill valve you can quickly identify whether you are dealing with a simple adjustment or a part replacement.
Before rushing to replace expensive hardware or calling an emergency plumber, take a few minutes to inspect your toilet tank using the diagnostic steps outlined in this guide. With basic tools and a bit of patience, you can restore your toilet to perfect working order, save money on costly service calls, and gain confidence in handling home plumbing maintenance. If you encounter stubborn corrosion, cracked porcelain, or persistent leaks beyond your comfort level, never hesitate to reach out to a trusted, licensed professional plumber to protect your home from water damage.
Sources
- National Kitchen & Bath Association (NKBA) Home Maintenance Guidelines
- International Plumbing Code (IPC) Residential Standards
- Consumer Product Safety and Home Improvement Plumbing Guides
- Professional Residential Plumbing Contractor Association Best Practices
Disclaimer
Disclaimer: Plumbing systems and toilet models vary significantly by manufacturer, age, and local building codes. Always shut off the main water supply before attempting major plumbing repairs. If you encounter severe corrosion, cracked porcelain, or complex leaks, consult a licensed, insured professional plumber to avoid personal injury or home water damage.


Pingback: How to Fix a Wobbly Toilet: Causes & Easy DIY Solutions - Plumbing Guider