Every homeowner has experienced it at some point. You flush your bathroom toilet, wash your hands, step out into the hallway, and suddenly—BANG! A sharp, startling sound reverberates from behind the drywall or under the floorboards. Sometimes it sounds like a single hammer strike against metal. Other times, it is a series of rapid-fire rattling, knocking, or shuddering vibrations that make you wonder if your pipes are about to burst through the plaster.
While noisy plumbing after flushing toilet issues is incredibly common acrosl=s homes of all eras, that does not mean you should ignore it. It can feel deeply alarming, especially in the quiet middle of the night.
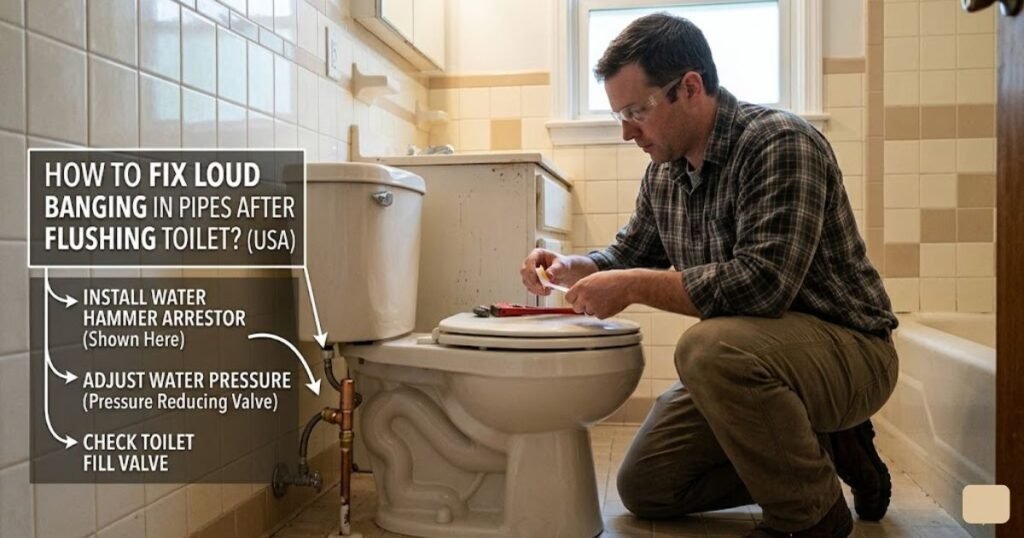
This extensive, homeowner-friendly guide will walk you through exactly how to fix loud banging in pipes after flushing toilet. We will break down why these noises happen, look closely at the underlying physics in simple everyday terms, provide step-by-step DIY troubleshooting methods, and help you determine when it is time to call in a professional plumber. Lets deep dive into “How to Fix Loud Banging in Pipes After Flushing Toilet?”
READ MORE: Emergency Toilet Repair Near Me: Your Ultimate Guide to Fast and Reliable Solutions
Why Pipes Bang After a Toilet Flush
To stop the racket in your walls, you first need to understand what is triggering it. That loud banging is a physical symptom of kinetic energy. When rushing water is stopped suddenly, that energy has to go somewhere.
Here are the six main reasons your plumbing is objecting so loudly:
1. Water Hammer (Hydraulic Shock): Water is heavy and cannot be compressed. When your toilet’s fill valve snaps shut, the rushing water crashes into it at high speed. This sends a violent, high-pressure shockwave backward through the plumbing, causing the pipes to flex and jump.
2. Loose Supply Pipes: Pipes run through holes in your wood framing. Over time, the plastic or metal straps holding them steady can break or loosen. If a pipe isn’t immobilized, even a minor pressure shift will cause it to slam repeatedly against the studs or drywall.
3. High Water Pressure: Excessive pressure forces water to move at an aggressive, dangerous velocity, multiplying the force of the water hammer. Safe residential plumbing should run between 40 and 60 PSI. Anything over 80 PSI causes long-term structural damage.
4. Faulty Fill Valve: If the valve inside the toilet tank is old or covered in mineral buildup, it can “chatter” or bounce rapidly instead of sealing smoothly. This rapid opening and closing triggers a stuttering, machine-gun knocking sound.
5. Waterlogged Air Chambers: Homes built before the 2000s often have vertical, dead-end T-pipes hidden in the walls. These are meant to trap an air pocket that acts as a soft cushion for pressure spikes. Over the years, the water absorbs this air, leaving the chamber waterlogged and removing the cushion entirely.
6. Worn Shutoff Valves: If the manual valve on the wall beneath your toilet has a degraded or loose interior rubber washer, it will flap wildly in the rushing water during a refill. This creates a loud, vibrating hum or rhythmic knocking.
Common Causes at a Glance
- The Valve Snap: Modern fast-closing toilet valves cut off heavy water flow instantly.
- The Energy Wave: Non-compressible water bounces backward, transforming into a kinetic shockwave.
- The Contact Point: Unsecured copper or PEX pipes crash into wooden wall framing.
- The Pressure Overload: System water pressure exceeding 60-70 PSI amplifies the force of every impact.
- The Failed Cushion: Older built-in wall air chambers lose their trapped air pockets over time.
READ MORE: How to Repair a Toilet that Keeps Running: Step by Step
Is the Problem Dangerous?
When your home starts shouting at you after a routine bathroom trip, it is entirely natural to feel worried. While a toilet pipes banging sound is rarely an immediate cataclysmic emergency that will flood your home tonight, it is absolutely a warning sign that requires practical, timely attention. Ignoring a persistent water hammer issue can cause structural wear and tear to build up quietly over time.
Think of it like driving your car over a deep pothole at high speed every single day. The car might not break down the first or second time, but eventually, your suspension is going to give out.
Continuous mechanical hammering inside your walls can gradually lead to:
- Leaks at joints or fittings
- Loose pipe supports
- Damage to valves and fixtures
- Extra wear on the toilet supply line
- Ongoing noise that gets worse over time
The key is to treat it as a maintenance issue early. Most of the time, the fix is simpler and cheaper when you deal with it before real damage starts.
Tools and Materials You May Need
You do not need a full plumbing shop to handle basic troubleshooting. A few simple tools can go a long way.
- Adjustable wrench
- Screwdriver
- Pressure gauge
- Pipe clamps or pipe straps
- Water hammer arrestor
- Replacement fill valve
- Teflon tape
- Towels or a bucket
Keep a flashlight nearby too. A small leak or loose connection is much easier to spot with good light.
READ MORE: How Much Does a Plumber Charge to Unclog a Toilet?
Step-by-Step Ways to Fix the Banging Noise
Let’s dive into the practical DIY fixes you can try at home. We will rank these troubleshooting steps starting with the easiest, least invasive tasks and move down toward advanced mechanical additions.
Fix 1: Adjust or Replace the Toilet Fill Valve
If the banging sound occurs exclusively when the toilet tank finishes refilling, the valve itself is likely closing with excessive speed or chattering.
Why It Works
Installing a modern, high-quality, regulated fill valve ensures that the closing action happens gradually and smoothly, dissipating the fluid momentum safely rather than snapping shut like a trapdoor.
Basic DIY Steps
- Remove the toilet tank lid carefully.
- Flush the toilet and watch how the tank refills.
- Listen for any sudden stop, hissing, or vibrating sound.
- Check whether the valve looks old, dirty, or partly blocked.
- If needed, clean the valve or replace it with a new one.
When to call a plumber:
If the valve is hard to access, the toilet keeps running, or replacement parts do not stop the banging, it may be time for professional help.
Fix 2: Check and Adjust the Local Shutoff Valve
Sometimes the problem isn’t the complex valve inside the tank, but rather the manual valve on the wall right next to the floor.
Why It Works
If a multi-turn shutoff valve is only partially open, or if its internal compression washer is loose, water rushing past it creates turbulent eddy currents. This turbulence vibrates the valve stem, rattling the connected pipework.
Basic DIY Steps
- Check that the valve is fully open.
- Slowly turn it a little to see whether the noise changes.
- Look for leaks, rust, or corrosion around the valve.
- If it is stiff or damaged, it may need replacement.
When to stop:
Do not force a stuck valve. If it will not move easily or begins to leak, stop and call a plumber.
Fix 3: Perform a Full Plumbing System Drain and Recharge
If your home relies on built-in wall air chambers that have become completely waterlogged, you can restore their effectiveness by purging all the water out of your pipe network.
Why It Works
Draining your entire house allows atmospheric air to enter the lines, emptying out those hidden vertical T-pipes. When you turn the water back on, the air gets trapped at the top of those dead-ends once again, instantly restoring your shock-absorbing air cushions.
Basic DIY Steps
- Locate your home’s main water shutoff valve (usually found in the basement, a crawlspace, or near the street curb) and turn it off completely.
- Go to the absolute highest point in your home (usually a second-story bathroom or attic sink) and turn on all the faucets completely to let air draw into the plumbing network.
- Go to the lowest point in your house (a basement laundry tub, an outdoor garden spigot, or a ground-floor shower) and open those valves wide.
- Flush all the toilets in the house to completely empty out their tanks.
- Let the entire system sit open for roughly 15 to 20 minutes. You will hear sputtering and gurgling as water gravity-drains completely out of the system.
- Close every single faucet across the house, starting from the lowest floor and working your way back to the top.
- Slowly turn your main water supply valve back on. The lines will hiss, sputter, and cough up trapped air when you first open your sink faucets again—this is completely normal.
- Once the stream runs clear and steady, flush your problem toilet. If empty air chambers were your primary issue, the banging noise should now be totally silent.
Fix 4: Test and Regulate House Water Pressure
High water pressure is a silent killer for home appliances and plumbing joints. If your main incoming water pressure is too high, every single fix you try will simply be a temporary band-aid.
Why It Works
Lowering system pressure drops the kinetic energy of the moving water column to safe, manageable thresholds. This reduces the velocity at which the water collides with closing valves.
Basic DIY Steps
- Purchase an inexpensive, analog water pressure gauge.
- Screw the gauge directly onto an unregulated outdoor hose spigot or your washing machine’s cold-water supply outlet.
- Make sure no other appliances, showers, or toilets are running in the house.
- Turn the spigot valve on fully and read the dial.
- The Target Zone: Your pressure should ideally read between 45 and 60 PSI. If your reading exceeds 75 or 80 PSI, your water pressure is too high.
- Locate your home’s Water Pressure Reducing Valve (PRV). This is a bell-shaped brass device located on your main incoming water line right after the main shutoff handle.
- Loosen the locknut on the top adjustment bolt of the PRV.
- Using a wrench or screwdriver, turn the bolt counterclockwise to decrease the pressure (remember: “lefty-loosey” lowers the pressure). Turn it in small, half-turn increments, then retest your gauge until the reading settles safely around 50 PSI. Tighten the locknut back down.
Incoming City Water (High Pressure 90+ PSI)
└──> [ Water Pressure Reducing Valve (PRV) ]
└──> Restored Safe House Flow (Balanced 50 PSI)
When to call a plumber: If turning the adjustment bolt on your PRV yields absolutely no change on your pressure gauge, or if water begins leaking out of the bell housing, the internal rubber diaphragm has ruptured. The PRV is broken and needs to be cut out and replaced by a professional.
Fix 5: Secure Loose Pipes with Clamps
If you have open, unfinished spaces in your home like an unfinished basement, a utility closet, or an accessible crawlspace you can visually inspect how your pipes are routed.
Why It Works
Physically strapping a pipe down prevents it from moving laterally when fluid shifts occur. If it cannot flex, it cannot strike the surrounding building framing.
Basic DIY Steps
- Have a helper stand upstairs and flush the problem toilet while you stand in the basement or crawlspace below.
- Watch and listen closely to track where the copper or PEX lines run through the flooring joists. Look for spots where the pipe visibly jerks or sways when the toilet valve shuts off.
- Purchase plastic talon clamps, rubber-lined pipe straps, or copper U-hangers that match the exact diameter of your pipes (typically 1/2-inch or 3/4-inch lines).
- Anchor the straps securely to the wooden framing using wood screws.
- Crucial Tip: Do not anchor metal copper pipes with bare steel straps. Dissimilar metals will undergo galvanic corrosion over time, causing the pipe to rust through. Always use copper-coated straps or plastic clamps for copper pipes. Additionally, do not clamp the lines so tightly that they cannot expand and contract longitudinally with temperature changes, or you will create a ticking noise when hot water runs.
Fix 6: Install a Mechanical Water Hammer Arrestor
A water hammer arrestor is designed to absorb pressure shock.
Why it may solve the problem:
It gives the sudden water stop somewhere to go, which reduces the bang.
Basic steps:
- Find the toilet supply line or area where the arrestor can be installed.
- Make sure the part matches the plumbing size and setup.
- Turn off the water before installing.
- Follow the product instructions carefully.
When to call a plumber:
If you are not comfortable cutting into the line or replacing fittings, this is a smart job for a plumber. A wrong installation can leak or fail.
READ MORE: How to Plumb a Basement Bathroom: Step By Step DIY Guide
How to Tell Which Cause Is Most Likely.
To help you save time and narrow down your troubleshooting focus, use this contextual diagnostic matrix to match your specific system symptoms to the most likely mechanical culprit:
| What You Hear & See | Where It Happens | The Most Likely Culprit | Best Initial Action |
| A sharp, singular BANG the exact second the toilet stops refilling. | Inside the wall right behind or beneath the toilet tank. | Water Hammer due to a fast-closing valve or waterlogged air chambers. | Run a full plumbing system drain and recharge, or install a retro-fit water hammer arrestor. |
| A rapid-fire, machine-gun rattling or chattering that lasts for several seconds as the tank fills. | Inside the toilet tank itself or directly inside the adjacent drywall cavity. | Faulty Fill Valve or a loose internal rubber washer inside the local shutoff valve. | Open the toilet tank lid to check the fill valve mechanism, or replace the fill valve entirely. |
| A dull, heavy thud followed by a long, slow vibrating hum through the floors. | Sounds like it is coming from the basement, crawlspace, or utility closet lines. | Loose, Unsecured Supply Pipes lacking proper structural framing hangers. | Inspect open basement or crawlspace areas while a helper flushes the toilet; install pipe clamps. |
| A loud bang that happens not just when the toilet flushes, but also when the washing machine or dishwasher runs. | Heard throughout multiple rooms and various walls across the entire house. | Excessively High Water Pressure across the main incoming municipal line. | Buy a cheap pressure gauge and check your household PSI at an outdoor spigot; adjust the main PRV. |
Troubleshooting Checklist for Homeowners
Use this short checklist before you call for help:
- Listen carefully to where the banging starts
- Check whether the noise happens only after flushing
- Inspect the toilet fill valve and supply line
- Make sure the shutoff valve is fully open
- Look for visible leaks or loose pipe movement
- Test home water pressure
- Drain and refill the lines if needed
- Consider a water hammer arrestor
- Replace worn toilet parts if they are clearly old
Taking these steps in order can save time and keep the repair process simple.
READ MORE: Fix Leaky Bathroom Faucet
Prevention Tips
Once you stop the banging, a few good habits can help prevent it from coming back.
- Keep water pressure at a safe level
High pressure makes banging more likely. A plumber can help confirm whether your home is in a healthy range.
- Replace worn toilet parts early
Do not wait until a fill valve is barely working. Replacing tired parts before they fail can prevent noise and leaks.
- Secure loose plumbing lines
If pipes move or shake, they are more likely to knock when water flow changes.
- Address plumbing noise quickly
Small noises often get worse over time. Catching them early usually means an easier repair.
- Schedule routine plumbing checks in older homes
Older plumbing systems deserve extra attention. A simple inspection can catch worn parts before they become bigger problems.
Frequently Asked Questions
Why do my pipes bang after I flush the toilet?
The most common reason is water hammer, which happens when water stops suddenly inside the pipes. It can also be caused by high water pressure, loose pipes, or a worn toilet fill valve.
How do I stop water hammer in toilet pipes?
Start by checking the toilet fill valve, supply line, and shutoff valve. If the problem continues, a water hammer arrestor or a pressure adjustment may be needed.
Can high water pressure cause banging pipes after flushing?
Yes. High water pressure makes the plumbing system more forceful, which can increase banging, vibration, and wear on valves and fittings.
Do I need a plumber for loud banging pipes after toilet flush?
Not always. Some causes are simple enough for a homeowner to check, such as loose parts or a worn fill valve. A plumber is the safer choice if the noise is severe, ongoing, or tied to hidden pipes.
Will a water hammer arrestor fix toilet pipe noise?
It often helps, especially when the sound is caused by sudden valve shutoff. But if the real problem is high pressure, loose pipes, or damaged parts, the arrestor may only be part of the solution.
Final Takeaway
While the sudden, aggressive clatter of plumbing pipes inside your walls can feel stressful, remember that it is a highly structural, mechanical issue with clear, logical solutions. In most American households, a noisy plumbing loop after a toilet flush can be resolved over a single afternoon with a quick trip to the local hardware store and a couple of basic hand tools.
Start with the simplest, least invasive methods first: check the mechanics inside your toilet tank, drain your lines to recharge your home’s natural air cushions, and check your static household water pressure with a basic gauge. If those steps don’t give you the absolute silence you want, installing a handy inline mechanical water hammer arrestor will easily tame the problem.

