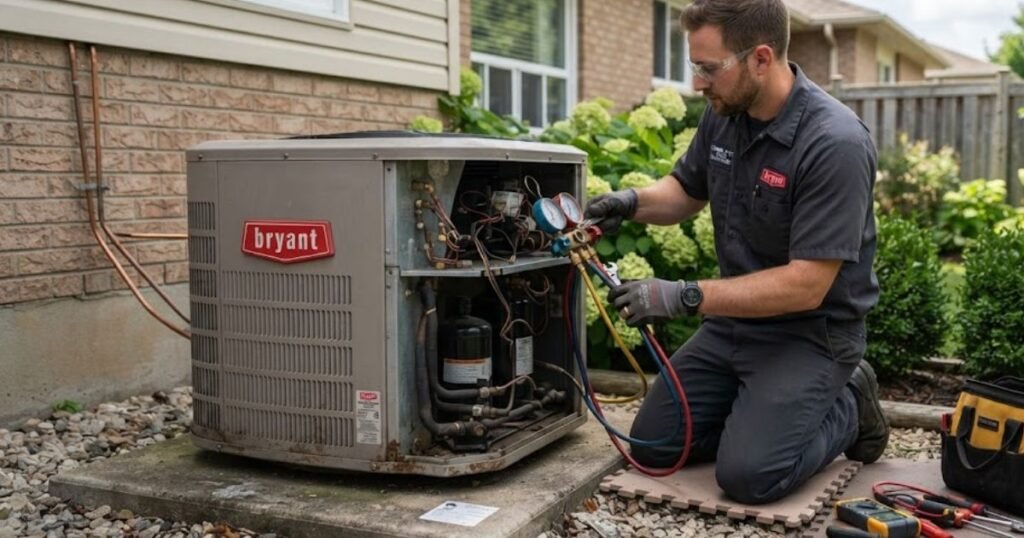
I’ve been climbing into attics and crawling around outdoor condenser pads for over 15 years, and Bryant heat pumps are some of the most common systems I run into. They’re reliable, reasonably priced compared to other premium brands, and built on Carrier’s manufacturing platform which means solid components and decent parts availability.
Still, no heat pump runs forever without a hiccup. When homeowners search “Bryant heat pump repair near me,” it’s usually because something just stopped working at the worst possible time: a freezing January night, a sweltering July afternoon, or a strange noise that’s been getting louder for a week.
In this guide, I’ll walk you through exactly what I look for when I get a service call: how Bryant heat pumps work, the most common problems I see in the field, honest repair cost ranges, and how to find a technician who actually knows what they’re doing. I’ll also show you which checks are safe to try yourself and which ones you should leave to a licensed pro. Lets deep dive into “Bryant Heat Pump Repair Near Me”
Key Takeaways
- Most Bryant heat pump breakdowns come from dirty filters, weak capacitors, or refrigerant issues not major mechanical failure.
- A properly maintained Bryant heat pump should last 15–20 years.
- Repair costs generally range from $150 for a simple fix to $4,500+ for a compressor replacement.
- Bryant-authorized, NATE-certified technicians offer the best combination of factory training and warranty protection.
- If your system is over 12 years old and needs a major repair, replacement is often the smarter financial move.
READ MORE: Bryant Evolution Heat Pump Review: Features, Comparison & Cost
What Is a Bryant Heat Pump?
A Bryant heat pump is a dual-purpose HVAC system that both heats and cools your home by moving heat energy rather than generating it directly.
Heating mode: The system pulls heat from the outdoor air yes, even cold air holds usable heat energy and moves it inside through the refrigerant cycle.
Cooling mode: The process reverses. Heat is pulled from inside your home and released outdoors, working much like a central air conditioner.
Energy efficiency: Bryant heat pumps are rated using SEER2 (cooling) and HSPF2 (heating) ratings. Higher-tier units like the Evolution series can reach premium efficiency levels, which lowers monthly utility costs but can mean pricier component replacements.
Expected lifespan: With regular maintenance, most Bryant heat pumps last 15 to 20 years. Coastal or high-humidity climates tend to shorten that lifespan due to corrosion.
Popular Bryant series:
- Legacy Line — budget-friendly, dependable
- Preferred Series — mid-tier efficiency and features
- Evolution Series — top-tier efficiency with variable-speed and communicating controls
Signs Your Bryant Heat Pump Needs Repair
Watch for these warning signs before a small issue becomes an expensive one:
- No heat or noticeably weak heat output
- No cool air during summer operation
- Weak or reduced airflow from vents
- Visible ice buildup on the outdoor unit
- Outdoor fan not spinning
- Loud banging, grinding, or clicking noises
- Burning or electrical smell near the indoor or outdoor unit
- System short-cycling (turning on and off repeatedly)
- Unexplained spike in your energy bill
- Water pooling near the indoor unit
- Error codes displayed on a communicating thermostat
- Thermostat unresponsive or showing incorrect readings
READ MORE: Carrier Heat Pump Reviews — Models, Costs, Pros & Cons
Common Bryant Heat Pump Problems
1. Heat Pump Won’t Turn On
- Symptoms: No response from thermostat, no fan, no hum.
- Possible causes: Tripped breaker, blown fuse, dead thermostat batteries, failed contactor.
- DIY checks: Confirm the thermostat has power, check your breaker panel, replace thermostat batteries.
- Professional repair: If power is confirmed but the unit still won’t start, a technician should test the contactor and control board.
2. Not Heating Properly
- Symptoms: Blows air, but it’s cool or lukewarm.
- Possible causes: Low refrigerant, failed reversing valve, dirty filter, defrost control issue.
- DIY checks: Replace the air filter and check that outdoor coils aren’t blocked by debris.
- Professional repair: Reversing valve and refrigerant work require EPA-certified handling.
3. Not Cooling
- Symptoms: Warm air during cooling mode, system runs constantly.
- Possible causes: Refrigerant leak, dirty condenser coil, failed compressor, low airflow.
- DIY checks: Clean debris away from the outdoor unit and check filter.
- Professional repair: Refrigerant leaks need a licensed tech to locate, repair, and recharge properly.
4. Frozen Outdoor Unit
- Symptoms: Visible ice or frost on coils or refrigerant lines.
- Possible causes: Defrost control failure, low refrigerant, restricted airflow, faulty sensor.
- DIY checks: Turn off the system and let it thaw; clear leaves or snow from the unit.
- Professional repair: If freezing returns quickly, the defrost board or refrigerant charge needs diagnosis.
5. Compressor Failure
- Symptoms: Outdoor unit hums but doesn’t run, or trips the breaker repeatedly.
- Possible causes: Electrical failure, refrigerant overcharge, age-related wear.
- DIY checks: None recommended this is a high-voltage component.
- Professional repair: Compressor diagnosis and replacement should always be handled by a licensed technician.
6. Capacitor Problems
- Symptoms: Humming noise, fan won’t start, system struggles to turn on.
- Possible causes: Worn-out start/run capacitor (one of the most common heat pump failures).
- DIY checks: None capacitors store electrical charge even when powered off.
- Professional repair: A quick, affordable fix for a trained technician with proper safety equipment.
7. Contactor Failure
- Symptoms: Outdoor unit doesn’t engage, or continues running even when thermostat is off.
- Possible causes: Pitted or stuck contacts from electrical wear.
- DIY checks: Visual inspection only do not touch internal components.
- Professional repair: Straightforward, low-cost replacement in most cases.
8. Refrigerant Leak
- Symptoms: Reduced heating/cooling, hissing sound, ice buildup.
- Possible causes: Corroded lines, faulty fittings, physical damage.
- DIY checks: None safe to perform.
- Professional repair: Requires leak detection, repair, and EPA-compliant recharge.
9. Defrost Control Issues
- Symptoms: Excess ice buildup, system stuck in defrost mode.
- Possible causes: Failed defrost sensor or control board.
- DIY checks: None beyond visual inspection.
- Professional repair: Board or sensor replacement and calibration.
10. Thermostat Malfunction
- Symptoms: Blank screen, inaccurate temperature, unresponsive controls.
- Possible causes: Dead batteries, wiring issue, outdated firmware, failed unit.
- DIY checks: Replace batteries, check wiring connections, restart the thermostat.
- Professional repair: Wiring diagnosis or thermostat replacement if DIY checks don’t help.
11. Fan Motor Failure
- Symptoms: No airflow, weak airflow, or grinding noise from the unit.
- Possible causes: Worn bearings, electrical failure, motor burnout.
- DIY checks: Visually confirm the fan blade isn’t obstructed.
- Professional repair: Motor replacement requires electrical disconnection and proper part matching.
12. Dirty Evaporator Coil
- Symptoms: Reduced efficiency, ice buildup, weak temperature output.
- Possible causes: Dust and debris accumulation over time.
- DIY checks: None — coil is inside the unit housing.
- Professional repair: Professional coil cleaning restores efficiency and prevents freezing.
13. Clogged Air Filter
- Symptoms: Weak airflow, higher energy bills, system freezing.
- Possible causes: Filter not replaced on schedule.
- DIY checks: Check and replace filter — this is the #1 homeowner fix.
- Professional repair: Rarely needed unless neglect caused coil damage.
14. Electrical Problems
- Symptoms: Tripped breakers, burning smell, system won’t start.
- Possible causes: Loose wiring, failed capacitor, damaged control board.
- DIY checks: Check breaker only — do not open electrical panels.
- Professional repair: Always required for electrical diagnosis and repair.
15. Drain Line Blockage
- Symptoms: Water leaking near indoor unit, musty smell.
- Possible causes: Algae or debris clogging the condensate line.
- DIY checks: Inspect the drain line for visible blockage near the exit point.
- Professional repair: Line flushing and clog removal to prevent water damage.
READ MORE: Goodman Heat Pump Review | Efficiency, Cost, Pros & Cons
Bryant Heat Pump Error Codes
| Error Code | Meaning | Possible Cause | Recommended Fix |
| E1 | High pressure lockout | Blocked airflow, overcharged refrigerant | Clear debris, professional refrigerant check |
| E2 | Low pressure lockout | Refrigerant leak, low charge | Leak detection and recharge by technician |
| E4 | Communication error | Faulty wiring between thermostat and board | Inspect and repair wiring connections |
| E5 | Compressor overload | Electrical fault, failing compressor | Professional compressor diagnostic |
| E6 | Defrost sensor fault | Faulty sensor or wiring | Sensor replacement |
| E7 | Reversing valve fault | Stuck or failed valve | Valve inspection and replacement |
| E9 | Control board fault | Board malfunction or power surge | Board diagnostic or replacement |
Note: Exact codes may vary slightly by model and control system. Always confirm with your unit’s manual or a certified technician.
Bryant Heat Pump Repair Costs (USA)
| Repair | Estimated Cost Range |
| Diagnostic fee | $75 – $200 |
| Capacitor replacement | $150 – $400 |
| Contactor replacement | $150 – $350 |
| Thermostat repair/replacement | $120 – $500 |
| Refrigerant recharge | $200 – $600 |
| Fan motor replacement | $350 – $700 |
| Compressor replacement | $1,800 – $4,500 |
| Defrost control board | $300 – $650 |
| Circuit board replacement | $400 – $800 |
| Full system replacement | $6,000 – $14,000 |
Pricing varies significantly by region, local labor rates, system age, unit accessibility, and part availability. Always request a written estimate before authorizing repair work.
READ MORE: Ultra Quietest Heat Pump for Your Home: Review, Comparison & Cost
How to Find the Best Bryant Heat Pump Repair Near You
- Licensed technicians: Confirm state HVAC licensing before hiring.
- NATE-certified professionals: This certification reflects verified technical competency.
- Bryant-authorized dealers: These technicians receive factory training specific to Bryant systems.
- Insurance: Confirm liability and workers’ comp coverage.
- Reviews: Look for consistent, detailed feedback rather than just star ratings.
- Emergency availability: Especially important during extreme weather seasons.
- Warranty support: Ask if they can process Bryant manufacturer warranty claims.
- Upfront pricing: Reputable companies quote before starting work.
- Financing options: Useful for larger repairs or replacements.
- Maintenance plans: A good sign the company thinks long-term, not just one-off calls.
Questions to Ask Before Hiring an HVAC Contractor
- Are you Bryant certified or an authorized dealer?
- Do you offer emergency or after-hours service?
- Is the diagnostic fee applied toward the repair cost?
- Do you guarantee your repairs, and for how long?
- Do you stock genuine Bryant parts?
- Are written estimates free before work begins?
- Are your technicians licensed and background-checked?
DIY Troubleshooting Before Calling a Technician
Before booking a service call, it’s worth running through these safe checks:
- Replace thermostat batteries
- Check your breaker panel for a tripped switch
- Inspect and replace a dirty air filter
- Clear leaves, dirt, and debris from the outdoor unit
- Confirm vents and registers aren’t blocked or closed
- Look for visible ice buildup and allow it to thaw if present
- Try a basic system reset per your owner’s manual
Do NOT attempt: Refrigerant handling, compressor repair, or opening electrical panels. These tasks require EPA certification, specialized tools, and carry serious safety risks including electrical shock and chemical exposure.
READ MORE: Best Swimming Pool Heat Pump: Review, Comparison, and Buying Tips
Bryant Heat Pump Maintenance Tips
Spring checklist
- Test cooling mode before hot weather arrives
- Clean or replace the air filter
- Clear debris from around the outdoor unit
- Check condensate drain line
Summer checklist
- Monitor for unusual noises during heavy use
- Keep landscaping trimmed back 2+ feet from the unit
- Replace filters every 1–3 months
- Schedule a professional cooling tune-up
Fall checklist
- Test heating mode before cold weather hits
- Inspect outdoor unit for summer debris buildup
- Check thermostat programming for the season
- Schedule a professional heating tune-up
Winter checklist
- Keep outdoor unit clear of snow and ice
- Watch for excessive frost that doesn’t clear during defrost cycles
- Avoid covering the unit completely, which can trap moisture
- Monitor indoor comfort and energy bills for changes
Repair vs. Replace
| Factor | Repair | Replace |
| System age | Under 10 years | Over 12–15 years |
| Repair cost | Under 30% of replacement cost | Repeated repairs adding up |
| Efficiency | Still performing near original spec | Noticeably declined efficiency |
| Warranty | Still active | Expired or limited |
| Future reliability | Isolated issue | Multiple recurring problems |
As a rule of thumb, if a single repair costs more than 30-50% of a full replacement, or your system is past the 12-15 year mark, replacement is usually the better long-term investment — especially with newer, more efficient models available.
How Long Does Bryant Heat Pump Repair Take?
- Thermostat repair/replacement: 30–90 minutes
- Capacitor replacement: 30–60 minutes
- Fan motor replacement: 1–2 hours
- Refrigerant leak repair: 2–4 hours, sometimes requiring a follow-up visit
- Compressor replacement: 3–6 hours
- Defrost board replacement: 1–2 hours
- Full system replacement: 1–2 full days
READ MORE: Solar Powered Heat Pump Cost: USA Homeowner Guide to Savings
Emergency Bryant Heat Pump Repair
Some situations call for immediate professional attention rather than waiting for a scheduled appointment:
- Complete heating failure during freezing winter temperatures
- Any burning smell coming from the indoor or outdoor unit
- Sparking, tripped breakers, or other electrical warning signs
- Suspected refrigerant leaks (hissing sounds, chemical odor)
- Total loss of airflow in extreme weather
If you notice any of these signs, shut the system down at the thermostat or breaker and call a licensed technician right away.
Ways to Reduce Future Repair Costs
- Schedule annual professional tune-ups
- Replace air filters on a consistent schedule
- Have coils professionally cleaned periodically
- Consider a smart thermostat for better system monitoring
- Keep at least 2 feet of clearance around the outdoor unit
- Address minor issues before they become major failures
- Look into extended warranty coverage for newer systems
- Enroll in a maintenance agreement with a trusted local contractor
Frequently Asked Questions
How much does Bryant heat pump repair cost?
Most common repairs range from $150 to $700, while major repairs like compressor replacement can run $1,800 to $4,500 depending on your region and system.
Why is my Bryant heat pump not heating?
The most common causes are a dirty air filter, low refrigerant, a failing reversing valve, or a defrost control malfunction.
How long do Bryant heat pumps last?
With consistent maintenance, most Bryant heat pumps last between 15 and 20 years before major components begin to fail.
Should I repair or replace my Bryant heat pump?
If your system is under 10 years old and the repair is minor, repair is usually the better value. If it’s over 12-15 years old or facing a major component failure, replacement often makes more financial sense.
How do I find Bryant heat pump repair near me?
Search for NATE-certified, Bryant-authorized technicians in your area, check recent reviews, and confirm they offer upfront pricing and emergency availability before booking.
When to Call a Professional
If your DIY checks filter, breaker, thermostat batteries, and outdoor unit clearance don’t resolve the issue, it’s time to call a licensed technician. Anything involving refrigerant, electrical components, or the compressor should never be attempted without proper training and certification.
Common Mistakes Homeowners Make
- Ignoring strange noises until they turn into major failures
- Skipping annual maintenance to save money short-term
- Attempting refrigerant or electrical repairs without training
- Hiring the cheapest bidder without checking certification
- Waiting too long to call for repair during extreme weather
- Not replacing air filters on a regular schedule
Expert Tips
After 15 years in this trade, the single biggest factor I see separating a $200 repair bill from a $4,000 one is timing. Homeowners who address strange noises, weak airflow, or rising energy bills early almost always pay less than those who wait until the system fails completely.
Conclusion
A malfunctioning heat pump is stressful, especially when it happens during extreme weather. But most Bryant heat pump problems from dirty filters to worn capacitors are common, well-understood issues that a certified technician can resolve quickly and affordably.
The key is acting early: run through the safe DIY checks first, and if the problem persists, call a licensed, NATE-certified, Bryant-authorized technician near you. Regular maintenance remains the best way to avoid emergency repairs altogether, and when a major component does fail, weighing repair costs against your system’s age will help you make the smartest long-term decision for your home.