You wake up, jump in the shower, and get hit with a wall of cold water. Not a great way to start your morning.
If you have a gas water heater, there’s a good chance a small box on the front of the unit the Honeywell water heater control is the reason things went sideways. Maybe the status light is blinking. Maybe the pilot won’t stay lit. Maybe you have no idea where to even start.
You’re not alone. Thousands of homeowners search every month for answers about Honeywell water heater control problems, reset procedures, and error codes. The good news? Many of the most common issues are fixable without calling a plumber.
In this guide, you’ll learn:
- What the Honeywell water heater control actually does
- How to read and adjust temperature settings
- How to reset the control when something goes wrong
- What every blinking light pattern means
- How to troubleshoot the most common problems
- When it’s time to repair — and when to replace
Let’s deep dive into “Honeywell Water Heater Control: Settings, Fixes & Reset”
READ MORE: Tankless Water Heater Not Working? Causes, Fixes & Troubleshooting
What Is a Honeywell Water Heater Control?
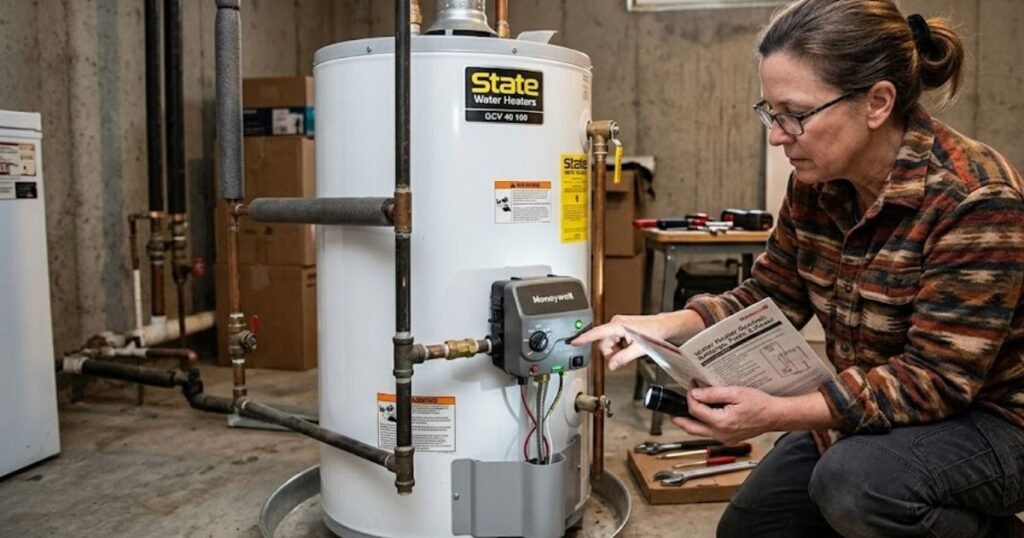
The Honeywell water heater control is the brain of your gas water heater. It’s that boxy unit mounted to the side of the tank — usually blue, gray, or black — with a dial on the front and a small status LED indicator.
Its job is to manage three critical functions:
- Temperature regulation — keeping your water at the temperature you set
- Gas flow control — opening and closing the gas valve to fire the burner
- Safety shutdowns — cutting gas if something dangerous is detected
Think of it like a thermostat, a safety controller, and a gas valve all wrapped into one compact unit.
Key Components Inside the Control
| Component | What It Does |
| Gas Control Valve | Opens and closes to regulate gas flow to the burner |
| Thermostat Sensor | Reads the water temperature inside the tank |
| Thermopile | Generates a small voltage from the pilot flame to power the control |
| Electronic Control Board | Processes sensor data and triggers heating cycles |
| Status LED Indicator | Communicates diagnostics through flash patterns |
The thermopile is worth understanding. It’s a small device that sits in the pilot flame. As long as the pilot is burning, the thermopile generates enough electricity to keep the gas valve open and the control powered. If the pilot goes out, the thermopile stops producing voltage and the gas valve closes automatically as a safety measure.
READ MORE: Why Is My Gas Water Heater Pilot Light Not Staying Lit? Causes & Fixes
Types of Honeywell Water Heater Controls
1. Mechanical Controls
Older water heaters typically more than 10–15 years old often use simpler mechanical controls. These have a basic dial to set temperature and a manual pilot lighting procedure. There’s no LED status light and no electronic diagnostics.
They’re straightforward and durable, but if something goes wrong, you have fewer clues to work with.
2. Electronic Controls
Most water heaters built in the last decade use Honeywell’s electronic gas controls. These add:
- A status LED that flashes specific error codes
- More precise temperature sensing
- Better safety monitoring for issues like overheating or sensor failures
- Sometimes a digital display showing temperature or error codes
If your unit has a small LED light near the bottom of the control, you have an electronic control. This guide focuses primarily on electronic controls since they’re the most common type homeowners ask about.
Honeywell Water Heater Temperature Settings Explained
The dial on your Honeywell control has labeled positions rather than exact degree markings. Here’s what each one generally means in terms of water temperature:
| Setting | Approximate Temperature | Best Use |
| Vacation (VAC) | ~50°F (10°C) | Away for extended periods |
| Low | ~90–100°F | Very light use, energy saving |
| Hot (120°F mark) | ~120°F | Recommended default for most homes |
| A | ~130°F | Larger households with high demand |
| B | ~140°F | Dishwashers without internal heaters |
| C | ~150°F | Commercial or high-demand applications |
| Very Hot | ~160°F | Maximum output; scalding risk |
Note: Exact temperatures vary by model. These ranges reflect commonly documented Honeywell electronic gas control behavior and typical industry settings. Check your owner’s manual for model-specific ranges.
Best Temperature Setting for Most Homes
The U.S. Department of Energy and most plumbing professionals recommend 120°F (the “Hot” setting) for standard households. It’s hot enough for showers, dishes, and laundry while reducing the risk of scalding especially important in homes with young children or elderly family members.
If your dishwasher doesn’t have a built-in water heater, bumping to the “A” position (around 130°F) can help with cleaning performance.
READ MORE: Gas Heater for Home Not Working? Causes, Fixes & Pro Tips
How to Adjust Your Honeywell Water Heater Control Safely
Adjusting the temperature is simple but there are a few things to keep in mind before you touch that dial.
Step-by-Step Instructions
- Find the control panel — it’s mounted on the side of the tank, usually near the bottom
- Check the current dial position — note where it’s set before making changes
- Turn the dial slowly to your desired setting — don’t force it
- Wait 1–2 hours for the water to recover to the new temperature
- Test the hot water at a faucet to confirm the change took effect
⚠️ Safety Warning: Never set your water heater above 120°F if children or elderly people use the hot water. Water at 140°F can cause a serious scald burn in as little as 5 seconds. If you need higher temperatures for appliances, consider installing a mixing valve at the tank outlet instead of cranking up the whole system.
Honeywell Water Heater Control Reset (Step-by-Step)
Sometimes the control locks out after detecting a fault. A reset can clear temporary errors and get things running again but it’s not a cure-all.
When a Reset Helps
- After a power interruption
- After the pilot accidentally went out
- After a temporary temperature spike triggered a safety shutdown
When It Won’t Fix the Problem
- Repeated lockouts after resetting (points to an underlying hardware issue)
- A failed thermopile or thermocouple
- A failed gas valve
- A cracked heat exchanger or venting problem
How to Reset Your Honeywell Water Heater Control
- Turn the dial to the OFF position — you should feel it click into place
- Wait at least 5 minutes — this lets gas fully dissipate and allows the control to fully reset
- Turn the dial to the PILOT position
- Press and hold the pilot button (usually a red button near the dial) while using a long lighter or match to light the pilot through the pilot access port
- Continue holding the pilot button for 30–60 seconds after the pilot lights — this lets the thermopile heat up enough to generate holding voltage
- Release the button slowly — if the pilot stays lit, the reset worked
- Turn the dial to your desired temperature setting
- Watch the status light — it should flash once every 3 seconds in normal operation
Signs the Reset Worked
- Pilot flame stays lit without holding the button
- Status LED blinks once every 3 seconds (normal operation indicator)
- Hot water returns within 1–2 hours
- No unusual smells or sounds from the unit
If the pilot won’t stay lit or the status light shows an error pattern after resetting, you likely have a component issue that needs further diagnosis or professional attention.
READ MORE: AO Smith vs. Rheem Water Heaters: Comparison & Expert Reviews
Honeywell Water Heater Status Light & Error Codes
The small LED on your Honeywell control is your best diagnostic tool. It speaks in flash patterns. Learning to read them can save you time and money.
| Flash Pattern | Meaning | Recommended Action |
| No light at all | No pilot / thermopile not generating power | Relight pilot; check thermopile |
| 1 flash every 3 seconds | Normal operation — system working correctly | No action needed |
| 2 flashes | Thermopile voltage low | Check pilot flame; replace thermopile if needed |
| 4 flashes | Temperature exceeded limit (overheating) | Check for sediment buildup; flush tank |
| 5 flashes | Sensor fault detected | Inspect wiring connections; may need professional |
| 7 flashes | Gas valve or control board error | Likely needs control replacement |
| 8 flashes | Upper thermostat tripped (thermal cutout) | Allow tank to cool; reset or replace thermostat |
⚠️ Caution: Never attempt to bypass or disable safety controls on your water heater. These protections exist to prevent fires, explosions, and carbon monoxide hazards. If a fault keeps recurring, address the root cause don’t just keep resetting.
If your control is showing 7 flashes consistently, it almost always means the control valve assembly itself has failed. Resetting won’t help at that point.
Common Honeywell Water Heater Control Problems and Fixes
1. No Hot Water
- Symptoms: Cold water at every tap, even after waiting hours.
- Likely causes: Pilot light out, failed thermopile, gas supply interrupted, control in lockout.
- DIY checks: Look through the pilot access window — is the pilot lit? If not, try relighting it following the steps above. Check that your gas shutoff valve is open. Look at the status light for error codes.
- When to call a pro: If the pilot won’t stay lit or gas supply seems normal but the burner won’t fire.
2. Pilot Light Won’t Stay Lit
- Symptoms: Pilot lights during the relighting process but goes out when you release the button.
- Likely causes: Weak or failed thermopile, dirty pilot orifice, draft from nearby HVAC or open vents.
- DIY checks: Clean any debris from the pilot tube area. Hold the pilot button down for a full 60 seconds before releasing — the thermopile needs time to heat up. Check for nearby drafts.
- When to call a pro: If the pilot keeps going out after you’ve cleaned the area and tried multiple relight attempts, the thermopile is probably weak and needs replacement.
3. Heater Keeps Turning Off
- Symptoms: Hot water available but runs out quickly, or heater shuts off mid-use.
- Likely causes: Heavy sediment buildup reducing efficiency, overheating protection triggering, undersized tank.
- DIY checks: Flush the tank to clear sediment (see maintenance section below). Check the temperature setting if it’s too high, the high-limit switch may keep tripping.
4. Temperature Too Low
- Symptoms: Warm but not hot water; hot water runs out fast.
- Likely causes: Temperature set too low, heavy sediment reducing heat transfer, undersized tank for household demand, dip tube failure.
- DIY checks: Turn the dial up one position and wait 2 hours. Flush the tank to remove sediment.
5. Water Too Hot
- Symptoms: Scalding hot water at faucets, steam from hot water lines.
- Likely causes: Temperature set too high, faulty thermostat reading incorrectly.
- DIY checks: Turn the dial down to the “Hot” (120°F) position. If water stays too hot even at low settings, the thermostat sensor may be failing.
6. Control Won’t Reset
- Symptoms: Pilot lights but status light keeps showing fault codes, or control won’t respond at all.
- Likely causes: Persistent fault that hasn’t been corrected, failed control board, failed gas valve.
- DIY checks: Identify and fix the underlying fault (sediment, bad thermopile, etc.) before attempting another reset. Repeatedly resetting without addressing the root cause won’t help.
7. Burner Not Igniting
- Symptoms: Pilot is lit, thermostat is calling for heat, but the main burner never kicks on.
- Likely causes: Failed gas valve, clogged burner orifice, low thermopile output preventing valve operation.
- DIY checks: Verify pilot flame is strong and blue — a weak, yellow pilot may not generate enough thermopile voltage to open the main valve.
- When to call a pro: Burner issues involving gas components are best left to a licensed plumber or gas technician.
READ MORE: How Long Does a Water Heater Take to Heat Up?
Honeywell Gas Control Valve Troubleshooting
The gas control valve is the heart of the Honeywell control assembly. It regulates gas to both the pilot and the main burner and it takes commands from the electronic board based on what the sensors report.
Common Signs the Valve Is Failing
- Status light shows 7 flashes consistently
- Main burner fires erratically or not at all despite pilot staying lit
- Control seems unresponsive to dial changes
- Valve makes clicking or buzzing sounds but burner doesn’t fire
Gas Valve Troubleshooting Checklist
- ✅ Confirm pilot flame is blue and steady (not yellow or weak)
- ✅ Check thermopile voltage most technicians test with a multimeter; a healthy thermopile typically generates enough millivolt output to hold the valve open (consult your model’s specs for exact diagnostic values)
- ✅ Inspect all wiring connections between the thermopile and the control look for corroded or loose terminals
- ✅ Watch the status LED carefully the flash pattern tells you which component the board is flagging
- ✅ Verify gas supply pressure is adequate by checking other gas appliances in your home
If your thermopile tests low and replacing it doesn’t fix the problem, the valve itself may have an internal failure. At that point, the entire control assembly typically needs replacing since the valve isn’t sold separately.
DIY Maintenance Tips to Extend Control Life
Your Honeywell water heater control lasts longer when the rest of the system is well maintained. Here’s what to stay on top of:
- Flush the tank annually — sediment buildup forces the burner to run longer and hotter, stressing the control and shortening tank life
- Inspect the burner flame every couple of years — it should burn blue; orange or yellow flames suggest combustion problems
- Check venting regularly — blocked flue pipes cause dangerous backdrafting and can trigger safety shutdowns
- Keep the area around the water heater clear — restricted airflow starves combustion and stresses the unit
- Watch the status light monthly — catch problems early before they become expensive failures
- Test your hot water temperature with a thermometer twice a year to verify the control is reading accurately
- Look for corrosion or moisture around the control wiring connections — moisture is a common cause of premature control failure
READ MORE: Best Tankless Water Heater— Top Picks, Costs & Buyer’s Guide
Repair vs. Replace — What Makes More Sense?
| Situation | Repair | Replace |
| Water heater is under 7 years old | ✅ Often worth repairing | Only if part isn’t available |
| Water heater is 10+ years old | Consider age vs. cost | ✅ Usually makes more sense |
| Control cost is under $150 | ✅ Repair is cost-effective | — |
| Multiple components failing | — | ✅ System-wide replacement better |
| Tank is leaking | No | ✅ Replace entire water heater |
| Still under manufacturer warranty | ✅ Use warranty coverage | — |
| Frequent repeated failures | — | ✅ Replacement is more reliable |
Homeowner Decision Checklist
Before spending money, ask yourself:
- How old is my water heater? (Average lifespan is 8–12 years for gas units)
- Is the tank itself in good condition, or is there rust, corrosion, or leaking?
- What’s the cost of the new control vs. the cost of a new water heater?
- Has this control failed before, or is this the first issue?
It’s worth noting that many homeowners who’ve dealt with failed Honeywell controls report replacing the entire control assembly rather than trying to repair individual components inside it. The board and valve are integrated, and repair parts typically aren’t sold separately by most suppliers.
When to Call a Professional
Some water heater issues fall firmly outside DIY territory. Call a licensed plumber or gas technician if:
- You smell gas near the water heater leave the house and call your gas company immediately
- The control keeps locking out repeatedly after multiple resets
- Water is overheating despite a low temperature setting
- You notice water leaking from the tank, valve connections, or pressure relief valve
- The burner won’t ignite after pilot troubleshooting
- The status light shows sensor fault codes (5 or 7 flashes) that persist after reset
- You’re not comfortable working around gas appliances — there’s no shame in calling a pro
Safety Note: Gas water heater repairs involve combustible fuel and high-temperature systems. When in doubt, always prioritize safety over saving money. A licensed technician can diagnose and fix most Honeywell control issues in a single visit.
Frequently Asked Questions
How do I reset my Honeywell water heater control?
Turn the dial to the OFF position and wait at least 5 minutes. Then move the dial to PILOT, press and hold the pilot button, and use a lighter to ignite the pilot through the access port. Hold the button for 30–60 seconds after the flame appears, then slowly release. If the pilot stays lit, turn the dial to your desired temperature. The status LED should blink once every 3 seconds to confirm normal operation.
What does a blinking light mean on a Honeywell water heater?
One flash every 3 seconds means everything is working normally. Two flashes typically indicate low thermopile voltage. Four flashes signal an overtemperature condition. Five flashes point to a sensor fault, seven flashes usually mean a gas valve or board failure, and eight flashes indicate a thermal cutout event. No light at all usually means the pilot isn’t lit and the thermopile isn’t generating power.
Why is my Honeywell water heater not getting hot?
The most common reason is a pilot light that’s gone out or a weakened thermopile that can’t hold the gas valve open long enough to heat the tank. Other causes include the temperature dial being set too low, heavy sediment buildup reducing heating efficiency, or the control being in a lockout state after a fault.
How long does a Honeywell water heater control valve last?
Honeywell gas control valves typically last 8–12 years under normal operating conditions — roughly in line with the lifespan of the water heater itself.
Can I replace a Honeywell water heater control myself?
Technically, yes the control assembly is a bolt-on unit that many experienced DIYers can swap out. The process involves shutting off gas and water, draining the tank partially, disconnecting the gas lines and wiring, removing the old control, and installing the new one.
Conclusion
Taking care of your Honeywell water heater control doesn’t have to be intimidating. By paying close attention to the built-in LED diagnostic status light, maintaining clear air passages around the base of your tank, and keeping the temperature set to a safe, efficient 120°F (“Hot”) baseline, you can ensure your home enjoys a reliable supply of hot water for years to come.
Before you spend hundreds of dollars calling a local service technician or rushing out to purchase an expensive new control replacement part, take a few minutes to look at the flash code on the front face of the unit, run through our step-by-step reset sequence, and check your wire connections. More often than not, a simple cleaning or a quick manual reset is all it takes to get your hot water back up and running smoothly.